Dr. Robinson explains in video how to reduce a large PDF to just a few pages, so anyone can “copy” just a few pages out as needed or convert a whole inaccessible PDF to something accessible with a screen reader. She begins with a blurry PDF of “A Tale of Two Cities,” demonstrating how it turns blue when clicked, or a screen reader saying “empty document”. To make the PDF more manageable, she uses the “Control + P” command, which is the universal print command across browsers. She selects “Microsoft Print to PDF” from the printer options and then uses “Alt + G” to navigate quickly to the page selection. After selecting only two pages to save, she names the file and saves it to her downloads folder using “Alt + D” followed by “Alt + S.”
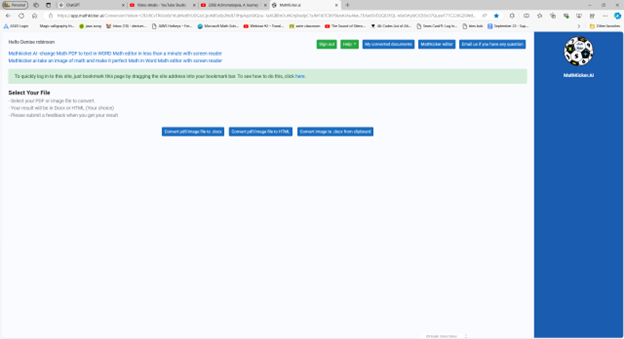
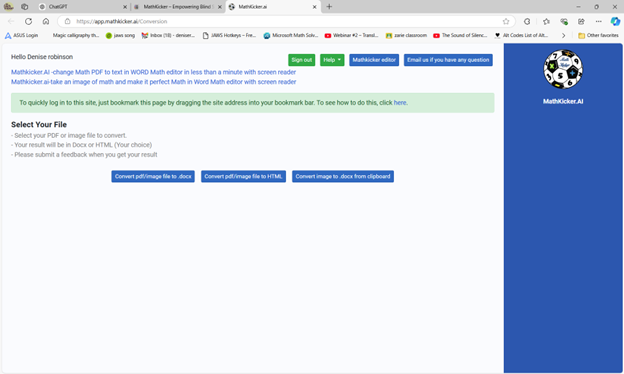
Next, Dr. Robinson uses MathKicker.AI, an AI program typically for math conversions but also converts anything to convert the PDF to a DOCX file. She opens Math Kicker, navigates to the convert to PDF button by pressing “B,” and waits for it to convert. Once the conversion is complete, she accesses the converted file using “Control + J” in a browser or “Windows + E” to open the file explorer. In file explorer and selects the newly saved PDF from her downloads folder.
Print Options to reduce a PDF
After verifying that the correct pages were saved, she adjusts the viewing size to 200% using “Alt + V” and then “Z” to make the text more readable in WORD. The text appears flawless, making it easy for screen readers to process and read aloud.
Dr. Robinson emphasizes that this method is particularly useful for low vision or blind students, allowing them to access only the necessary pages of a large PDF and allowing them to use a screen reader to read content. This approach also benefits fully sighted users who may struggle with poor-quality images. By converting and saving specific pages, users can create clear, readable text from even the blurriest PDFs. There are AI programs on the WEB that will do this also.
Dr. Robinson introduces Mathify, now called Mathkicker.AI, an AI program designed to convert inaccessible math content into accessible formats. This tool is especially beneficial for the blind community, providing a solution for one of the most challenging aspects of accessible education: converting math from inaccessible formats into usable, accessible ones.
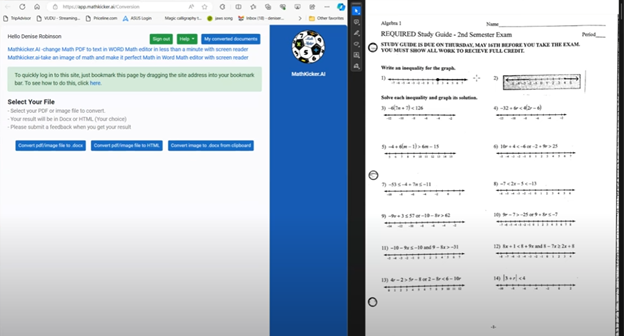
In this tutorial, Dr. Robinson demonstrates how to use Mathify to convert a PDF image file into a DOCX file. She focuses on a table of math, one of the most problematic types of files to translate. Dr. Robinson opens the file, which prompts a save and loads in a private window. This process is typically faster in a standard window.
As the document loads, Mathkicker.AI effectively transforms the original images of X and Y tables into accessible tables. These tables allow students to later convert them into graphs, giving them the ability to independently create and emboss their graphs. Dr. Robinson scrolls through the document, highlighting the images now converted into accurate math tables. Small squares around each equation make them easily identifiable.
She explains that students can use the “Alt + Equals” command in Word’s math editor to navigate to the last cell in the table and type out their equations. This feature highlights how Mathify translates PDFs into accessible, editable text. The original PDF is titled “Equivalent Ratios Practice Number One.” It converts successfully into clear and accessible text.
Now a New Mathkicker Editor
Dr. Robinson emphasizes that Mathkicker AI continues to improve with user feedback. She notes her preference for left alignment and how the program adapts to these preferences. Despite being a new tool, Mathkicker excels at handling math and other content, making it a versatile resource. Dr. Robinson encourages viewers to use Mathkicker and look forward to more tutorials, as the program has continued to evolve and improve utilizing a Mathkicker editor now.
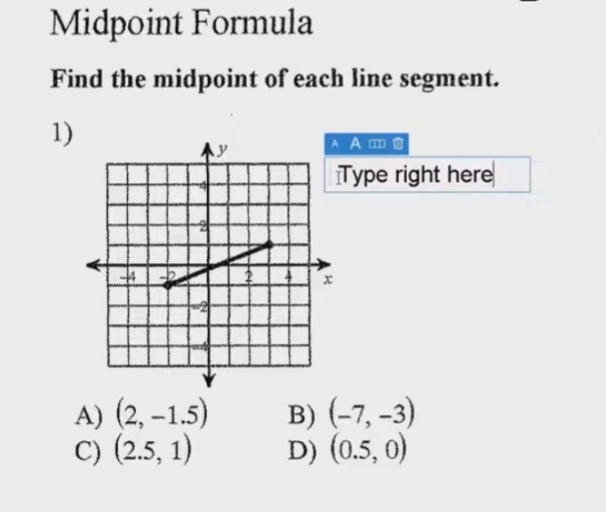
You can perform all these tasks using current PDF versions, even with inaccessible scanned images. First, demonstrate how to write text directly on scanned PDFs, then save the edited file. Next, show students how to type directly on PDF and email the completed PDF to their teacher for submission. Perfect touch typing is always preferred for ease.
For low vision users, all math content with voice output offers additional support. Combine this tool with text manipulation in PDFs to make materials more accessible. This approach ensures students can interact with complex materials efficiently, despite any visual challenges.
Here are some useful keyboard commands for working with PDFs in Adobe Acrobat, focusing on enlarging the screen and typing on the document:
Type directly on PDF commands
Enlarge Screen (Zoom In/Out)
Zoom In:
Press Ctrl + + (Plus sign) on Windows.
Press Cmd + + (Plus sign) on Mac.
Zoom Out:
Press Ctrl + - (Minus sign) on Windows.
Press Cmd + - (Minus sign) on Mac.
Fit to Screen:
Press Ctrl + 0 (Zero) on Windows.
Press Cmd + 0 (Zero) on Mac.
Typing on a PDF
Type Directly on PDF
Add Text:
Select the Text Box Tool by pressing Ctrl + Shift + T on Windows.
On Mac, you might need to manually select the tool from the toolbar.
Type in a Form Field:
Navigate to the form field using the Tab key.
Press Enter to start typing.
Add a Comment:
Press Ctrl + 6 to open the comment tool on Windows.
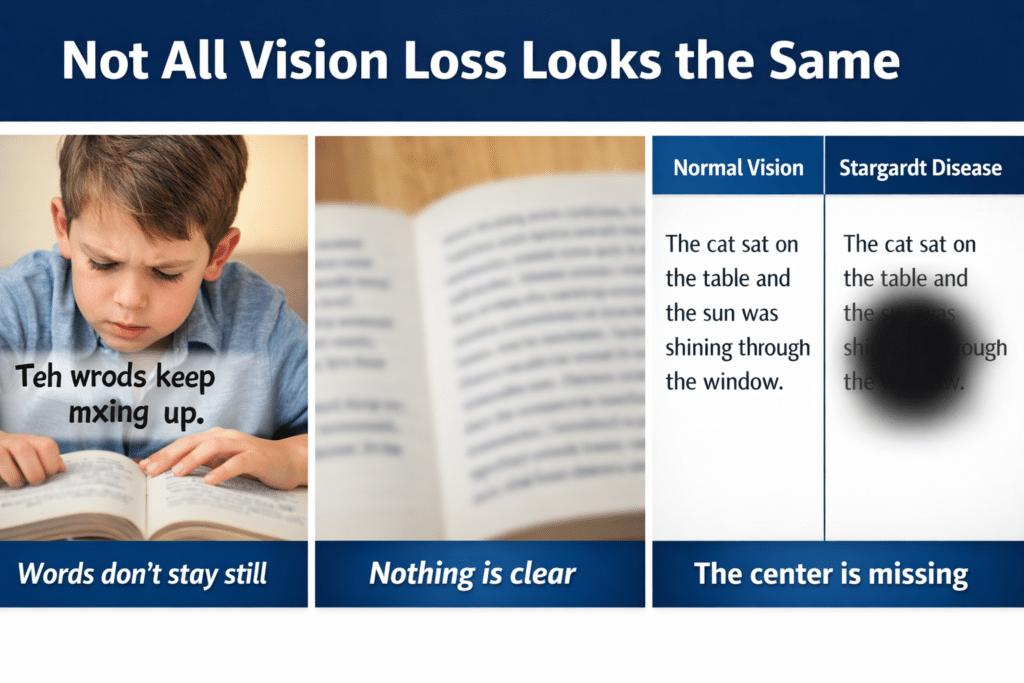
How to Read, Write, and Learn with Low Vision: How vision loss can appear
2.2 Billion People Live With Vision Impairment
Vision loss is one of the most common disabilities on earth, and it’s growing fast. If you work in healthcare, tech, education, or policy, these numbers matter for accessibility, product design, and funding.
Over 51.9 million adults in the U.S. report some level of vision difficulty. About 6–7 million Americans have significant vision loss or blindness. Globally, 2.2 billion people have vision impairment.
But those top-line numbers hide urgent trends. Here’s the breakdown with the latest 2024-2026 data, what’s driving it, and what to do about it.
Tools + Techniques That Build Real Independence
Students and adults with vision challenges do not learn one way. They require the right tools, combined with direct, targeted training.
Success happens when tools match the vision need and instruction builds efficiency
Tools + Training by Vision Need
1. Dyslexia (Processing and Decoding)
Dyslexia affects how the brain processes text. It often overlaps with vision-related challenges.
Tools
Text-to-speech: JAWS, NVDA
Speech-to-text (dictation)
Immersive Reader
Audiobooks: Bookshare, Learning Ally
Training Focus
Pair listening with reading
Build strong keyboarding for writing
Navigate digital text efficiently
Goal Improve comprehension while reducing reading fatigue
2. Blurred or Reduced Vision (Low Vision)
Tools
Magnification: ZoomText, Windows Magnifier
High contrast and color filters
Enlarged text and screen scaling
Screen readers: JAWS, NVDA
Training Focus
Use magnification efficiently without losing place
Strengthen visual tracking
Transition smoothly to audio when needed
Master keyboard navigation
Goal Maximize usable vision while increasing speed and accuracy
3. Central Vision Loss
(Stargardt, macular degeneration)
Tools
Screen reader (primary): JAWS, NVDA
Refreshable braille display
Audio + braille combination
OCR tools for printed content
Training Focus
Full keyboard control
Braille literacy (UEB and Nemeth)
Strong auditory processing
Goal Achieve full independence through non-visual access
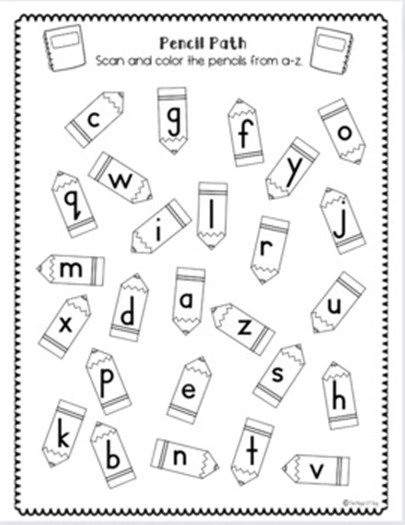
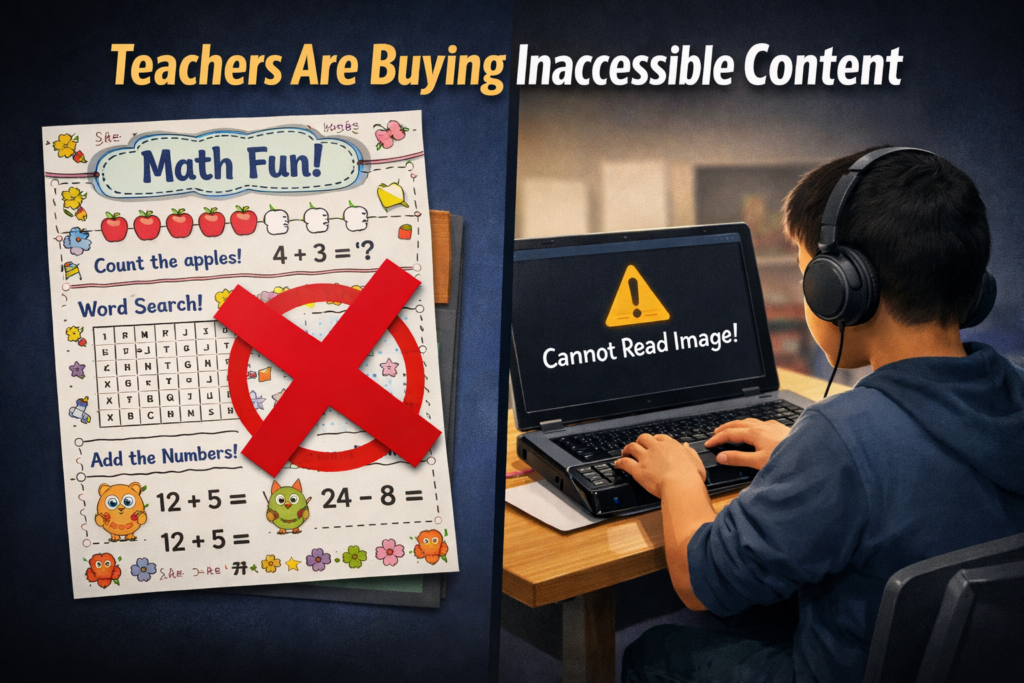
Inaccessible Images of Work teachers are buying from inaccessible platforms
Ban inaccessible purchased materials district-wide to prevent Title II failures
Why Teacher Marketplace Worksheets Are Failing Title II-inaccessible image of work
Why Teacher Marketplace Worksheets Are Failing Title II-No way Math
Teachers rely on many marketplace sites for worksheets and classroom materials. These platforms include printable shops, template libraries, curriculum bundles, early childhood packs, subscription marketplaces, and shared teacher resources. Most of this content looks creative, but it is some of the least accessible digital material in education.
These products often come as scanned pages, image-only PDFs, stylized templates, or graphic-heavy worksheets. Blind and deaf students cannot access any of it, and Title II places full responsibility on schools, not marketplace sellers.
Why Marketplace Worksheets Fail Title II
Most marketplace materials violate WCAG 2.1 AA before the lesson begins. Common barriers include:
Image-only worksheets with no real text
Scanned files that screen readers cannot read
Decorative fonts that block OCR
Graphics replacing questions or math steps
Worksheets without headings or structure
Videos without captions or ASL
Lessons with images that lack alt text
Blind students cannot read these materials. Deaf students cannot access embedded videos or audio instructions. Low-vision students cannot enlarge the content without distortion.
Marketplace content blocks access at the point of instruction, which Title II now prohibits.
Schools Must Stop Using Inaccessible Marketplace Content
Title II holds the school accountable for any material assigned to students. That includes purchased content—no matter where it came from.
Schools must:
Remove inaccessible marketplace materials from student access.
Archive them securely so only the original purchaser can access them.
Stop assigning inaccessible products, even if purchased with personal funds.
Approve only accessible content for future lessons.
If this content stays available to students, the school opens itself to complaints, investigations, and penalties.
The Financial and Legal Risks Are Real
A single inaccessible worksheet can trigger:
OCR complaints
Federal monitoring
Required remediation plans
Staff discipline
Loss of employment for repeated violations
Marketplace sellers face no consequences. Schools and teachers do.
Other Marketplaces Also Cause Problems
This issue extends far beyond one platform. Barriers appear across:
Printable shops
Early childhood curriculum sites
Pinterest-style bundles
Etsy printable sellers
Canva template libraries
Subscription curriculum platforms
Teacher “side job” shops
Commercial worksheet sites
Too Many to State here
If the file is image-based, untagged, or graphic heavy, it likely violates WCAG.
Schools must apply the same standard everywhere: If it is not accessible, it should not be used.
Why Remediation Usually Fails
Teachers often try to “fix” marketplace worksheets. Most cannot be repaired.
Reasons include:
Scanned pages contain no text to tag
OCR destroys the layout
Math is stylized and unreadable
Reading order is broken
Copyright prohibits modification
Rebuilding is often easier than remediation.
What Schools Must Do Now
Schools need a clear, enforceable plan:
Ban inaccessible purchased materials district-wide.
Adopt accessible worksheet templates for all staff.
Train teachers to spot inaccessible formats instantly.
Create accessible master curriculum built from scratch.
Require vendors and marketplaces to meet WCAG 2.1 AA.
Audit all teacher-purchased content before it reaches students.
Work with blind and deaf access specialists who test content daily.
This protects students and reduces legal exposure for teachers and districts.
Why This Matters Most
Blind and deaf students lose learning time every day because marketplace content excludes them. They fall behind before the lesson even begins.
Title II changes that. Schools must choose materials that include everyone, not just those who can see or hear the content.
Closing Note: Access Starts With What Schools Buy
Teachers want to help their students. Most do not realize the materials they purchase create the very barriers Title II now forbids. Schools protect students and staff when they stop buying inaccessible content and build accessible materials from the start.
Fix Digital Accessibility Before Title II Enforcement-No access to work
Schools and colleges face serious gaps in digital access. These gaps harm blind and deaf students the most, and they also affect every learner who needs clear, structured content. Title II now requires full WCAG 2.1 AA compliance. Schools must shift from crisis responses to real systems. The good news is that this work is fixable when they follow a clear plan.
1. Start With an Accessibility Audit: Blind and Deaf Students Face the Sharpest Access Gaps
Every school should begin with a full digital audit. This audit must involve experts who use screen readers and braille displays every day on the platforms used in education. Without these specialists, audits miss the barriers that blind students face. Any image-based video must include described content throughout. Schools can find strong examples and guidance at Described and Captioned Media Program (DCMP).
Schools should also check whether interactive elements, buttons, and menus work with keyboard-only navigation. Many blind students rely on keyboard access, and inaccessible controls often block them before the lesson even begins.
The audit should include websites, LMS content, Google Classroom, PDFs, worksheets, videos, vendor platforms, parent portals, and staff materials. Real blind access testers expose problems that automated tools never find. Audits reveal the true accessibility debt. Schools need this view before anything else.
Most deaf learners use ASL as their primary language. They often need an actual signer on digital content as well as written text. Captions alone rarely provide full access, because captions do not follow ASL structure. Find out full details from DCMP.org also.
Schools should start with embedded text on all visual content first. This step creates a basic access layer while teams prepare for ASL. Once content stabilizes, schools can add ASL signers during development.
Schools must include ASL interpretation on videos, lessons, and major digital materials. An ASL signer keeps the message clear, complete, and culturally accurate.
This work must also be audited by a deaf professional who signs. Without that review, digital content remains incomplete and inaccessible.
2. Fix PDFs and Scanned Worksheets First
Most access failures start with inaccessible PDFs-which are actually images of work. Schools can convert scanned worksheets to readable text, add proper heading structure, insert alt text, tag tables, and ensure text reflows on mobile. These steps give blind students access at the same time as their peers. For easy full access, Just put everything into Microsoft WORD and if you can move a mouse cursor through the content, it will be accessible to a screen reader. make sure you add proper headings throughout.
3. Enforce Accessible Google Docs, Slides, and Assignments
Teachers create inaccessible content daily by pasting images of work into what was accessible if typed out properly in google. Schools should require headings, proper contrast, real alt text, logical reading order, described images, and accessible math. This one shift removes thousands of barriers. Currently Math is only fully accessible in Microsoft WORD using the Math editor. Google does not have all the appropriate tools in place to recreate what OFFICE 365 has already done.
Typically, only images of words appear in products from Google, which makes the content completely inaccessible to blind students. Embedded videos also stay inaccessible for deaf learners, because images never give enough detail or language to explain the lesson. Math remains inaccessible across Google products, and blind students cannot access equations without proper structure.
4. Make All Video Content Accessible
Videos must serve blind and deaf students. Schools should ensure accurate captions, audio descriptions, clear narration, and safe visual design. This protects access and reduces legal risk.
5. Replace Inaccessible Vendor Platforms
Many learning apps and platforms still fail WCAG standards. Schools must request VPATs, require WCAG 2.1 AA, demand remediation timelines, and remove non-compliant tools. Title II holds the school responsible, not the vendor. When schools stop buying inaccessible products, vendors will change their design or leave the market.
6. Train Staff in Real Accessibility Skills
Accessibility training must move beyond awareness. Staff need training in screen reader testing, accessible document workflows, caption skills, alt text guidelines, accessible math support, and LMS accessibility checks. Blind and deaf students rely on technology, not sight or hearing. Staff must understand these tools, so they must receive direct instruction from experts who use these tools daily. These specialists can walk staff through the fine details needed to make content fully accessible quickly and easily (relative to what content they already have).
7. Provide Blind and Deaf Students With Real-Time Access
Access cannot arrive days later. Schools should deliver materials at the same time as sighted peers, provide braille or screen-reader-ready files, use CART or interpreters, and ensure accessible assessments. This reduces OCR complaints and supports equal learning.
8. Build an Accessibility Governance Team
Districts need structure to stay compliant. This team sets policy, provides training, monitors compliance, reviews content, approves vendors, and reports progress. Governance turns accessibility from a reaction into a system.
9. Bring in Specialists When Needed
Most schools lack internal expertise. They can partner with certified blindness professionals, deaf education specialists, accessibility technologists, braille experts, and WCAG consultants. Title II allows districts to use outside experts when staff lack training.
10. Address a Damaging Message Still Circulating in Schools
Many professors and teachers still hear, “Check your materials, but don’t worry about them.” This message shows how long schools have ignored accessibility laws. Title II removes the option to delay. Schools must fix inaccessible content, not simply acknowledge it.
11. The Word “Accommodation” Must Go
The word “accommodation” was not removed from Title II, but the new DOJ rule shifts the focus toward accessibility from the start, especially for digital content.
Schools must stop relying on the word accommodation. The term assumes students start with barriers and then wait for fixes. Blind and deaf students lose time every day when access comes after instruction. They fall behind because the content was inaccessible from the start.
Title II requires full access at the moment instruction begins. Students must receive materials in the same format, at the same time, as their peers. This shift removes delay, reduces frustration, and ends the cycle of constant catch-up. True access begins when schools design content correctly, not when they repair barriers later.
12. Make Accessibility Part of School Culture
Accessibility becomes sustainable when it becomes normal. Schools can add accessibility checks to grading policies, include accessibility in evaluations, require captions, post accessible templates, and adopt accessible curriculum materials. Small habits prevent massive remediation later.
13. Remove and Archive All Inaccessible Content by April 23
Schools must remove inaccessible digital content by April 23. They must secure this content so only the original creator can access it. If old materials stay public, anyone can use them to file an accessibility complaint. This creates immediate legal risk for the educational institutions.
Most schools will find it easier to build fully accessible content from the start. Rebuilding old, image-based, untagged, or uncaptioned materials often takes far more time than creating new accessible versions. Schools protect themselves and their students when they remove inaccessible work, archive it safely, and rebuild content using WCAG 2.1 AA standards now so they can be fully uploaded on April 24, 2026.
Closing Note: Access Protects Everyone
Blind and deaf students face the hardest barriers, yet accessible design lifts all learners. Clear content improves structure, readability, quality, and learning across every classroom. Schools that begin this work now protect their students, their staff, and their programs.
Dates to Follow
What this means for schools and colleges
Larger districts and colleges (≥ 50,000 population)
Deadline: April 24, 2026
Standard: WCAG 2.1 AA
Scope: Websites, web content, mobile apps, PDFs, forms, LMS content, videos, social media, and anything accessed through a browser
Smaller districts and colleges (<50,000 population): April 26, 2027
Penalties for Noncompliance With DOJ- Judge states compliance
There are penalties, and they are serious for those educational systems that do not take this law seriously. Most people still don’t understand what they look like in real practice. This applies to K–12 schools, colleges, universities, and all state and local government entities. The DOJ didn’t just set new rules — it created enforceable consequences. Because WCAG 2.1 AA is now the legal standard, districts and colleges can no longer claim “we didn’t know” or “we’re working on it.” Here is what non-compliance triggers.
1. Federal Investigations (OCR or DOJ)
If a parent, student, or advocate files a complaint, the Office for Civil Rights (OCR) or the Department of Justice (DOJ) can open a formal investigation.
These investigations can require the school to:
Turn over digital content
Provide accessibility audits
Provide staff training records
Provide procurement contracts
Provide evidence of accessibility testing
Provide timelines for remediation
Investigations can last months or years — and they are public record.
2. Legally Binding Resolution Agreements
Most investigations end with a Resolution Agreement, which is legally enforceable.
These agreements typically require the school to:
Fix inaccessible websites and apps
Remediate thousands of PDFs
Train all staff
Hire accessibility experts
Conduct annual audits
Report progress to OCR or DOJ for years
These agreements are not optional. They are monitored and enforced.
3. Loss of Federal Funding (Including IDEA & Title I)
This is the penalty that gets districts’ attention.
If a school or college refuses to comply with a Resolution Agreement, OCR can recommend termination of federal financial assistance, including:
IDEA funding
Title I funding
Title II funding
Pell Grants
Federal student aid
Research grants
This is extremely rare — because schools comply once their funding is threatened — but it is absolutely within the law.
4. DOJ Civil Enforcement Actions
The DOJ can file a civil action in federal court.
This can result in:
Court orders
Mandated remediation
Mandatory training
Court‑appointed monitors
Strict timelines
Public reporting requirements
These cases are expensive, public, and reputation‑damaging.
5. Monetary Penalties (Civil Penalties & Damages)
While Title II itself does not impose “fines,” the DOJ can seek:
Civil penalties
Compensatory damages for individuals harmed
Attorney’s fees
Costs of compliance
Colleges are especially vulnerable here because inaccessible digital systems can directly impact:
Admissions
Financial aid
Course registration
Housing
Online learning
6. Private Lawsuits
Individuals can file lawsuits under:
ADA Title II
Section 504 of the Rehabilitation Act
These lawsuits can result in:
Damages
Attorney’s fees
Court‑ordered remediation
Colleges have already faced many of these cases — and the new rule strengthens the legal basis for them.
7. Public Accountability & Reputational Damage
When a school or college is found non‑compliant, the findings are:
Public
Searchable
Often covered by the media
Shared by disability advocacy groups
This affects:
Enrollment
Community trust
Accreditation reviews
State oversight
The Bottom Line
Schools and colleges cannot ignore this rule. The penalties are real, enforceable, and already being used in digital accessibility cases.
But here’s the hopeful part — and the message you can deliver to parents:
**For the first time, blind, low‑vision and all students have a federal rule with teeth.
Districts, schools and colleges must comply. And if they don’t, families have powerful enforcement tools.**
This is the strongest legal protection our students have ever had.
The new Title II rule applies directly to all state and local government entities — which includes public K–12 schools, public colleges, and public universities.
Private schools are not automatically covered under Title II. But that does not mean they are exempt from accessibility requirements.
Here’s the real picture
1. Private Schools Are Covered Under ADA Title III (Not Title II)
Private schools — including:
Private K–12 schools
Private colleges
Private universities
Religious schools (with some exceptions)
are covered under ADA Title III, which prohibits discrimination by “places of public accommodation.”
Education is explicitly listed as a public accommodation.
This means private schools must still provide equal access, including digital access.
2. Title III Does Not Name WCAG 2.1 AA — But Courts and DOJ Use It Anyway
Even though Title III doesn’t name a specific standard, the DOJ and federal courts have repeatedly used WCAG as the benchmark for accessibility.
And now that the DOJ has formally adopted WCAG 2.1 AA for public entities, it becomes the default expectation for private schools too.
In practice:
If a private school’s website, LMS, or digital content is inaccessible, they can still be found in violation of the ADA.
3. Private Schools Can Still Face:
DOJ investigations
OCR complaints (if they receive federal funds)
Lawsuits under ADA Title III
Section 504 complaints (if they receive federal funds)
Court‑ordered remediation
Damages and attorney’s fees
Private schools are sued for digital inaccessibility every year, and the new Title II rule strengthens the legal argument families can use.
4. Private Schools That Receive Federal Funding Must Follow Section 504
If a private school receives any federal funding — even a single program — they must comply with Section 504 of the Rehabilitation Act, which requires:
Equal access
Non‑discrimination
Accessible digital content
This includes:
Private schools with lunch programs
Private schools receiving IDEA funds
Private colleges receiving federal student aid
Private schools receiving grants
Section 504 is powerful — and enforceable.
5. Private Schools Are Already Feeling Pressure to Match Public School Standards
Here’s the part families will care about:
Private schools cannot fall behind public schools.
If public schools must meet WCAG 2.1 AA:
Parents will expect the same from private schools
Students will demand equal access
Lawsuits will reference the new rule
Vendors will shift to WCAG 2.1 AA
Accreditation bodies will begin asking questions
Private schools that ignore accessibility will lose:
Students
Reputation
Competitive standing
6. What This Means for Families in Private Schools
Your child has the right to:
Accessible digital content
Accessible websites
Accessible apps
Accessible videos
Accessible documents
Accessible learning platforms
Equal participation
Real‑time access
Even in a private school.
And now, with the new Title II rule setting a national standard, families have more leverage than ever to demand accessibility.
7. What This Means for Private School Teachers and Administrators
Private schools must now:
Train staff in accessible digital design
Ensure LMS platforms are accessible
Fix inaccessible PDFs and documents
Caption and describe videos
Ensure apps and websites work with assistive technology
Provide accessible materials in real time
Even though Title II doesn’t apply directly, the expectations and legal pressure absolutely do.
Bottom Line: Private Schools Are Not Exempt From Accessibility
They may not fall under Title II, but they are still bound by:
ADA Title III- https://www.accessibility.works/blog/higher-ed-ada-compliance-requirements-road-map/
Section 504 (if federally funded)
Civil rights laws
Court precedent
DOJ enforcement
Parent advocacy
Market pressure
And now that WCAG 2.1 AA is the national standard for public education, private schools will be expected — and pushed — to meet it too.
K–12 isn’t just panicking — they’re in a full‑scale scramble, and for reasons that are even more urgent than higher ed. The DOJ’s Title II rule hits K–12 systems right where they’re already stretched thin: staffing, training, legacy content, and compliance culture.
Here’s the landscape, laid out clearly and grounded in what districts are now realizing.
Why K–12 districts are suddenly alarmed about the Title II WCAG 2.1 rule
1. Districts assumed “accommodations” were enough — now they’re not
For decades, K–12 has relied on:
TVIs to “fix” inaccessible content
Disability services to retrofit materials
Parents to advocate
Students to “make do”
The new rule requires proactive accessibility, not reactive fixes. That’s a seismic shift.
2. K–12 has enormous accessibility debt — bigger than higher ed in some ways
Districts are realizing they must remediate:
Thousands of PDFs
Teacher‑made worksheets
Google Classroom content
LMS modules
Vendor platforms
Parent portals
IEP systems
School websites
Mobile apps
Most of this content was never designed with WCAG in mind.
3. Teachers generate inaccessible content every single day
This is the part that’s scaring administrators.
Every day teachers create:
Google Docs
Slides
Worksheets
Videos
Scanned PDFs
Classroom posts
Almost none of it meets WCAG 2.1 AA. And now it legally must.
4. Districts don’t have accessibility governance
Most K–12 systems lack:
A digital accessibility policy
A compliance officer
A remediation workflow
A content review process
Training for staff
A way to monitor thousands of pages
They’re realizing they need infrastructure, not just training.
5. Vendors are a huge liability
Districts rely on:
Curriculum platforms
Assessment systems
Parent communication apps
Scheduling tools
Payment portals
Transportation apps
Many of these tools are not WCAG 2.1 AA compliant, and the DOJ rule makes the district responsible for the accessibility of third‑party tools.
This is causing real panic.
6. The deadlines are tight for K–12 too
Large districts (50,000+ population) must comply by April 2026. Smaller districts by April 2027.
Given the volume of content and the lack of staff, these timelines feel impossible to many administrators.
7. OCR complaints are already rising
Families are becoming more aware of their rights. Advocacy groups are watching. Blind/low‑vision access issues are among the most common complaints.
Districts know enforcement is coming.
What this means for an accessible world
This rule gives you extraordinary leverage because it legally validates everything people have been advocating for so long:
Real‑time access
Non-visual design
Proper alt text
Accessible math (Nemeth, tactile, digital)
Keyboard‑only navigation
Accessible PDFs
Structured documents
Captioned and described media
Accessible learning platforms
Districts can no longer say: “Just give the student an accommodation.” or “We’ll fix it when needed.”
In April 2024, now delayed to Nov 2027, the U.S. Department of Justice published its final rule updating Title II of the ADA to require that state and local governments make their websites and mobile apps accessible by conforming to WCAG 2.1 Level AA. (WCAG 2.1 AA) or face the consequences.
This is the first time the DOJ has formally adopted a specific technical standard for digital accessibility under Title II.
All state and local government entities, including:
State agencies
Counties, cities, municipalities
Independent school districts
Special district governments
Contractors or vendors providing public‑facing digital services on behalf of these entities
This includes any third‑party platform used to deliver services (payment portals, scheduling systems, learning platforms, etc.).
Compliance deadlines
The DOJ set two compliance timelines:
April 24, 2026 → Entities with 50,000+ population
April 26, 2027 → Entities with <50,000 population and special districts
These dates apply to full conformance with WCAG 2.1 AA for all covered digital content.
What WCAG 2.1 AA requires
WCAG 2.1 AA addresses barriers affecting people with:
Blindness or low vision
Deafness or hearing loss
Cognitive or learning disabilities
Mobility or dexterity impairments
Key requirements include:
Text alternatives for images
Captioning and audio description for video
Keyboard accessibility for all functions
Sufficient color contrast
Logical heading structure
Resizable text and responsive layouts
Avoiding motion‑based inputs (e.g., shaking a device)
Touch target size and spacing for mobile apps
What content is covered?
The rule applies to all web content and mobile apps a public entity provides or makes available. This includes:
Websites
Mobile apps
Online forms
PDFs and digital documents
Portals and dashboards
Learning platforms
Third‑party tools used to deliver public services
What content is not required to comply?
The rule includes limited exceptions:
Archived web content
Preexisting traditional electronic documents (e.g., old PDFs)
Content posted by non‑affiliated third parties
Password‑protected individual documents
Preexisting social media posts
These exceptions are narrow—most active, public‑facing content must meet WCAG 2.1 AA.
Why the DOJ adopted WCAG 2.1 AA
The DOJ emphasized that inaccessible digital services create real barriers—for example:
Blind users unable to access images without alt text
Inaccessible forms blocking access to voting, tax info, or school services
Barriers to participating in civic events
The rule aims to ensure equal access to essential public services.
What this means schools, colleges and any educational institution
For blind/low‑vision students and families receive real‑time, nonvisual access to digital content. WCAG 2.1 AA now gives legal backbone for the accessibility standards people advocate for—especially around:
Alt text
Keyboard access
Logical structure
Screen‑reader compatibility
Accessible PDFs
Mobile app access ease with braille display or Voice Over
Captioning and audio description
This is a powerful tool for your advocacy with districts, IEP teams, and state agencies.
You’re not imagining it — public colleges and universities really are scrambling, and the panic is coming from several very real, structural reasons that the higher‑ed sector has been avoiding for years. Here’s what the current reporting and expert analysis show, grounded in the sources we just pulled.
Why colleges and Schools are panicking about the new Title II WCAG 2.1 rule
1. The rule is no longer “guidance” — it’s enforceable law
Public colleges and universities are now legally required to meet WCAG 2.1 AA across all digital services. This is a major shift from the old “best practice” era.
For higher ed, which has thousands of pages, PDFs, videos, portals, and legacy systems, this is a massive lift.
2. The deadlines are tight — especially for large institutions
Public institutions serving populations of 50,000+ must comply by April 24, 2026. Smaller ones have until April 26, 2027.
Most colleges are nowhere near WCAG 2.1 AA compliance today.
3. Higher ed has huge accessibility debt
Experts note that colleges have:
Decentralized web teams
Fragmented domains
Thousands of legacy PDFs
Inaccessible videos
Third‑party tools that aren’t compliant
This means they’re not starting from zero — they’re starting from negative.
4. Colleges have been relying on “accommodations,” not accessible design
For years, many institutions leaned on disability services offices to “fix” inaccessible content after the fact. The new rule requires proactive accessibility, not reactive accommodations.
This is a cultural shift higher ed has resisted for decades.
5. The exceptions are narrow — and colleges hoped they’d be broader
The DOJ’s exceptions (archived content, pre‑existing social media posts, third‑party content, etc.) are very limited.
Most active content must be fully accessible.
6. Colleges and schools fear litigation and OCR complaints
Higher ed is already a top target for ADA and Section 504 complaints. Now that WCAG 2.1 AA is the explicit legal standard, colleges know enforcement will increase.
7. They know they can’t fix this with a one‑time project
Experts warn that accessibility must become a digital operating model, not a “compliance project.”
That means governance, training, workflows, and accountability — areas where higher ed is historically weak.
As Our team teaches blind low vision, this article is directed toward that population but this is true for ALL populations of children.
For decades, blind and low‑vision students have been expected to “make do” with inaccessible schoolwork, delayed accommodations, and digital tools that were never designed for them. Parents have fought and Teachers of the visually impaired have patched and remediated-transcribed work until late in the evenings. Students have worked twice as hard for half the access.
But now, everything is changing.
In April 2024, the U.S. Department of Justice issued a landmark update to Title II of the Americans with Disabilities Act, requiring all state and local governments — including every public school district in the country — to make their websites, digital learning platforms, documents, and mobile apps accessible by following WCAG 2.1 Level AA.
This is not guidance or a suggestion. This is federal law.
And for the first time, our children have a clear, enforceable right to full, equal, real‑time access to their education.
Why this rule matters so much for blind and low‑vision students
Blind and low‑vision students have always been the most impacted by inaccessible digital content. When a worksheet is posted as an image, when a math assignment is scanned sideways, when a teacher uploads a PDF with no tags, when a learning platform isn’t keyboard accessible — that student is locked out.
The new rule changes that.
WCAG 2.1 AA requires schools to ensure:
All images have alt text
All documents are structured for screen readers
All videos have captions and audio description
All platforms work with keyboard navigation
All math and STEM content is accessible
All mobile apps are operable for non-visual users
All content is perceivable, operable, understandable, and robust
This is the first time the federal government has said, in clear language: “Your digital content must be accessible from the start.”
No more waiting or retrofitting. No more “we’ll fix it later” or “we didn’t know.”
Why schools are scrambling or should be scrambling— and why that’s good news
K–12 districts are suddenly realizing that:
Teachers create inaccessible content every day
Thousands of PDFs and worksheets must be remediated
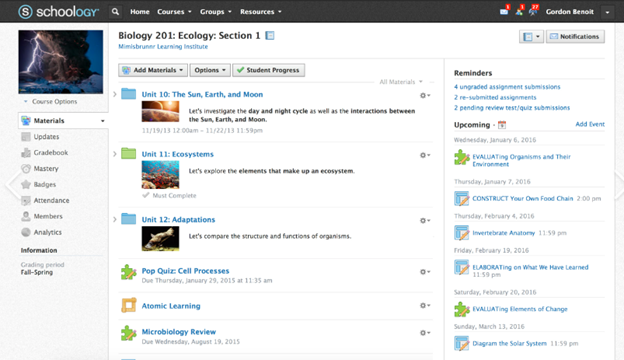
Google Classroom, Schoology, Canvas, and other platforms must meet WCAG
Vendor tools must be accessible — and the district is responsible if they’re not
They need training, workflows, and accountability
They must comply by 2026 or 2027, depending on district size
This is overwhelming for them — but it’s also the first time blind and low‑vision students have the law fully on their side… as do all students!
So if you hear panic you’re it is not a bad thing. It’s the sound of a system finally being required to do what it should have done all along.
What this means for your child
It means your child has the right to:
Access their schoolwork at the same time as their peers
Use screen readers, magnification, braille displays, and other tools without barriers
Receive accessible math, science, and STEM content
Navigate school websites and portals independently
Access digital textbooks and curriculum materials
Participate fully in online learning
Receive materials in formats that work for them — every time
This is not optional. Or “if the teacher has time.” This is not “if the district can figure it out.”
This is their legal right.
What this means for teachers
Teachers are not expected to become accessibility experts overnight. But they are expected to learn the basics of accessible digital design — and districts are required to train them.
This rule gives teachers clarity, structure, and support. It gives them a roadmap. It gives them permission to slow down and do things right.
And it gives them the tools to reach every learner, not just those who can see the screen.
What this means for TVIs and accessibility professionals
For years, TVIs have been forced into the role of “fixer” — remediating inaccessible content after the fact, often late at night, often under pressure, often without the authority to change the system.
This rule changes your role.
You are no longer the emergency repair technician. You are now the accessibility leader your district must rely on.
Your expertise is finally recognized as essential, not optional.
Why this is a moment of hope
For the first time in U.S. history, blind and low‑vision (and all) students have a federal rule that:
Names the standard
Sets the deadlines
Defines the expectations
Holds districts accountable
Protects students’ right to equal access
This is the beginning of a new era — one where our children can learn, participate, and thrive without barriers.
And for families who have spent years advocating, fighting, and explaining the same issues over and over, this rule is a long‑awaited validation:
Your child deserves full access. All children deserve independence. Your child deserves equal opportunity. And now, the law finally backs you up.
JAWS UEB MATHS/Nemeth Settings-Word and Braille Math Editor
If you’ve ever struggled to get JAWS to read math correctly on your computer, this walk-through will make your life much easier. In this video, I demonstrate how to set JAWS for either UEB Maths or Nemeth math using the JAWS UEB/Nemeth Settings, then show you how to create accessible math using Word’s Math Editor and the Braille Math Editor. Whether you’re a TVI (Teacher of the Blind), a student, or an AT (Access Technology) specialist, these steps will help you produce clear, accurate, and accessible math every time.
WORD MATH EDITOR Setup
1. Open the Math Editor
Alt + =
2. Open the Equation Tools tab
Alt + J, E
3. Open Math Options (Settings)
T, 1 (This opens the Math Options dialog.)
4. Set Alignment to Left Inside the Math Options dialog:
Alt + J → moves to Justification
L → Left alignment
Alt + D → Set as Default
Tab, Tab → to OK
Enter
When asked to save as default, choose Yes (This saves the settings to the Normal template.)
5. Check Conversion (if math looks wrong)
While inside a math zone:
Alt + =
Alt + J, E
C → Convert
Make sure it is set to Professional
WORD MATH EDITOR — Command Sequence (JAWS + Keyboard)
Open the Math Editor
Press Alt + = This inserts a new math zone and opens the Word Math Editor.
Move in and out of the math zone
Right Arrow → move into the math zone
Right Arrow again → move through elements
Left Arrow → move backward
Esc → exit the math zone and return to normal text
Insert common structures
Fraction → Ctrl + /
Exponent → Ctrl + Shift + =
Subscript → Ctrl + =
Square root → type \sqrt then press Space
Matrix → type \matrix then press Space
Parentheses → type ( then ) (Word auto‑sizes them)
Accessibility opens the world for blind and low-vision people. Access Tech Lessons can help users get the most out of these tools by offering step-by-step guides and support. It removes limits, builds confidence, and gives you real control of your daily life. With the right tools, navigation becomes possible, learning becomes smoother, and work becomes fully accessible.
This page brings together practical lessons that teach you how to use the technology that matters most. Each lesson stays simple, direct, and hands-on so you can learn with confidence. You will explore screen readers, braille displays, iPhone navigation, accessible math tools, and the skills needed to work, study, and travel independently.
As you move through each lesson, your skills will grow, and your world will open. Access becomes freedom. Freedom becomes opportunity. And opportunity builds a future filled with purpose and vision.
What Screen Readers Can’t See: A Wake-Up Call for Educators
Many teachers rely on tools like Snip & Clip or download entire packets of image-based worksheets. But it’s important to understand that most resources on popular teacher websites—especially those behind paywalls—are completely inaccessible to blind and low vision students. These materials are often just images or scanned PDFs. Consequently, screen readers can’t read this type of content at all.
This video demonstrates how these inaccessible formats appear to a screen reader user. It shows how nothing reads, nothing speaks, and the content remains out of reach.
It also shows how older students who have been taught tech skills for years, transcribers or teachers, can quickly make the material accessible. This is especially helpful for a screen reader user who is not yet able to do it independently.
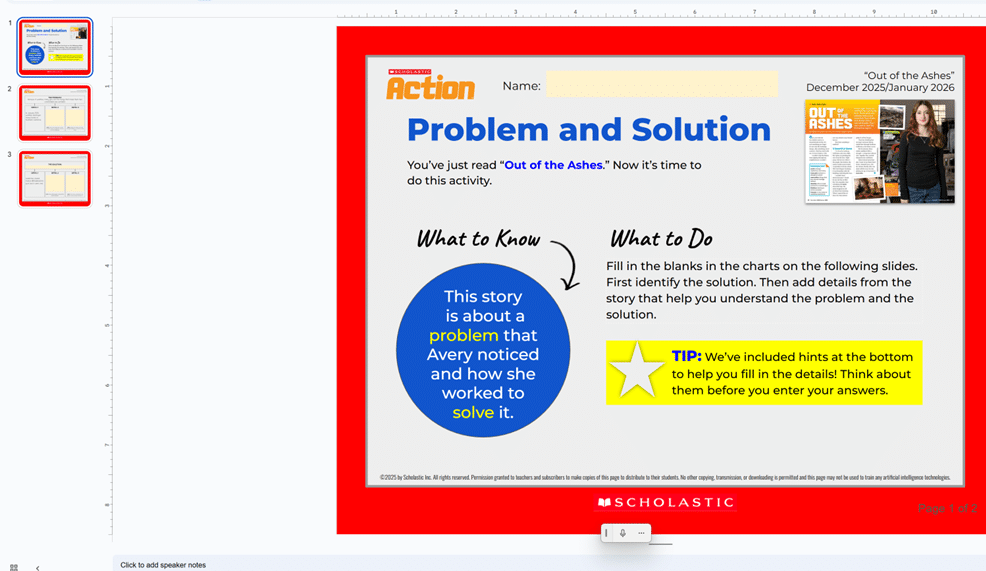
Google slide image of work-all inaccessible to a screen reader user
Commands to know: Use EDGE and its built in AI with -CTRL+Shift+period, so the AI can see the pages you are on. (Do not do banking of any kind without using a private window and a non-AI browser.)
Watch the video to get all the steps down. It can change your life to the inaccessible world. Alternatively, transcribers and teachers can do it for you until you learn the skills well yourself.
Other School Platforms that are inaccessible can be resolved with this solution also now
Calibre’s Windows download page offers a powerful, free tool for managing digital books across platforms, making it an excellent choice for tasks like using Calibre-translate EPUB to DOCX format. Whether you need to translate epub files to docs or other formats, Calibre is compatible with Windows 10 (version 1809 and above) and is a one-stop solution for digital management, of e-book conversion, library organization, and device syncing. Key features include:
Multi-format support: Convert between EPUB, MOBI, PDF, and more, including Calibre-translate EPUB to DOCX
Device syncing: Seamlessly transfers books to Braille displays and screen reader-compatible devices
Customizable interface: Works well with JAWS, NVDA, and other assistive technologies, ensuring easy use when you translate EPUB to docs using Calibre
Legacy support: Older versions available for Windows 7, 8, and early Windows 10 builds
Whether you’re a blind reader using a Braille display or an educator curating accessible content, Calibre empowers users to take control of their digital libraries with clarity and ease. It especially excels in tasks like Calibre-translate EPUB to DOCX. Please remember to contribute to their great efforts in making life easier, especially with tools like Calibre-translate EPUB to DOCX
Learning how to teach or learn Nemeth math using assistive technology can seem challenging, but with the right tools and approach, it becomes manageable and effective. Whether you’re a parent helping your child, an educator supporting students, or an independent learner, using a Focus 40 Braille Display and JAWS screen reader provides an accessible way to master Nemeth code. In this guide, I will walk you through setting up your technology and using the Braille Math Editor to confidently teach and learn math concepts from basic arithmetic to advanced algebra. Let’s simplify the process and enhance your skills.
Setup Nemeth with JAWS
Start by setting JAWS to the proper Nemeth settings. Access the JAWS Settings Center with Insert + 6 then Control+Shift+D to set default: type “Braille m” in the search box. Navigate to “Braille Mode” and make sure you hear “Structured” mode, ensuring that both the active cursor and Braille cursor follow each other. This will allow you to track what the student is doing on their display.
Alt + F to language profiles, and alt + D to details. Once open Alt + M to math options and up arrow to Nemeth if it is not selected. This will ensure that math expressions are correctly read and displayed in Nemeth Braille. Enter to close, Alt + A to apply and enter to close.
Teach or learn Nemeth JAWS, braille display and BME
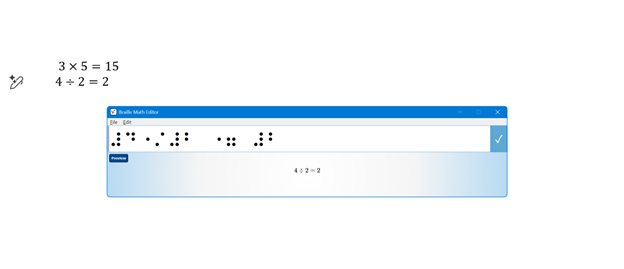
Using the Braille Math Editor is key to teaching and learning math effectively. Type out equations like “1+2=3” or more complex algebraic expressions, and feel the Braille output directly on your Braille display. Correct mistakes quickly using the Braille display and JAWS auditory feedback, making it easy to follow along. Use the Braille Viewer to see it visually and compare with the Braille Display by opening JAWS context menu, go to Utilities and Braille Viewer to turn it on.
This step-by-step approach works for basic arithmetic to complex math such as algebra, Trigonometry, calculus and beyond. Both the Braille Math Editor and Word Math Editor can help you visualize and interact with Nemeth code to easily learn it and/or teach others. Practice consistently to improve your tactile reading skills and build confidence in math.
By following this guide, you’ll gain the tools to teach and learn Nemeth math efficiently, whether for yourself or for your students.
To enter college, you need a foundation in Algebra and Geometry. For STEM fields, add Calculus and Trigonometry. Trigonometry studies the relationships between angles and sides of triangles. With tools like Trigonometry with Math Editor, Braille Math Editor and screen readers, you can easily explore these relationships. It uses sine, cosine, and tangent functions to relate angles to side lengths. These functions are essential in physics, engineering, and astronomy. They help solve problems involving distances and angles. For example, trigonometry determines the height of a building or the distance across a river without direct measurement.
Trigonometry provides tools to model and solve problems involving angles and distances. It is fundamental to mathematics and its applications.
Going to College
If you go into STEM field IN college, you need advanced classes in but not limited to college algebra, trigonometry and calculus. When you are a screen reader and Braille user, these skills will allow you the options and opportunities to complete work as sighted peers.
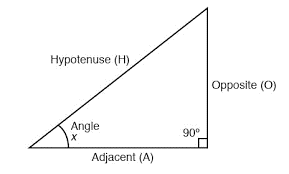
Let’s talk about: Trigonometry which is a branch of mathematics that studies the relationships between the angles and sides of triangles
Right triangle for Trigonometry with math editor
You can copy this content and paste into WORD OFFICE 365. Make sure you select Math 1 at a time and alt = to turn into true math. Then you can Ctrl = to change to professional or keep the LaTex then enter and braille it in again using Nemeth or UEB Math or practice LaTex.
Problem 1: Finding the Length of a Side
Given: A right triangle with one angle of 30° and the hypotenuse of 10 units. Find: The length of the side opposite the 30° angle.
More options for JUST auditory learners or braille learners and taking totally inaccessible images of WORD and making them accessible using Mathkicker.AI.
Optimizing Windows 11 Efficiency for Screen Reader with Key Settings and Configurations takes an hour most often 2 or so to complete. Longer if you are new to screen reader and how Windows 11 works. It is different than other OS systems so give yourself grace as you learn all there is to know about this system. As you move through your keyboard and discover you would like a particular key somewhere, like the applications key, you can remap a key to create that yourself. AND, you MUST have Local Admin on School Computers.
How to setup Computer for Optimizing Windows 11 Efficiency
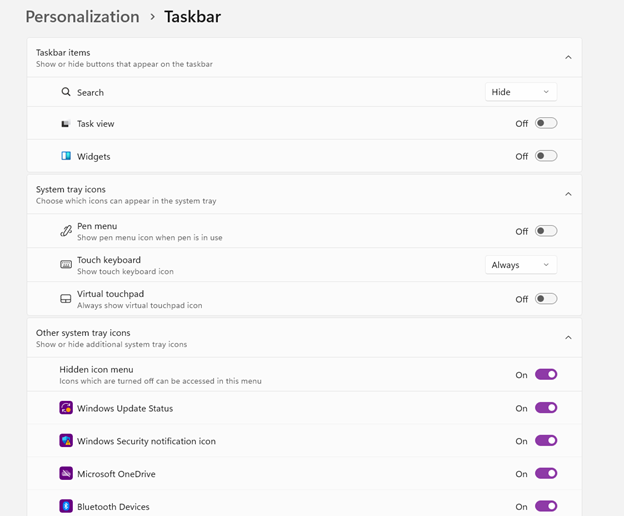
Change Taskbar Settings
Update Computer every day
Go to task manager and disable anything you do not need at start up
Go to Power Options and change from Sleep to Shut Down when you press Shut down button
take off sleep options in general unless you are advanced user
Keep in mind that your screen reader cannot reset or the RAM clear if you computer is in sleep mode or hibernate mode
Turn off Touch pad- if you do not your palm will touch the mouse pad and auto activate items or move your cursor on your computer. This equals huge frustration to a screen reader user.
Windows T and clear that taskbar–this is million dollar real-estate to access programs fast
Setup WORD
Go to control panel and setup Sound card options
Windows and adjust other sound options using sndvol.exe
Setup Gmail and Drive and learn new commands
Setup Outlook
Taskbar setting for Windows 11 setup
Efficiency for Screen Readers and other Setup Skills
Proper Set up Windows 11 to work with screen readers and braille displays is crucial for visually impaired users. This configuration ensures smooth interaction with the system, giving users full access to information and applications such as Gmail for optimizing access..
1. Accessibility and Independence
Configuring Windows 11 for screen readers like JAWS, NVDA, or Narrator, and integrating braille displays, provides full independence. Without proper setup, tasks such as reading documents, browsing, or using software become challenging. A well-configured system ensures all functions are accessible.
2. Productivity and Efficiency
Screen readers and braille displays let users interact quickly with the system. Setting up Windows 11 for compatibility speeds up responses to commands. It also ensures smoother transitions between applications, making multitasking more efficient. Proper configuration prevents lag or software conflicts, which increases productivity in school and work settings.
3. Customization for Personalized Needs
Each user has different needs. Windows 11 allows users to customize screen reader settings (e.g., speech rate, verbosity, and key commands) and braille displays (e.g., output type and formatting). These adjustments create a personalized experience, improving comfort and reducing frustration.
4. Enhanced Braille Support
Windows 11 offers enhanced braille support when paired with leading screen readers. Proper setup lets users access seamless braille input and output for text and math. It also allows advanced navigation of documents. Correct braille display configuration ensures accurate reading and editing of both simple text and more complex content.
5. Compatibility with Updates
As Windows 11 updates, keeping screen readers and braille displays integrated is essential. A well-maintained setup ensures new features or security updates don’t disrupt accessibility tools. This is vital for maintaining ongoing access such as the new Google Commands for navigation.
Key Setup Steps for Optimizing Windows 11 for Accessibility:
Ensure Compatibility: Install the latest versions of screen readers and braille display drivers compatible with Windows 11.
Enable and Configure Narrator: Windows 11 includes Narrator, which can be set up for basic tasks if needed.
Customize Keyboard Shortcuts: Set up shortcuts for easier navigation and quicker interaction.
Adjust Accessibility Settings: Go to “Accessibility” in the Settings app to adjust visual and audio cues like contrast and text size.
Test with Braille Displays: Pair and calibrate braille displays for reading and input in UEB or Nemeth, depending on preferences.
With proper set up, Windows 11 for screen readers and braille displays furthers accessibility. This setup enhances independence, productivity, and ease of use in the digital world.
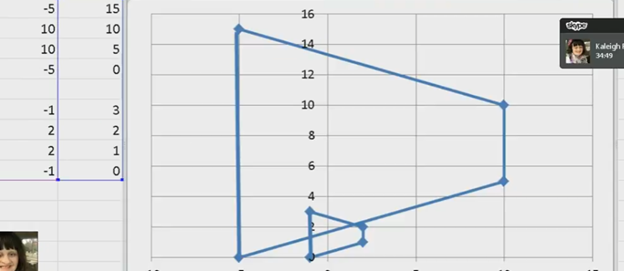
Dr. Robinson guides transcribers through the process of math image conversion for accessibility, specifically focusing on converting math images into accessible Word documents using MathKicker.AI. She begins by highlighting that transcribers will easily recognize an image when it turns blue upon clicking it when opened in PDFs. These images, often blurry due to repeated copying by teachers, require careful description for students who cannot feel the number lines. Dr. Robinson emphasizes the importance of adjusting the level of detail based on the student’s age and familiarity with number lines during the math image conversion access process.
To begin the process to learn how to convert math images into accessible Word documents for students with accessibility needs, Dr. Robinson gives step-by-step video instruction using “Windows + Shift + S” to capture the image and then select “Convert Image to Doc” using the clipboard in Mathkicker.AI. This method is particularly useful for large documents. Once converted, the image opens in Word, where it is important to enable editing with F6. She advises saving the document with a simple name, like “Line Work,” and placing it in the downloads folder from Mathkicker.AI.
Dr. Robinson demonstrates how to work side-by-side with the original image and the converted document. By adjusting the zoom to 200%, transcribers can compare the math accurately. She notes that sometimes images may contain extra elements, like a punched hole, which the software might misinterpret. These should be corrected during math image conversion for access.
Accuracy for Math image conversion access
For further accuracy, Dr. Robinson recommends using alternative text (alt text) for the graphic line. This helps students and sighted individuals, such as teachers or parents, understand the content. She explains that leaving the graphic in the document with added alt text is beneficial. A user can add the braille Math editor into use in WORD also for more options or even using EXCEL.
Moving to more complex math for math image conversion access, she instructs on using the Desmos graphing calculator. Students can use “Alt + Print Screen” to capture and paste graphs into the Word document. Describing shaded areas or specific graph features is crucial for clarity. Finally, Dr. Robinson shows how Math Kicker efficiently converts math into text, creating clean, accessible documents. This method, combining math image conversion access and alt text descriptions, significantly speeds up the transcription process while ensuring students receive accurate, accessible math content. Dr. Robinson concludes by encouraging transcribers to reach out with any further questions. At times, you need to adjust Margins, etc.
Dr. Robinson demonstrates how to use MathKicker.AI to complete various types of math with NVDA and UEB math. She begins by accessing a math problem in HTML format through a browser. Using outdated software, including NVDA on Windows 10, she shows how even older technology can effectively handle advanced math tasks.
First, Dr. Robinson opens a math problem in Firefox, which currently translates math perfectly. She presses “Control + P” to print the page as a PDF, saving it to her downloads folder. Next, she switches to Chrome using “Windows + 3” and opens Math Kicker.AI, a tool designed for converting math problems. She uses the “Alt + C” command to start the conversion process.
She navigates through MathKicker’s options using the applications key and selects UEB math code with NVDA commands. After selecting the PDF file, she waits for two chimes, indicating the conversion is complete. To begin solving the problem, she turns off the virtual cursor, moves to the problem area, and uses the “F2” key to break down the equation into individual components.
She demonstrates how to solve the problem step by step, using commands like “Alt + B” to apply operations to both sides of the equation. She also uses “Control + R” to replace specific elements in the equation, simplifying the problem as she goes. After completing the math problem, she presses “F9” to review the LaTeX code, reinforcing her understanding of the math.
Dr. Robinson explains how these steps ensure that even visually impaired students can solve advanced math problems with outdated technology. She emphasizes that Math Kicker.AI, combined with NVDA, allows for accurate UEB math transcription, making it accessible to a global audience. She concludes by encouraging viewers to use these methods to handle any type of math problem effectively. More NVDA and UEB Math videos here.
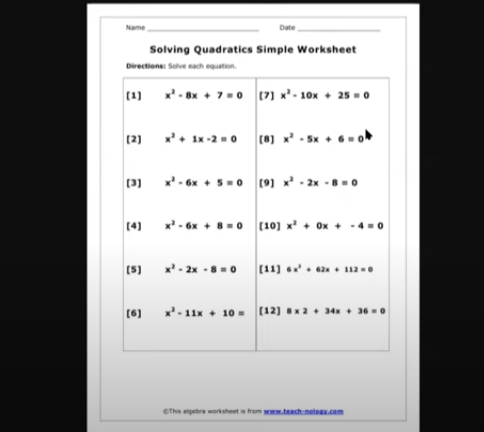
In this video, Dr. Robinson begins by demonstrating how to use MathKicker.ai with screen readers like JAWS or NVDA. She focuses on solving quadratic equations. First, she shows how to handle graphics that are not accessible to screen readers. By using the “Applications” key and selecting “Copy Image,” users can paste the image into MathKicker using “Alt + V.” The system converts the image into readable math, confirmed by two chimes.
Dr. Robinson then guides users to navigate and manipulate the quadratic equation in MathKicker.ai with screen reader. She demonstrates how to move constants to the other side of the equation using “Control + Right Arrow.” Next, she explains the process of completing the square by taking half the coefficient of x, squaring it, and applying it to both sides with “Alt + B” and entering the value.
She continues by rewriting the equation as a perfect square, using “Control + R” to replace terms in MathKicker.ai with screen reader. She shows how to take the square root of both sides with “Alt + B” and using “R” for radical. The process involves replacing the square root with the exact values, ensuring each step is clear and accurate.
Throughout the MathKicker.ai with screen reader tutorial, Dr. Robinson emphasizes using keyboard commands to navigate and solve the equation. She also highlights how users can submit their work to their teachers directly from MathKicker by using the “Applications” key and selecting “Submit Work to My Teacher.” See more lessons on Mathkicker.AI with Jaws or NVDA.
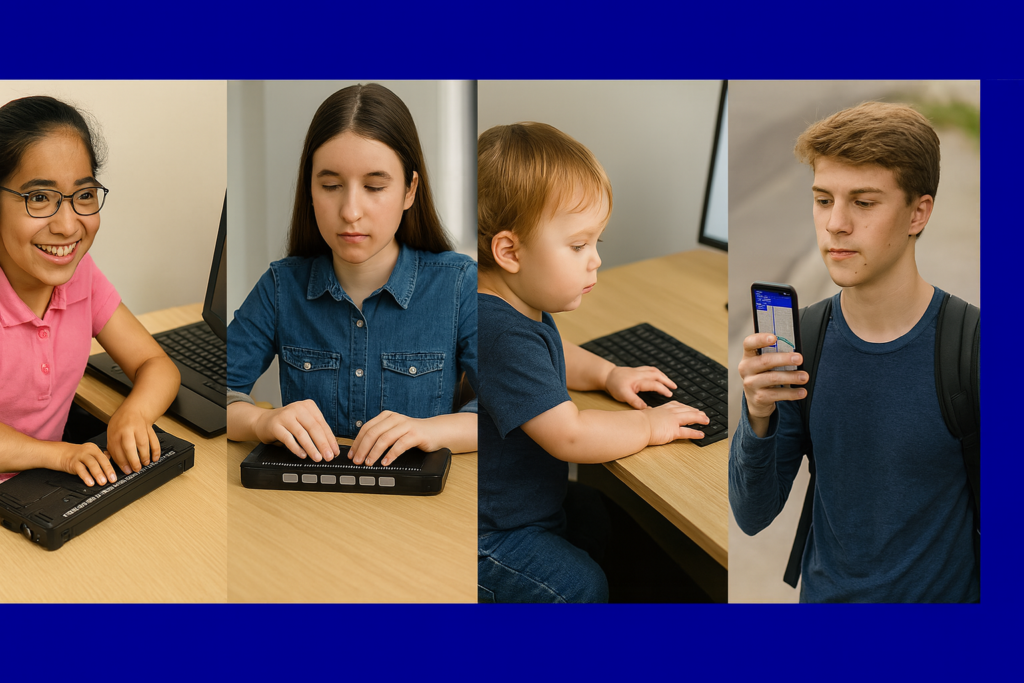
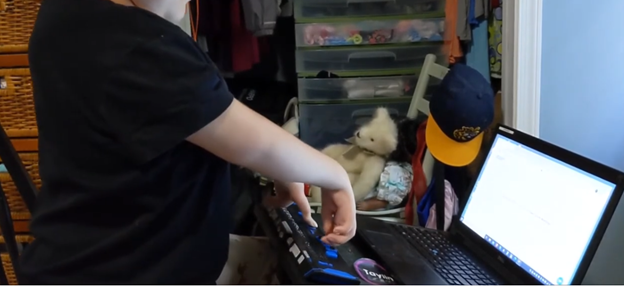
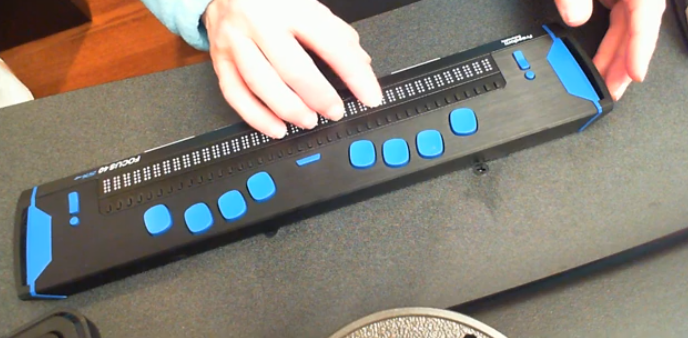
Kaleigh was born with very special hands. So, whether you have 10 fingers or 2 or 3, there is always an easy way to use a braille display to control your computer.
Math for all ages, Math Team, Dr. Robinson, along with Professor Betsey, Campbell Rutherford (teacher intern), led the session. Nate Kile (Access Tech Specialist) was the moderator. Math Team emphasized the importance of ensuring blind students can access their technology independently and efficiently. Nate Kile assisted by handling participant questions during the presentation, allowing attendees to type inquiries in the Zoom chat box. Mr Kile would ask the Math Team from the virtual attendees.
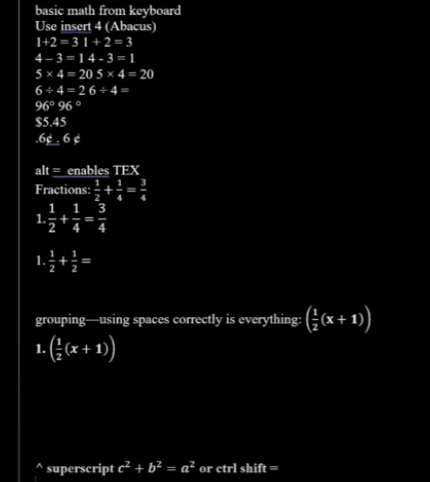
Each presenter built on the others’ lessons. Dr. Robinson began with elementary math training skills and how JAWS and other assistive technologies play crucial roles in blind students’ education. Teaching math for all ages, she typed out typically math problems in elementary school to show audience how easily math is completed in WORD. Nate provided opportunities for participants to unmute themselves using Alt + A or Alt + M to ask questions.
Math for all Ages: Dr Robinson
The Math Team turned off their videos to optimize bandwidth. When teaching virtually, turning off video offers better bandwidth for a flow of uninterrupted instruction. Dr. Robinson started the discussion by running JAWS, a screen reader. She explained how to troubleshoot JAWS issues, recommending minimizing programs and restarting the software for optimal performance.
The session highlighted key JAWS commands, such as Windows + D for quick access to the desktop. Dr. Robinson demonstrated how blind students could use Braille displays for math, including Nemeth code. She showed how blind students control their computers by personalizing settings like screen readers and Bluetooth. Customizing the setup is essential for supporting math learning at all ages.
Math for all ages math formulas in Word
Math for all Ages: Professor Betsey
Professor Betsey demonstrated how to effectively use Braille displays, including advanced setups for students. She went into MathType and LaTex and how to use advanced Math techniques to accomplish all math levels. She emphasized the importance of maintaining accessibility and autonomy for students through personalized settings. As a college-level math professor, she explains that using a PC for math enables full inclusion of blind students. Prof. Betsey emphasizes that this technology allows blind students to participate equally in all aspects of their education. This approach supports the goal of providing math for all ages.
Math for all Ages: Campbell
Campbell Rutherford, a teacher intern, demonstrated how to integrate graphing and mathematical functions using accessible technology for blind students. Campbell began by demonstrating how to write a function in Word using LaTeX. She then transitioned to graphing that function in Desmos, an online graphing calculator. Using her braille display and screen reader, she input and analyzed the graph. Campbell explained how blind students can explore mathematical properties like intercepts and undefined points. After reviewing the graph, she took a screenshot and pasted it into a Word document. This tied together the written mathematical properties and the visual representation. Throughout, Campbell stressed the importance of accessible math for students of all ages.
Throughout the session, the Math Team emphasized the importance of managing constant software updates. They explained how providing local admin rights empowers students to update their programs and devices independently. This in-turn prepares them for both academic success and future employment. The TechVision team’s approach ensures that students can fully access their education and maintain control of their technology. This ultimately sets them up for long-term success but especially the STEM field. More Math Lessons here:
To use MathType and LaTeX with screen readers like JAWS or NVDA, you can easily create and render math formulas directly in Word or Google Docs. Here’s how to get started with MathType in both platforms and some important points for using LaTeX commands.
MathType in Word:
Download MathType: First, download and install MathType as an add-on for Word. This will allow you to use LaTeX commands within your Word documents.
Using Alt = for Equations:
In Word, pressing Alt + = will activate the equation editor, allowing you to type math formulas using LaTeX-like syntax without needing the dollar signs ($).
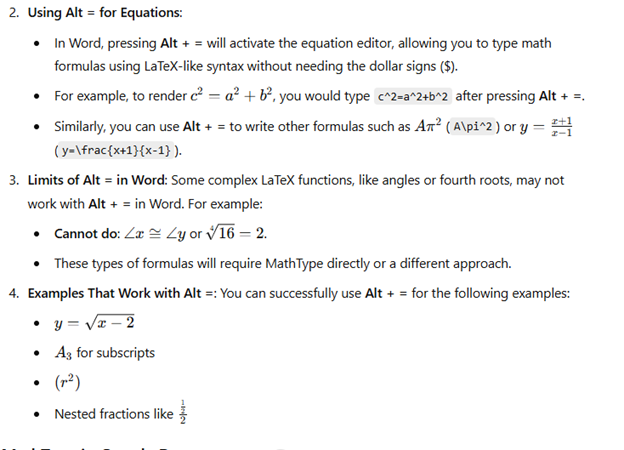
For example, to render c2=a2+b2c^2 = a^2 + b^2c2=a2+b2, you would type c^2=a^2+b^2 after pressing Alt + =.
Similarly, you can use Alt + = to write other formulas such as Aπ2A\pi^2Aπ2 (A\pi^2) or y=x+1x−1y = \frac{x+1}{x-1}y=x−1x+1 (y=\frac{x+1}{x-1}).
Limits of Alt = in Word: Some complex LaTeX functions, like angles or fourth roots, may not work with Alt + = in Word. For example:
Cannot do: ∠x≅∠y\angle x \cong \angle y∠x≅∠y or 164=2\sqrt[4]{16} = 2416=2.
These types of formulas will require MathType directly or a different approach.
Examples That Work with Alt =: You can successfully use Alt + = for the following examples:
y=x−2y = \sqrt{x-2}y=x−2
A3A_3A3 for subscripts
(r2)(r^2)(r2)
Nested fractions like 122\frac{\frac{1}{2}}{2}221
Visual Rendering after you press enter in WORD for MathType with screen readers-LaTex
Latex is typed out and this is the visual rendering of the LaTex from Mathtype
MathType in Google Docs-though can give challenges based on technology:
Add MathType Add-on: In Google Docs, go to Add-ons and download MathType. This will allow you to use LaTeX commands by rendering them in the document.
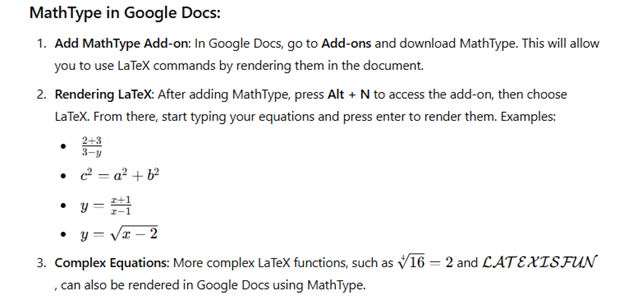
Rendering LaTeX: After adding MathType, press Alt + N to access the add-on, then choose LaTeX. From there, start typing your equations and press enter to render them. Examples:
2+33−y\frac{2+3}{3-y}3−y2+3
c2=a2+b2c^2 = a^2 + b^2c2=a2+b2
y=x+1x−1y = \frac{x+1}{x-1}y=x−1x+1
y=x−2y = \sqrt{x-2}y=x−2
Complex Equations: More complex LaTeX functions, such as 164=2\sqrt[4]{16} = 2416=2 and LATEXISFUN\mathcal{LATEX IS FUN}LATEXISFUN, can also be rendered in Google Docs using MathType.
Visual rendering of math after translation of LaTex in Docs using mathtype addon
By using Alt + = in Word and MathType in Google Docs (but be aware there may be issues in Docs), you can seamlessly render a variety of math formulas and equations with ease. Screen readers like JAWS and NVDA will effectively read these equations, enhancing accessibility for blind and visually impaired students.
MathType(LaTex) Alt = in WORD will render formulas to Math see below
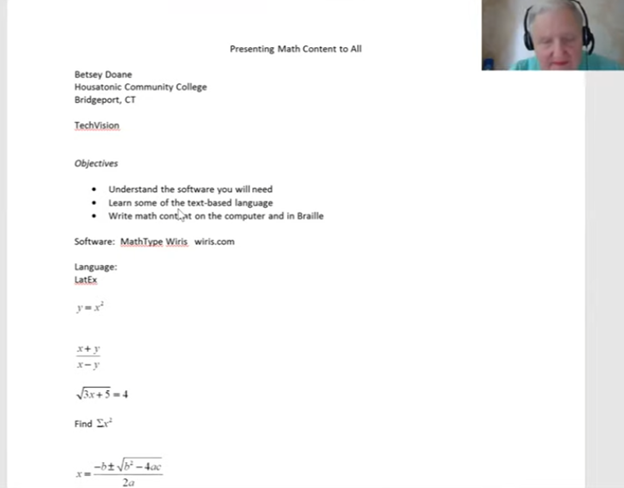
Dr. Betsey Doane shared her experience teaching math for over 50 years and the importance of making math accessible to all students, including those with visual impairments. She began by introducing the software MathType, essential for creating accessible math content. The software integrates into Word and allows users to write math that is accessible to both screen readers and braille displays. Her efforts truly embody the concept of Advanced Math Made Accessible.
Dr. Doane explained the basics of LaTeX, a text-based language used for writing math. She demonstrated how to input and translate common math expressions such as fractions, square roots, and equations using LaTeX in Word. Her instructions included using the Focus 40 Braille Display and ensuring proper configurations for students to view math content in braille. This approach makes advanced math more accessible for everyone.
LaTex using Mathtype to insert perfect Advanced math made accessible
She emphasized the importance of understanding both the visual and non-visual ways of presenting math, highlighting that students need the right software and commands to work effectively. By using LaTeX and MathType, both sighted and blind students can access and solve math problems, ensuring inclusion in any classroom setting. This makes advanced math accessible and easier to understand.
She highlighted the use of MathType software, which integrates seamlessly with Microsoft Word, allowing users to create and present math content that is accessible through screen readers like JAWS and braille displays like the Focus 40. Dr. Doane explained how MathType enables students and educators to write complex equations, such as fractions, square roots, and exponents, in both visual and non-visual formats. This ensures that blind students can access the same content as their sighted peers, making advanced math more accessible.
Advanced Math Made Accessible with LaTex
Dr. Doane also provided an introduction to LaTeX, a powerful text-based language used for writing mathematical expressions. She demonstrated how to write math using LaTeX syntax, such as using backslashes for commands like fractions and square roots. By using LaTeX in Word with MathType, math content can be rendered correctly on both screen readers and braille displays, making it easier for blind students to follow along in class and complete assignments. This is another way to make advanced math accessible.
Furthermore, Dr. Doane stressed the importance of configuring braille displays correctly, ensuring that input is set to computer braille and output is set to grade 2. She provided step-by-step instructions for adjusting these settings on the Focus 40 Braille Display, ensuring that students can navigate math content effectively, contributing to the overall goal of making advanced math accessible.
In conclusion, Dr. Doane encouraged educators to adopt these tools and techniques to create an inclusive learning environment where both sighted and blind students can excel in mathematics. Her detailed instructions and practical advice offer a clear path toward accessible math education for all.
Dr. Robinson and Lucas began the session by navigating Canvas, focusing on essential screen reader commands for effective navigation. They highlighted the importance of commands like Insert + F5, F6, and F7 to explore the page layout before moving through various elements. When discussing the Canvas school platform navigation, Dr. Robinson highlighted the need to recognize interactive elements like radio buttons and check-boxes to ensure smooth navigation in Canvas. By understanding these features, students can efficiently move through the platform and complete tasks effectively. Understanding Canvas school platform navigation is key for accessibility.
To streamline their workflow, they used first-letter navigation, such as hitting “C” to quickly jump to courses. This method enables users to navigate faster without manually tabbing through multiple options. Lucas demonstrated how to access different sections of the Canvas interface, including courses and messages, using the appropriate keyboard commands. Mastering the navigation of the Canvas school platform efficiently requires knowing these shortcuts.
InBox Management in Canvas school Platform Navigation
For inbox management, Lucas efficiently used first-letter navigation to filter unread emails and compose a new message. Dr. Robinson guided him through composing an email, showing how typing the recipient’s name narrows down the list of available contacts. Lucas learned how to navigate, select recipients, and send messages within the Canvas interface. Canvas school platform navigation strategies significantly improved his inbox management skills.
After addressing the inbox, they moved on to class assignments. Using heading and link navigation commands, Lucas accessed assignments and checked due dates. Dr. Robinson stressed the importance of using key commands, such as Insert + F7, to bring up lists of assignments and quickly navigate to relevant tasks on the Canvas school platform.
Lastly, they tackled PDF accessibility. Dr. Robinson showed Lucas how to download and convert PDFs into Word documents for better accessibility and interaction. By converting documents, Lucas could add notes, adjust content, and work more effectively. These steps reinforced the power of screen reader commands, helping users stay organized and fully engaged in digital learning environments on the Canvas school platform.
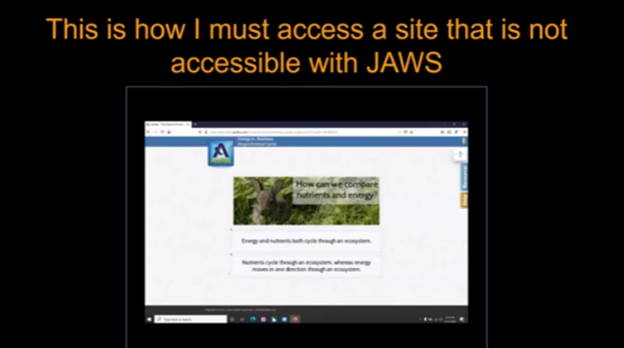
Emery, a blind ninth-grader at Kalaheo, introduces herself and shares her love for math and technology. She uses a computer with a screen reader and Braille display to access her education. Eme navigates her world with a cane and texts friends using her phone. During the pandemic, her computer became essential for schoolwork. She explains how she uses various tools to access her education, including JAWS screen reader and Braille Display and other access technology. Eme highlights the importance of accessible assignments and demonstrates navigating an online platform despite its challenges. Accessible work at school is critical for her success.
Emery uses tools like the JAWS screen reader and Braille display connected to her computer to navigate her studies. She emphasizes that accessible assignments are crucial because they allow her to engage with the same content as her peers. When assignments are not accessible, it creates significant barriers to her learning. It is evident that accessible work at school can make a big difference.
Eme Making Work accessible on an inaccessible site
By ensuring Teachers’ work is accessible, you empower students like Emery to succeed and participate fully in their education. Accessible materials foster a learning environment where all students can be included and thrive. Therefore, focusing on making work accessible at school helps all students.
She thanks teachers for their commitment to making education accessible for everyone. Providing accessible work at school shows dedication to inclusion and highlights the importance of accessibility.
Using Focus 40 Braille Display to do Math Work in Word with Jaws, Kim demonstrates commands in WORD using FOCUS 40 Braille display exclusively. She can control her computer and complete her math work in WORD with just the display.
Here are some essential commands for using the Focus 40 Braille Display to do math in Microsoft Word:
To Navigate Schoology with Jaws is easy using these useful keyboard commands for navigation. When you’re using a screen reader like JAWS or NVDA it is very accessible. Kim demonstrates her skills, showing how to navigate schoology with efficiency. She shares with others how this training has allowed her to access her education.
Use the arrow keys to navigate to the desired course and press Enter.
Access Course Materials:
Press H to navigate through headings until you reach the course materials section.
Use the arrow keys to select the material you want to access.
Navigate to Assignments:
Press Insert + F6 to bring up the headings list.
Use the arrow keys to find and select the “Assignments” heading.
Access Notifications:
Press Insert + F5 to bring up the form fields list.
Navigate to the notifications section and press Enter.
Navigate to Discussions:
Press H to move through headings until you reach the “Discussions” section.
Use the arrow keys to select and enter a discussion.
General Navigation:
Use Tab and Shift + Tab to move forward and backward through interactive elements.
Press G to navigate to graphics and L to navigate to lists.
One Trick to remember is when a PDF viewer of work opens, the download in WORD link is at the very bottom. Use your links list or ctrl end and up arrow to find it.
Turning images into text in Google Docs is a simple process that uses Optical Character Recognition (OCR) technology. This feature allows you to extract text from images, making it editable and searchable. Whether you have a photo of a document, a screenshot, or a PDF, Google Docs can quickly convert the image to text for further use. Changing inaccessible to accessible is an important step, and this post will show you how to upload an image, open it in Google Docs, and extract the text for easy editing.
To turn images into text in Google Docs, you can use a built-in feature that utilizes Optical Character Recognition (OCR). Here’s how you can do it:
1. Upload the Image to Google Drive
Open Google Drive.
Click New and select File Upload.
Upload the image containing the text (formats like JPG, PNG, and PDF work).
2. Open Image with Google Docs for Changing inaccessible to accessible
Once the image is uploaded, right-click the file in Google Drive.
Select Open with, then choose Google Docs.
Google Docs will open a new document with the image at the top and the recognized text below it.
3. Edit the Extracted Text
After Google Docs converts the image to text, review and edit the text as needed. OCR isn’t always perfect, so you may need to make corrections.
Another option from Gmail for Changing inaccessible content to accessible text
When you receive an attachment in Gmail (you cannot do this in Outlook or other email client), open it in the virtual viewer by pressing Enter on the attachment. It will automatically open in the virtual viewer. You can either tab to “Open with” or press Insert + F5, then down arrow to “Google Docs” and press Enter. Wait as Google Docs uses OCR to convert the image into text. Be patient during this process, as it may take a moment to complete.
By following these steps, you can easily extract text from images using Google Docs. This is especially useful for making printed documents or screenshots searchable and editable.
The Desmos Graphing Calculator using keyboard commands is a powerful and accessible tool for visualizing mathematical concepts and solving complex equations. With a range of keyboard commands, users can efficiently navigate the interface, manipulate graphs, and explore functions without relying on a mouse. Whether you’re zooming in on a graph, adjusting sliders, or using audio trace mode, these commands enhance the user experience, making it easier for everyone, including those with visual impairments, to engage with mathematics. This introduction will guide you through the essential keyboard shortcuts to maximize your productivity and understanding while using the Desmos Graphing Calculator.
The Desmos Graphing Calculator is a powerful and accessible tool for visualizing mathematical concepts and solving complex equations. With a range of keyboard commands, users can efficiently navigate the interface, manipulate graphs, and explore functions without relying on a mouse. Whether you’re zooming in on a graph, adjusting sliders, or using audio trace mode, these commands enhance the user experience, making it easier for everyone, including those with visual impairments, to engage with mathematics.
Essential Desmos Graphing Calculator
General Navigation
Open Graphing Calculator: Alt + G
Focus on Expression List: Ctrl + E
Add New Expression: Enter
Graph Manipulation
Zoom In: Ctrl + +
Zoom Out: Ctrl + -
Reset Zoom: Ctrl + 0
Audio Trace Mode
Enable/Disable Audio Trace Mode: Alt + T
Summarize Selected Curve: Alt + S
Describe Graph Axes: Alt + G
Move to Next Point: Right Arrow or Down Arrow
Move to Previous Point: Left Arrow or Up Arrow
Sliders
Decrease Value: Left Arrow
Increase Value: Right Arrow
Decrease Value by Larger Increment: Page Down
Increase Value by Larger Increment: Page Up
Tables
Next Cell: Tab
Previous Cell: Shift + Tab
Next Row: Down Arrow
Previous Row: Up Arrow
Exporting Graphs
Open Share Menu: Ctrl + Shift + S
Print Graph: Select “Print” to save as a PDF.
Export as Image: Select “Export Image” to save as PNG, SVG, or for a Braille embosser.
Copy Link: Select “Copy Link” to share the graph online.
These commands should help you navigate, edit, and export your graphs efficiently.
Before you begin, remember when you are using your devices to maintain upright posture to protect your spine and neck. So, regularly cleaning the Focus 40 Braille Display and running diagnostics is crucial for maintaining its performance and longevity. Dust, dirt, and oils from your hands can accumulate on the Braille cells, potentially causing malfunctions or reducing the tactile quality of the display. By keeping the Braille cells clean, you ensure that the device remains responsive and accurate. Running diagnostics helps identify any issues early, allowing for timely repairs and preventing more significant problems down the line. This proactive maintenance not only extends the life of your device but also ensures a reliable and efficient user experience12.
Here are the steps to clean the Focus 40 Braille Display and run diagnostics:
Cleaning the Focus 40 Braille Display
Turn Off the Device: Ensure the Focus 40 Braille Display is turned off and unplugged.
Prepare Cleaning Materials: Use a soft, lint-free cloth dampened with water or isopropyl alcohol. Avoid using harsh chemicals.
Turn On the Device: Power on the Focus 40 Braille Display.
Enter Diagnostic Mode: Press and hold the Menu button while turning on the device. Continue holding the button until the device enters diagnostic mode.
Run Tests: Use the navigation keys to select and run various diagnostic tests, such as checking the Braille cells, buttons, and connectivity.
Cleaning the Focus 40 Braille Display and running diagnostics
Regular cleaning and diagnostics help maintain the performance and longevity of your Focus 40 Braille Display, ensuring it remains responsive and reliable.
You can quickly create an electronic signature using keyboard commands on various platforms. In Microsoft Word or Adobe Acrobat, type, draw, or insert a signature image. Keyboard shortcuts simplify the process, making it easy to add signatures to digital documents. This guide provides step-by-step instructions on typing, drawing, or inserting a signature using shortcuts. You can apply this method across all versions of Word for creating electronic signatures efficiently and effectively.
To create an electronic signature using keyboard commands, follow these steps:
Make Electronic Signatures in WORD and Adobe
In Microsoft Word:
Open a blank document. Press Alt + N, then P to insert a picture if you’re using a scanned image of your signature.
This means, hand write out a signature and scan it into computer and save as your signature. Then insert that into your documents and use any where to make an electronic signature process smoother
Use a mouse to crop out JUST the signature, application key when you are on the image and save as picture and name it the word signature after your name
For typed signatures, press Ctrl + Shift + K to enter text in a signature-like font (if available), then press Ctrl + B to bold the text if needed.
To save the signature, press Alt + F, then A to save as a PDF or document.
Practice making an electronic signature using the name ‘Jane Doe
In Adobe Acrobat:
Open a PDF and press F6 to navigate the newest Adobe or Alt + T for the tools menu. Navigate with F6 or the arrow keys to “Fill & Sign” and press Enter. Follow prompts to either type, draw, or insert an image of your signature.
Google offers several tools to make inaccessible images of work accessible through translation and text extraction. Google Translate includes an image translation feature, where users can upload an image and the tool will detect and translate the text within it into another language. Additionally, Google Drive and Google Docs use Optical Character Recognition (OCR) to convert images, like scanned PDFs, into editable text. This makes visual content, such as images with embedded text, accessible for screen readers, helping blind or low vision users engage with the content more easily. Using Google Docs as plain text can further streamline this process.
Here’s how to save a Google Doc as plain text using keyboard commands:
Open your document.
Press Alt + Shift + F to open the “File” menu. (Many times you can just use Alt+F)
Press Down Arrow to navigate to Download.
Press Right Arrow to expand the options, then press Down Arrow to select Plain Text (.txt).
Press Enter to download the document as a plain text file.
Open the .txt file, select with CTRL + A, Copy it with CTRL+C and paste into WORD with CTRL+ V
These steps will extract text then download the document with no formatting, leaving only the raw text. Then transfer it into WORD for easy reading
Google Doc as Plain Text Using Keyboard due to doc being side ways image
kaleigh takes images from a PDF and creates Geometry shapes such as vertices in Excel for perfect graphing.
In Excel, you can create vertices (edit points on a line) when working with shapes or lines. Here are the keyboard commands to manipulate vertices:
Always create a table with all pertinant numbers based on the math from your Work. Kaleigh took her work from a PDF and transported it into excel. If you make a space in excel leaving cells empty, you can create 2 intersecting graphs.
Basic Overview of Geometry using Excel Shapes
Insert a Shape:
Press ALT + N, SH to open the Shapes menu.
Use the arrow keys to select a line or shape and press Enter.
Edit Vertices:
Select the shape.
Press Shift + F10 (context menu) and choose “Edit Points” by using the arrow keys and pressing Enter.
Move Vertices:
Use arrow keys to move vertices around once in edit mode.
These steps allow for creating and editing vertices in Excel. More Excel lessons.
The most modern way as of 2024 to adapt work for blind or low vision students is using programs like MathKicker.ai, WORD Immersive Reader and Google Docs, follow these steps to ensure full accessibility for both English, Math and other content:
Use MathKicker.ai for Math Content:
Upload or paste math equations into MathKicker.ai. This tool converts complex math problems into formats accessible for screen readers like JAWS or NVDA.
Once converted, paste the accessible math text into Google Docs or other word processing platforms for students to use with their screen readers.
Convert Images to Descriptive Text in Google Docs:
When images contain important information, use Google Docs’ built-in alt text feature. Right-click the image, select “Alt text,” and enter a detailed description of the image, focusing on its relevance to the content.
For math-specific images (e.g., graphs, equations), describe the visual elements and provide the corresponding math in text form or, if needed, through MathKicker.ai to ensure clarity for students using auditory or Braille output.
How to Adapt Work and Why
3. Leverage Google Docs Collaboration Features:
Share Google Docs with students, allowing them to access the document using their preferred screen reader.
Enable real-time collaboration by ensuring that students can work in the document with peers or teachers, making the experience inclusive.
4. Use Heading and Structure Tools:
Make sure to structure documents with proper headings and styles in Google Docs to aid screen readers in navigating the document efficiently.
By combining MathKicker.ai for math accessibility and using Google Docs to convert visual content into descriptive text, blind or low vision students can access both English and math content effectively.
There are many ways to adapt work for inclusion. Inaccessible work creates barriers—choose the right tools, because together we achieve more than apart.
So many people ask, “How fast should my child be reading?” When discussing Braille Reading Speed Standards, it’s essential to remember that blind children are just as intelligent as sighted children so standard reading speed should be used for all children. Braille Reading Fast.
The TechVision Team use these same standards for all blind and low vision students. To name just a couple, Batya reads both Hebrew and English Braille and Dani excels to the top of her class also. If you set high standards then children will meet those standards. We have taken on beginner students and told them how fast they would be reading braille in a couple months, even in middle and high school. Just remember the older you start the longer it will take for them to gain speed. At the end of the 2 months, as their fingers would fly across the page reading braille, as they were timed with a fast speed, We would ask, “So did you really think you would be able to read that fast?” They would reply, “Of course, because you told me I would be able to.”
So, tell them, they can, and they will. Our Mission and Purpose is to have students (especially with similar intelligence) at the highest levels they can be with hard work and instruction to get them there as their peers.
Get to the Highest Levels
Tricks to use Time them every week (sometime everyday), so they see their progress Have them reread the same material to get flow and fluency Have them braille the material first using contractions, then read what they wrote
Visual braille reading speed chart as above accessible version