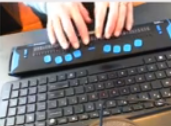
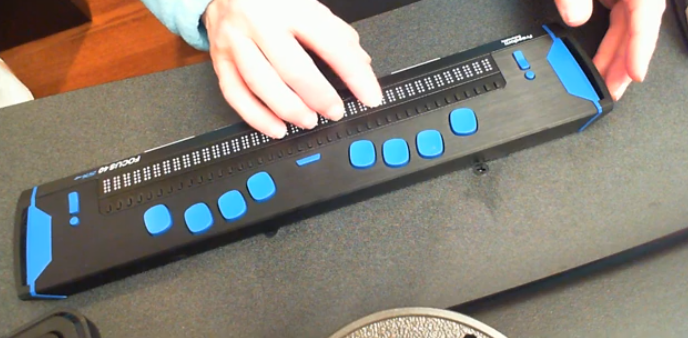
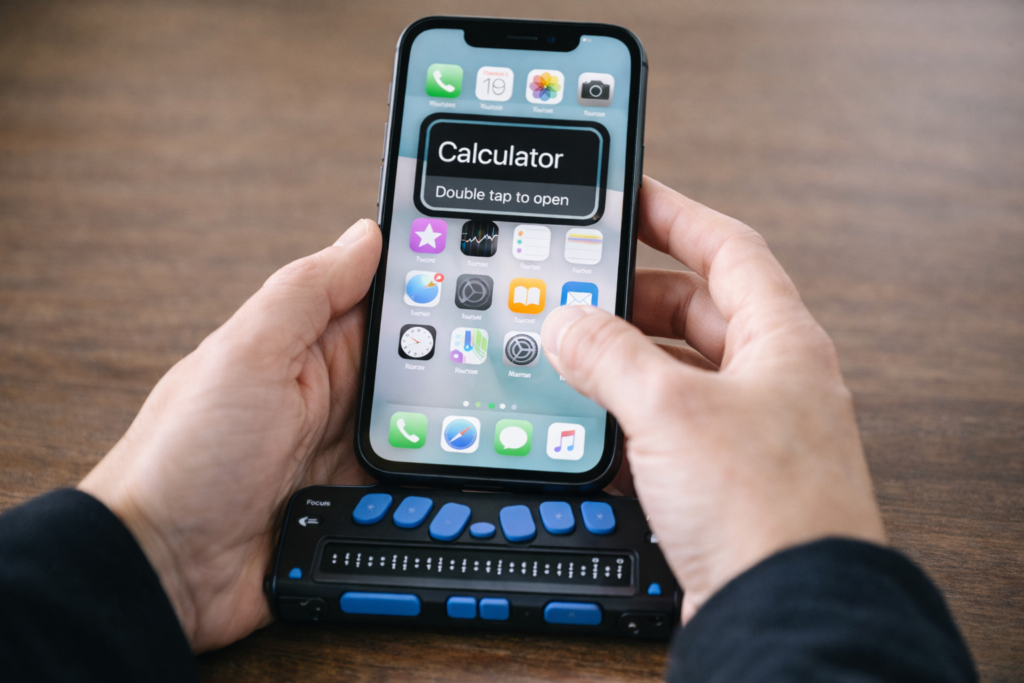
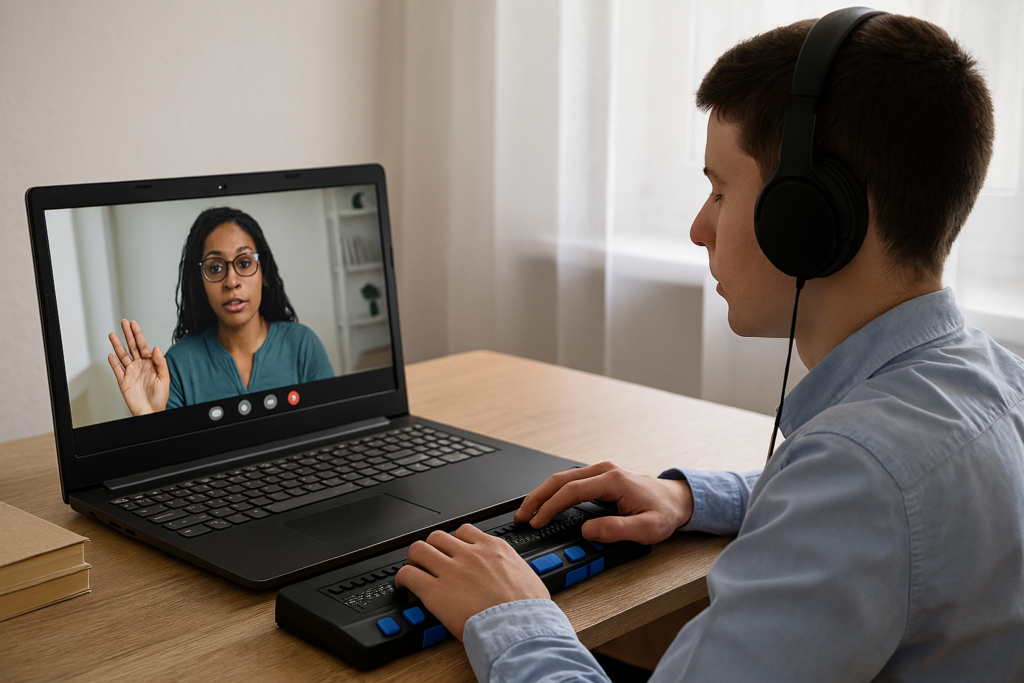
Dr. Robinson demonstrates how to navigate with the Focus 40 Braille Display, highlighting various commands and features for efficient use. She introduces the Focus 40 Braille Display, explains the importance of navigation commands, and demonstrates various navigation techniques. Additionally, she covers Focus Display Navigation Options to help users maximize their efficiency.
Focus Display Navigation Options Video Highlights
Introduction to navigation
Dr. Robinson introduces the Focus 40 Braille Display.
Explains the importance of navigation commands.
Prepares to demonstrate various navigation techniques.
Basic navigation commands
Shows how to move to the top and bottom of the display.
Uses specific key combinations for navigation:
Move to Bottom: Press dots 4-5-6 + Space.
Move to Top: Press dots 1-2-3 + Space.
Emphasizes the logic behind the commands.
Line and word navigation
Demonstrates moving one line at a time.
Uses key combinations for precise movement:
Move Down One Line: Press dot 4 + Space.
Move Up One Line: Press dot 1 + Space.
Explains how to navigate by words:
Move Forward One Word: Press dot 5 + Space.
Move Back One Word: Press dot 2 + Space.
Other Display Navigation
Focus Braille Display navigation options using router keys
Router keys and mode buttons
Highlights the use of router keys for quick cursor movement.
Introduces mode buttons for different navigation options:
Router Keys: Press the router key above the desired character.
Mode Buttons: Located on the left and right sides.
Shows how to navigate by paragraphs and sentences:
Move Forward One Paragraph: Press the right rocker switch down.
Move Back One Paragraph: Press the right rocker switch up.
Move Forward One Sentence: Press the left rocker switch down.
Move Back One Sentence: Press the left rocker switch up.
Panning and rocker switches
Explains the function of panning buttons:
Move Forward One Display Width: Press the right panning button.
Move Back One Display Width: Press the left panning button.
Demonstrates the use of rocker switches for line navigation:
Move Up One Line: Press the right rocker switch up.
Move Down One Line: Press the right rocker switch down.
Highlights the benefits for sighted individuals working with Braille learners.
Benefits of Focus Display
The Focus 40 Braille Display offers numerous benefits. Firstly, it enhances Braille literacy through intuitive navigation commands. Additionally, its versatile features support efficient reading and writing. Moreover, students can easily move through text, improving their skills. The Focus Display can be used exclusively to control the computer–that means, you DO NOT need to use the keyboard if you cannot or do not want to. This makes for VERY efficient math calculations. The device’s compatibility with various screen readers ensures accessibility. Furthermore, its portability allows seamless use in different environments. Overall, the Focus 40 empowers users, boosting their independence and confidence in learning.
To configure the Focus Braille Display SD card and Scratchpad, allowing you to copy files to and from the Micro SD card, make sure the unit is powered off and the supplied USB cable is connected to your PC. Next, press and hold the Left Panning button while simultaneously inserting the USB cable. The display powers on and the PC recognizes the Focus as a removable USB drive.
Note: If you use a screen reader such as JAWS over USB, it is recommended that you turn on speech or use a Bluetooth connection as braille will currently not work over USB when the Focus is being used as a storage device. You will also not be able to use the Scratchpad while in this mode.
Create .brf or .brl files in Braille Blaster or Duxbury or other braille translation APPs
Create .txt files in WORD, WordPad or another Braille editor
To transfer BRF and TXT files to the Micro SD card:
On the PC, open the folder containing the files you want to copy, select the files you want, and then press CTRL+C. This is key step when managing the Focus Braille Display SD card and Scratchpad option.
Windows E to file explorer and navigate to and open the USB drive to display the contents of the Micro SD card in navigation pane.
Open FSI, Focus5, Scratchpad, and then open the folder where you want to place the files and press CTRL+V. Files you want to edit should be placed into the Notes folder. Files placed into the Books folder cannot be modified.
To transfer TXT files created in Scratchpad:
Navigate to and open the USB drive to display the contents of the Micro SD card. Under This PC and navigation pane typically
Open FSI, Focus5, Scratchpad, Notes, and then select the TXT files you want to copy and press CTRL+C.
Navigate to the folder on your PC where you want to place the files and press CTRL+V. You can now use Notepad or another text editor to access these files.
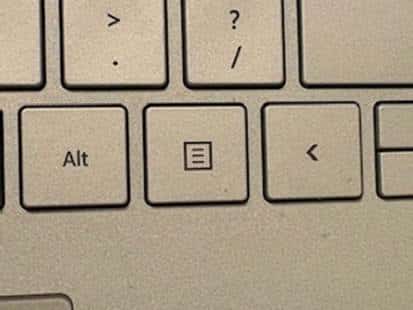
Once you have finished transferring files, press the APPLICATIONS key on your computer while focused on the USB drive, and choose Eject. Power the Focus off and back on and you will once again be able to use the Scratchpad as well as receive braille output from your screen reader over USB.
Press right shift + x to close current file if u make changes it will prompt you to save or discard so you can use cursor router button or dot 8 to navigate thru options
If you want to temporarily leave the scratchpad in the background and resume connection to computer do menu +B (space + dot 1,2)
Get out of file by pressing menu and it pops to file menu and rocker down to file, open, etc. and enter on choice
Rocker down to open or what you want
Select folder-I save most books in books so I open that with enter
Rocker down to file you want to open
To edit and type in the Scratchpad of a Focus Braille Display (like the Focus 40 Blue), you’ll be using its onboard notepad feature. This is a standalone function that lets you jot down notes directly on the device without needing a connected screen reader. Here’s how to navigate and use it:
Accessing and Using the Scratchpad
Enter Scratchpad Mode
Press Menu button (in center of dots 1 and 4) and rocker down until you reach Scratchpad or N+Menu for new file and enter for options-fastest but sometimes does not work so go Menu option rocker down
Press a cursor router button above the word “Scratchpad” to select it or enter to open.
Brailling and Editing
Use Braille input keys to type your content.
Use cursor router buttons to move the cursor to specific characters.
Use DOTS 7 + character to delete backward.
Use DOTS 8 to insert a new line or confirm actions.
Save Your Work
After brailling what you want just right shift + X and enter and it will prompt you to save.
Exit Scratchpad
Right Shift + X
Connect to computer will be B space to switch back and forth between your Notes folder with file to type in info and your computer. See video
Tips for Efficient Use
You can transfer Scratchpad files to a PC via USB or SD card in reader on your PC.
Scratchpad supports BRF and TXT formats, ensuring that the Focus Braille Display and SD card work harmoniously.
Tips & Limitations
Only plain text (.TXT) files are editable in NOTES folder
Files transferred from PC must be in UTF-8 or ASCII format which is .txt as it takes all format out
Dr. Robinson demonstrates how to set up a Spanish language profile in JAWS for a perfect JAWS Spanish language setup. This focuses on accessibility for Spanish-speaking students or students learning a 2nd language. She begins by explaining the differences in braille capitalization across regions. In European countries, dot six is used for capitals, while the U.S. and other areas use dots four and six. The braille display must output the text correctly in Word to ensure accurate reading.
Dr. Robinson guides users through the JAWS settings and starts with inserting a language profile. She uses specific keyboard commands, such as “Insert 6,” to access the JAWS settings center. She emphasizes the importance of setting the default language to Spanish (Spain International). This ensures that the braille output is in Spanish Grade 1. After adjusting the settings, she double-checks everything in Word to confirm that the changes have held.
Next, Dr. Robinson explains how to switch between languages. She advises setting up multiple language profiles. This allows quick toggling between them using commands like “Ctrl+Shift+Windows+L” or specific braille display commands. She ensures that the students can easily switch between English and Spanish, making their work seamless and efficient. See all JAWS Spanish language Setups and other lessons here.
Throughout the setup, Dr. Robinson highlights the importance of using commands to add necessary braille dots for accurate translation. Adding dot eight ensures the correct representation of certain letters and punctuation marks. She demonstrates how to practice symbols and contractions on the braille display, ensuring students are comfortable with the layout.
Dr. Robinson mentions that a practice sheet with all the necessary symbols and contractions are available on website. The website, yourtechvision.com, offers this resource to help students reinforce their learning. This resource helps students reinforce their learning and practice braille accurately. With this setup, students can work efficiently in Word using JAWS. They will perform tasks just like their peers with the help of a Focus 40 braille display. Then progress to using this in Google Classroom
Navigating IXL with a screen reader like JAWS allows blind students to access educational content easily. Using specific keyboard commands enables quick access to various elements on the page. For example, pressing H moves between headings, helping students locate sections in lessons or practice activities. When working on subtraction exercises in Focus 40 IXL, pressing B navigates to buttons like “Submit” or “Check Answer,” allowing students to interact with controls smoothly.
Another helpful command is Insert + F7, which opens a list of links on the page. This makes moving between sections, such as practice questions and feedback, more efficient. Students can also use F to quickly jump to answer boxes or search fields. To read questions or instructions, pressing Insert + Up Arrow reads the current line, while Ctrl + Down Arrow skips ahead to the next section when working on Focus 40 IXL subtraction.
JAWS Navigation Commands
By using these commands, students navigate IXL independently, completing exercises and reviewing answers efficiently. The screen reader provides real-time feedback, guiding students as they interact with IXL’s educational content related to subtraction problems. This empowers students to fully engage in their learning experience.
Essential IXL keyboard commands for navigating with JAWS:
Navigate headings: Press H to jump between headings, allowing you to quickly move through sections of the page during subtraction practice.
Navigate links: Use Insert + F7 to bring up a list of all links, and then use the arrow keys to select the desired one.
Move to next button: Press B to navigate through buttons on the screen, such as “Submit” or “Check Answer” while working on subtraction in Focus 40 IXL.
Move to form fields: Use F to jump between input fields, such as answer boxes or search fields.
Navigate by list: Press L to move through lists of questions or answer choices, ensuring efficient navigation during subtraction lessons.
Read the current line: Press Insert + Up Arrow to read the current line, useful for verifying questions or feedback.
Repeat the last spoken phrase: Use Insert + 5 on the numpad to repeat the last spoken message.
Skip to the next section: Press Ctrl + Down Arrow to quickly skip paragraphs and reach the next section of text, which can be especially useful in Focus 40 IXL subtraction lessons.
Focus Display Commands
Navigating IXL subtraction math using the Focus 40 Braille Display and JAWS enhances accessibility for blind students. By combining keyboard commands and tactile feedback, students can efficiently work through subtraction problems. Solving subtraction on a display is also easier than just audio feedback. Pressing H on the keyboard or using the Router Keys on the Focus 40 allows them to jump between headings, locating sections like instructions or problem sets quickly.
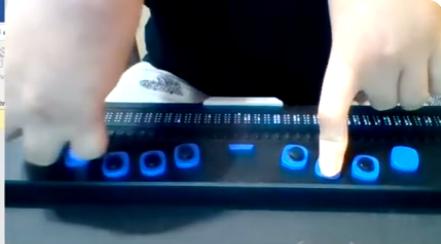
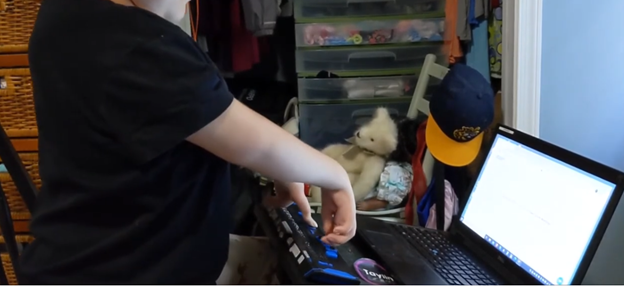
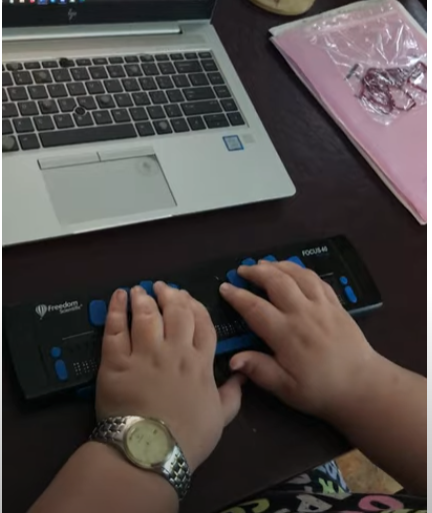
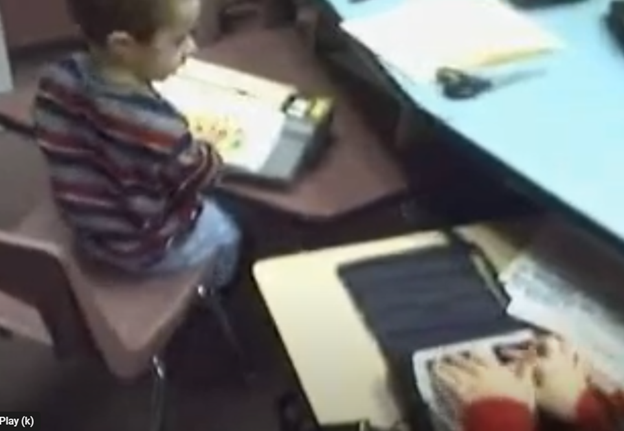
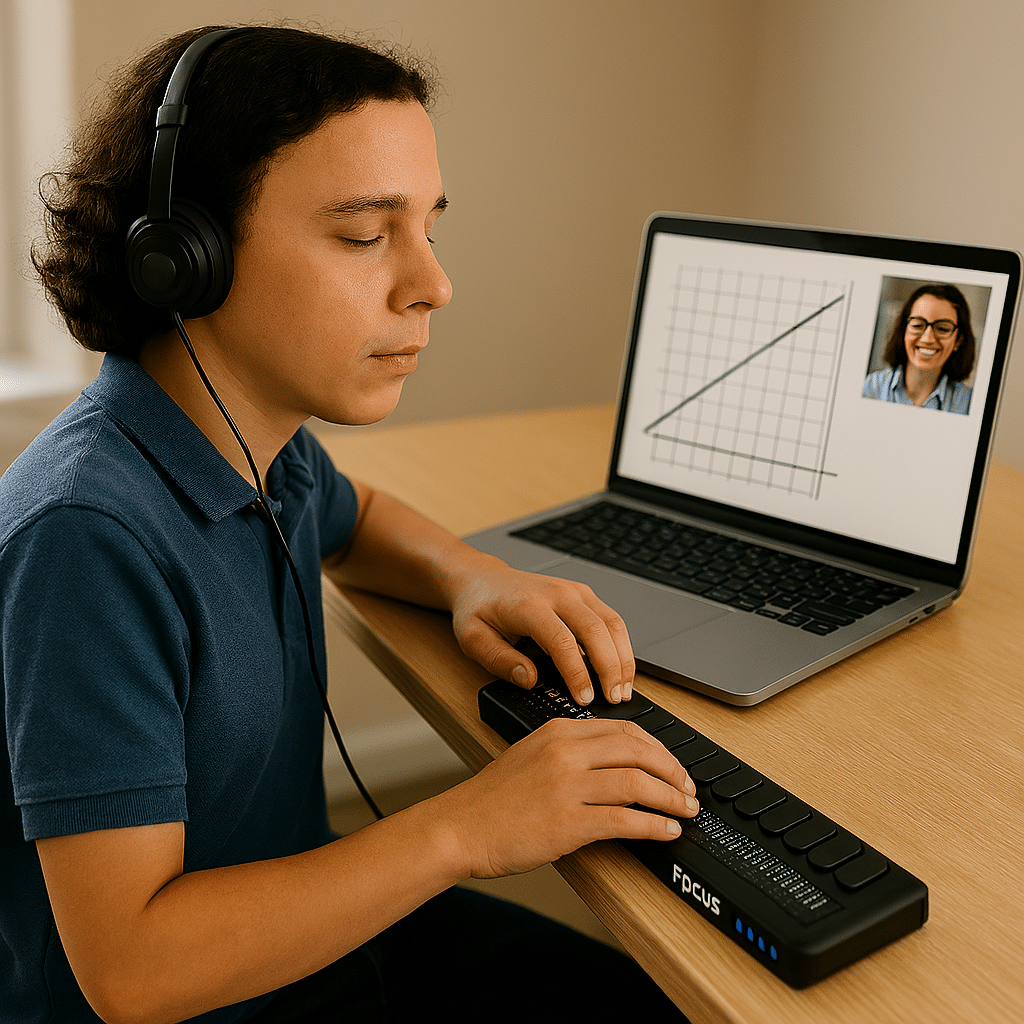
Taylin using Focus 40 Display with 1 finger on left hand and 2 knuckles on right hand
For Focus 40 IXL subtraction problems, students can use E for edit or the Cursor Routing Buttons to jump directly to the answer input fields. As they enter their responses, the Braille display provides real-time feedback, ensuring accuracy. Pressing Insert + Up Arrow or using the Braille Display’s Line Reading feature reads the current subtraction problem, helping students verify their work. To check answers or move to the next problem, they can press B to navigate to buttons like “Submit,” or use the Panning Buttons to scroll through the page.
Focus 40 Braille Display with JAWS
The Focus 40 Braille Display, paired with JAWS, offers students the tactile and auditory support they need to complete all math problems independently in IXL. This combination enhances their confidence and accuracy in solving subtraction problems.
Using a Focus 40 Braille Display and JAWS, students can efficiently complete algebra assignments in Word, ensuring both speed and accuracy. They can navigate through documents, input mathematical symbols for their Algebra work, and graph equations using Desmos. The Braille Display provides tactile feedback while JAWS offers audio guidance, allowing students to efficiently edit, correct mistakes, and organize data into tables. With these tools, they can seamlessly complete algebraic tasks and submit their work via email, ensuring full participation in math activities.
To complete algebra problems in Word using a Focus 40 Braille Display and JAWS, students should follow these steps for effective Algebra with Focus Display:
FOCUS and JAWS Display Commands
Using the Focus 40 Braille Display, Dr. Robinson demonstrates how to efficiently braille out algebra problems in Word.
Set the Braille Display to Input Mode: Begin by pressing G.7 + Space to switch through the display modes. Set it to Input Mode for algebra.
Navigate the Document: Use 1 + Space to move to the top of the document. To navigate the document, students press the left-side buttons for backward movement. They then use the right-pan buttons to move forward, ensuring smooth progress while working on Algebra with the Focus Display.
Enter Algebraic Symbols: Students can easily type algebraic symbols, like Delta (Δ), by using the keyboard. After typing, copy the symbol using Shift + C to avoid repeating it manually later.
Work with Mathematical Formulas: To type formulas like “Rise over Run” (Δy/Δx), use the keyboard to input characters. Make sure to add spaces around operations for clarity, especially when sharing with sighted peers. For example, input the formula as “Δy = 2” and “Δx = 3” with a the Focus Display and JAWS.
Navigate Through Graphing: To access graph, students can use the rocker bars or 1 + Space for upward navigation and 4 + Space for downward movement.
Input Values into Desmos: After entering algebraic equations, students can switch to Desmos by pressing Shift + 4 + 5 (Alt + Tab equivalent). They can then input values and trace graphs using the Alt + T command for audio tracing.
Copy and Paste Graphs: Once the graph is complete in Desmos, use Alt + Print Screen to capture the graph. Paste it into Word with Shift + V for documentation.
Submit the Assignment: When the algebra problem is finished, the student can email the document by navigating to File using Alt + F and attaching it in Outlook. Then open Outlook, use F9 to quickly send the email once Outlook is open.
These steps help students efficiently solve algebra problems in Word while using their Braille Display for input. Additionally, students can smoothly navigate Desmos for graphing, enhancing their algebra skills with the Focus 40 Display
Enable Students to Efficiently complete Algebra with Focus Display
Using Tables for Data: If the algebra assignment involves creating tables, students can use Alt + N to insert a table. On the Braille Display, press 6 + 8 + Space to activate the Alt command and navigate to the Table option. Once a table is created, pressing Tab will move between cells, and 4 + 5 + Space adds more rows as needed, making tables part of their Algebra workflow using a Focus Display.
Auto-fitting Tables: To ensure tables fit content properly, use Alt + J + L to access the layout options. Select AutoFit Contents to adjust the table size automatically. This helps in organizing the data neatly for submission in Algebra with Focus Display assignments.
Editing and Correcting Mistakes: If a student makes an error, they can use 3 + Space on the Braille Display to move by character and correct the mistake. Use Shift + 6 + 7 + Space to select the incorrect portion and retype it. The Braille Display’s tactile feedback helps ensure precision when editing formulas.
Reviewing the Work: To review algebra problems, students can move back through the document using 1 + 4 + Space to navigate line by line. Press Insert + Up Arrow to have JAWS read back the current line, ensuring that everything is correct before submission.
Final Submission Process: Once the assignment is complete, the student can go to Alt + F to access the File menu. Choose Share. From there, they can attach the document directly in an email. Using F9 forces Outlook to send the email quickly. Make sure their work is submitted on time, thereby completing their Algebra with Focus Display workflow.
More Lessons for Math
By following this step-by-step guide, students can efficiently complete algebra problems using the Focus 40 Braille Display, JAWS, and Word. The tactile feedback from the display, combined with JAWS’ audio guidance, enhances both speed and accuracy. This combination helps students solve math problems, graph equations, and organize data effectively. When using the Focus Display, students experience seamless transitions between tasks, ensuring smooth navigation throughout their algebra assignments.
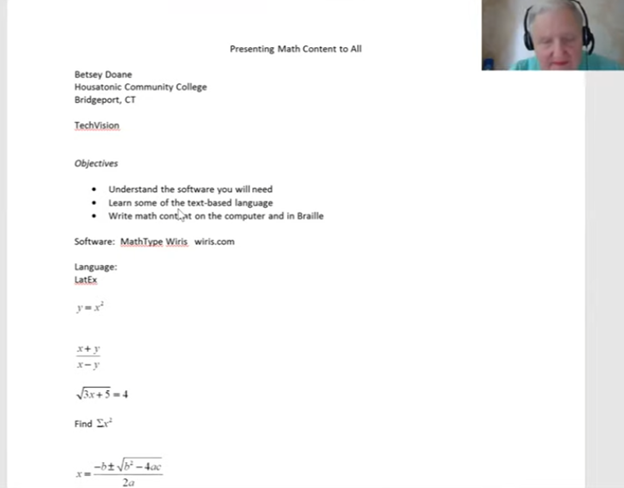
Dr. Betsey Doane shared her experience teaching math for over 50 years and the importance of making math accessible to all students, including those with visual impairments. She began by introducing the software MathType, essential for creating accessible math content. The software integrates into Word and allows users to write math that is accessible to both screen readers and braille displays. Her efforts truly embody the concept of Advanced Math Made Accessible.
Dr. Doane explained the basics of LaTeX, a text-based language used for writing math. She demonstrated how to input and translate common math expressions such as fractions, square roots, and equations using LaTeX in Word. Her instructions included using the Focus 40 Braille Display and ensuring proper configurations for students to view math content in braille. This approach makes advanced math more accessible for everyone.
LaTex using Mathtype to insert perfect Advanced math made accessible
She emphasized the importance of understanding both the visual and non-visual ways of presenting math, highlighting that students need the right software and commands to work effectively. By using LaTeX and MathType, both sighted and blind students can access and solve math problems, ensuring inclusion in any classroom setting. This makes advanced math accessible and easier to understand.
She highlighted the use of MathType software, which integrates seamlessly with Microsoft Word, allowing users to create and present math content that is accessible through screen readers like JAWS and braille displays like the Focus 40. Dr. Doane explained how MathType enables students and educators to write complex equations, such as fractions, square roots, and exponents, in both visual and non-visual formats. This ensures that blind students can access the same content as their sighted peers, making advanced math more accessible.
Advanced Math Made Accessible with LaTex
Dr. Doane also provided an introduction to LaTeX, a powerful text-based language used for writing mathematical expressions. She demonstrated how to write math using LaTeX syntax, such as using backslashes for commands like fractions and square roots. By using LaTeX in Word with MathType, math content can be rendered correctly on both screen readers and braille displays, making it easier for blind students to follow along in class and complete assignments. This is another way to make advanced math accessible.
Furthermore, Dr. Doane stressed the importance of configuring braille displays correctly, ensuring that input is set to computer braille and output is set to grade 2. She provided step-by-step instructions for adjusting these settings on the Focus 40 Braille Display, ensuring that students can navigate math content effectively, contributing to the overall goal of making advanced math accessible.
In conclusion, Dr. Doane encouraged educators to adopt these tools and techniques to create an inclusive learning environment where both sighted and blind students can excel in mathematics. Her detailed instructions and practical advice offer a clear path toward accessible math education for all.
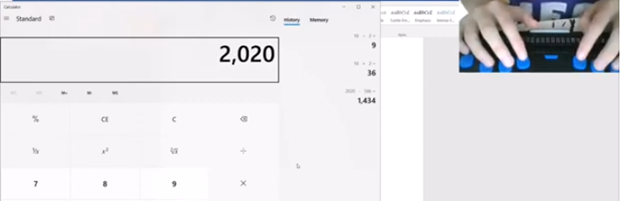
Using Focus 40 Braille Display to do Math Work in Word with Jaws, Kim demonstrates commands in WORD using FOCUS 40 Braille display exclusively. She can control her computer and complete her math work in WORD with just the display.
Here are some essential commands for using the Focus 40 Braille Display to do math in Microsoft Word:
Connecting a Focus Braille Display to a computer using JAWS screen reader enhances accessibility for blind and visually impaired users. The process of connecting a Connect Focus 40 Braille display allows users to interact with digital content through tactile feedback, improving independence and productivity. By following a few simple steps, you can seamlessly connect the Braille display via USB or Bluetooth and configure it in JAWS for optimal use. This guide provides an easy-to-follow approach for setting up your Focus Braille Display and ensuring smooth integration with JAWS.
Here are the steps to connect a Focus Braille Display to your computer using JAWS screen reader:
Connect Focus 40 Braille Display or other displays
Power on the Focus Braille Display
Ensure the Focus Braille Display is fully charged and powered on before connecting.
Connect the Display to the Computer
Use either USB or Bluetooth to connect the Focus Braille Display to your computer.
For USB: Plug the USB cable into both the Braille display and the computer.
For Bluetooth: Enable your computer’s Bluetooth and pair the Focus display in the Bluetooth settings.
Enable Braille in JAWS
Open JAWS by pressing Insert + J. Then, press Alt + O to open the Options menu.
Press B to select Braille or use the arrow keys to navigate, then press Enter.
Select the Braille Display
In the Braille settings window, ensure the “Focus” display is selected under the Default Braille Display dropdown.
If it’s not selected, use the arrow keys to choose “Focus” or manually type the model of the Braille display.
Check Braille Display Connection
After selecting the correct display, click OK or press Enter to confirm the connection.
JAWS should now detect the Focus Braille Display. Braille output should appear, and the display keys will control JAWS.
Configure Settings (Optional)
To further customize settings like verbosity and Braille output, go to Braille options via Insert + J, Alt + O, and B.
Test the Connection
Use JAWS commands on your keyboard or the Focus Braille Display keys to navigate.
If the connection works, the Braille display will respond to the text output from the computer.
By following these steps, you should successfully connect your Focus Braille Display to a computer using JAWS.
Dr. Robinson explains the three toggles to Switch Focus Braille Modes quickly on your Braille display. One toggle puts you into Braille mode for all Braille tasks. Another toggle switches to computer braille which inputs direct Nemeth code for math. The third toggle is for computer in and contracted out for either Nemeth or UEB math.
Access Jaws settings to set up Focus Braille Mode Options
First, press Insert + 6 to check your settings. Type “braille m” and down arrow to “Braille mode.” You can access options one by one with arrow keys or press F6 to jump to structured then Alt+T to jump to output. Press down arrow to UEB Grade 2 then tab to input and c to computer braille first to uncheck the box that says “Show current word in computer Braille”. Shift tab back up to input and choose UEB for both input and output. You can have other options also but this is what used here.
Tab through back to For structured Braille mode, check “Active cursor follows Braille cursor” and “Braille cursor follows active cursor.” These settings help beginners, especially when working with sighted personnel learning Braille to following along visually for instructor. Always have a certified Braille instructor (TVI) to teach reading and writing Braille correctly.
Always press Alt + A to apply settings before exiting. However, if you do not like the extra information at the start of your display, shift tab back to search in settings and type status and enter. Down arrow to status and F6 and down to right (to place status on the right of display) and down to none and apply that and close. When you first turn on your Braille display, the status characters may be confusing to young learners. Additional Braille Display Lessons here.
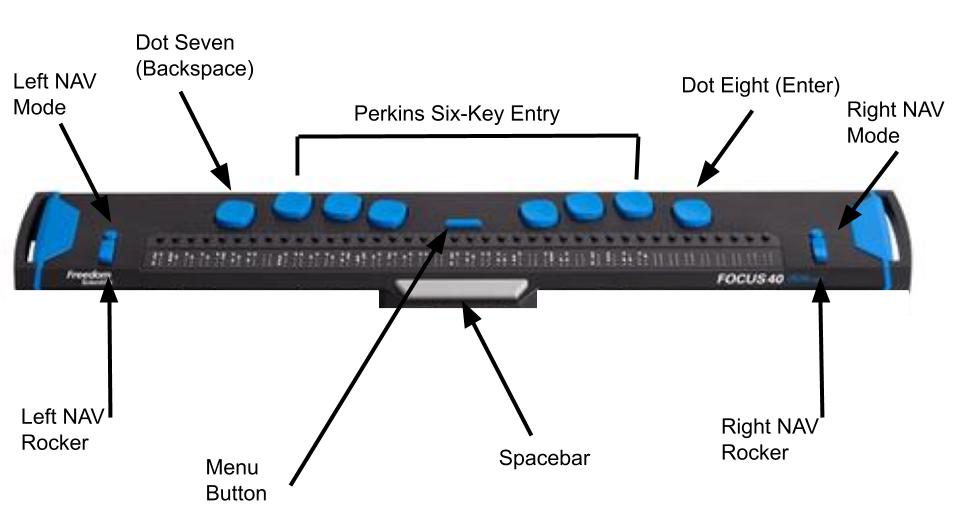
Focus Braille Display Image with Button options
Switch Focus Braille display modes quickly on display
For advanced users, status dots help in tables and other navigation. Beginners should start with “none.” Press Alt + A to apply changes, then enter to close. The Braille display functions like a Braille writer. Keys 1 2 3 are on the left, and keys 4 5 6 are on the right with space in between the left and right side. The left pinky key is backspace, which changes to dot 7, and the right pinky is enter or dot 8 in combination with other keys.
Before you begin, remember when you are using your devices to maintain upright posture to protect your spine and neck. So, regularly cleaning the Focus 40 Braille Display and running diagnostics is crucial for maintaining its performance and longevity. Dust, dirt, and oils from your hands can accumulate on the Braille cells, potentially causing malfunctions or reducing the tactile quality of the display. By keeping the Braille cells clean, you ensure that the device remains responsive and accurate. Running diagnostics helps identify any issues early, allowing for timely repairs and preventing more significant problems down the line. This proactive maintenance not only extends the life of your device but also ensures a reliable and efficient user experience12.
Here are the steps to clean the Focus 40 Braille Display and run diagnostics:
Cleaning the Focus 40 Braille Display
Turn Off the Device: Ensure the Focus 40 Braille Display is turned off and unplugged.
Prepare Cleaning Materials: Use a soft, lint-free cloth dampened with water or isopropyl alcohol. Avoid using harsh chemicals.
Turn On the Device: Power on the Focus 40 Braille Display.
Enter Diagnostic Mode: Press and hold the Menu button while turning on the device. Continue holding the button until the device enters diagnostic mode.
Run Tests: Use the navigation keys to select and run various diagnostic tests, such as checking the Braille cells, buttons, and connectivity.
Cleaning the Focus 40 Braille Display and running diagnostics
Regular cleaning and diagnostics help maintain the performance and longevity of your Focus 40 Braille Display, ensuring it remains responsive and reliable.
This session shows how users can start auto-read on the Focus Braille display with JAWS, adjust reading speed, and activate a full-read mode with ER + Space, even though many believed this feature did not exist. This video demonstrates the feature in action and explains how it works along with other useful commands. These commands allow you to fully control your computer exclusively using the Focus 40 or 80 Braille display-See video below
Use the modifier keys to simulate key combinations (keystrokes) that include CTRL, ALT, WINDOWS Key, SHIFT, or the JAWS Key (INSERT). To use these modifiers for the Focus Braille Display when typing a keystroke, do the following:
Hold down DOT 8 CHORD and then press the corresponding modifier keys in the keystroke. Modifier keystrokes are listed in the following table.
After you create the modifier portion of the keystroke, release the keys and press the remaining part of the keystroke. For example, to perform the keystroke CTRL+SHIFT+V, you press DOTS 3-7-8 CHORD, release the keys, and then press V (DOTS 1-2-3-6).
Focus Display combo Commands
Modifier Keys
Key Name
Keystroke
Function Keys (F1 through F12) For more information, see the Function Keys description.
DOT 1
INSERT
DOT 2 8 space
CTRL
DOT 3 8 space
WINDOWS Key
DOT 4 8 space
JAWS Key
DOT 5 8 space
ALT
DOT 6 8 space
SHIFT
DOT 7 8 space
APPLICATION Key
RIGHT SHIFT+DOT 2 CHORD
TAB
DOTS 4-5 CHORD
SHIFT+TAB
B CHORD
HOME
K CHORD
END
DOTS 4-6 CHORD
Select Prior Line
DOTS 1-7 CHORD
Select Next Line
DOTS 4-7 CHORD
Select to End of Line
DOTS 4-6-7 CHORD or 4,7, space
ESC
RIGHT SHIFT+DOT 1 or Z CHORD
DELETE
FOR CHORD
Select word
5,7, space
Selection Commands
Description
Braille Sign
Braille Dot Patterns
Select Next Character
LEFT SHIFT+DOT 6
LEFT SHIFT+DOT 6
Select Prior Character
LEFT SHIFT+DOT 3
LEFT SHIFT+DOT 3
Select Next Line
LEFT SHIFT+DOT 4
LEFT SHIFT+DOT 4
Select Prior Line
LEFT SHIFT+DOT 1
LEFT SHIFT+DOT 1
Select to End of Line
LEFT SHIFT+DOT 5
LEFT SHIFT+DOT 5
Select from Start of Line
LEFT SHIFT+DOT 2
LEFT SHIFT+DOT 2
Select from Top
LEFT SHIFT+L
LEFT SHIFT+DOTS 1-2-3
Select to Bottom
LEFT SHIFT+DOTS 4-5-6
LEFT SHIFT+DOTS 4-5-6
Select Next Screen
LEFT SHIFT+DOTS 4-6
LEFT SHIFT+DOTS 4-6
Select Prior Screen
LEFT SHIFT+K
LEFT SHIFT+DOTS 1-3
Select All
LEFT SHIFT+FOR Sign
LEFT SHIFT+DOTS 1-2-3-4-5-6
Select a Frame
RIGHT SHIFT+9
RIGHT SHIFT+DOTS 3-5
Select a Heading
RIGHT SHIFT+6
RIGHT SHIFT+DOTS 2-3-5
Select a Link
RIGHT SHIFT+7
RIGHT SHIFT+DOTS 2-3-5-6
Windows Commands
Description
Braille Sign
DOTS Pattern
ALT+TAB
LEFT SHIFT+DOTS 4-5
LEFT SHIFT+DOTS 4-5
Paste from Clipboard
LEFT SHIFT+V
LEFT SHIFT+DOTS 1-2-3-6
Copy to Clipboard
LEFT SHIFT+C
LEFT SHIFT+DOTS 1-4
Cut to Clipboard
LEFT SHIFT+X
LEFT SHIFT+DOTS 1-3-4-6
Undo
LEFT SHIFT+Z
LEFT SHIFT+DOTS 1-3-5-6
Delete
LEFT SHIFT+D
LEFT SHIFT+DOTS 1-4-5
Table of Multi-Control Functions
Function
Command
Toggle Auto Advance Mode or auto read
LEFT SELECT+RIGHT SELECT to start and stop down arrow – er+space is read all – if you want to auto read and hear words then down arrow and speed up as you want
Decrease Auto Advance Speed
LEFT SELECT
Increase Auto Advance Speed
RIGHT SELECT
Left Mouse Click
PANNING BUTTON+CURSOR ROUTING BUTTON or PANNING ROCKER UP+CURSOR ROUTING BUTTON or PANNING ROCKER DOWN+CURSOR ROUTING BUTTON
Control+Left Mouse Click
ROUTING BUTTON CHORD
Page Down
LEFT or RIGHT SELECT+ROCKER DOWN
Page Up
LEFT or RIGHT SELECT+ROCKER UP
Top of File
LEFT PANNING BUTTON+SELECT BUTTON or SELECT BUTTON+PANNING ROCKER UP
Bottom of File
RIGHT PANNING BUTTON+SELECT BUTTON or SELECT BUTTON+PANNING ROCKER DOWN
End
PANNING BUTTON+ROCKER BAR DOWN
Home
PANNING BUTTON+ROCKER BAR UP
Next Line
ROCKER BAR DOWN
Prior Line
ROCKER BAR UP
Pan Left
LEFT PANNING BUTTON or LEFT PANNING ROCKER UP
Pan Right
RIGHT PANNING BUTTON or RIGHT PANNING ROCKER UP
Select Text
RIGHT SELECT BUTTON+CURSOR ROUTING BUTTON
Select Block
SELECT BUTTON+CURSOR ROUTING BUTTON at beginning of block; repeat at end of block
Examples to show you how it all goes together:
restart jaws 2,8,space space, 1,8,space d
Windows search box with– right shift, 4
alt tab is 6,8, space then 4,5 space—or right shift 4 5
F6, space/1-8 f
Ctrl tab – 3 8 space the tab with 4,5 space
alt f4 – 1 6 8 space then d
read all, space/1-2-4-5-6, ER cord
say title of window – right shift/dots 1-2
Say time– right shift/dots1-2-3
read all — er chord
refresh screen -right shift z
in drive get contractions off and cursor off
Then –insert z cursor off-2,8,space then z
Or do slash for search—contractions off with g,7,space then dots 3,4
hush up jaws—3,8, space
HOME- K CHORD
END-DOTS 4-6 CHORD
PAGE UP-LEFT SHIFT+ROCKER BAR UP or RIGHT SHIFT+ROCKER BAR UP or DOTS 2-3-7 CHORD
PAGE DOWN-LEFT SHIFT+ROCKER BAR DOWN or RIGHT SHIFT+ROCKER BAR DOWN or DOTS 5-6-7 CHORD
DELETE–FOR CHORD as in 1,2,3,4,5,6 and space –the word chord is the language I grew up with, they made it space a couple decades ago as new people did not get term “chord”
Commands to get you going on Understanding more skills
esc is right shift dot 1
alt right shift dot 2 is
right click right shift dot 3
Windows search box with right shift+4
right shift dot 5 is window list
left shift 1 – select line
left shift 3 – select character
dot 6 8 space then d to URL
3 8 space that opens new tab
dot 3 8 space the tab with 4,5 space
alt tab is 6,8, space then 4,5 space
PC cursor is p space
taskbar is 4,8,6 then t
alt f4 – right shift dot then 1 6 8 space then d for do
F6, space/1-8 then f
read all, space/1-2-4-5-6, ER cord
Went over, say title of window using the Focus, right shift/dots 1-2
Space 4 8 to desktop
Say time with the Focus, right shift/dots1-2-3
say time with right shift 1 2 3
right shift z refresh screen
er chord is read all
8 4 space then t to taskbar
8 4 space then d to desktop
title with space/8-5 followed by T, but the shift/1-2 is just so much nicer.
Learning how to teach or learn Nemeth math using assistive technology can seem challenging, but with the right tools and approach, it becomes manageable and effective. Whether you’re a parent helping your child, an educator supporting students, or an independent learner, using a Focus 40 Braille Display and JAWS screen reader provides an accessible way to master Nemeth code. In this guide, I will walk you through setting up your technology and using the Braille Math Editor to confidently teach and learn math concepts from basic arithmetic to advanced algebra. Let’s simplify the process and enhance your skills.
Setup Nemeth with JAWS
Start by setting JAWS to the proper Nemeth settings. Access the JAWS Settings Center with Insert + 6 then Control+Shift+D to set default: type “Braille m” in the search box. Navigate to “Braille Mode” and make sure you hear “Structured” mode, ensuring that both the active cursor and Braille cursor follow each other. This will allow you to track what the student is doing on their display.
Alt + F to language profiles, and alt + D to details. Once open Alt + M to math options and up arrow to Nemeth if it is not selected. This will ensure that math expressions are correctly read and displayed in Nemeth Braille. Enter to close, Alt + A to apply and enter to close.
Teach or learn Nemeth JAWS, braille display and BME
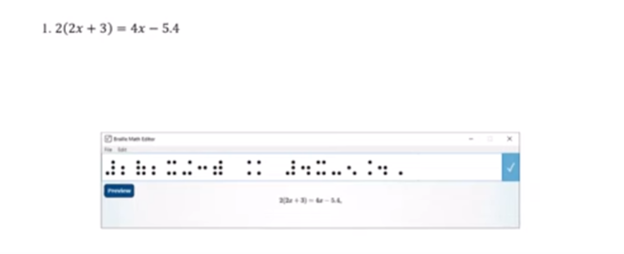
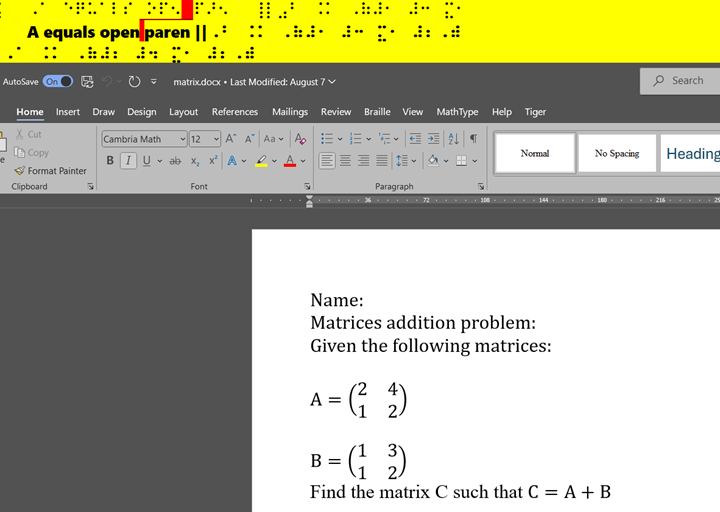
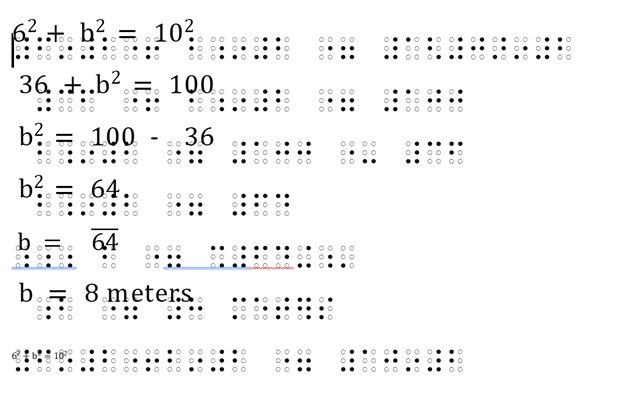
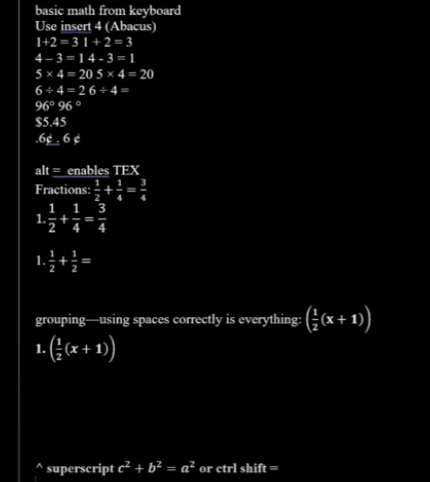
Using the Braille Math Editor is key to teaching and learning math effectively. Type out equations like “1+2=3” or more complex algebraic expressions, and feel the Braille output directly on your Braille display. Correct mistakes quickly using the Braille display and JAWS auditory feedback, making it easy to follow along. Use the Braille Viewer to see it visually and compare with the Braille Display by opening JAWS context menu, go to Utilities and Braille Viewer to turn it on.
This step-by-step approach works for basic arithmetic to complex math such as algebra, Trigonometry, calculus and beyond. Both the Braille Math Editor and Word Math Editor can help you visualize and interact with Nemeth code to easily learn it and/or teach others. Practice consistently to improve your tactile reading skills and build confidence in math.
By following this guide, you’ll gain the tools to teach and learn Nemeth math efficiently, whether for yourself or for your students.
In this lesson, you’ll learn how to teach and practice Unified English Braille (UEB) math using a Focus or Brailliant Braille display with JAWS. Start by setting up the correct Braille settings in JAWS, ensuring your Braille display and cursor follow each other for accurate feedback. Adjust your language profiles and choose UEB Grade 2 for output and input. Navigate through basic arithmetic and algebra problems using JAWS’ Braille Math Editor, making corrections easily. This step-by-step method will help both new and experienced teachers guide students in learning UEB math effectively.
First, set up JAWS properly by accessing the JAWS Settings Center Insert + 6 followed by (Ctrl+Shift+D) to set default. Type out and Navigate to “Braille mode” and ensure your display is set to “Structured” mode. Enable the settings that allow the active cursor to follow the Braille display and vice versa. This ensures that wherever your student is on the screen, you can follow along on your display. Turn on the Braille Viewer also to see the braille at the top of your monitor if you have sight.
Next, Alt + F to Language profiles then Alt + D to details and open and confirm UEB Grade 2 and Unicode by default. You can continue to Tab or Alt + M for math and select the UEB Math option in JAWS settings. Enter to close then Alt A to apply and enter to close. You are ready to go.
Practice using the Braille Math Editor
For practicing, you’ll use JAWS Braille Math Editor to create and edit math expressions as 1 option. Other options are WORD Math editor and LaTex as another as you become more advanced. Start with basic arithmetic, typing out equations such as “1+2=3,” and use the Braille display to feel the corresponding Braille output. This method works for both teaching and self-learning. As you advance to algebra, geometry, Trigonometry and calculus, use the WORD Math editor or Braille Math Editor to navigate complex equations. The editor allows easy error correction, reinforcing concepts as students work through problems.
Teach Math with Jaws and braille display-Basic to advanced math formulas
This method also helps auditory learners who can listen to JAWS while simultaneously feeling the Braille on the display. Practicing consistently with both the Braille Math Editor and JAWS will solidify UEB math skills and improve teaching efficacy.
Learning Spanish Braille involves understanding the unique characteristics of the Braille system used for the Spanish language. Then build on the foundational skills of Braille reading and writing. Here’s how to approach it:
1. Understand the Braille Alphabet in Spanish
Spanish Braille follows the same 6-dot system as English Braille.
Extra characters are included to represent letters with accents and special characters used in Spanish.
Key additions include:
Ñ: Represented by a unique Braille symbol.
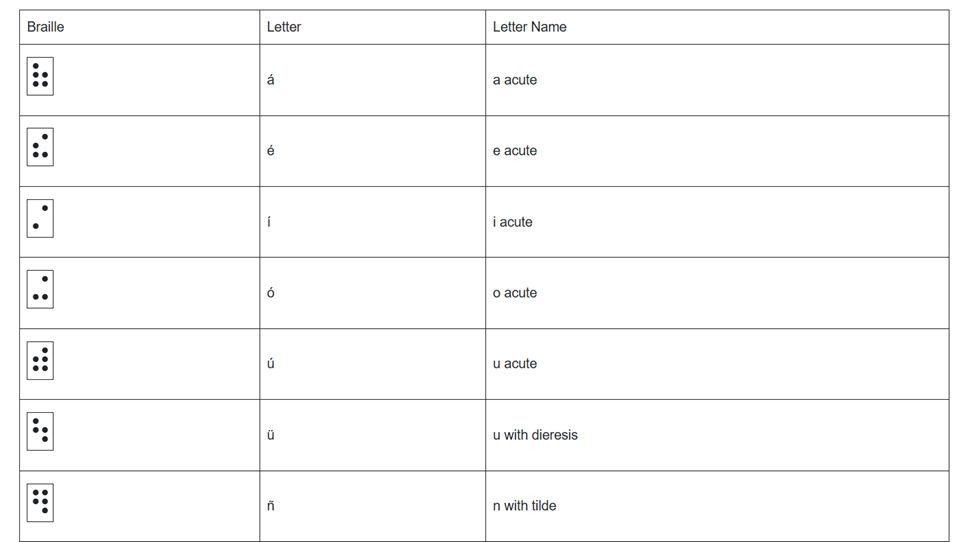
Accented vowels: Á, É, Í, Ó, Ú have distinct Braille symbols.
Punctuation: Spanish uses inverted question marks (¿) and exclamation marks (¡), and these have their own symbols in Spanish Braille.
2. Start with the Basics
– Begin by learning the standard Braille alphabet for unaccented letters, numbers, and common punctuation marks.
– Practice reading and writing these basic symbols to build fluency.
3. Familiarize Yourself with the Extra Characters
– Learn the Braille symbols for accented vowels (á, é, í, ó, ú) and ñ.
– Read and practice with materials specifically written in Spanish Braille to develop fluency.
– You can find books, articles, or educational materials written in Spanish Braille to improve your reading skills online.
5. Engage with Digital Tools
– Tools like Braille displays and screen readers can be set to Spanish to help reinforce learning. See below list of all Spanish symbols
– Software like JAWS or NVDA can be configured to support Braille output in Spanish. This allows for real-time practice with written content.
6. Practice Writing Spanish Braille
– Use a Braille writer to practice writing in Spanish Braille. Focus on mastering punctuation and special characters.
– The fastest and easiest to edit option will be to practice typing or brailling on a display. The FOCUS 40 Braille Display or Brailliant Braille Display to write out Spanish words and sentences.
7. Learn through Immersive Activities
– Reinforce learning, engage in practical activities like labeling objects in Spanish Braille. Work with bilingual Braille texts (Spanish and English).
8. Find a Teacher or Tutor
– If possible, work with an instructor who is fluent in Spanish Braille and the language. They can guide you through the nuances of the language and provide feedback on your progress.
– Organizations specializing in Braille education, like TechVision, can help offer resources or tutors for Spanish Braille.
8. Go to a Spanish Speaking Country
-Totally immerse yourself within a culture that will speak the language you want to learn well.
Spanish-Española Symbols
Spanish-Española 1. Jaws settings: Set up braille profile – insert 6 (ctrl shift D) for default. After completing the steps, open settings again to ensure they apply only to Word settings. Next, type “braille mode” twice, press F6, and use Alt+G to access languages and set your preferences. For those requiring a Spanish Braille display or keyboard, ensure your device is compatible with your software settings. More Video lessons can help.
This lesson is Spain (international) Input and Output are Spanish Grade 1
2. Tab to profile languages and set those up and enter to close Jaws settings
3. Alt 8 to make sure dots 7,8 show on display-accept and close settings
1. Set up Voice profile in Jaws-open context menu, options, voices, add a profile
1. In Word-change voice quickly: 2 options: on keyboard- ctrl shift window L to change profile or on Focus -2,3,4,5,7, space to change languages)
2. Insert+ctrl+S to change to Spanish profile or to other language
3. G+7+space on Focus to computer braille (which will output Spanish grade 1)– capital is dot 7 under capital letter on display
For Braille with Braille Display on Computer
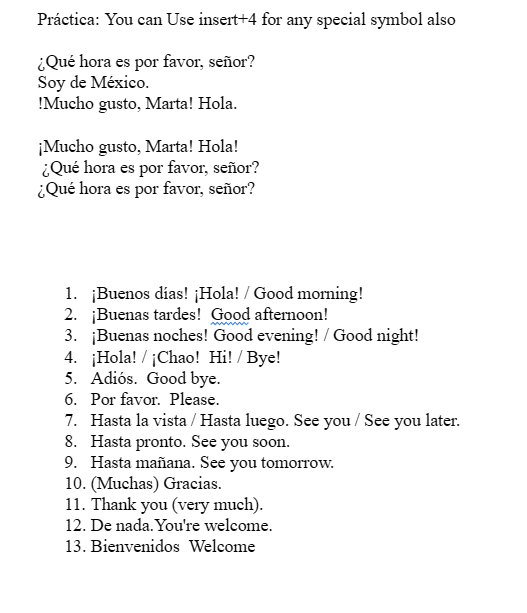
Práctica:
á 1,2,3,5,6
é 2,3,4,6
í 3,4
ó 3,4,6
ú 2,3,4,5,6
ü 1,2,5,6,8
ñ 1,2,4,5,6, 8
Punctuation for Spanish Braille using Braille Display
! 2,3,5, 7 is exclamation mark
inverted ! is 2,3,5, 7, 8 is upside down exclamation mark
Period is . is dot 3
Comma is , is dot 2 for comma
question mark is ? is dot 2, 6
upside down question mark or inverted ? is 2,6,7
Spanish Braille for Keyboard and JAWS
Lower Case Letters
á (lower case a, acute accent) = Press Ctrl + ‘ (apostrophe), then the letter a é (lower case e, acute accent) = Press Ctrl + ‘ (apostrophe), then the letter e í (lower case i, acute accent) = Press Ctrl + ‘ (apostrophe), then the letter i ó (lower case o, acute accent) = Press Ctrl + ‘ (apostrophe), then the letter o ú (lower case u, acute accent) = Press Ctrl + ‘ (apostrophe), then the letter u ñ (lower case n, tilde accent) = Press Ctrl + Shift + ~ (tilde), then the letter n ü (lower case u, diaeresis accent) = Press Ctrl + Shift + : (colon), then the letter u
Upper Case Letters
Á (upper case A, acute accent) = Press Ctrl + ‘ (apostrophe), then Shift + a É (upper case E, acute accent) = Press Ctrl + ‘ (apostrophe), then Shift + e Í (upper case I, acute accent) = Press Ctrl + ‘ (apostrophe), then Shift + i Ó (upper case O, acute accent) = Press Ctrl + ‘ (apostrophe), then Shift + o Ú (upper case U, acute accent) = Press Ctrl + ‘ (apostrophe), then Shift + u Ñ (upper case N, tilde accent) = Press Ctrl + Shift + ~ (tilde), then Shift + n Ü (upper case U, diaeresis accent) = Press Ctrl + Shift + : (colon), then Shift + u
Hasta la vista / Hasta luego. See you / See you later.
Hasta pronto. See you soon.
Hasta mañana. See you tomorrow.
(Muchas) Gracias.
Thank you (very much).
De nada. You’re welcome.
Bienvenidos Welcome
Lo siento I’m sorry
Con permiso / Perdón / Disculpe Excuse me / Pardon me
¡Vamos! Let’s go!
¿Cómo está usted? How are you? (formal)
¿Cómo estás? How are you? (informal)
Insert+4 for eacute in
¿Qué tal? How’s it going?
Bien / Muy bien Good / Very good
Insert+4 for acute in Más below
Mal / Muy mal / Más o menos Bad / Very bad / OK
Sí / No Yes / No
¿Cómo?
¿Cómo se llama usted? What is your name? (formal)
¿Cómo te llamas? What is your name? (informal)
Me llamo… / Mi nombre es… My name is…
Mucho gusto. / Encantado. Nice to meet you.
Immersion in Language
Here is the sequence of learning in order to learn any language well:
The time it takes to learn a new language, like Spanish, while living in a country where it is the only language spoken, depends on several factors. However, here are general timelines and considerations:
1. Immersion Benefits
Living in a Spanish-speaking country accelerates learning because you’re constantly exposed to the language in real-life situations like:
Listening: Conversations, TV, radio, and announcements.
Speaking: Daily interactions with locals, from shopping to asking for directions.
Reading and Writing: Street signs, menus, newspapers, and more.
2. Language Learning Proficiency Levels
The Common European Framework of Reference for Languages (CEFR) breaks language learning into six levels:
A1 (Beginner): Basic phrases and conversations (3–6 months).
A2 (Elementary): Can understand simple texts and conversations (6–12 months).
B1 (Intermediate): Hold conversations on familiar topics and function in everyday life (12–18 months).
B2 (Upper Intermediate): Fluent in most situations, including work and travel (18 months–2 years).
C1 (Advanced): Understand complex topics and engage in nuanced conversation (2–3 years).
C2 (Proficient): Full mastery of the language, similar to a native speaker (3+ years).
Factors that will Determine Speed
3. Factors That Affect Learning Speed
Motivation and Attitude: Strong motivation and a positive mindset can accelerate your progress.
Practice Consistency: Daily practice, speaking, listening, and reading in Spanish speeds up learning.
Prior Language Experience: If you’re already familiar with Romance languages (e.g., Italian or French), learning Spanish might be faster due to similarities in vocabulary and grammar.
Formal Education: Taking classes, whether in person or online, and using language apps like Duolingo or Babbel can help structure your learning and improve your skills more quickly.
Social Interaction: Making friends who are native speakers or joining local groups can enhance your conversational abilities.
4. Realistic Expectations
– For basic conversational fluency (A2-B1), expect about 6 months to 1 year of immersion if you’re dedicated and practicing regularly.
– To reach an advanced level (C1), you might need 2 to 3 years of living and interacting in the language full-time.
5. Cultural Immersion
Your understanding of Spanish will deepen faster if you immerse yourself in the local culture, customs, and idiomatic expressions. Engaging in local activities, reading newspapers, and watching TV shows will all help you learn the language more organically.
Summary:
On average, 6 months to 1 year of immersion in a Spanish-speaking country should allow you to gain conversational fluency, with full mastery taking about 2–3 years, depending on your dedication and resources.
Adult Learning Speed
Sequence of learning for an adult
For adults, learning a new language like Spanish while living in a country where it’s the only language spoken can still be highly effective, but several factors can influence the timeline. Here’s what an adult learner can expect:
1. General Time frames for Adult Learners
Conversational fluency (A2-B1 level): Typically achievable in 6 months to 1 year of immersion.
Advanced proficiency (B2-C1 level): May take 1.5 to 2.5 years of consistent use and practice.
Full fluency (C2 level): Can take 3 years or more, depending on factors like exposure, practice, and language complexity.
2. Factors Affecting Adult Learning Speed
Cognitive Flexibility: Adults tend to be more methodical learners than children, but they can sometimes struggle with retaining new vocabulary and adapting to different grammar structures.
Prior Experience: If the adult already speaks a Romance language (like Italian or French), they will likely learn Spanish more quickly because of the structural similarities.
Learning Environment: The more opportunities for immersion—such as interacting with native speakers, engaging in cultural activities, and using Spanish in daily tasks—the faster the progress.
Language Learning Methods: Adults often benefit from a combination of formal learning (e.g., classes, tutors) and informal learning (e.g., conversations, media consumption).
Motivation and Consistency: Adults with clear goals and regular practice (even just 30 minutes a day) tend to progress faster. Maintaining consistent practice is key to long-term retention.
Challenges for Adult Learners
3. Challenges for Adult Learners
Accent and Pronunciation: Adults might find it harder to develop a native-like accent, though this doesn’t prevent them from becoming highly fluent.
Work and Life Responsibilities: Adults often juggle work and personal responsibilities, which can limit the time available for focused language learning.
Grammar: Grasping grammatical structures, verb conjugations, and nuances may take longer for adults compared to younger learners, who tend to absorb new patterns more intuitively.
4. Accelerating Adult Learning
Use Daily Immersion: Engage in conversations, read signs, watch TV shows, and use apps like Duolingo or Babbel to reinforce lessons in real-life situations.
Structured Learning: Enroll in Spanish classes or hire a tutor to build a strong foundation in vocabulary and grammar.
Use Technology: Utilize language-learning apps, podcasts, or online lessons. Watching Spanish media with subtitles can help you pick up common phrases and pronunciation.
– Join Social Circles: Engage with locals, participate in group activities, and use Spanish in daily interactions. This practical experience will help reinforce what you’ve learned.
– Set Realistic Goals: Adults benefit from having clear, incremental goals (e.g., mastering a certain level of vocabulary or holding a 10-minute conversation) to track progress and stay motivated.
Adult Experience
5. Common Experiences for Adults
After 3-6 months, most adults can hold basic conversations, ask for directions, and manage daily interactions in Spanish.
By 1 year, many can discuss familiar topics, navigate most social situations, and understand much of what they hear or read.
Within 2 years, a dedicated adult learner can likely achieve strong conversational fluency and understand complex topics, though nuances and slang may still be challenging.
Summary
For an adult, achieving conversational fluency in Spanish typically takes 6 months to 1 year with immersion and regular practice. Advanced proficiency may take 1.5 to 2.5 years, while full fluency could require 3 years or more, depending on the learner’s background, motivation, and exposure to the language.
Dr. Robinson and her Team at TechVision have made a significant global impact via their Team Mission and Purpose. TechVision specializes in 1:1 remote instruction in education for the blind and visually impaired, serving individuals of all ages. We also train School Teams: transcribers, Teachers of the Blind and other School Personal and work with parents. Their expertise is delivered through personalized, real-time 1:1 remote instruction. This approach empowers students and clients to compete equally with their sighted peers in both education and work.
Dr. Robinson provides a detailed guide on completing a quadratic formula in Microsoft Word using UEB math and JAWS screen reader. She breaks down each step, ensuring users can follow along and understand how to effectively utilize the powerful math editor in Word with JAWS.
Dr. Robinson begins the tutorial by explaining how to setup JAWS, for UEB math. She guides users through configuring JAWS settings to ensure correct output in the math editor. For additional help with settings, users can refer to a previous video.
After the setup, Dr. Robinson demonstrates how to open the math editor in Word using “Alt + Equals.” This command opens the editor, allowing users to start inputting equations. She explains that users will enter the quadratic formula character by character, ensuring they follow along slowly.
To illustrate, Dr. Robinson uses the example A = 1, B = -8, and C = 7. She guides users in entering this formula into the editor, stressing the importance of accuracy and correct use of parentheses. Parentheses are crucial for ensuring the editor interprets the formula correctly, especially with complex expressions.
Navigate Equation Editor in WORD
Next, she shows how to navigate Word’s ribbon using “Alt + J” to access the equation tools. Once there, users can select the quadratic formula from the options. Dr. Robinson encourages users to explore other built-in equations in Word, as they can simplify creating complex mathematical expressions.
While inputting the quadratic formula, Dr. Robinson demonstrates how to use “Alt + J + C” to convert the formula from linear to professional format. This conversion makes the equation visually appealing and easy to read, which is important when sharing or printing the document.
Throughout the tutorial, Dr. Robinson emphasizes showing every step of the equation-solving process. She explains how to break down the quadratic formula into components using the math editor, making each step clear and easy to follow. This approach helps users understand the logic behind solving quadratic equations and reinforces the importance of accuracy.
Troubleshoot common Issues
Finally, Dr. Robinson offers tips on troubleshooting common issues for UEB math and JAWS, like automatic capitalization in Word. She shows how to adjust autocorrect settings to prevent unwanted changes in mathematical expressions, ensuring equations remain correct and properly formatted.
By the end of the tutorial, users understand how to complete a quadratic formula in Word using UEB math and JAWS. Dr. Robinson’s clear instructions and focus on accuracy make this an essential resource for improving skills in assistive technology for math tasks. Users can continue learning in creating graphs in excel.
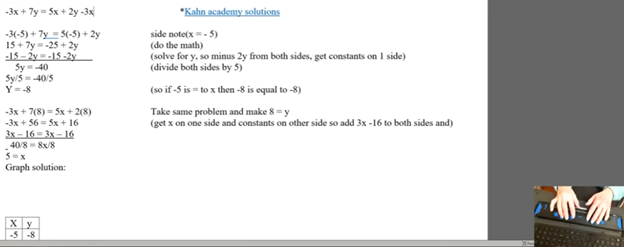
Dr. Robinson demonstrates how to solve multi-line algebra problems using the Braille Math Editor (BME) in JAWS with a braille display. She explains that this method is effective for any multi-line mathematics problem, where isolating variables like x is essential. To start, Dr. Robinson reviews the equation by moving through the text using the up arrow key. She listens to the equation read aloud by JAWS and then enters the Braille Math Editor in Word. This setup is key for mastering Braille Math in Word.
Specific Braille Commands to solve Multi-Line Algebra Problems
Dr. Robinson uses specific braille commands to navigate and edit the math content. She mentions that the transcriber typically uses Alt + Equals to ensure the math is perfectly formatted for the student. She also highlights the importance of using a braille display in Word to solve Braille Math problems. It allows users to follow the dots more easily compared to relying solely on auditory cues from JAWS, enhancing the experience of doing Algebra in Braille Math in Word.
Input commas to separate lines
As she progresses, Dr. Robinson inputs commas between steps to maintain clarity in the solution process. This practice enables her to review the steps effectively on the braille display. She demonstrates how to correct mistakes quickly using the arrow or router keys. Dr. Robinson explains the importance of using fraction marks and how specific commands help navigate fractions within BME in Word. Such details are part of mastering Braille Math in Word.
Toward the end, Dr. Robinson checks her work by moving up and down the lines in the document. She quickly identifies a mistake, corrects it, and emphasizes how easy it is to make corrections with this setup. Dr. Robinson advises students considering a math career to invest in a braille display with at least 40 cells. For the best experience, she recommends choosing a display with 80 cells, especially when working on Braille Math in Word.
In conclusion, Dr. Robinson effectively shows how to use the Braille Math Editor and JAWS to solve multi-line algebra problems. This method provides a clear and accessible way for blind students to engage in complex math tasks. It ensures both accuracy and efficiency in their work, showing the importance of mastering Braille Math in Word. Here is another student completing Math in the Braille Math Editor, then to advanced math in WORD to UEB Math.
Setting up Spanish Braille using JAWS-enabled Braille display involves a few key steps. First, configure the Braille profile in JAWS by pressing Insert + 6 to open the settings center. Navigate to the Braille mode settings and select Spanish (Spain International) as the default language. This ensures the Braille output is in Spanish Grade 1. You can quickly switch between languages using Ctrl + Shift + Windows + L or specific Braille display commands. Additionally, practice using symbols and contractions on the Braille display to become comfortable with the layout. This setup allows visually impaired users to work efficiently in Spanish, ensuring accurate Braille representation and seamless integration with their tasks.
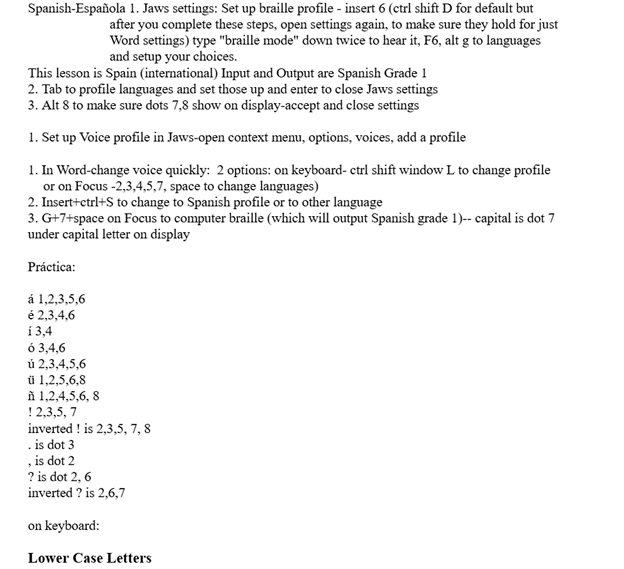
Spanish-Española 1. Jaws settings: Set up braille profile – insert 6 (ctrl shift D for default but after you complete these steps, open settings again, to make sure they hold for just Word settings) type “braille mode” down twice to hear it, F6, alt g to languages and setup your choices.
This lesson is Spain (international) Input and Output are Spanish Grade 1
2. Tab to profile languages and set those up and enter to close Jaws settings
3. Alt 8 to make sure dots 7,8 show on display-accept and close settings
1. Set up Voice profile in Jaws-open context menu, options, voices, add a profile
1. In Word-change voice quickly: 2 options: on keyboard- ctrl shift window L to change profile or on Focus -2,3,4,5,7, space to change languages)
2. Insert+ctrl+S to change to Spanish profile or to other language
3. G+7+space on Focus to computer braille (which will output Spanish grade 1)– capital is dot 7 under capital letter on display
Práctica:
á 1,2,3,5,6
é 2,3,4,6
í 3,4
ó 3,4,6
ú 2,3,4,5,6
ü 1,2,5,6,8
ñ 1,2,4,5,6, 8
Punctuation for Spanish Braille using JAWS
! 2,3,5, 7
inverted ! is 2,3,5, 7, 8
and
. is dot 3
and
, is dot 2
? is dot 2, 6
inverted ? is 2,6,7
on keyboard:
Lower Case Letters
á (lower case a, acute accent) = Press Ctrl + ‘ (apostrophe), then the letter a é (lower case e, acute accent) = Press Ctrl + ‘ (apostrophe), then the letter e í (lower case i, acute accent) = Press Ctrl + ‘ (apostrophe), then the letter i ó (lower case o, acute accent) = Press Ctrl + ‘ (apostrophe), then the letter o ú (lower case u, acute accent) = Press Ctrl + ‘ (apostrophe), then the letter u ñ (lower case n, tilde accent) = Press Ctrl + Shift + ~ (tilde), then the letter n ü (lower case u, diaeresis accent) = Press Ctrl + Shift + : (colon), then the letter u
Upper Case Letters
Á (upper case A, acute accent) = Press Ctrl + ‘ (apostrophe), then Shift + a É (upper case E, acute accent) = Press Ctrl + ‘ (apostrophe), then Shift + e Í (upper case I, acute accent) = Press Ctrl + ‘ (apostrophe), then Shift + i Ó (upper case O, acute accent) = Press Ctrl + ‘ (apostrophe), then Shift + o Ú (upper case U, acute accent) = Press Ctrl + ‘ (apostrophe), then Shift + u Ñ (upper case N, tilde accent) = Press Ctrl + Shift + ~ (tilde), then Shift + n Ü (upper case U, diaeresis accent) = Press Ctrl + Shift + : (colon), then Shift + u
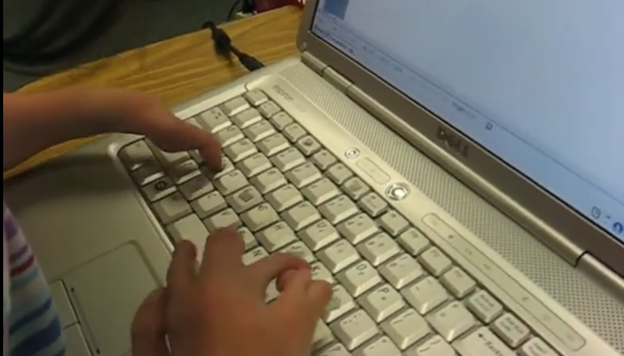
Kaleigh was born with very special hands. So, whether you have 10 fingers or 2 or 3, there is always an easy way to use a braille display to control your computer.
Years ago, Aubrey was just learning how to learn remotely. Dr Robinson lived close by so was able to come over in person to help her with skills and hand under hand and hand over hand as needed to learn position of fingers. A major part of her lessons is to learn to do work on braille display and computer with keyboard shortcuts. This video is her just learning how to do math in WORD.
To answer a Zoom call using keyboard shortcuts when on a braille display and computer, you can use the following:
These shortcuts help you manage calls efficiently without needing to use a mouse. A braille display and computer can make these tasks smoother.
Here are some additional keyboard shortcuts that Aubrey learned to enhance her navigation and accessibility experience:
General Web Navigation on braille display and computer
Ctrl + L or Alt + D: Focus on the address bar.
Ctrl + T: Open a new tab when using a braille display and/or computer.
Ctrl + W: Close the current tab.
Ctrl + Shift + T: Reopen the last closed tab.
Ctrl + Tab: Switch to the next tab.
Ctrl + Shift + Tab: Switch to the previous tab.
Ctrl + R or F5: Refresh the current page.
Ctrl + F: Open the find bar to search within the page on your braille display and computer setup.
Screen Reader Specific
Insert + F7: Open the links list in JAWS.
Insert + F6: Open the headings list in JAWS.
Insert + Down Arrow: Start reading continuously from the current position in JAWS.
Ctrl + Alt + Arrow Keys: Navigate by character, word, or line in NVDA for better synchronization with your braille display and computer.
Aubrey using braille display and computer, to learn how to complete math in WORD
Windows Accessibility commands for display and computer
Windows Key + U: Open the Ease of Access Center.
Windows Key + Plus (+): Turn on Magnifier and zoom in.
Windows Key + Minus (-): Zoom out with Magnifier.
Windows Key + Ctrl + N: Open Narrator settings.
Windows Key + Ctrl + O: Turn on the On-Screen Keyboard.
Text Editing
Ctrl + C: Copy selected text.
Ctrl + X: Cut selected text.
Ctrl + V: Paste copied or cut text.
Ctrl + Z: Undo the last action.
Ctrl + Y: Redo the last undone action.
These shortcuts can help you navigate more efficiently and make your web browsing and computer use more accessible. If you need more specific shortcuts or have other questions, feel free to ask!
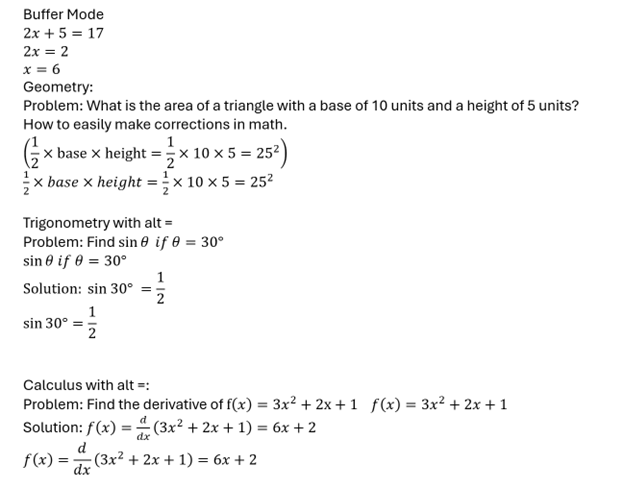
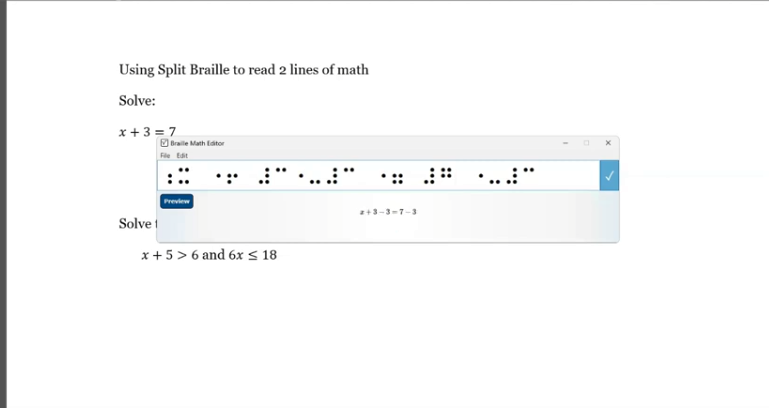
The new Split Braille™ for Buffer Mode in WORD for math is a feature in JAWS 2024. It offers powerful functionality for Braille display users. So, it allows viewing content from different locations on the same Braille line and a longer display is more advantageous to use. Complete Proper Word setup First, then continue.
Now let’s Enable Split Braille View-To enable a Split Braille view, press ALT+INSERT+V (or ALT+CAPS LOCK+V in Laptop layout) to open the Select Braille View dialog box. Focus Braille display users can press LEFT SHIFT+DOTS 1-2-7. In the dialog box, select your desired view and click OK. The active view remains for the current JAWS session and resets upon restarting JAWS.
Using Split Braille for Buffer Mode View in WORD for Math
By default, your current location appears in the left region, and the active view results appear in the right region. So, to swap these regions, reopen the Select Braille View dialog box and select the Swap split button mode. You can also change braille modes with a simple command
Navigating and Selecting Text
In most views, you can navigate and select text independently in the split region. Use the Right NAV rocker to pan and the Right Rocker bar to move by line. To select text for copying and pasting, press SHIFT button with a Cursor Router at the start and end of the selection. Dots 7 and 8 indicate the selection, which is automatically copied to the clipboard.
Commands for HumanWare Displays
For the Brailliant BI 40 series and Mantis Q40 displays:
Open Select Braille View dialog: Fourth Thumb Key+C1+C2+C3+C6 (or ALT+CAPS LOCK+V on Mantis Q40).
Toggle Buffered Text mode: C1+C2+C3 (not on Mantis Q40).
Pan split view region: Third and Fourth Thumb Keys.
Navigate by line: C6+Third and Fourth Thumb Keys (not on Mantis Q40).
Select text: First Thumb Key + Cursor Router.
For newer HumanWare displays:
Open Select Braille View dialog: K1 + pan Easy Access Bar right.
Swap regions: K1 + pan Easy Access Bar left.
Pan split view region: K4 + pan Easy Access Bar right/left.
Navigate by line: K4 + pan Easy Access Bar up/down.
Available Views
No Split View Mode: Uses the full display length for the current line (default).
Buffered Text: Captures text at your current location and displays it in the right half.
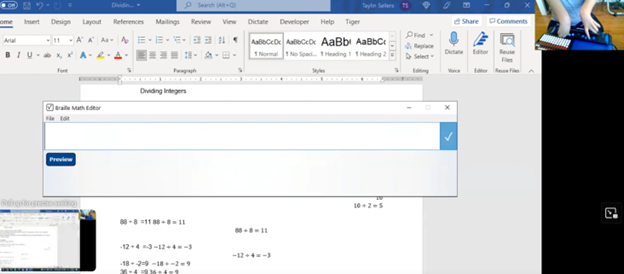
In this video, Dr. Denise Robinson guides Tay in proper Braille Math Editor Mode on her FOCUS Display. The session begins with Dr. Robinson reminding Tay how to change the computer’s mode to “contracted out/computer in.” This change ensures proper Braille math output, which simplifies the process and reduces errors.
Dr. Robinson then encourages Tay to use the Braille Math Editor with confidence, using her 2 knuckles on her right hand and 1 pointer finger on her left hand. She goes onto explain that the chosen mode automatically handles many aspects of math input. This approach allows Tay to focus more effectively on solving problems.
Next, Tay is guided through various math problems, including division and multiplication. Dr. Robinson carefully ensures that Tay understands how to input problems correctly into the Braille Math Editor. For division tasks, she provides clear instructions on entering Braille codes and following the correct sequences.
Furthermore, Dr. Robinson emphasizes the importance of memorizing math facts. She highlights how strong basic math skills can significantly improve accuracy and speed. Through consistent practice and repetition, Tay begins to reinforce these essential concepts.
As the session continues, Tay receives positive reinforcement, which helps her gain confidence. With each task, Tay requires fewer prompts, showing her growing independence in handling math problems.
Finally, Dr. Robinson concludes by praising Tay’s progress. She expresses confidence in Tay’s continued improvement and emphasizes that ongoing practice will help Tay master essential math skills. Dr. Robinson also reassures Tay that she will become more comfortable using the Braille Math Editor with time.
Overall, this session reflects Dr. Robinson’s commitment to fostering independence and competence in her students using proper Braille Math Editor Mode. She ensures they have the necessary tools and confidence to succeed academically. This methodical approach helps students like Tay build a strong foundation for future learning and problem-solving. To further learning, Embossing math using Braille Blaster or graphics using Tiger will always increase understanding of math in general.
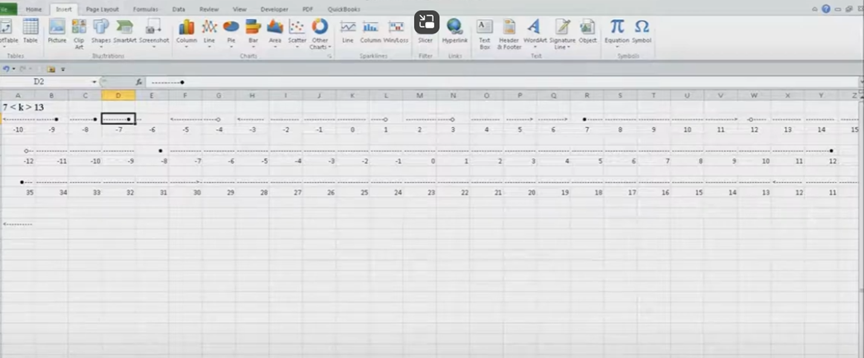
Dr. Robinson introduces a lesson on using Microsoft Excel to solve math work, specifically focusing on inequalities and graphs. She begins by guiding students on how to put Excel in focus to tackle various math problems in Excel. This helps students to optimize their math work in Excel effectively. Next, she instructs them to create a template using a number line. To insert symbols like less than or greater than signs, students use the Alt + N and then U commands to insert bullets or symbols.
For students with a numpad, Alt + 7 and Alt + 9 quickly insert a hollow or solid bullet, respectively. For those without a numpad, they can use the Insert + Symbols option. Students then align their number line by inserting a bullet in the middle, ensuring four dashes on each side for perfect centering when solving math work in Excel.
To center content, students use the Applications key and press F. They adjust the horizontal and vertical alignment to ensure everything is perfectly centered. This is a useful step when handling math problems in Excel. After completing their problems, students select the content using Shift + Right Arrow and copy it using Ctrl + C. This entire process enhances their skills in doing math work in Excel.
When pasting into Microsoft Word with Ctrl + V, students have various formatting options. By pressing the Control key and right arrow, they can select different formatting options for their pasted content. They can also Alt H to home and V to paste and right arrow through options. This flexibility allows blind students to format and customize their graphs just like their sighted peers when solving math problems in Excel. After the student pastes an image, they press the Applications key and up arrow to select Alt Text and type the description. Once they finish typing, they press Ctrl + Space and C to close the navigation pane and return to the document.
Dr. Robinson concludes by showing examples of completed math problems in Excel and graphs, demonstrating how well-formatted the number lines and inequalities look. Blind students can confidently create hollow and solid bullets, as well as inequalities, just like other students, thanks to the accessible features in Excel. This process ensures they stay engaged in their learning, achieving the same results as their peers when doing math work in Excel. Make sure your display is working well.
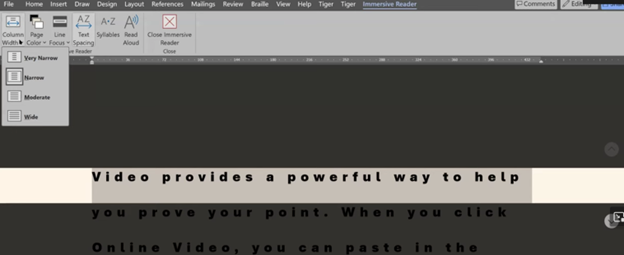
Dyslexia and screen readers: Focus in immersive reader in WORD
Dyslexia and Screen Readers–Many people think screen readers are only for blind students.
They are not.
Audio feedback can also change the life of any student with dyslexia.
When a student hears letters, words, sentences, spelling, punctuation, and mistakes read back in real time, the brain receives information through another pathway. The student is no longer trapped by what the eyes alone can process.
For blind students, screen readers paired with a braille display provide access. They connect what students hear to the words under their fingers, which strengthens reading, spelling, and writing.
For sighted students with dyslexia, audio feedback can provide clarity, confidence, independence, and a way to catch errors they may never see visually. It can also help them hear spelling patterns, punctuation, spacing, and sentence structure as they write.
This is not cheating.
It is access.
This is literacy through technology.
When students learn to use tools like screen readers, text-to-speech, speech-to-text, keyboard commands, and audio editing, they begin to read, write, revise, and complete work with far more independence.
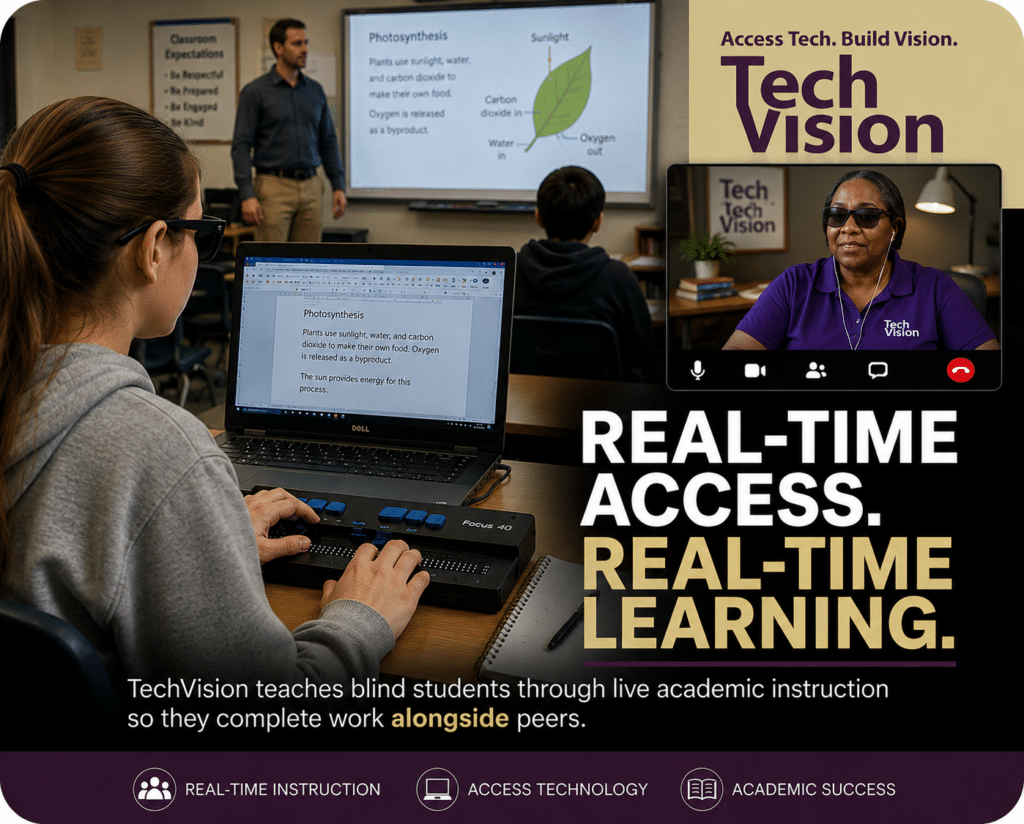
At TechVision, blind and low vision students learn how to access education in real time using the same technology and workflow skills required in school, college, work, and life so they can keep pace with their peers independently and confidently.
When instruction begins as early as 3 years of age, students often develop the foundational technology, braille, and academic access skills necessary to progress alongside peers from the very beginning rather than spending years trying to catch up later. Even students who begin later often make remarkable gains and can frequently close significant skill gaps within 1–2 years through intensive real-time instruction and consistent access to technology instruction.
Our students do not simply learn isolated technology commands. They learn how to actively use assistive technology while completing real academic work alongside their peers.
Through live instruction, students develop:
screen reader proficiency using JAWS, NVDA, Narrator, and VoiceOver
braille display fluency using Focus Braille Displays
accessible math and science skills using Word Math Editor, Braille Math Editor, LaTex and Nemeth Code
Canvas, Google Classroom and Office 365 accessibility and all platforms
tactile graphics and STEM access skills
keyboarding and digital workflow independence
file management and organization skills
independent problem solving using real classroom materials
and so much more
Working closely within schools and families, Access Technology Instruction occurs both during live classroom participation and through dedicated 1-on-1 instructional sessions focused on building independence, long-term success, and the ability to independently complete daily assignments and plan workload responsibilities throughout the school week.
Our team includes both blind and sighted instructors with extensive experience using the same technology students are expected to master. This real-world expertise allows instruction to move beyond theory into practical daily application.
Accessibility is not about completing work later. Access is Inclusion.
TechVision continues teaching blind and low vision students around the world through remote instruction designed to build confidence, independence, and meaningful academic access.
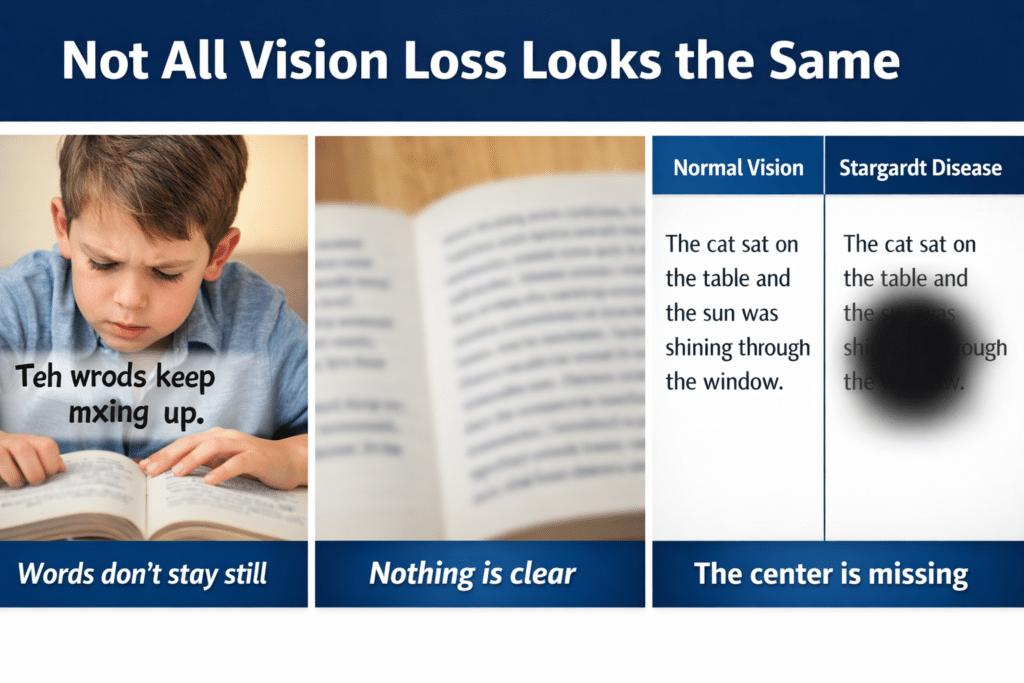
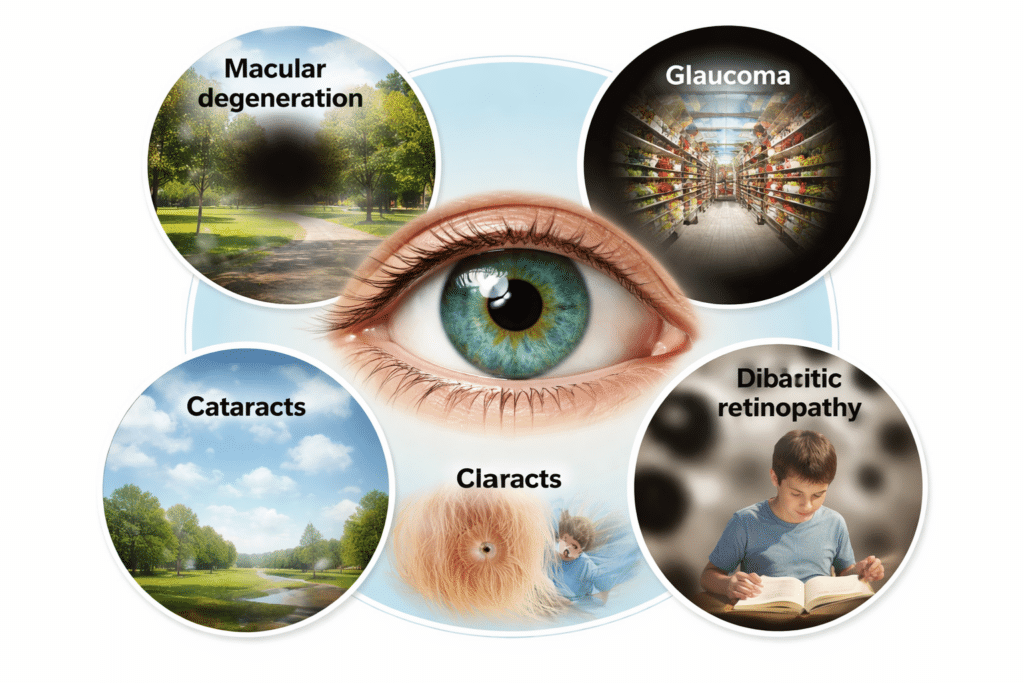
How to Read, Write, and Learn with Low Vision: How vision loss can appear
2.2 Billion People Live With Vision Impairment
Vision loss is one of the most common disabilities on earth, and it’s growing fast. If you work in healthcare, tech, education, or policy, these numbers matter for accessibility, product design, and funding.
Over 51.9 million adults in the U.S. report some level of vision difficulty. About 6–7 million Americans have significant vision loss or blindness. Globally, 2.2 billion people have vision impairment.
But those top-line numbers hide urgent trends. Here’s the breakdown with the latest 2024-2026 data, what’s driving it, and what to do about it.
Tools + Techniques That Build Real Independence
Students and adults with vision challenges do not learn one way. They require the right tools, combined with direct, targeted training.
Success happens when tools match the vision need and instruction builds efficiency
Tools + Training by Vision Need
1. Dyslexia (Processing and Decoding)
Dyslexia affects how the brain processes text. It often overlaps with vision-related challenges.
Tools
Text-to-speech: JAWS, NVDA
Speech-to-text (dictation)
Immersive Reader
Audiobooks: Bookshare, Learning Ally
Training Focus
Pair listening with reading
Build strong keyboarding for writing
Navigate digital text efficiently
Goal Improve comprehension while reducing reading fatigue
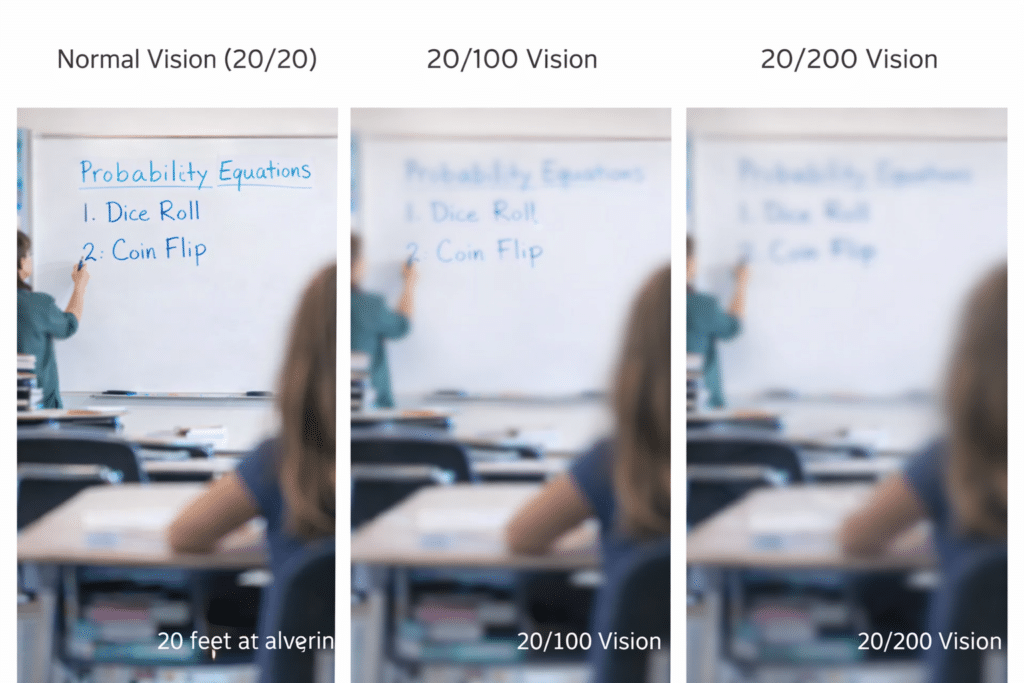
2. Blurred or Reduced Vision (Low Vision)
Tools
Magnification: ZoomText, Windows Magnifier
High contrast and color filters
Enlarged text and screen scaling
Screen readers: JAWS, NVDA
Training Focus
Use magnification efficiently without losing place
Strengthen visual tracking
Transition smoothly to audio when needed
Master keyboard navigation
Goal Maximize usable vision while increasing speed and accuracy
3. Central Vision Loss
(Stargardt, macular degeneration)
Tools
Screen reader (primary): JAWS, NVDA
Refreshable braille display
Audio + braille combination
OCR tools for printed content
Training Focus
Full keyboard control
Braille literacy (UEB and Nemeth)
Strong auditory processing
Goal Achieve full independence through non-visual access
Fix Digital Accessibility Before Title II Enforcement-No access to work
Schools and colleges face serious gaps in digital access. These gaps harm blind and deaf students the most, and they also affect every learner who needs clear, structured content. Title II now requires full WCAG 2.1 AA compliance. Schools must shift from crisis responses to real systems. The good news is that this work is fixable when they follow a clear plan.
1. Start With an Accessibility Audit: Blind and Deaf Students Face the Sharpest Access Gaps
Every school should begin with a full digital audit. This audit must involve experts who use screen readers and braille displays every day on the platforms used in education. Without these specialists, audits miss the barriers that blind students face. Any image-based video must include described content throughout. Schools can find strong examples and guidance at Described and Captioned Media Program (DCMP).
Schools should also check whether interactive elements, buttons, and menus work with keyboard-only navigation. Many blind students rely on keyboard access, and inaccessible controls often block them before the lesson even begins.
The audit should include websites, LMS content, Google Classroom, PDFs, worksheets, videos, vendor platforms, parent portals, and staff materials. Real blind access testers expose problems that automated tools never find. Audits reveal the true accessibility debt. Schools need this view before anything else.
Most deaf learners use ASL as their primary language. They often need an actual signer on digital content as well as written text. Captions alone rarely provide full access, because captions do not follow ASL structure. Find out full details from DCMP.org also.
Schools should start with embedded text on all visual content first. This step creates a basic access layer while teams prepare for ASL. Once content stabilizes, schools can add ASL signers during development.
Schools must include ASL interpretation on videos, lessons, and major digital materials. An ASL signer keeps the message clear, complete, and culturally accurate.
This work must also be audited by a deaf professional who signs. Without that review, digital content remains incomplete and inaccessible.
2. Fix PDFs and Scanned Worksheets First
Most access failures start with inaccessible PDFs-which are actually images of work. Schools can convert scanned worksheets to readable text, add proper heading structure, insert alt text, tag tables, and ensure text reflows on mobile. These steps give blind students access at the same time as their peers. For easy full access, Just put everything into Microsoft WORD and if you can move a mouse cursor through the content, it will be accessible to a screen reader. make sure you add proper headings throughout.
3. Enforce Accessible Google Docs, Slides, and Assignments
Teachers create inaccessible content daily by pasting images of work into what was accessible if typed out properly in google. Schools should require headings, proper contrast, real alt text, logical reading order, described images, and accessible math. This one shift removes thousands of barriers. Currently Math is only fully accessible in Microsoft WORD using the Math editor. Google does not have all the appropriate tools in place to recreate what OFFICE 365 has already done.
Typically, only images of words appear in products from Google, which makes the content completely inaccessible to blind students. Embedded videos also stay inaccessible for deaf learners, because images never give enough detail or language to explain the lesson. Math remains inaccessible across Google products, and blind students cannot access equations without proper structure.
4. Make All Video Content Accessible
Videos must serve blind and deaf students. Schools should ensure accurate captions, audio descriptions, clear narration, and safe visual design. This protects access and reduces legal risk.
5. Replace Inaccessible Vendor Platforms
Many learning apps and platforms still fail WCAG standards. Schools must request VPATs, require WCAG 2.1 AA, demand remediation timelines, and remove non-compliant tools. Title II holds the school responsible, not the vendor. When schools stop buying inaccessible products, vendors will change their design or leave the market.
6. Train Staff in Real Accessibility Skills
Accessibility training must move beyond awareness. Staff need training in screen reader testing, accessible document workflows, caption skills, alt text guidelines, accessible math support, and LMS accessibility checks. Blind and deaf students rely on technology, not sight or hearing. Staff must understand these tools, so they must receive direct instruction from experts who use these tools daily. These specialists can walk staff through the fine details needed to make content fully accessible quickly and easily (relative to what content they already have).
7. Provide Blind and Deaf Students With Real-Time Access
Access cannot arrive days later. Schools should deliver materials at the same time as sighted peers, provide braille or screen-reader-ready files, use CART or interpreters, and ensure accessible assessments. This reduces OCR complaints and supports equal learning.
8. Build an Accessibility Governance Team
Districts need structure to stay compliant. This team sets policy, provides training, monitors compliance, reviews content, approves vendors, and reports progress. Governance turns accessibility from a reaction into a system.
9. Bring in Specialists When Needed
Most schools lack internal expertise. They can partner with certified blindness professionals, deaf education specialists, accessibility technologists, braille experts, and WCAG consultants. Title II allows districts to use outside experts when staff lack training.
10. Address a Damaging Message Still Circulating in Schools
Many professors and teachers still hear, “Check your materials, but don’t worry about them.” This message shows how long schools have ignored accessibility laws. Title II removes the option to delay. Schools must fix inaccessible content, not simply acknowledge it.
11. The Word “Accommodation” Must Go
The word “accommodation” was not removed from Title II, but the new DOJ rule shifts the focus toward accessibility from the start, especially for digital content.
Schools must stop relying on the word accommodation. The term assumes students start with barriers and then wait for fixes. Blind and deaf students lose time every day when access comes after instruction. They fall behind because the content was inaccessible from the start.
Title II requires full access at the moment instruction begins. Students must receive materials in the same format, at the same time, as their peers. This shift removes delay, reduces frustration, and ends the cycle of constant catch-up. True access begins when schools design content correctly, not when they repair barriers later.
12. Make Accessibility Part of School Culture
Accessibility becomes sustainable when it becomes normal. Schools can add accessibility checks to grading policies, include accessibility in evaluations, require captions, post accessible templates, and adopt accessible curriculum materials. Small habits prevent massive remediation later.
13. Remove and Archive All Inaccessible Content by April 23
Schools must remove inaccessible digital content by April 23. They must secure this content so only the original creator can access it. If old materials stay public, anyone can use them to file an accessibility complaint. This creates immediate legal risk for the educational institutions.
Most schools will find it easier to build fully accessible content from the start. Rebuilding old, image-based, untagged, or uncaptioned materials often takes far more time than creating new accessible versions. Schools protect themselves and their students when they remove inaccessible work, archive it safely, and rebuild content using WCAG 2.1 AA standards now so they can be fully uploaded on April 24, 2026.
Closing Note: Access Protects Everyone
Blind and deaf students face the hardest barriers, yet accessible design lifts all learners. Clear content improves structure, readability, quality, and learning across every classroom. Schools that begin this work now protect their students, their staff, and their programs.
Dates to Follow
What this means for schools and colleges
Larger districts and colleges (≥ 50,000 population)
Deadline: April 24, 2026
Standard: WCAG 2.1 AA
Scope: Websites, web content, mobile apps, PDFs, forms, LMS content, videos, social media, and anything accessed through a browser
Smaller districts and colleges (<50,000 population): April 26, 2027
The iPhone is the most powerful accessibility tool available to blind and low‑vision students today. With the right skills, it becomes a map, a magnifier, a reader, a communication device, a travel tool, and a pathway to independence.
This guide gives students, parents, teachers, and O&M instructors everything needed to build real-world iPhone skills from basic Siri commands and VoiceOver gestures to advanced navigation and daily-living tools. Use it as a curriculum, a quick reference, or a step-by-step learning path.
A TechVision Core Resource
The iPhone gives blind and low-vision students real independence. With the right skills, it becomes a map, a reader, a magnifier, a travel tool, and a partner for daily life. This guide helps students, parents, and teachers build strong iPhone skills one clear step at a time.
Lessons- follow these steps
1. Getting Started
The guide begins with simple setup steps that build confidence fast.
Accessibility Shortcut–You can press home button at any time and just say: “Siri open Accessibility” or wherever you need to go for what you need to do
Where to find it: Settings → Accessibility → Accessibility Shortcut Students turn features on and off with a quick triple-click.
Key tasks:
Set VoiceOver, Zoom, or Magnifier
Set up Siri for hands-free support
Add emergency contacts
Customize Control Center
Organize the Home Screen
Core Access Features
VoiceOver
Zoom
Magnifier
Display and text adjustments
First Skills to Teach
Turn VoiceOver on or off
Learn basic gestures
Use Siri for fast tasks
Adjust speech rate
Open and close apps
2. VoiceOver Skills
Students grow from simple gestures to full digital literacy.
Beginner
Where to find it: Settings → Accessibility → VoiceOver
Explore the screen
Activate items
Use basic Rotor options
Start typing with VoiceOver
Intermediate
Edit text
Use the App Switcher
Navigate long pages
Move by headings or links
Use dictation
Advanced
Where to find it: Settings → Accessibility → VoiceOver → Activities / Braille / Rotor Actions
Customize the Rotor
Use Activity profiles
Use Braille Screen Input
Work in complex apps
3. Navigation & O&M with iPhone
Orientation Tools
Look Around-outside navigation
Compass
Landmarks
Spatial audio
Seeing AI
Clew-inside navigation Where to find them: Maps and Compass apps
Dropping Pins
Drop a pin with VoiceOver: Maps → Current Location → Rotor → Drop Pin
Drop a pin with Siri: “Drop a pin.”
Label and save locations
Add Favorites
Create walking routes
Real-World Travel Skills
Walking directions
Bus stop navigation
Checking surroundings
Soundscape-style apps
Safe campus routines
Safety Tools
Where to find them: Settings → Emergency SOS, Find My, Messages
Emergency SOS
Location sharing
Device tracking
Safe communication practices
4. Apps for Daily Living
Vision Support Apps
Where to find them: App Store
Seeing AI
Be My Eyes
Envision
Magnifier
Productivity Tools
Reminders
Calendar
Notes
Shortcuts
Timer and alarms
School & Work
Files
Email
Safari
Reading apps
Document scanning
5. Low Vision Tools & Strategies
Visual Settings
Where to find them: Settings → Accessibility → Display & Text Size
Contrast
Bold text
Reduce transparency
Color filters
Invert colors
Magnification Tools
Where to find them: Settings → Accessibility → Zoom Control Center → Magnifier
Zoom
Magnifier
Camera zoom
Flashlight for clarity
Reduce Fatigue
When to switch from Zoom to VoiceOver
When audio improves endurance
How stands and holders help
6. Parent Guide
Parents help skills grow through simple routines.
Focus areas:
What to teach at each age
How to practice safely
How to reduce frustration
When to add new apps
How to build daily habits
Where to find key tools: Settings → Screen Time, Settings → Emergency SOS
7. Teacher Guide
Teachers integrate iPhone skills into daily instruction.
Teach VoiceOver
Skill progression
Gesture modeling
Rotor instruction
Text-editing practice
Then Navigation
Classroom → hallway → campus
Pinning school locations
Safe movement routines
Teach Organization
Where to find it: Press and hold any app → Edit Home Screen
Folder creation
Notifications
Calendar and reminders
Assessment
Define mastery
Measure progress
Write goals and objectives
8. Learning Paths
Beginner Path
Activate Accessibility Shortcut
Learn basic gestures
Practice the Rotor
Use Siri for quick tasks
Drop a first pin
Intermediate Path
Edit text
Navigate long pages
Use Maps
Use Seeing AI
Organize the Home Screen
Advanced Path
Braille Screen Input
Custom Rotor
Advanced Maps skills
Shortcuts automation
Real-world travel practice
9. Lesson Index
This section lists all iPhone lessons. Each item includes:
A clear title
A short description
A consistent layout
This turns the page into a complete curriculum hub.
What does 20/100 vision look like: 3 comparisons: 20/20, 20/100 and 20/200
20/100 Vision: What It Really Means for People (Not legally blind, but close)
Many people hear “20/100” and think it is only “blurry.” But what does 20/100 vision look like for someone in everyday life? It is far more than that. For a student, 20/100 changes access to learning, classroom speed, and social interaction.
1. The board exists, but details disappear
A student with 20/100 sees the board, but letters fade quickly. Low contrast, faint markers, and glare make decoding slow.
2. Text requires extra effort
The eyes work harder to hold focus. Small print drains energy fast. Reading becomes a stamina task, not an intelligence test.
3. Faces and expressions lose clarity
At 20/100, subtle expressions vanish. Social cues move too fast. Misunderstandings follow because detail drops before meaning forms.
4. Mobility becomes cautious
Depth and detail shrink. Hallway movement requires more scanning. Crowded spaces increase stress and accidental bumps.
5. Fatigue arrives early
Eyes strain harder to stay clear. By mid-day, the visual system tires. Students feel the fatigue long before they report it.
6. Behavior changes are often misread
A student who looks away, slows down, or avoids reading is not lazy. They are adapting to a visual load others cannot see.
20/100 Is Not “Almost Fine”—It Is Reduced Access
This acuity does not reflect intelligence or motivation. It reflects how much effort a student must spend to access the same information as peers.
With stronger contrast, better lighting, correct seating, and the right tools, students with 20/100 can thrive.
How 20/100 Shifts Toward 20/200 During the Day
Visual clarity changes with fatigue. By afternoon, students often experience:
slower refocusing
reduced contrast sensitivity
more blur at distance
difficulty maintaining near clarity
This shift can push functional acuity close to 20/200, especially under stress, glare, or eye strain.
It works much like a Snellen chart: A student who reads 20/100 in the morning may miss one or two extra letters later, shifting the score. Missing those letters can lower acuity enough to look more like 20/160–20/200, even though the eye disease did not change—only the fatigue did.
Summary
20/100 vision affects more than reading. It changes learning, speed, confidence, and daily stamina. Early support, correct tools, and intentional teaching help students keep pace and protect their energy.
Keep in mind that life is competition so to keep up:
Life is a measure of access.
With the right tools, students with 20/100 vision:
can read using laptops and screen readers
People with 20/100 vision can work independently and may or may not need braille, braille displays, or tactile graphics, depending on whether their eye condition is stable or degenerative.
navigate confidently with cane and GPS
complete assignments alongside their peers using access technology
If instruction begins early and stays consistent, they thrive.
Understanding Vision in Children: What Visual Acuity Really Means
Finding high-quality tactile graphics for advanced math often feels overwhelming, especially when you support blind students who want deeper conceptual understanding. However, you can simplify the process with a clear list of reliable sources. To begin, you can explore this curated collection of teacher-vetted tactile math libraries. These sites cover algebra and pre-calculus through Calculus I–III. In addition, they include limits, derivatives, integrals, function behavior, curves, and coordinate systems. As a result, you gain ready-to-use tactiles that strengthen conceptual learning for all students. For example, many of these graphics support problem-solving, graph analysis, and multi-step reasoning. Though the focus leans toward higher-level math, these sites still offer tactile graphics for every math level. Finally, you can review them in order, moving from the most comprehensive to excellent, knowing each one provides strong and dependable options.
The information below is in order of the most comprehensive to excellent so all options are great for finding anything you need. On the European site, just remember to select English
STPT = Science, Technology, Physics, and Tactile It’s one of the major content categories inside the Tactile Inclusion Project (TIP) collection.
TIP created a huge set of tactile graphics across:
Math
Science
Physics
Technology
Geometry
Calculus
Data & graphs
Best source for calculus‑level tactile graphics. This project includes audio‑tactile and swell‑paper‑ready graphics for algebra → calculus, created by math teachers for blind students.
Calculus‑related tactiles available
Limits (approaching values, left/right limits)
Derivative concepts (slopes, tangent lines)
Curve behavior (increasing/decreasing, concavity)
Graphs of functions (polynomials, exponential, trig)
Area under curves (Riemann rectangles)
Integrals (definite/indefinite visualizations)
Coordinate planes, axes, quadrants
Piecewise functions
Parametric curves
Sequences & series visuals
Optimization diagrams
Why it’s ideal for blind students:
Graphics are simplified to core mathematical meaning
Includes audio explanations
Translatable into 29 languages
Free to download
2. ProBlind — Global Database of 1,250+ Tactile Math Graphics- make sure you choose your language preference:
Calculus‑level graphics include:
Function families
Derivative slope diagrams
Concavity & inflection points
Trig function curves
Exponential/logarithmic curves
Limits & asymptotes
Area under curves
3D surfaces (simplified for tactile use)
Calculus
Limits
Derivatives (slopes, tangent lines)
Integrals (area under curves)
Concavity & inflection points
Function families
Riemann sums
Asymptotes & behavior at infinity
Pre‑Calculus & Algebra
Trig functions
Exponential/logarithmic curves
Coordinate planes
Piecewise functions
Parametric curves
Geometry & STEM
Shapes
Graphs
Data displays
3D surfaces (simplified)
All graphics are:
Swell‑paper ready
Embosser friendly
Audio‑described
Designed specifically for blind learners
Where TIP Lives Now
Because the original TIP website has a broken SSL certificate, the safe, active home for all TIP graphics is:
The TGIL was established in 2007 by the American Printing House for the Blind (APH) to support transcribers by providing free, customizable tactile graphics templates for images that are commonly used in K-12 education. The goal of the TGIL was to help speed up textbook transcription by providing a good starting point for creating high-quality tactile graphics.
While supporting transcribers remains an important part of the TGIL’s mission, we have recently expanded the scope and purpose of the TGIL to provide graphics that have been “optimized for the Monarch.” These graphics support direct-to-student delivery of graphics for use in a digital format with the Monarch multi-line tactile display.
The metadata for each graphic in TGIL will indicate whether the graphic was created for embossing and/or whether it has been optimized to display on the Monarch. We also invite users to request graphics for use on the Monarch — or request remediation of an existing graphic — when an “optimized for Monarch” alternative is not yet available.
How Different Eye Conditions Affect the Way People See: A central blue-green human eye is surrounded by four circular images showing how different eye conditions affect vision: macular degeneration with a dark central blur, glaucoma with tunnel vision, cataracts with overall cloudiness, and diabetic retinopathy with floating dark spots.
Key Statistics on Blindness and Vision Loss
Overall Vision Loss
More than 12 million Americans live with blindness or significant vision impairment, and it’s important to understand how different eye conditions affect the way people see, as each one can have unique effects on vision.
Globally, 2.2 billion people have vision impairment or blindness.
Age-Related Increase
Vision loss rises sharply with age because the risk of major eye diseases grows over time.
After age 40, one in eight adults develops a vision-threatening eye condition.
After age 65, the rate of blindness and low vision increases four-fold.
Adults over 75 experience the highest rates of blindness in the population.
Nearly half of all blindness occurs in people over 70.
Leading Causes of Vision Loss as We Age
How Different Eye Conditions Affect the Way People See as These Conditions Become More Common with Age
Cataracts
Affects 24 million Americans over 40.
By age 80, more than half of adults develop cataracts.
Glaucoma
Over 3 million Americans have glaucoma.
Risk doubles every 10 years after age 40.
Age-Related Macular Degeneration (AMD)
Leading cause of blindness in older adults.
Affects 11 million Americans, expected to reach 22 million by 2050.
Diabetic Retinopathy
Affects one in three adults with diabetes.
Risk increases with both age and length of diabetes.
Why Eye Conditions Worsen With Age
Here are the major age-related changes:
The lens becomes cloudy, causing blurred or dim vision.
The retina loses cells, reducing clarity and contrast sensitivity.
The optic nerve can suffer pressure-related damage.
Blood vessels weaken, especially with diabetes and hypertension.
Impact on Daily Life
Older adults with low vision face three times the fall risk.
Vision loss increases depression risk by up to 25 percent.
Two-thirds of adults in assisted-living communities have untreated vision issues.
Hopeful Note
Most age-related eye diseases are treatable or manageable with early detection. Screen reader technology, braille displays, and accessible tools also help older adults stay independent.
Most people assume vision loss is like “blurry vision” — but every eye condition affects sight in a completely different way. Understanding these differences helps teachers, families, and coworkers support students and adults with confidence and empathy.
This guide breaks down the most common eye conditions and gives you a simple, accurate explanation of how the world looks through their eyes.
1. Cataracts
What it is: Clouding of the eye’s natural lens. You See:
Vision appears foggy, milky, or like looking through dirty glass
Colors look faded
Light glare is intense (especially headlights at night)
What helps: Even lighting; high contrast; reducing glare. sun glasses help stop glare of cataracts. Removal is important to regain full vision.
2. Macular Degeneration (AMD)
What it is: Damage to the macula, the part of the retina responsible for central vision. You See:
A dark or blurry spot in the center
Faces and print disappear
Side vision stays clear
What helps: Large print, audio access, magnification, and teaching scanning strategies. Teaching to focus on the outside of vision. Prism glasses the will help bring vision to the center again
3. Stargardt Disease
What it is: A juvenile form of macular degeneration. You see:
Central blind spots
Difficulty recognizing faces
Trouble reading standard print
Good peripheral vision
What helps: High‑contrast materials, audio, and flexible access to digital text. Prism glasses
4. Glaucoma
What it is: Damage to the optic nerve, often from high eye pressure. You see:
Loss of peripheral (side) vision and central vision
“Tunnel vision” in later stages
Difficulty navigating crowded spaces
What helps: Clear pathways, orientation & mobility support, and strong lighting. Treatment is so essentially crucial to slow or stop progression of disease
5. Diabetic Retinopathy
What it is: Damage to retinal blood vessels from diabetes. You see:
Floaters (dark spots that move) and grow larger
Patchy or fluctuating vision
Blurry or distorted areas
Vision may change day‑to‑day
What helps: Flexible accommodations, audio tools, and predictable layouts.
Keep blood sugar between 80–150 mg/dL, and maintain an A1C below 7.0. These levels help prevent the widespread damage diabetes can cause throughout the body. Diabetes damages the body’s small blood vessels first, so the eyes, kidneys, feet, and fingers often show problems early. When blood flow weakens, nerves and tissues become painful and begin to die.
6. Achromatopsia (Total Color Blindness)
What it is: A rare condition affecting cones in the retina. You see:
The world appears in shades of gray
Extreme light sensitivity
Reduced clarity
What helps: Low‑vision sunglasses, tinted filters, wearing a hat outside and dimmed environments.
7. Corneal Diseases
What it is: Damage or irregularity of the cornea. You see:
Vision appears distorted, wavy, blurred edges or double
Glare and halos around lights
Difficulty with fine detail
What helps: Contrast, reduced glare, and alternative access to print.
Why This Matters
Understanding how people see with different eye conditions reveals why global vision loss continues to rise. There are hundreds of known eye conditions, from common refractive issues to rare disorders that slowly damage sight. The World Health Organization notes at least fifteen major conditions that affect vision, with many others harming eye health silently. More than thirty-three million people are blind from preventable causes today. Over one billion people live with treatable or preventable vision loss but lack access to essential care.
There are hundreds of recognized eye conditions globally, ranging from common refractive errors to rare genetic disorders. The World Health Organization highlights at least 15 major conditions that impact vision, but many more affect eye health without causing vision loss.
Understanding Vision in Children: What Visual Acuity Really Means
Best Computer PC Specs buying Guide for 2025 and beyond: RAM, CPU, SSD, graphics card, gaming and more explained
If you’re planning to buy a computer now, pause before diving into the best PC specs. Keep in mind that dealers often clear out older models during holiday sales. To make sure you know exactly what you’re getting, skip down to the section on ‘Older and Newer Naming’ of laptops.
Specs You Need and PC Details Explained
Memory (RAM): 64 GB DDR5 (4800–5600 MHz, dual channel, expandable to 128 GB on some models). Continue for more detailed advice, for Best Computer Specs Guide.
Storage (SSD): 2 TB PCIe Gen 4 NVMe SSD (blazing fast read/write speeds, optional dual SSDs up to 4–8 TB total)
Display: 14‑inch UHD (3840 × 2160) Mini‑LED, 120 Hz refresh rate, HDR support or 14- 16‑inch OLED, 240 Hz for gaming/creative workloads
Reduce Eye Strain with a High Resolution Curved Screen
Ultra HD / 4K: 3840 × 2160 pixels
8K UHD: 7680 × 4320 pixels
Highest Resolutions Available (2025)
8K UHD (7680 × 4320):
Currently the highest mainstream resolution for TVs and monitors.
It is Extremely sharp, but requires powerful GPUs and large screens to notice the difference.
Best Curved Monitors (2025)
Brand
Best Model
Size / Resolution
Use Case
Key Strengths
Samsung
Odyssey OLED G9
49″ Dual QHD (5120×1440)
Gaming / Immersion
240 Hz refresh, deep 1000R curve, HDR OLED
Dell / Alienware
Alienware AW3425DW
34″ QD‑OLED (3440×1440)
Gaming / Esports
Fast response, vivid colors, G‑Sync Ultimate
Dell UltraSharp
U4025QW
40″ 5K2K (5120×2160)
Productivity / Multitasking
Huge workspace, USB‑C hub, color accuracy
LG
UltraGear 45GR75DC
45″ WQHD (3440×1440)
Gaming / Creative
OLED panel, 240 Hz, immersive ultrawide
HP
E45c G5
45″ Dual QHD (5120×1440)
Productivity / Office
Replaces dual monitors, ergonomic design
Gigabyte
G27FC
27″ Full HD (1920×1080)
Budget Gaming / Entry Level
Affordable, decent curve, FreeSync support
Quick Recommendations
For Gaming Immersion: Samsung Odyssey OLED G9 or Alienware AW3425DW.
For Productivity/Work: Dell UltraSharp U4025QW or HP E45c G5.
For Budget Buyers: Gigabyte G27FC.
For Hybrid Use (Gaming + Creative): LG UltraGear 45GR75DC.
Other items you need for laptop and more USBs for a desktop
Ports & Connectivity:
2 × Thunderbolt 4 / USB‑C
3 × USB‑A 3.2
HDMI 2.1
Ethernet RJ‑45
Wi‑Fi 7 + Bluetooth 5.4
Keyboard: QWERTY keyboard, with Applications/Menu key
Around 4 pounds ≈ 1.81 kilograms.
How to Find Your Computer Specs (Windows 11, December 2025)
1: Using System Settings
Press Windows key + E to open File Explorer.
Press Shift + Tab to move focus to the Navigation Pane.
Arrow down to This PC (usually near the bottom).
Right‑click on This PC and choose Properties (or press Enter).
A window will open showing basic system information, including:
Device name
Processor (CPU)
Installed RAM
System type (32‑bit or 64‑bit)
Windows edition and version
2: Using Settings → About
Press Windows key + I to open Settings.
Navigate to System.
Scroll down and select About.
Under Device specifications, you’ll see:
Processor (CPU)
Installed RAM
Device ID
Product ID
System type
Under Windows specifications, you’ll see:
Edition (e.g., Windows 11 Pro)
Version and build number
3: Advanced Specs (Optional)
For deeper details like graphics card, storage, and drivers:
Press Windows key + R, type dxdiag, and press Enter.
This opens the DirectX Diagnostic Tool, showing CPU, RAM, GPU, and driver versions.
Summary
Basic specs (CPU, RAM, Windows version) → System → About or This PC → Properties.
Detailed specs (graphics card, drivers) → dxdiag.
These steps work with keyboard navigation and are accessible for screen reader users.
Find information in MSINFO32
MSINFO32 is the command that opens the System Information utility in Windows.
It provides a comprehensive overview of your computer’s hardware, software, and system components.
Unlike the simple “About” page, MSINFO32 gives deep technical details useful for troubleshooting, upgrades, or support.
How to Open MSINFO32
Press Windows key + R to open the Run dialog.
Type msinfo32 and press Enter.
The System Information window will appear.
What You’ll See in MSINFO32
System Summary (default view):
OS name and version
System manufacturer and model
Processor type and speed
Installed RAM
BIOS version/date
Boot mode (UEFI or Legacy)
Hardware Resources:
IRQs, DMA, I/O ports, memory addresses
Useful for diagnosing hardware conflicts
Components:
Display (graphics card details)
Storage (drives, controllers)
Network (adapters, protocols)
Input devices
Software Environment:
Loaded drivers
Running tasks
Services
Environment variables
Why It’s Useful
Troubleshooting: Quickly check BIOS version, drivers, and hardware conflicts.
Upgrades: Confirm RAM slots, CPU type, and expansion options.
Support: Export system info to share with IT or tech support.
Memory Details
These values describe how your computer uses RAM (physical memory) and virtual memory:
Installed Physical Memory (RAM): 64.0 GB The total amount of RAM physically installed in your system.
Total Physical Memory: 63.8 GB The usable portion of your installed RAM. A small amount is reserved for system hardware.
Available Physical Memory: 56.2 GB The amount of RAM currently free and available for use by applications and the system.
Total Virtual Memory: 67.8 GB This includes physical RAM plus page file space. Virtual memory allows your system to use disk space as extra memory when RAM is full.
Available Virtual Memory: 58.9 GB The portion of virtual memory that’s currently unused and available.
Page File Space: 4.00 GB The size of the page file (a reserved portion of your hard drive used as virtual memory).
Go to Programs and features and make sure you have all your security and power to run programs so do a find command for “run” and look for your .nets.
What .NET Does for a Computer—let’s just say it IS REALLY IMPORTANT
Runs Applications:it is software framework/platform .NET provides the Common Language Runtime (CLR), which acts like a virtual machine. It takes code written in languages like C#, F#, or VB.NET and makes sure it runs correctly on your computer.
Manages Resources: The CLR handles memory management, security, thread management, and error handling. This means programs don’t have to reinvent these functions — they rely on .NET to do it safely.
Provides Libraries: The Framework Class Library (FCL) is a huge collection of pre‑built code for everyday tasks:
Reading/writing files
Connecting to databases
Networking and internet communication
User interface controls
Math, cryptography, and more
Supports Multiple Languages: Developers can write programs in C#, F#, VB.NET, and others. .NET makes them interoperable, so code written in one language can work with another.
Cross‑Platform Evolution:
Go get those important computer items at: Ninite.com
Beat Graphics card for computers using screen readers or other access technologies: NVIDIA
GRAPHICs card RUN that screen reader–get a good one GAMING computers will get you the specs you need for a screen reader or just regular use
NVIDIA RTX cards dominate the high‑end market with unmatched ray tracing, AI features (DLSS, CUDA, Omniverse), and raw compute power.–the BEST for screen readers and older students–middle school up
AMD Radeon RX cards offer better value for money, strong rasterization performance, and more efficient power use, especially at 1440p and 4K gaming.
The applications key– is KEY of importance-the funny looking horseshoe on a gaming computer or square with lines in it on general computers–it is a right click of a mouse or 1 press of a key.
Basic specifications for a laptop: gaming computer will have the speed and video card needed for performance
Processor (CPU): some use the words i5, i7, i9 but the new words are Ultra 5,7 or 9 on machines–i9 is compared to ultra 9 and so on like this
Intel Naming Shift
Older naming convention (up to 13th Gen): so if you have this then know it is an older model and during holidays, this is what companies are selling cheaply to get rid of–so just be aware–
Intel Core i3, i5, i7, i9
Example: Intel Core i7‑12700H
New naming convention (14th Gen and newer):
Intel Core Ultra 5, Ultra 7, Ultra 9
Example: Intel Core Ultra 9 185H
The “Ultra” branding emphasizes AI acceleration and new architecture (Meteor Lake, Lunar Lake).
How They Compare
Core i5 → Core Ultra 5
Core i7 → Core Ultra 7
Core i9 → Core Ultra 9
Intel Core Ultra 9 285HX (24 cores, up to 5.5 GHz turbo) or AMD Ryzen 9 7945HX (16 cores, up to 5.4 GHz turbo)
Memory (RAM): 64 GB DDR5 (4800–5600 MHz, dual channel, expandable to 128 GB on some models)
Storage (SSD): 1 TB PCIe Gen 4 NVMe SSD (with option for dual SSDs up to 4 TB total)
Display: 17.3‑inch UHD (3840 × 2160) Mini‑LED, 120 Hz refresh rate, HDR support or 16‑inch OLED, 240 Hz for gaming/creative work
Favorite computers for running software such as JAWS, NVDA and other blind ware–You must have HIGH RAM and speed
Top Favorite: ASUS
ASUS Laptop Weights–based on student–
ZenBook Series (ultralight)
New ZenBook A14: as low as 2.18 lbs (0.99 kg)
VivoBook Series (mid‑range everyday use series)
ROG Gaming Series (heavy duty)
Zephyrus G14: ~3.53 lbs (1.6 kg)
Strix G15: ~5.07 lbs (2.3 kg)
Pic of ASUS-ROG-heavier with numpad
Surface Pro-top Favorite
Microsoft Surface Pro Weights–lightest and most powerful of laptops
Surface Pro 3–7: ~1.7 lbs (0.77 kg)
Surface Pro 8–10: ~1.94–1.96 lbs (0.88–0.89 kg)
Surface Pro 11 (latest): ~1.96 lbs (0.89 kg)
Surface Pro X (ARM model): ~1.7 lbs (0.77 kg)
comparing true laptop form factors, ASUS ultrabooks and Surface Laptop models are closer in weight, while Surface Pro remains the lightest option in the 2‑in‑1 category.
Different versions and do not suggest this collapsible one for students, that flips up–just too easy to flip down
Get Surface Pro with a true laptop lid that opens easily
HP computers
Be careful as most do not come with applications key any more–yes you can use Insert F10 but … takes 2 keys to implement a keystroked of right click
HP EliteBook 645 G10 includes a dedicated Applications/Menu key on its keyboard layout.
Build your computer: EliteBook 645 G10 is a lightweight, secure, and efficient business laptop with AMD Ryzen 7000 series power
Processor Options:
AMD Ryzen 5 7530U: 6 cores / 12 threads, up to 4.5 GHz-elementary and middle school
AMD Ryzen 7 7730U: 8 cores / 16 threads, up to 4.5 GHz-high school
These are efficient 7nm chips with solid multitasking and productivity performance.
Graphics:
Integrated AMD Radeon RX Vega 6 GPU
Suitable for office work, media playback, and light graphics tasks
Not designed for gaming or heavy 3D rendering.–but that is fine as that is not why you buy it
Memory:
Configurable up to 64 GB DDR4 RAM
Dual SO-DIMM slots, user-upgradable.
Storage:
PCIe SSD options, typically up to 1 TB
HP HP EliteBook 870 G11 (17‑inch) -4.1 lbs–keep in mind you want a laptop carry case for laptops
High‑Performance PC Laptop Models
HP ZBook Fury 16 G11 – workstation powerhouse for engineering, CAD, and 3D rendering
MSI Raider 18 HX AI – top‑tier gaming laptop with desktop‑class GPU
ASUS ROG Strix G18 / Zephyrus G16 – high‑end gaming and creator laptops
Do NOT overdo bump dots on keyboard to find position for touch typing-then student start counting dots to get to keys–create muscle memory which means you want to have them repeat typing skills–explanation below dot placements.
Place bump dots on keys: 5 and 0 on num row above qwerty keys-backspace is already large
Place dots on F4, F12–if all the keys run together then either F8 or F9. My F keys are broken up in panels from F1 to F4 and F5 to F8 and F9 to F12 so I do not need any bump dots–a gaming keyboard is divided up for speed of access so no bump dots needed
Many computers share the arrow keys with home, end pg up and pg down–only put a bump dot on up arrow to quickly move hand to the right while left hand holds down the FN key and right hand to do the pg up and so forth
Remember, the keyboard already has built in bump dots on f and j so do not place any more bump dots on keys
Dell is not my top choice of a computer but is a fine machine with specs you can get with:
Processors: Intel Core Ultra 7/9 or AMD Ryzen 9 HX — powerful x86 chips for heavy workloads.
Serviceability: Easier to upgrade storage, RAM, and wireless adapters
Memory: Configurable up to 64–128 GB DDR5 RAM, far beyond Surface’s 16–32 GB.
Storage: Options up to 2–8 TB PCIe NVMe SSDs.
Graphics: Dedicated NVIDIA RTX GPUs (e.g., RTX 5090 or workstation Ada cards).
Displays: Larger 16–18″ screens, often 2.5K or 4K OLED, high refresh rates.
Weight: Heavier (≈4 lbs / 1.8 kg), but more versatile for gaming, AI, or workstation tasks.
What I Use on a Daily Basis-I work very long hours
So I do have a Ultra HD / 4K: 3840 × 2160 pixels and it has changed my life with no more headaches from long hours at my screen and always have night light on-if you do not know about this feature, press your windows key and type night and night light will generate–decrease the brightness to more muted colors and it takes out more blue light which reduces eye strain. But the 4k does that by itself, then the night light takes away brightness–I am very light sensitive so light in general causes my eyes pain which gives headaches (I no longer have that issue with the 4k.). I use my screen reader often–hence the needed power in general.
My PC Computer Specs Explained
CLX computers are made by CLX Gaming, which is a division of Cybertron International Inc., a long‑standing U.S. system integrator based in Wichita, Kansas and an incredible company to work with for any product they sell.
About CLX
Founded: January 29, 2016, as a brand under Cybertron International.
Focus: Custom gaming PCs, workstations, and desktops tailored for gamers, content creators, and professionals.
Specialty:
Fully customizable builds (CPU, GPU, RAM, cooling, case design).
Award‑winning custom paint and chassis designs.
Product families named after Egyptian mythology (Ra, Set, Scarab, Horus, Osiris, Anubis).
Support: Free lifetime technical support, up to 3 years parts warranty, and lifetime labor coverage.
Why CLX Stands Out and why I picked it–I could build exactly what I wanted and needed and their service support is exceptional in the industry as if or when you call, you get a person who knows anything you ask.
Customization: You can configure nearly every component, from Intel/AMD CPUs to NVIDIA/AMD GPUs.
Performance: Builds range from mid‑tier gaming rigs to extreme workstations with 64–128 GB RAM and multi‑GPU setups.
Design: Known for bold, artistic case designs and RGB lighting.
Reliability: As part of Cybertron International (established in 1997), CLX benefits from decades of PC integration experience.
Takeaway
CLX computers are custom‑built in the USA by CLX Gaming (Cybertron International), offering high‑performance, highly customizable systems for gamers and professionals who want both power and personalization.
The CLX is the Best machine I have every owned and then I go portable with my Surface Pro which is also exceptional for power and portability
This video takes you through setting up the Tiger 9 software from ViewPlus Technology for translating math equations into braille so you can emboss Math with Tiger. Dr. Robinson demonstrates how to access the Tiger ribbon, open her existing profile settings, and configure options like the braille type and math notation style. She also shows how to adjust ink settings if needed for embossing printed text alongside braille. Then she translates the math and gets it ready to emboss for student.
Tiger 9 Math Translation and Editing
Dr. Robinson demonstrates how to use Tiger 9, to translate math content in Word. She use a 40 cell FOCUS braille display but emphasizes the importance of using an 80-cell braille display if the student is going into math or STEM fields. Dr. Robinson also explains how to use the WORD math equation editor or Braille math editor on the Braille display to emboss Math with Tiger. She concludes by solving a right triangle problem using the math contents then embossing the math for hard copy if desired.
Emboss Work with Tiger 9 in WORD
Go onto learn how to emboss graphics in WORD using Tiger software also for students to feel all needed math symbols and pictures to learn on their own. Ideally, all students have embossers at home. ViewPlus embossers with software are fully accessible for all exclusive screen reader users.
Dr. Robinson demonstrates Tech Tricks on How to Properly Format a Paper. Such as how to correct formatting issues in a document, emphasizing the importance of proper indentation, font usage, and spacing. She also explains how to rebuild a normal template, adjust page views, and input a header correctly. Lastly, she discusses the process of correcting formatting issues in a document, particularly for works cited or reference pages, and stresses the importance of following specific requirements when formatting papers.
Step by Step directions on:
Properly Format of a Paper
When your word template is not adjusting or working the way it needs to, then rebuild it.
Delete Normal Template
Windows R and type %appdata%\Microsoft\Templates and enter.
Press N for normal and hit delete and get rid of it. Alt F4 and close
Go back to WORD
Rebuild the Normal template
Alt O then P to your paragraph spacing.
Alt F to “after” spacing and you will hear 8 pt, so type 0
tab once hit S for single spacing and make sure it is selected then tab.
save as default with Alt D then Alt A to save all documents based on the normal template.
Close dialog box
Now control D to your font dialog box and you can select any font that is required by APA or MLA, but we typically use Times New Roman so type Tim
Down arrow to Times New Roman
Tab twice and make sure the font size is 12.
Set default with Alt D then Alt A for all documents based on the normal template.
Close dialog box
Your WORD Template is now ready to go for a Properly Formatted Paper
If you have already written your paper, then open it up
select it all with ctrl A then ctrl C to copy it.
Alt Tab to the new WORD document and you will paste in using this option to get rid of all formats.
Alt H to home, V to paste and T to keep text only.
Ctrl A to select all and Ctrl 1 to truly make sure it is single spaced.
If you start a New writing assignment-keep it single spaced and then when done, do the following also. We are humans and make mistakes.
Control home to make sure you are at the top of the paper.
Down arrow one line at a time and listen for any line that says blank and backspace or delete and get rid of it.
You do not want any blank lines in this document because it is now single space. If you are just typing it out, do not hit enter twice but only when you begin a new paragraph
When you hear: Works Cited or References: press control enter to make a brand-new page to stand alone. Do this for all: Works Cited or References for a new page
When you get to the bottom of your References or if you are typing it out, then when at the end
control shift up arrow to select all your citations then do a Ctrl T for hanging indent which means the first line is the longest and every line thereafter will be indented ½ inch.
How to Properly Format a Paper
To Begin a Proper Paper or to Double check it
F12 to save as and name it properly and place it in proper folder:
Ctrl Shift N makes a new folder,
type the name of the class and enter to solidify name of class.
Then enter to open folder
Alt n to file name again to make sure it is correct. Retype if it changed.
Alt S to save it.
place paper there and all other drafts.
Enter into the header first (that is the white space of the margin) with Alt V, H
Insert your page number first:
Alt N to insert NU to number (listen for top of page and enter or right arrow to open)
down arrow to Plain number 3 which places your number on the right-hand side of your header and press enter.
Now type in your last name and press space to put a space between your last number and page number and hit escape to get out of your header.
Now type a proper heading:
Type your name and enter.
Type the professors or teachers’ name and enter.
Type the subject and enter.
insert the date the professor requires for either MLA or APA with Alt N, D, then down arrow to the proper format requested and enter and it will automatically insert into paper.
Now Check Format of Paper
control home
Make proper paragraphs.
Ctrl down arrow jumps you 1 paragraph at a time so tab 1 time and hear indent 1.5 inches. That means margin is 1 inch and indent is .5 inches.
Listen carefully and feel your display as when you ctrl down arrow and you see spaces then there is already a bad indent there so delete it until it is 1 inch which you can feel on your display also, then tab and hear 1.5 inches and continue. Be incredibly careful that you do not go into the works cited page so listen carefully and stop at the end of the paper.
When done with indents, Ctrl home.
control A to select the whole document and control 2 for double space.
Down arrow to your title and control E to center your title and make sure it is in title case. Insert f3 takes you through case formats so you do not need to retype.
Now control home once again and press F7 for the editor .
Your screen reader will tell you what percentage score you have, and you want to get it to 100 percent.
Tab once and make sure it says formal writing. You have three options under here, but formal writing is the default:
Tab to corrections and you hear spelling then down arrow to grammar and make sure those are down to zero when you are done.
Tab to refinements then down arrow through clarity, conciseness, formality, inclusiveness, punctuation conventions, resume, sensitivity geopolitical references and vocabulary.
Keep in mind if it starts selecting proper nouns you can always tab to ignore as you are going through your options.
When you lose focus of the editor or escape to jump back into paper to add or change paper details, just F7 to resume editor.
Tab To the next option of similarity and check for similarity to online sources (this is what your professor or teacher does to make sure you did not plagiarize. Make corrections as needed so you are not plagiarizing.
Tab to insights where document stats will be and enter.
This dialog box tells you what level you are writing at so if you need to write at a college level make sure you are writing at your grade level or above.
As you make all the corrections that the editor suggests it will immediately improve your scores.
If you check your paper and you accept improper formats or spelling, then do the following to tell the editor to recheck your paper.
Alt F to file and T to tools then P to proofreading:
First, Alt w to writing style and make sure you have the grammar and refinements option selected.
alt K to recheck your paper and enter to close, then F7 to recheck your paper again.
Continue Learning on how to Properly Format a Paper with:
Low-vision users enhance visibility and accessibility using tech tricks for screen scaling, mouse visibility, and reading tools. Immersive Reader in Microsoft Word, accessible from the View tab, adjusts text spacing, column width, and background color. UsersThese Low Vision Computer Tricks improve readability by customizing these settings to suit their visual needs efficiently. In Microsoft Edge, Immersive Reader activates on supported pages to simplify reading and navigation. These tools combine to provide low-vision users with a personalized, accessible digital experience.
Dr. Robinson teaches strategies to enhance accessibility using low-visionLow toolsVision Computer Tricks in Microsoft Word, Edge, and system settings. First, she demonstrates how to adjust display settings for optimized visibility using the Windows key. By typing “display,” users can access scaling options, which enlarge screen content for better readability. Additionally, increasing mouse pointer size and inverting its color improves navigation while reducing eye strain.
Next, in Microsoft Word, Dr. Robinson highlights Immersive Reader, available in the View tab, to enhance readability and adjust text settings. For instance, users can change font styles and sizes with Ctrl+A and Ctrl+Shift+> or Ctrl+Shift+< for better clarity. These Low Vision Computer Tricks include changing font styles and sizes with Ctrl+A and Ctrl+Shift+> or Ctrl+Shift+< for better clarity. Furthermore, the Line Focus feature reduces clutter by focusing on one or a few lines, aiding users with dyslexia. Moreover, Read Aloud, activated with Alt+Ctrl+Space, provides text-to-speech support with adjustable speed and voice options.
In Edge, pressing F9 activates Immersive Reader, which simplifies web pages by removing clutter for a cleaner reading experience. Users can also customize text preferences or enable Read Aloud for auditory assistance. These Low Vision Computer Tricks also include customizing text preferences or enabling Read Aloud for auditory assistance. Notably, Dr. Robinson recommends Edge for its built-in accessibility commands, though Chrome and Firefox offer similar tools.
Immersive reader for low vision
Finally, she emphasizes using Night Light mode to reduce blue light exposure and protect long-term eye health. These tools, combined with her strategies, empower low-vision users to navigate technology effectively.
Dr. Robinson emphasizes practical and efficient math strategies for visually impaired students using assistive technology. Moreover, she demonstrates accessible solutions that empower students to engage independently in math tasks. Some of the best tricks to learning math for visually impaired students include understanding how to use technology effectively. For example, she teaches the Word Math Editor, activated with Alt+Equals, which enables students to access and edit equations effectively. Furthermore, this tool allows students to calculate expressions, such as a circle’s area, using keyboard shortcuts for greater efficiency. In addition, she introduces the Braille Math Editor, which enhances accessibility and provides tactile support for understanding complex math concepts. Continue with Advanced Math with LaTex using Mathkicker.AI-Matrices also.
Dr. Robinson configures Braille displays and the Braille Math Editor to improve accessibility and clarity for students. Students solve problems efficiently by using built-in features like scientific calculators and shortcuts such as Ctrl+C and Ctrl+V.
Dr. Robinson demonstrates advanced techniques, including LaTeX for math notation and proper vinculum coverage in equations. She converts equations between professional and linear formats to ensure accuracy in math tasks. Knowing tricks to learning math, such as using LaTeX, can greatly benefit students. Add Tactile Math Tools for even better understanding.
She teaches code structures and tools to help students work independently with their peers during lessons. By optimizing settings and using shortcuts, students gain confidence and efficiency in solving complex math problems.
Dr. Robinson ensures students participate fully in math classes and achieve academic success. Her methods, which include easy ways to learn math, integrate the latest assistive technologies to empower visually impaired students in STEM fields.
Decrease Eye Strain and See Your Computer More Easily
Blue light emitted from computer screens can be harmful to your eyes over time, contributing to digital eye strain, disrupted sleep patterns, and even long-term vision damage. For those with low vision, the strain caused by blue light can make using a computer even more challenging. In this post, I will guide you through simple adjustments to your computer settings that will not only help reduce blue light exposure but also make your screen and browser easier to view, enhancing your overall comfort and visual experience with Blue Light Low Vision Tech Tricks.
Blue light from electronic devices can cause a number of issues, including:
Eye strain
Blue light from screens can reduce contrast, leading to eye strain, dry eyes, and fatigue.
Retinal damage
Long-term exposure to blue light can damage retinal cells, which can lead to vision problems like age-related macular degeneration.
Sleep disruption
Exposure to blue light before bed can affect the body’s production of melatonin, which can disrupt sleep patterns.
Other health issues
Research suggests that exposure to blue light may contribute to cancer, diabetes, heart disease, and obesity.
Blue light gone for easy reading with low vision Tech Tricks in a Browser
Use blue light-blocking glasses or filters on your devices
Adjust your display settings
Follow the 20/20/20 rule: every 20 minutes, focus on an object about 20 feet away for at least 20 seconds
Get regular eye exams
Constant exposure to blue light over time could damage retinal cells and cause vision problems such as age-related macular degeneration. It can also contribute to cataracts, eye cancer and growths on the clear covering over the white part of the eye.
Change the setup of your computer and save your VISION!
Digital Math in WORD and Braille Math Editor for Nemeth or UEB Input/Output via MathCat with JAWS or NVDA. This lesson empowers you to learn skills for teaching yourself and others Nemeth or UEB math. By incorporating Math AI, you can transform inaccessible math images into usable formats in just seconds, significantly speeding up the learning process compared to transcribing character by character. While the video covers some essential skills, the following links provide comprehensive lesson details from the Digital Math in WORD Video.
MathCat with JAWS or NVDA
Learning how to teach or learn Nemeth math using assistive technology can seem challenging, but with the right tools and approach, it becomes manageable and effective. Whether you’re a parent helping your child, an educator supporting students, or an independent learner, using a Focus 40 Braille Display and JAWS screen reader provides an accessible way to master Nemeth code. In this guide, I will walk you through setting up your technology and using the Braille Math Editor to confidently teach and learn math concepts from basic arithmetic to advanced algebra. Let’s simplify the process and enhance your skills.
Setup your computer to work the best with Screen readers and Digital Math in WORD
Before beginning the challenge of learning Nemeth or UEB with screen readers, make sure you Optimize your Windows 11 computer for Efficiency with Screen Readers with Key Settings and Configurations. Optimizing Windows 11 Efficiency for Screen Reader with Key Settings and Configurations takes an hour most often 2 or so to complete. Longer if you are new to screen reader and how Windows 11 works. It is different than other OS systems so give yourself grace as you learn all there is to know about this system. As you move through your keyboard and discover you would like a particular key somewhere, like the applications key, you can remap a key to create that yourself. AND, you MUST have Local Admin on School Computers.
Mathkicker.AI
Mathkicker for digital math access with Jaws or NVDA-Login Page
Keith Bundy, a blind baseball announcer, shared his journey of overcoming obstacles to live his dream as a sports announcer. Mr. Bundy, blind since childhood, longed to play sports but lacked opportunities in Southern Indiana. Listening to baseball broadcasts fueled his dream. In 2001, he received an invitation to announce an American Legion Baseball game. With family support and a refreshable braille display, Bundy began announcing for teams semi-professionally.
On August 29th and 30th, significant events took place in Madison, South Dakota. The Dakota State University Trojans and the Madison Bulldogs both won their first games in their new stadiums. However, a less noticed but equally significant event occurred on August 29th. Keith Bundy, who grew up blind in Southern Indiana, fulfilled a lifelong dream by becoming an announcer in stadiums. It was a monumental day for Blind Baseball Announcer Keith Bundy.
Growing up, Keith was passionate about sports but couldn’t participate due to his blindness. He spent many nights listening to baseball broadcasts and dreaming of being part of a team. In 2001, a chance opportunity to announce an American Legion Baseball game changed his life. With the support of his family and the use of assistive technology like a refreshable braille display, Keith began announcing baseball games. Over the years, he announced for various teams, including Dakota State University and the Madison Broncos.
Blind baseball announcer Keith reading stats from braille display
Keith is FIRST person to in new stadium
On August 29th, Keith became the first person to announce an event in the new stadium, a moment he described as humbling and significant. He emphasized that blindness is not an insurmountable obstacle and credited his success to the right circumstances, a strong work ethic, and the support of many people, including his wife Peggy and his friend Tom Frel. Blind Baseball Announcer Keith Bundy has shown that anything is possible with the right support.
Keith’s story is a testament to perseverance and proper education. Most of all, the power of community support in achieving one’s dreams.
Blind individuals, with the right instruction and tools, can achieve their dreams just like anyone else. By learning essential skills, such as using assistive technology, braille, or orientation and mobility training, they can overcome obstacles that once seemed insurmountable. With guidance tailored to their needs, they gain confidence, independence, and the ability to pursue passions, whether in academics, sports, or careers. By embracing the right resources and support, blind people can turn their dreams into reality and thrive in any field they choose.
More options for JUST auditory learners or braille learners and taking totally inaccessible images of WORD and making them accessible using Mathkicker.AI.
Access Technology Training Lessons provide detailed instruction to enhance your skills.
TechVision provides direct, remote training to students and clients around the world. We teach exactly what each learner needs so they can access the same work as their peers. Additionally, we focus on real assignments, real deadlines, and real expectations from school, work, or rehabilitation programs.
We tailor every lesson to the student’s current tasks and long‑term goals. This individualized approach builds confidence, independence, and strong academic performance. Furthermore, we write IEP goals directly related to each student’s needs, ensuring progress, and school expectations align per grade level and skill.
Students learn to use screen readers, braille displays, and other access technologies to complete the same documents, graphs, tests, and projects as their classmates. This targeted training prepares students for success in school, work, and daily life. Additionally, many TechVision Specialists are blind themselves and provide authentic guidance that strengthens student independence. In addition to being incredible mentors.
Remote teaching with Access Training Teacher
In addition to live remote lessons, learners, families, and educators can continue building skills through yourtechvision.com and our YouTube Channel. These videos demonstrate access technology in action and allow people to review, practice, and learn at their own pace. Moreover, districts, rehab centers, and private clients often combine direct training with these resources for ongoing support.
TechVision Access Training Instruction Model
TechVision’s model blends real‑time, one‑on‑one teaching with on‑demand video lessons. This combination ensures students can meet immediate expectations and continue growing independently over time. Ultimately, our goal is equal access to education, work, and life through practical, powerful training using access technology.
TechVision’s empowers lifelong learning and independence.Additionally, our YouTube Channel and website offer ongoing access to essential skills and demonstrations.
Optimizing Windows 11 Efficiency for Screen Reader with Key Settings and Configurations takes an hour most often 2 or so to complete. Longer if you are new to screen reader and how Windows 11 works. It is different than other OS systems so give yourself grace as you learn all there is to know about this system. As you move through your keyboard and discover you would like a particular key somewhere, like the applications key, you can remap a key to create that yourself. AND, you MUST have Local Admin on School Computers.
How to setup Computer for Optimizing Windows 11 Efficiency
Change Taskbar Settings
Update Computer every day
Go to task manager and disable anything you do not need at start up
Go to Power Options and change from Sleep to Shut Down when you press Shut down button
take off sleep options in general unless you are advanced user
Keep in mind that your screen reader cannot reset or the RAM clear if you computer is in sleep mode or hibernate mode
Turn off Touch pad- if you do not your palm will touch the mouse pad and auto activate items or move your cursor on your computer. This equals huge frustration to a screen reader user.
Windows T and clear that taskbar–this is million dollar real-estate to access programs fast
Setup WORD
Go to control panel and setup Sound card options
Windows and adjust other sound options using sndvol.exe
Setup Gmail and Drive and learn new commands
Setup Outlook
Taskbar setting for Windows 11 setup
Efficiency for Screen Readers and other Setup Skills
Proper Set up Windows 11 to work with screen readers and braille displays is crucial for visually impaired users. This configuration ensures smooth interaction with the system, giving users full access to information and applications such as Gmail for optimizing access..
1. Accessibility and Independence
Configuring Windows 11 for screen readers like JAWS, NVDA, or Narrator, and integrating braille displays, provides full independence. Without proper setup, tasks such as reading documents, browsing, or using software become challenging. A well-configured system ensures all functions are accessible.
2. Productivity and Efficiency
Screen readers and braille displays let users interact quickly with the system. Setting up Windows 11 for compatibility speeds up responses to commands. It also ensures smoother transitions between applications, making multitasking more efficient. Proper configuration prevents lag or software conflicts, which increases productivity in school and work settings.
3. Customization for Personalized Needs
Each user has different needs. Windows 11 allows users to customize screen reader settings (e.g., speech rate, verbosity, and key commands) and braille displays (e.g., output type and formatting). These adjustments create a personalized experience, improving comfort and reducing frustration.
4. Enhanced Braille Support
Windows 11 offers enhanced braille support when paired with leading screen readers. Proper setup lets users access seamless braille input and output for text and math. It also allows advanced navigation of documents. Correct braille display configuration ensures accurate reading and editing of both simple text and more complex content.
5. Compatibility with Updates
As Windows 11 updates, keeping screen readers and braille displays integrated is essential. A well-maintained setup ensures new features or security updates don’t disrupt accessibility tools. This is vital for maintaining ongoing access such as the new Google Commands for navigation.
Key Setup Steps for Optimizing Windows 11 for Accessibility:
Ensure Compatibility: Install the latest versions of screen readers and braille display drivers compatible with Windows 11.
Enable and Configure Narrator: Windows 11 includes Narrator, which can be set up for basic tasks if needed.
Customize Keyboard Shortcuts: Set up shortcuts for easier navigation and quicker interaction.
Adjust Accessibility Settings: Go to “Accessibility” in the Settings app to adjust visual and audio cues like contrast and text size.
Test with Braille Displays: Pair and calibrate braille displays for reading and input in UEB or Nemeth, depending on preferences.
With proper set up, Windows 11 for screen readers and braille displays furthers accessibility. This setup enhances independence, productivity, and ease of use in the digital world.
TechVision Access Instruction is the TechVision Difference. Dr. Robinson and her Tech Vision team provide one-on-one and school team remote instruction for visually impaired individuals in real time. They enhance technology skills for students, adults, and groups by teaching them to use assistive technologies like PC computers, screen readers (JAWS, NVDA, Narrator), and Braille displays. This approach ensures students complete their work alongside peers without needing extra time
TechVision Access Instruction aims to transform education for the blind and visually impaired. They combine the right technology with effective instruction. They offer teaching internships to advanced students, providing hands-on job skills that enhance resumes for future employment or college applications. Their goal is to empower visually impaired individuals to achieve their full potential and navigate the world confidently.
TechVision Website
Our Mission and Purpose is enable blind and visually impaired students the ability to access and complete work as their sighted peers. This requires, screen readers, braille displays and other access technology.
Technology that gives you VISION with Access Instruction
The TechVision mission and purpose, led by Dr. Robinson and her highly skilled TechVision Specialists, are to change lives via instruction in access technology, enabling inclusion and educational equality.
The TechVision Specialists are uniquely skilled in teaching blind and low vision students. They focus on direct instruction on all technology like computers(requires Local Admin Access), screen readers, Braille displays, and smartphones. This approach has revolutionized the educational experience for blind and low vision students and clientele. Their expertise and global reach have significantly impacted students. They empower students to access information and navigate the world on an equal footing with sighted peers.
Additionally, TechVision collaborates with school districts and private entities to address the evolving needs of education. This collaboration promotes independence and inclusion in both classrooms and the job market. By equipping students with essential skills, TechVision creates an environment of true equality. As a result, opportunities become accessible to everyone, regardless of visual impairment.
TechVision specializes in teaching all subjects, especially advanced mathematics, to blind and visually impaired students. This enables them to succeed academically. Many of these students pursue majors in Applied Mathematics at prestigious institutions, including Harvard University. They use innovative methods to ensure blind and low vision students perform at the same high level as their sighted peers.
Integration
Additionally, TechVision integrates tools like Artificial Intelligence (AI), word processors, screen readers, and Braille displays to support student success. These tools allow visually impaired students to produce work comparable to their classmates. Consequently, this promotes integration and equal opportunities in academic environments: Even to the point that you can Make an Electronic Signature -Then insert it into a Document.
In this tutorial, Dr. Denise M. Robinson shows how to use JAWS with Braille Math and Word Math Editors. This video on UEB Math with JAWS empowers blind and visually impaired students and professionals. It provides tools and techniques to excel in mathematics. Set up WORD properly first, then continue.
UEB Math in Braille Math Editor
First, the tutorial introduces essential software and hardware. This includes JAWS, a Focus Braille Display, or NVDA and the necessary math editors. Dr. Robinson guides viewers through the setup process. She ensures all components are correctly configured for optimal performance.
Next, the video explores the practical application of these tools. Viewers learn to input mathematical expressions using the Braille Math Editor. They navigate complex equations and use the split-braille-for-buffer mode to enhance workflow. Dr. Robinson offers clear, step-by-step instructions. This makes it easy for users to follow along and practice.
By the end of this tutorial, UEB math in braille math editor viewers understand how to use JAWS and Braille Math Editors efficiently. They can create, edit, and review UEB math content. This video is an invaluable resource. It helps enhance digital math literacy and achieve greater independence in academic or professional pursuits.
In this video, Dr. Denise M. Robinson demonstrates how to use the WORD Math Editor and Braille Math Editor with JAWS using LaTeX or Braille. This tutorial is designed for screen reader users, with or without braille displays, who want to improve their math skills.
First, Dr. Robinson introduces the essential tools for using matrices in WORD, including JAWS, a Braille display (if desired), and the WORD Math Editor. She explains how to set up each tool to work together smoothly, which is crucial for creating and editing math content.
Next, the video focuses on creating matrices. Dr. Robinson uses LaTeX to input mathematical expressions. She explains each step clearly, making it easy to follow along. Viewers will learn how to enter rows and columns in a matrix, helping them understand matrix structure.
Then, Dr. Robinson demonstrates how to use auditory feedback, which allows users to hear the math content they are working on. This feature helps ensure accuracy and makes it easier to catch mistakes. Additionally, she shows how to switch between auditory and Braille feedback, providing flexibility for different learning styles.
The video also covers using the Braille display with the math editors. Dr. Robinson explains how to navigate through the matrix using Braille and provides tips on reading and editing the content efficiently. This section is particularly helpful for users who rely on Braille for their work.
Finally, the tutorial concludes with a review of the key points. Dr. Robinson summarizes the steps for creating and editing matrices. She encourages viewers to practice using the tools and techniques demonstrated in the video. By the end of the tutorial, users will feel more confident in their ability to work with math content.
In this video, Dr. Denise M. Robinson demonstrates how to use the WORD Math Editor and Braille Math Editor with UEB and NVDA. The tutorial, focused on Digital Math with UEB, is specifically designed for screen reader users, with or without braille displays, who want to improve their math skills.
First, Dr. Robinson introduces the essential tools needed for using matrices in WORD using UEB Math. These include NVDA though Jaws can be used, a Braille display (if desired), and the WORD Math Editor. She carefully explains how to set up each tool to work seamlessly together. This setup is crucial for creating and editing math content efficiently.
Next, Dr. Robinson focuses on creating matrices using LaTeX. She walks viewers through each step, making it easy to follow along. The video shows how to enter rows and columns in a matrix, helping users understand the structure of matrices. Dr. Robinson’s clear explanations ensure that even complex steps are understandable.
The video then demonstrates how to use auditory feedback with the math editors. Dr. Robinson shows how users can hear the math content they are working on. This feature helps in catching mistakes and ensuring accuracy. Additionally, she explains how to switch between auditory and Braille feedback. This flexibility is particularly useful for different learning styles and preferences.
Dr. Robinson also covers how to navigate through the matrix using a Braille display if desired. She offers practical tips on reading and editing the content efficiently. This section is especially beneficial for those who rely on Braille for their work.
Finally, the video concludes with a summary of the key points of working in WORD using UEB Math. Dr. Robinson encourages viewers to practice the tools and techniques demonstrated in the video. By the end, users will feel more confident in their ability to create and edit math content using JAWS and the WORD Math Editor
Dr. Robinson guides users through setting up Braille mode via Default profile by typing it in the edit box. She types “Braille Mode” in the search box, and F6 to access different settings. She uses “F6” to navigate to the desired options, then “Alt + F” to select language profiles. To access MathCat option via alt D to details then tab to Nemeth and change to MathCat then OK.
Dr. Robinson explains how to select the correct Braille code, such as UEB math with JAWS or Nemeth code. She walks through the process of applying these settings and closing the settings dialog.
Once set up, Dr. Robinson demonstrates how to solve math problems using JAWS in Word. Dr Robinson explains the process of entering equations using “Alt + Equals” to open the math editor. She highlights how to type out equations, like “X squared plus 3 equals 11.” Then how to navigate through the math content using keyboard commands.
She also explains complex math using UEB Math with Jaws, such as using square roots and other mathematical symbols, by using Unicode and LaTeX commands. Dr. Robinson shows the equation tools in Word by pressing “Alt + J” E to equation menu. Then explains how to convert equations between professional and linear formats using “Alt + JE + C.”
Throughout the tutorial, Dr. Robinson ensures users understand the commands necessary for navigating and editing math content effectively. She also provides troubleshooting tips, such as using the Math Viewer with insert space + = . This gives more detailed navigation of hearing each symbol, particularly useful for more complex equations.
Dr. Robinson concludes by encouraging users to explore more advanced math problems and settings. This ensures that they can confidently use JAWS for UEB math in various applications. If you experience computer issues in general, set it up to work the most efficiently with screen readers.
Kim began as a young student with TechVision. Her mother sought help and discovered that we provide real-time instruction using everyday technology essential for future job success. TechVision worked with Kim several days a week, ensuring continuous learning and growth. She used a PC with access technology to access her school platform and all else, including a Computer Enabled access with screen readers and a braille display, to access her world and education. Over time, she transformed from a struggling blind student, reliant on constant para and teacher support, to an independent learner working on her own. This is her story, please listen.
For Kim, moving from depending on others for her education to becoming independent changed everything. With TechVision’s hands-on, real-time learning, she learned to use screen readers and a braille display, which let her access schoolwork by herself. Instead of always needing help from a para or teacher, Kim could now complete her assignments on her own, just like her classmates. This gave her confidence and made her feel more in control of her education. Being able to work independently helped her stay on track with her peers and prepared her for future success. A Computer Enabled access to change her life.
Dr. Robinson demonstrates how to complete multi-level math in WORD using Braille Math Editor with JAWS. She used an algebra problem as an example. She explains that this method applies to several types of math problems. First, she highlights how transcriptionists or students can prepare algebra equations using the Alt + Equals command to insert math symbols directly in Word. Once the equation is ready, the blind student can easily solve it using a Focus 40 Braille display.
Dr. Robinson shows how students can work within the Braille Math Editor. By pressing Insert + Space followed by Shift + Equals, the editor opens, and the math problem appears ready for solving. She mentions that students can choose between Nemeth code or Computer Braille, depending on their preference. Both modes allow for precise calculations and input, enabling them to complete multi-level math problems efficiently across multiple levels.
As the student works through the problem, they can use Braille commands like 4-5-6 Space to navigate to the end of the problem and add a dot 6 for separating steps with commas. This method keeps the equation organized, allowing the student to solve the problem in multiple lines, just as their sighted peers would. By checking the Braille display frequently, students ensure accuracy while solving multi-level math equations and maintaining neatness.
Finalizing and Reviewing Work to complete multi-level math
Once the math is complete, the student hits Enter to insert the solution into Microsoft Word. Dr. Robinson uses Ctrl + L to align the text to the left after confirming correct spacing and formatting. She resolves errors, such as unnecessary commas or misalignments, by reviewing each line. Editing line by line ensures the final product is both clean and accurate. The process concludes with a perfectly formatted, multi-level math solution, efficiently done using the Braille Math Editor, thus completing the task effectively.
This setup provides blind students with the tools to complete complex multi-level math work just like their peers, ensuring accessibility and ease in academic settings. More math lessons here.
Strong touch typing skills create independence, speed, and confidence for blind and low vision students using screen readers, braille displays, or electronic braillers. Early instruction helps students build muscle memory, accuracy, and efficient keyboarding habits that support reading, writing, research, and future employment.
Students should:
Learn correct finger placement
Keep wrists relaxed and posture aligned
Use all fingers consistently
Focus on accuracy before speed
Practice daily using structured lessons
Websites such as TypingClub.com can support additional practice, but direct instruction and proper technique remain critical for long-term success.
Mikaela’s Story
Mikaela moved to my district in 2nd grade when I was Miss Mehlenbacher. My students always enjoyed racing to spell my last name the fastest, and Mikaela always won.
We immediately began intensive technology instruction, including touch typing and keyboarding skills. The video above shows Mikaela typing on her laptop just five months later.
Many of the photos and videos on this website were taken between 2000–2010, so image quality may appear blurry due to older camera technology.
Typing with 3 Fingers on her laptop is made easier with practice.
A child with three fingers can type at over 77 words per minute by using adaptive strategies to access the same technology. Kaleigh is JUST learning the first steps in typing on a regular laptop.
Typing with 3 Fingers
First, they learn how to optimize their finger movements, reducing unnecessary motion. They focus on accuracy and gradually build speed through consistent practice. Children can learn to use the identical keyboard and computers as their peers. Using the center of the keyboard as positioning to the rest of the keyboard is part of the skill. The child practices finger coordination, mastering a rhythm that increases typing speed. Over time, these techniques combine to enable the child to exceed expectations and type as quickly as possible. More YouTube Channel Lessons
Other Kaleigh Videos typing as she advances to typing over 77 words per minute
Access Braille Writing and PC Devices: The year is 2000 and I am blessed with meeting 3 siblings in a family of 8. I first met the oldest daughter who was in 2nd grade grade and her sister who was in preschool. Their young brother, was just born. All 3 have a VERY rare condition called: Spondylometaphyseal dysplasia with cone rod dystrophy. This was an exciting journey with all 3. All 3 live very successful lives now.
Early Education Leads to Access Braille Writing Devices
Starting at 3 months old: First, always teach the parents right along with the child–Teamwork is key! One crucial step was ensuring he could eventually access Braille writing devices to aid in his learning journey. Teach fun games on a computer as they learn like Starfall games and Inclusive Multi-Sensory Learning Tools. If you sense a visual impairment and glasses need to be work, try: Kids Bright Eye glasses or Eye patches
Pre-teaching a blind child from an early age involves fostering foundational skills that support sensory development, spatial awareness, and independence. Here’s how you can engage with a blind child from 3 months old to 3 years old and up to 3rd Grade, ensuring they develop crucial abilities at each stage:
At 3 Months Old in general:
At this stage, it’s all about sensory exploration and exposure. A blind infant learns through touch, sound, and smell. Parents and caregivers can begin pre-teaching through activities that engage the child’s remaining senses.
Tactile Exploration: Provide different textures for the baby to feel, such as soft cloth, textured toys, and various materials. This helps them develop an understanding of their environment through touch.
Auditory Stimulation: Introduce the baby to a variety of sounds, from gentle music to the sound of voices and everyday noises. Toys that make sounds or produce vibrations can also help the child associate movements with sounds.
Bonding with Language: Talk to the baby constantly, explaining what’s happening around them. Even at this age, exposing them to language and verbal interaction is key for cognitive development.
At 1 Year Old:
By the time the child is 1 year old, they are starting to gain more control over their movements and understand their surroundings through tactile and auditory feedback. The focus at this age is on expanding their sensory awareness and motor skills.
Mobility Encouragement: Support the child as they begin to crawl or walk. Encourage them to explore safe spaces, ensuring the environment is designed for them to navigate without harm.
Hands-on Learning: Let the child interact with everyday objects, describing what they are holding. This could include toys, household items, or safe objects they encounter daily.
Cane-have a cane around his/her toys so they get acquainted with the tool
Language Development: Continue talking to the child, narrating actions and surroundings. Introduce basic concepts like hot/cold, soft/hard, and big/small, as this builds vocabulary and concept understanding. Have them touch everything, giving purpose to what they interact with always.
A 4-year-old uses the Mountbatten, and a 2nd grader uses the Braille Lite with a Braille display to access Braille writing devices.
At 3 Years Old Access Braille writing devices and start typing on computer:
At 3 years old, the blind child is ready to begin more structured learning and independent exploration. Pre-teaching during this period focuses on more complex tasks, building independence, and preparing for future skills. Begin touch-typing on keyboard of computer and using other braille devices like the MouthBatten Brailler. This student learned all of the alphabet and several contractions.
Orientation and Mobility: Begin teaching basic orientation and mobility skills, using a cane for navigation. This will help the child build confidence in moving through space.
Fine Motor Skills: Encourage fine motor development through activities like threading beads, playing with textured blocks, or using simple tactile puzzles. This helps the child develop dexterity and hand-eye coordination.
Pre-Braille Exposure: Introduce early Braille awareness through tactile games or exposure to raised dots or objects. As they may not be ready to fully learn Braille, familiarization with textures and symbols helps lay the foundation for literacy. This includes touch typing on keyboard using braille on braille device like a Mouthbatten Brailler
Self-Care Skills: Teach simple self-care tasks like washing hands, dressing, and feeding themselves. These activities foster independence and help them gain confidence in daily living skills.
By consistently engaging the child’s senses and nurturing their curiosity, they will develop essential skills for future success. With each stage of growth, pre-teaching ensures they build a strong foundation. This approach prepares the child to easily learn more complex skills later, such as reading Braille, using assistive technology and navigating the world independently.
Continuing to teach a blind child in kindergarten through 2nd grade involves focusing on expanding their academic, social, and independence skills, while incorporating accessible tools and adaptive techniques. Here’s how you can approach teaching at each stage:
Kindergarten (K)-Access writing PC computers:
In kindergarten, the focus is on introducing basic academic concepts while fostering independence and confidence in social situations. This student was able to begin reading braille like his peers due to already knowing braille letters and symbols. He also know the keys on the computer to begin learning how to type out work to email to teacher. Teach how accessible Work is needed, including Math for now and later on.
Braille Literacy: Begin formal Braille instruction, introducing letters, numbers, and simple words. Use tactile books, raised alphabet cards, and manipulative’s to enhance literacy.
Orientation and Mobility: Continue reinforcing basic mobility skills such as using a cane and navigating familiar spaces like classrooms and playgrounds.
Interactive Learning: Incorporate multi-sensory learning activities, such as counting objects with tactile number lines and participating in songs or rhymes for phonics and vocabulary.
Technology Introduction: Introduce basic assistive technology, such as a Mountbatten Brailler or screen reader software, to support early writing and computer skills.
First Grade (1st Grade):
In first grade, the child should begin building on the foundations laid in kindergarten, focusing on more advanced academic and mobility skills.
Braille Proficiency: Increase fluency in Braille reading and writing. Introduce more complex words, sentences, and basic punctuation. Begin incorporating Braille reading into classroom activities.
Math Skills: Teach basic math concepts using tactile math tools like counting beads, tactile number lines, and raised math grids. Introduce early Nemeth Code for math symbols in Braille.
Social Integration: Encourage social interactions and group activities, teaching the child to collaborate with peers and practice conversational skills.
Assistive Technology Growth: Begin integrating more advanced technology, such as screen readers (e.g., JAWS or NVDA) and tactile graphics for learning new concepts.
Second Grade (2nd Grade):
By second grade, the goal is to strengthen the child’s academic abilities while fostering greater independence. His sisters immediately picked up keyboarding and were handing in all work within 2 months to teachers via email. They learned Braille reading
Advanced Braille: Continue advancing Braille reading and writing skills, incorporating full sentences and paragraphs. Increase reading speed and comprehension through practice. Teach how to braille or keyboard work on PC computer.
Math in Braille: Build on basic math skills, using tactile tools to teach addition, subtraction, and early multiplication. Enhance familiarity with the Nemeth Code for math. Teach how to output math on the computer using WORD
Independent Learning: Encourage more independent work by providing opportunities to complete assignments using accessible technology. Allow the child to practice retrieving and saving work on a computer or braille device.
Orientation and Mobility: Further develop mobility skills by teaching navigation in unfamiliar environments. Practicing independent travel in controlled settings, such as the school campus or nearby park is essential.
Assistive Technology Growth: Continue integrating more advanced technology, with screen readers (e.g., JAWS or NVDA) so they can advance om speed to keep up with outputting work with their peers.
Throughout kindergarten through 2nd grade, regular collaboration with teachers, mobility instructors, and other specialists is essential. Tailor instruction to the child’s progress and ensure their curriculum is fully accessible to set them up for long-term success. This type of collaboration must continue throughout school to Access Braille writing devices and PC Computers.
Computer Local Admin access is Crucial at all education levels. Dr. Robinson, an Assistive Technology and IT specialist, sets up, maintains, and controls all the computers used in TechVision programs while TechVision Team continues teaching students to manage their own technology. She emphasizes the importance of blind students having local admin access on their school computers so they can make necessary updates and changes to their laptops as needed.
Firstly, she highlights that anti-virus software like Kaspersky or Sophos often interferes with screen readers. Instead, Dr. Robinson recommends using Malwarebytes with Microsoft Defender, as it provides strong protection without disrupting screen reader functionality. Having Computer Local Admin access ensures students can implement these software changes.
Dr. Robinson also explains the need for screen readers such as JAWS. Schools often filter out essential websites and programs like Freedom Scientific, which students require for their studies. With local admin access, students can update their screen readers and related software, which is necessary to keep their devices running smoothly. These updates are crucial and happen every few months. Computer Local Admin access allows students to manage these updates efficiently.
In addition, students must manage their desktops efficiently. They need to pin important programs, such as JAWS, to the taskbar for quick access and adjust their settings without assistance. Pinning their school sites to the desktop make quick access to any site. Through the context menu, students can navigate and personalize their desktop to meet their needs.
Computer Local Admin access to Applications Key on desktop to access anything on the computer
The run dialog box is another essential tool with CTRL+R. Students need to clear temporary files, which can slow down screen readers. Since screen readers are memory-intensive, removing these files improves both the computer’s speed and network performance. Computer Local Admin access is required for these maintenance tasks.
Dr. Robinson further emphasizes the importance of Office 365, especially for math tasks. Using the math editor, students can create and solve equations that read seamlessly on a braille display. This access is crucial for academic success, particularly in STEM subjects.
Lastly, Dr. Robinson stresses the necessity of file explorer -Windows+E and Bluetooth settings. Without a mouse, blind students rely on file explorer to organize their files. Bluetooth access is also essential for reconnecting braille displays and other devices.
In summary, Dr. Robinson believes local admin rights are essential for blind students to manage their technology independently, keep their devices updated, and fully engage in their education. This allows them full access for a lifetime. The TechVision Team ensures students learn essential skills to manage and update their devices independently, preparing them for a lifetime of technological adaptation. As technology evolves, these skills are crucial. Computer Local Admin access is vital for securing and maintaining employment so they know the updates needed, in an increasingly digital world.
Math for all ages, Math Team, Dr. Robinson, along with Professor Betsey, Campbell Rutherford (teacher intern), led the session. Nate Kile (Access Tech Specialist) was the moderator. Math Team emphasized the importance of ensuring blind students can access their technology independently and efficiently. Nate Kile assisted by handling participant questions during the presentation, allowing attendees to type inquiries in the Zoom chat box. Mr Kile would ask the Math Team from the virtual attendees.
Each presenter built on the others’ lessons. Dr. Robinson began with elementary math training skills and how JAWS and other assistive technologies play crucial roles in blind students’ education. Teaching math for all ages, she typed out typically math problems in elementary school to show audience how easily math is completed in WORD. Nate provided opportunities for participants to unmute themselves using Alt + A or Alt + M to ask questions.
Math for all Ages: Dr Robinson
The Math Team turned off their videos to optimize bandwidth. When teaching virtually, turning off video offers better bandwidth for a flow of uninterrupted instruction. Dr. Robinson started the discussion by running JAWS, a screen reader. She explained how to troubleshoot JAWS issues, recommending minimizing programs and restarting the software for optimal performance.
The session highlighted key JAWS commands, such as Windows + D for quick access to the desktop. Dr. Robinson demonstrated how blind students could use Braille displays for math, including Nemeth code. She showed how blind students control their computers by personalizing settings like screen readers and Bluetooth. Customizing the setup is essential for supporting math learning at all ages.
Math for all ages math formulas in Word
Math for all Ages: Professor Betsey
Professor Betsey demonstrated how to effectively use Braille displays, including advanced setups for students. She went into MathType and LaTex and how to use advanced Math techniques to accomplish all math levels. She emphasized the importance of maintaining accessibility and autonomy for students through personalized settings. As a college-level math professor, she explains that using a PC for math enables full inclusion of blind students. Prof. Betsey emphasizes that this technology allows blind students to participate equally in all aspects of their education. This approach supports the goal of providing math for all ages.
Math for all Ages: Campbell
Campbell Rutherford, a teacher intern, demonstrated how to integrate graphing and mathematical functions using accessible technology for blind students. Campbell began by demonstrating how to write a function in Word using LaTeX. She then transitioned to graphing that function in Desmos, an online graphing calculator. Using her braille display and screen reader, she input and analyzed the graph. Campbell explained how blind students can explore mathematical properties like intercepts and undefined points. After reviewing the graph, she took a screenshot and pasted it into a Word document. This tied together the written mathematical properties and the visual representation. Throughout, Campbell stressed the importance of accessible math for students of all ages.
Throughout the session, the Math Team emphasized the importance of managing constant software updates. They explained how providing local admin rights empowers students to update their programs and devices independently. This in-turn prepares them for both academic success and future employment. The TechVision team’s approach ensures that students can fully access their education and maintain control of their technology. This ultimately sets them up for long-term success but especially the STEM field. More Math Lessons here:
Emery, a blind ninth-grader at Kalaheo, introduces herself and shares her love for math and technology. She uses a computer with a screen reader and Braille display to access her education. Eme navigates her world with a cane and texts friends using her phone. During the pandemic, her computer became essential for schoolwork. She explains how she uses various tools to access her education, including JAWS screen reader and Braille Display and other access technology. Eme highlights the importance of accessible assignments and demonstrates navigating an online platform despite its challenges. Accessible work at school is critical for her success.
Emery uses tools like the JAWS screen reader and Braille display connected to her computer to navigate her studies. She emphasizes that accessible assignments are crucial because they allow her to engage with the same content as her peers. When assignments are not accessible, it creates significant barriers to her learning. It is evident that accessible work at school can make a big difference.
Eme Making Work accessible on an inaccessible site
By ensuring Teachers’ work is accessible, you empower students like Emery to succeed and participate fully in their education. Accessible materials foster a learning environment where all students can be included and thrive. Therefore, focusing on making work accessible at school helps all students.
She thanks teachers for their commitment to making education accessible for everyone. Providing accessible work at school shows dedication to inclusion and highlights the importance of accessibility.
Dr. Denise M. Robinson’s TechVision YouTube channel Lessons, @DrDeniseMRobinsontech, features a wide range of content. TechVision YouTube channel focuses on assistive technology, blind skills, accessibility and access to the World of information. The channel offers tutorials, guides, and resources for blind and low-vision individuals, educators, and parents. The channel covers topics like using screen readers, braille technology, and software such as JAWS and NVDA. Additionally, it provides practical tips for navigating various digital tools and environments. Dr. Robinson’s videos aim to empower viewers by providing them with the knowledge and skills needed to achieve independence in both educational and everyday tasks. Whether you’re learning skills or teaching them, this site supports your success effectively.
TechVision YouTube Channel Lessons
Access Blind and Low Vision education through hundreds of lesson videos covering all subjects and tools. Learn to use screen readers, braille displays, and other resources to enhance your education and life. Access Blind Low Vision Education @ TechVision YouTube Channel@DrDeniseMRobinsontech
To Navigate Schoology with Jaws is easy using these useful keyboard commands for navigation. When you’re using a screen reader like JAWS or NVDA it is very accessible. Kim demonstrates her skills, showing how to navigate schoology with efficiency. She shares with others how this training has allowed her to access her education.
Use the arrow keys to navigate to the desired course and press Enter.
Access Course Materials:
Press H to navigate through headings until you reach the course materials section.
Use the arrow keys to select the material you want to access.
Navigate to Assignments:
Press Insert + F6 to bring up the headings list.
Use the arrow keys to find and select the “Assignments” heading.
Access Notifications:
Press Insert + F5 to bring up the form fields list.
Navigate to the notifications section and press Enter.
Navigate to Discussions:
Press H to move through headings until you reach the “Discussions” section.
Use the arrow keys to select and enter a discussion.
General Navigation:
Use Tab and Shift + Tab to move forward and backward through interactive elements.
Press G to navigate to graphics and L to navigate to lists.
One Trick to remember is when a PDF viewer of work opens, the download in WORD link is at the very bottom. Use your links list or ctrl end and up arrow to find it.
Jordan talks about the important aspects of why blind students need to learn a computer. She discusses the benefits of computers for the blind also. She touches on necessary skills and how this will advance them in their dreams and goals in life.
Jordan on learning Computer for the blind talks about its importance along with a screen reader and display. These are crucial for blind people for several reasons:
Independence and Confidence: Mastering these technologies fosters independence, allowing children to complete tasks on their own without relying on others. This independence boosts their confidence and self-esteem3. Computers for the blind provide this type of access and more.
Equal Opportunities: Proficiency in assistive technologies ensures that blind children have equal opportunities in education and future employment. It levels the playing field, allowing them to compete with their sighted peers.
By learning to use a computer screen reader and braille display, blind children gain essential skills that support their academic, social, and personal growth, paving the way for a more inclusive and empowered future.
JAWS screen reader offers a variety of cursors that allow blind users to navigate and interact with different types of content more effectively. Each cursor has its specific role, enabling users to access information, move between elements, and interact with applications in various ways. Understanding how to use these cursors—such as the PC cursor, JAWS cursor, Virtual PC cursor, and more—can greatly enhance navigation, making it easier to explore screens, web pages, and documents. Mastering these tools provides more independence and control over the user experience, ensuring smoother and more efficient interactions with digital environments.
JAWS screen reader provides several cursors to help blind users navigate and interact with content effectively. Each cursor serves a different purpose, and knowing how to use them can improve navigation. Here’s an overview of how to use the different JAWS cursors:
All Those JAWS Cursors: Enhancing Navigation
1. PC Cursor
Purpose: This is the default cursor and follows the system focus.
How to Use: Use the keyboard to navigate the screen as a sighted user would, moving between menus, forms, or buttons. This cursor interacts directly with the application.
2. JAWS Cursor
Purpose: It simulates mouse movement and allows you to navigate the screen freely without being tied to the system focus.
How to Use: Use the number pad to move the JAWS cursor. The “5” key on the number pad reads the item under the cursor. Use this cursor to explore screen elements or access parts of the screen that may not be reachable with the PC cursor.
3. Virtual PC Cursor
Purpose: Primarily used in web browsers and documents to read content as if it were in a virtual document.
How to Use: Navigate with standard keyboard commands, such as arrow keys, or use quick navigation keys (like “H” for heading or “F” for form fields). The Virtual PC Cursor treats the content as a text-based document, allowing easy access to web and document elements.
4. Invisible Cursor
Purpose: Works similarly to the JAWS cursor but remains invisible. It’s useful when you don’t want to disturb the system focus.
How to Use: Move this cursor with the number pad keys without affecting other cursors, such as the PC cursor. This is often helpful for reading content while leaving the active focus elsewhere.
5. Touch Cursor
Purpose: Designed for touch screens, it allows for navigating and interacting with touch gestures.
How to Use: Utilize touch gestures on a touch screen to control JAWS. This is ideal for tablets or laptops with touch screens, making the experience more interactive.
6. Routing and Review Cursor
Purpose: Used for reviewing content on a braille display and routing the cursor to specific points.
How to Use: On a braille display, you can move the review cursor to read through text or route the PC cursor to a specific point by pressing routing buttons on the display.
By mastering these cursors, a JAWS user can efficiently navigate various environments, whether it’s desktop applications, web pages, or documents, enhancing both productivity and accessibility. Using proper touch-typing methods on keyboard allows great freedom and ease.
Formatting an APA format paper writing style using keyboard commands is an efficient way to create a properly structured document without relying on a mouse. By using shortcuts within programs like Microsoft Word, you can quickly adjust key elements such as margins, fonts, line spacing, and indentation. This guide outlines the essential steps, including setting up the title page, organizing headings, and formatting the references page. By mastering these keyboard commands, you can streamline the process of formatting your APA paper and ensure it meets academic standards.
To format an APA paper using keyboard commands, you can use several standard shortcuts within word processors like Microsoft Word. Follow these tips to make APA format paper writing easier:
1. Setup the Document in APA format paper writing style
Margins: The default margins in Word are typically 1 inch, but you can check by pressing Alt + P, then M, and selecting “Normal”.
Font and Size: Use Ctrl + D to open the Font dialog box. Set the font to Times New Roman and the size to 12. Both settings are essential in APA format paper writing.
Line Spacing: To set double spacing, press Ctrl + 2.
Indentation: For the first line of each paragraph, press Ctrl + T to create a hanging indent. To undo this and create a regular first-line indent, press Ctrl + Shift + T and then Tab to indent the first line.
APA format of paper
2. Title Page
Running Head: Press Alt + N to go to the “Insert” tab, then H for “Header”, and Ctrl + R to right-align the text. Type “Running head: YOUR TITLE” (in caps) on the first page. On other pages, just type the title without “Running head”.
Title: Press Ctrl + E to center the title. Capitalize each major word in the title.
Author and Institution: Press Ctrl + E again to center your name and institution. Press Enter between lines. Proper formatting of this section is crucial for APA format paper writing.
3. Main Body
Heading Levels:
Level 1: Centered, bold. Use Ctrl + E to center and Ctrl + B to bold.
Level 2: Left-aligned, bold. Use Ctrl + L to left-align and Ctrl + B to bold.
Level 3: Left-aligned, bold, and italicized. Use Ctrl + L, Ctrl + B, and Ctrl + I.
Level 4: Indented, bold, ending with a period. Use Ctrl + T for hanging indent, Ctrl + B, and type your text.
Level 5: Indented, italicized, ending with a period. Use Ctrl + T, Ctrl + I, and type your text.
4. References Page
Hanging Indent: Select the references text and press Ctrl + T to apply a hanging indent, following APA format paper conventions.
Title: Center the title “References” using Ctrl + E.
5. Page Numbers
Insert page numbers by pressing Alt + N, then N, and selecting “Page Number”. Place the number in the top right by pressing Ctrl + R.
This approach covers the essential formatting elements for an APA paper using keyboard shortcuts. Let me know if you need specific details on any step for better APA format paper writing! Find MLA Word Format here.
Regularly updating your computer is crucial for keeping it secure, efficient, and running smoothly. It’s important to apply the latest computer update to take advantage of these benefits. Software updates provide important improvements, such as enhanced security, better performance, and bug fixes. These updates also ensure that your computer stays compatible with the latest software and hardware, while offering new features to improve your user experience. Keeping your system up to date is a simple yet effective way to protect your device and ensure it operates at its best.
Regularly updating your computer as new updates are released is essential for several reasons:
Reasons to Apply Latest Computer Update
Regularly updating your computer is crucial for several reasons, starting with security. Updates often fix vulnerabilities that hackers could exploit. By keeping your system updated, you protect it from viruses, malware, and cyberattacks.
Computer updates in Settings
Secondly, updates improve performance by making your computer faster and more efficient. They address bugs and glitches that can slow down your system.
Next, applying the latest updates introduce new features or improve existing tools, enhancing both your user experience and productivity.
As software evolves, updates also ensure compatibility with the latest programs, hardware, and devices.
Finally, many updates focus on fixing bugs and stability issues, helping your computer run smoothly and preventing crashes.
By consistently updating, you keep your computer secure, fast, and fully functional, avoiding many common problems.
Picture of braille display, keyboard and iPhone for who we are and what we do
Our Mission
TechVision’s mission and purpose is to empower blind and visually impaired students through personalized, real‑time instruction in assistive technology, braille, STEM, and essential academic skills. Led by Dr. Denise M. Robinson, our specialists teach the tools and strategies students need to access information, build independence, and compete equally with their sighted peers.
What We Do
TechVision provides 1:1 remote instruction for learners of all ages. Our team teaches and offers:
What others use only through access methods such as but not limited to:
AI‑supported learning strategies: This direct, individualized approach transforms how blind and low‑vision students learn, work, access and navigate the world, staying true to our mission and purpose.
Screen readers
Braille displays
Computers and mobile devices
Word processing and productivity tools such as embossing
All academic classes and especially: Math, STEM, Nemeth, and all literacy
We provide rapid transcription services with quick digital turnaround, often within one hour when needed, and teach students how to independently emboss their own work.
We team with a certified Orientation & Mobility (O&M) specialist -Kevin Hollinger of Blindnesspro.com who travels on-site to deliver intensive instruction in safe, independent travel. Training includes school navigation, community routes, and real-world mobility skills to support full independence.
Why Our Work Matters
TechVision also trains school personnel: including transcribers, Teachers of the Blind, Teachers and support staff, to ensure students receive consistent, accessible materials. We partner with districts, families, and private organizations to create inclusive environments where blind and visually impaired individuals can thrive, fulfilling our mission and purpose.
Mission and Purpose Designed for Every Learner
We teach learners of all ages. Every student receives customized instruction based on their goals, strengths, and needs. Whether developing early childhood skills, mastering advanced mathematics, learning to use a braille display, preparing for college and employment, or adapting to vision loss later in life, our instruction meets each learner exactly where they are. Many of our students go on to pursue STEM fields, including Applied Mathematics at top universities.
The TechVision YouTube channel, created by Dr. Denise M. Robinson and her Team, offers hundreds of free, accessible video lessons. These lessons focus on empowering individuals who are blind or visually impaired through technology education. The channel covers a wide range of topics, making it useful for students, educators, and parents.
Each video provides hands-on, step-by-step tutorials for using assistive technology. Viewers can learn to use screen readers, magnification tools, and braille displays. The lessons also include detailed instructions on using programs like Microsoft Office and Google applications. This practical approach helps users apply technology to real-world tasks.
See What Is Possible with 21st Century Assistive Technology Instruction
These short clips show how quickly students build independence and speed through advanced assistive technology training delivered by instructors who use these tools daily in real-world application.
Remote Instruction Through Access Technology — Complete Real Work in Real Time for all ages. Our program specializes in providing Training For The Blind to ensure that every individual can succeed and work independently.
Training For The Blind & Vision Impaired-Remote Instruction via access Technology
Empowering Blind & Visually Impaired Students Through Technology and Direct Instruction-Access Technology that Gives you Vision
Offering Personalized 1:1 remote instruction in technology, Braille, Nemeth, and essential blind skills — for students of all ages, anywhere in the world, enhances their educational access. These services ensure all can access educational opportunities effectively.
Founded in 2007 by Dr. Denise M. Robinson, a global leader in remote instruction for blind and low-vision education, TechVision brings together a nationally recognized team of blind education specialists, access technology experts, transcribers, and certified braille instructors. The team delivers expert training in access technology, braille, braille math code, screen readers, and comprehensive academic accessibility. Through real-time, individualized instruction, TechVision equips blind learners of all ages to participate equally, work independently, and succeed across educational and professional environments.
What We Do: Educational Access
We Provide:
Support for families, schools, transition programs, and vocational rehabilitation with the goal of improving access to education.
1:1 specialized instruction in technology, Braille, Nemeth, and all academic access through use of a computer.
Training for school teams — Teachers of the Blind & Visually Impaired, transcribers, paras, and School staff
Technology setup & independence training using screen readers, braille displays, and computers
The TechVision Difference
TechVision, LLC transforms lives through personalized, real‑time remote instruction. Our team equips blind and visually impaired students and clients with the technology skills they need to compete equally with their sighted peers — in school, work, and life. We collaborate with families, districts, and agencies worldwide to ensure every learner has educational access and independence.
Why Educational Access Matters
With cutting‑edge tools — computers, screen readers, braille displays, and smartphones — our students learn to access information, navigate their world, and build independence. TechVision empowers learners to step into education and employment with the same opportunities as their sighted peers.
Who We Serve
College students needing support for educational access
Young adults
Adults returning to work
Anyone needing access to their world
Real 1:1 TechVision Instruction
Students learning to create graphs, write documents, code, and navigate technology independently. Doing Everything their peers are doing.
Learn how to do inequalities for math class using Excel and Word with a braille display–for a complete assignment that can be emailed to teacher when done. Additionally, we will cover tips on creating accessible math graphs to ensure all students can engage with the material effectively.
This video Instruction focuses on teaching math problems, specifically inequalities and graphing, using Excel. First, they direct the students to create a template with a number line. The students then insert information using less than and greater than symbols. For instance, to show a less than symbol, they use nine dashes, with each dash representing a unit. Also try Desmos for graphing online.
Next, the students insert bullets. If they have a numpad, they use Alt+7 for a hollow bullet and Alt+9 for a solid bullet. If not, they manually insert symbols via the insert menu. The students place the bullets on the number line, ensuring they are centered by putting four dashes on each side of the bullet.
To perfectly center the number, the students use the applications key and select the center alignment option or CTRL + E. After completing their problems, they select their work with Shift+Right Arrow and copy it using CTRL+ C. They then paste it into a Microsoft Word document with Ctrl+N and Ctrl+V.
Creating Accessible Math Graphs in Excel
Finally, for creating accessible Math Graphs, the students format their work by navigating through the formatting options with the right arrow key. This process allows blind students to create graphs and inequalities just like their sighted peers. The results are impressive, with perfectly centered number lines and accurately represented inequalities. The more you practice, the closer you become to being an expert in excel.
Watch YouTube video on Creating Accessible Math Graphs
Regarding Children Who Are Blind or Have Low Vision
Technology, Independence, and the Right to Compete
Access Technology Training lessons: Student creating a Google sheets line graph with screen reader and Braille Display
To Every School Administrator, Teacher, and Parent Who has a Child With Vision Loss:
This is not a suggestion. This is a plea – born from nearly 40 years of professional experience in the field of blindness, visual impairment and access technology, and from the realities of a competitive world that will not slow down and will not make exceptions – that you act now, while there is still time to give your child or student every possible advantage.
Children who are blind or have low vision are just as intelligent, capable, and ambitious as any sighted child. What they deserve – what they are owed – is the proper set of tools to demonstrate that capability at full speed. Right now, in too many classrooms and homes across this country, those tools are absent, delayed, or introduced far too late. That must change.
The Foundation: A Windows PC — The World’s Standard Platform
Windows-based PCs represent approximately 72% of all personal computers in use worldwide. This is not a preference – it is the dominant reality of the workplace, the university, the government agency, and the business world your child will enter. Teaching a blind or low vision child on any other primary platform is preparing them for a world that does not exist at scale.
Windows is also open and extensible. Unlike closed ecosystems, a Windows PC can be configured, customized, and expanded with virtually any assistive technology available – screen readers, braille drivers, magnification software, speech input – without restriction. It is the most future-proof environment for a child whose assistive needs may evolve over time. One critical requirement, however: the person who teaches your child must be actively using all components of the system themselves every single day, navigating exclusively by screen reader and braille display. You cannot teach what you do not live.
Every blind or low vision child should be learning on a Windows PC. Period. At the earliest age possible.
The Tools That Open the World: Screen Readers
A screen reader converts on-screen text and navigation into speech or braille output, allowing a blind user to operate a computer fully and independently. There are three primary options, each with a distinct role – and a serious student needs fluency in all three.
JAWS (Job Access With Speech)
JAWS is the gold standard in professional and educational environments. It offers the deepest compatibility with Microsoft Office, enterprise software, and web-based platforms. For any student planning to enter the professional workforce, JAWS fluency is a career asset. It is the screen reader most commonly encountered in workplaces that have made accessibility accommodations.
NVDA (NonVisual Desktop Access)
NVDA is free, open-source, and exceptionally powerful. It is fully supported, actively developed, and used by millions of blind individuals worldwide. For families and schools with budget constraints, NVDA removes every financial barrier to professional-grade access. Students who master NVDA are fluent in a tool used in homes, libraries, and workplaces globally.
Microsoft Narrator
Narrator is built directly into Windows and requires no installation. While not as feature-rich as JAWS or NVDA for complex tasks, it is a valuable tool for early introduction, emergency access, and environments where installing additional software is not immediately possible. Every Windows user – blind or not – has access to Narrator the moment they power on their device and complete setup.
iPhone with Siri and VoiceOver
No conversation about screen readers is complete without addressing the iPhone. Apple’s VoiceOver, built directly into every iPhone, is one of the most powerful tools available to combine the perfect team of PC with iPhone. It is the device you carry with you every hour of every day. Siri adds hands-free voice control outside class but inside class ability to send a quick SOS to their tech instructor for help keeps them moving. One command on the braille display connected to the computer goes right to the iPhone in their pocket, enables the student to send and SOS tech issue so a remote tech instructor can jump on to solve their issue so they can keep moving in class ASAP.
In the real world, blind professionals use a Windows PC at their desk and an iPhone in their pocket. Teaching both, from early on, prepares a student for exactly that reality.
Braille Displays: The Essential Partner to the Screen Reader
A refreshable braille display connects to a PC and presents on-screen text as braille cells that the user reads with their fingertips to teach spelling, paragraph layout and everything the sighted student does with print. This is not optional equipment for a serious student – it is essential. Reading braille is to literacy what reading print is to a sighted child. Without it, a blind student depends entirely on audio output, which is slower for review, comprehension, proofreading, and deep reading tasks. Beyond speed, a braille display teaches spelling, formatting, punctuation, and document structure in ways that audio alone simply cannot.
Recommended Displays
Focus 40 Blue (Freedom Scientific) — The preferred professional-grade display. Forty braille cells, excellent build quality, seamless integration with JAWS, and trusted in educational and workplace settings worldwide. The 40-cell width allows students to read longer passages without constant panning, dramatically improving reading speed and comprehension.
Brailliant BI 40X (HumanWare) — An outstanding alternative with strong multi-device connectivity and a comfortable key layout. Compatible with all major screen readers and well-suited for students who work across multiple devices throughout the school day.
A 40-cell display – not a smaller 14- or 20-cell model – is strongly recommended for students. The larger cell count significantly reduces the scrolling required and more closely mirrors the experience of reading a full line of text, building the natural reading rhythm that leads to true fluency. For students pursuing STEM fields, an 80-cell display is worth the investment.
The Hard Truth That No One Wants to Say Out Loud
A blind or low vision child, without proper tools, cannot complete academic work at the same speed as a sighted child with 20/20 vision. This is not a failure of the child. It is biology and failure of an educational system. It is the reality of navigating a world designed for sighted people without the technology that closes that gap.
Schools often respond to this reality by granting extended time – double time, time and a half, reduced assignments – on work and exams. And while this accommodation is legally appropriate, it comes with a hidden cost that is rarely spoken aloud: less work assigned means less information learned, and reduced exposure to content creates knowledge gaps that compound over time. The job that child will one day compete for will not reduce its requirements to match. We must look further down the road with clear Vision:
Extended time does not exist in a job interview.
Extended time does not exist when competing against other applicants for a position.
Extended time does not exist when a deadline arrives, a client is waiting, or a team needs output.
You learn less in school — and the job will demand more.
Close the Gap Before It Closes Their Future
Life is competitive. It has always been competitive. The kindest, most loving thing we can do for a child who is blind or has low vision is to prepare them to compete – not just to participate, but to compete effectively, efficiently, and with confidence, from kindergarten through career.
The only way to close the speed gap is technology mastered early with braille. A student who has used a screen reader and braille display fluently since early elementary school does not look like a student with a disability when they move through school or enter the workforce. They look like someone who is fast, precise, and capable, because they are.
Additional Reasons This Cannot Wait
1. Independence Is Dignity
A child who relies on a sighted person to read their screen or paper work, describe their assignments, write down their answers, or help navigate their computer is not independent – and they know it. That awareness is not abstract. It settles into them quietly and deeply: the knowledge that someone else is doing for them what they cannot yet do for themselves. It becomes embarrassment. Then frustration. Then, for far too many children, it becomes depression.
This is one of the most significant and least discussed emotional consequences of inadequate assistive technology instruction. These children are not failing because they lack intelligence or effort. They are failing because they have not been given their tools and they are old enough to understand the difference. Worse they watch their classmates work independently. They watch themselves need help. And over time, that gap between what they can do and what they are expected to do without support begins to define how they see themselves.
Independence Is the Antidote
Technology taught by a highly skilled instructor who uses these access tools daily eliminates this dependency. A child who can navigate their own screen, read their own assignments, and submit their own work has done something that no grade or test score can fully capture: they have proven to themselves and others that they can do it. That proof is the foundation of self-worth, confidence, and the unshakeable belief that one can manage one’s own life on one’s own terms.
Independence is not merely practical. It is the antidote to the depression that follows when a child has been taught, unintentionally, that they cannot.
2. Early Learning Equals Deep Fluency
A child who learns a screen reader at age four or five develops the same automatic, effortless relationship with that tool that a sighted child develops with reading text on a page and writing with a pencil. A teenager introduced to a screen reader for the first time is fighting an uphill cognitive battle, learning the tool at the same time they are trying to use it to complete schoolwork. Early adoption eliminates this double burden entirely.
3. Academic Access Across All Subjects
A properly configured PC with a screen reader opens every subject: reading, writing, math (with accessible tools like MathML and Nemeth braille, UEB Braille), science, coding, history, art research, everything. Without it, a blind student’s access to the full curriculum depends entirely on the availability of a human aide or specially prepared materials. Technology removes that bottleneck and gives the student direct, independent access to the same content as every other child in the room.
4. The Job Market Rewards Technology Fluency
Employers, by and large, do not know what screen readers are. They will not know to provide accommodations they have never heard of and in that gap of understanding, a qualified candidate can lose a job simply because the employer cannot picture how the work would get done.
A candidate who arrives already proficient changes that entire dynamic. They sit down at a Windows PC, they are productive immediately, and at the right moment they say with confidence: “I want you to know, I am blind, and this is exactly how I do this job.” Then they show it. With speed and efficiency. With no hesitation. That demonstration does more to overcome an employer’s uncertainty than any disclosure form or accommodation request ever could.
This person competes. The person who has never been properly trained walks into that same room hoping for understanding they may not receive. The difference between those two outcomes is not intelligence. It is preparation.
5. Post-Secondary Education Expectations
Colleges and universities have disability services offices, but those offices cannot replace skill. A student who arrives at university without strong assistive technology fluency will spend precious early semesters struggling to catch up on tools rather than engaging with coursework or they will not catch up at all, and fail. Too often, the alternative is that a parent steps in to do the work for them, which is exactly what regularly occurs when students arrive unprepared. Students who arrive already expert in their technology can advocate for themselves effectively, focus entirely on their education, and move forward alongside their peers.
6. Mental Health and Self-Efficacy
The psychological toll of constantly needing help of always being the student who requires special arrangements, who cannot do what everyone else is doing is real and cumulative. Technology-empowered students report significantly higher confidence, academic engagement, and willingness to attempt challenging tasks. Giving a blind or low vision child their tools is giving them their identity as a capable person.
On the Question of Learning Braille: Who, When, and Why
Braille literacy is one of the strongest predictors of academic success and employment for blind individuals. The research on this is not subtle, it is decisive. But the question of who should learn braille is not always straightforward, and it must be considered carefully in the context of each child’s specific diagnosis.
Children Who Are Fully Blind
There is no question. Braille instruction should begin immediately, ideally by age three, and no later than the beginning of formal schooling. Braille is their print. Delaying braille for a blind child is the equivalent of delaying reading instruction for a sighted child. Every year of delay compounds into a literacy deficit that becomes harder to close.
Children With Low Vision
This requires careful evaluation in partnership with the child’s ophthalmologist and prognosis. Three key questions must guide the decision:
Is the condition stable or progressive? If progressive, the answer is clear: begin braille instruction immediately, regardless of how much vision the child currently has.
Can the child read print efficiently at a rate and comfort level that matches a child with 20/20 vision? If not, print alone is not sufficient and braille must be part of the plan.
Is the child’s functional vision expected to remain sufficient throughout their lifetime? If there is any reasonable doubt, begin braille now. It is far easier to have a skill and not need it than to need a skill and not have it.
When Braille Starts Late
What if the child is older and braille instruction is only beginning now? Research is unambiguous on this point: students who begin braille instruction after 6th grade rarely achieve functional reading fluency. The tactile sensitivity, finger dexterity, and automatic cell recognition that true braille literacy requires develop in early childhood. That window is largely closed by the time a child enters middle school, and full literary braille instruction after that point becomes, in most cases, an exercise in frustration for both the student and the instructor.
For the older student who is past that window, the goal must shift to functional braille, what they will actually use in daily life: device navigation, labels, signage, reference points, and targeted reading tasks. Trying to force full literary braille on a resistant older student creates a battle you will not win. You will spend more time fighting than teaching. Focus on usefulness. Motivation follows. And in every case, a PC with a screen reader and braille display becomes the central key to that student’s success going forward.
If the Condition Is Progressive: Braille Is Not Optional
If a child has a progressive eye condition – retinitis pigmentosa, Stargardt disease, glaucoma, or any diagnosis with a trajectory toward increasing vision loss – braille instruction must begin immediately, regardless of how much usable vision the child currently has. Here is why:
Braille is most easily and deeply learned when taught young, when the brain’s neuroplasticity is at its peak, just as with learning any other language. The earlier the exposure, the deeper the fluency.
A child who waits until their vision has deteriorated significantly is learning braille at the same time they are grieving a loss: an emotionally devastating combination that slows learning or stops it entirely.
A teenager or adult who must learn braille after vision loss faces a steep, stressful acquisition curve that can take years to develop into functional fluency.
A child who learns braille at age three or four and uses it throughout their education will be functionally fluent by the time their vision deteriorates, ready, not scrambling.
Teaching braille to a child who still has usable vision is not pessimism. It is planning. It is love with foresight.
The Crisis That Arrives in Middle School
Every summer, TechVision receives calls about blind and low-vision students who are beginning to fall behind significantly. In most cases, blind children have no technology at all, and low-vision students lack both technology and braille instruction. By middle school, the academic demands increase sharply, the volume of reading and writing grows, and students are expected to manage far more digital work on their own, and they cannot.
For students with progressive low-vision diagnoses, middle school is often the point where remaining vision no longer allows them to complete work efficiently, even with low-vision tools. At that point, they are not only trying to keep up academically. They are also trying to learn braille, screen-reader skills, braille-display use, keyboarding, file management, accessible math, and online platform navigation, all at the same time. The academic and the remedial collide, and the student is caught in the middle.
That is why early instruction matters. Waiting until a student begins failing creates an avoidable crisis. Teaching braille and technology before the crisis gives the student time to build fluency, confidence, and independence.
The Timeline: What the Research and Experience Tell Us
Age 3: The ideal starting point. Children at this age learn through play and exploration and absorb braille as naturally as sighted children absorb picture books and letters (include a cane here also). Tactile literacy can begin before formal reading instruction in other areas. Introduce them to a PC with a screen reader and braille display through play. By age four, begin teaching touch typing. Done consistently, a child is ready to begin kindergarten already equipped.
Kindergarten through 2nd grade: Still an excellent window. With intensive, consistent instruction, a child can achieve strong foundational literacy by early elementary school.
3rd through 5th grade: Still achievable but increasingly challenging. By this stage, the child is already behind in braille literacy relative to academic demands. Intensive TVI/Tech support is essential and must begin immediately. Think summer time instruction-always.
Middle school and beyond: Braille can and should still be taught, but the window for achieving deep, automatic fluency is narrowing. Every year of delay past 5th grade represents a harder road. Shift the focus to functional braille and technology mastery.
When a school district first receives a blind or low vision student at any age: Instruction in assistive technology and braille (where indicated) must begin on day one: not after evaluation periods, not after IEP meetings have stretched across months or years. The clock is running from the moment that child walks through the door. Day one.
What We Are Asking You to Do
For School Districts:
Ensure every blind or low vision student has immediate access to a Windows PC configured with both NVDA and JAWS, connected to a 40-cell refreshable braille display and paired with a highly skilled instructor who uses these tools daily.
Hire TVIs and assistive technology instructors who are genuine daily users of the technology they teach. A degree or certification alone does not qualify someone to teach JAWS, NVDA, or a braille display. Technology fluency is not academic knowledge, it is muscle memory. It is the ability to troubleshoot in real time, demonstrate at speed, and anticipate where a student will struggle because you have been there yourself. A Teacher of the Blind and Visually Impaired (TVI) who does not use this technology every single day cannot teach it well, regardless of what their diploma says.
Coordinate braille and technology instruction as one integrated program, not two separate tracks. When these skills are taught together on the same device, they reinforce each other and the student learns faster. If a TVI is a strong braille teacher but does not have deep technology expertise, the right answer is to pair them with a qualified assistive technology instructor who does. Integration from one highly skilled person is the ideal; a strong partnership between specialists is the practical alternative. One person doing both poorly serves no one.
Begin NOW
Begin braille instruction for eligible students immediately upon enrollment, not pending further evaluation, not after the next IEP meeting, not once the “right” TVI is located. Interim solutions are acceptable. Delay is not.
Embed assistive technology instruction into the student’s daily academic life as the primary mode of access, not as a pull-out supplement. Remote instruction is a powerful and underutilized tool: a qualified technology instructor can be present in the classroom via headset and screen share, guiding the student in real time without disrupting the class, while the student remains fully included with their peers. When pulling a student out is unavoidable, choose the one hour of the school day that causes the least disruption to their social and academic integration. These students are already navigating more than their sighted peers. Do not add social isolation to that burden.
Measure student progress in assistive technology fluency with the same rigor applied to reading, math, and every other subject. The student completes all work on the PC. They email completed assignments to the teacher. The teacher places feedback directly in the document using Word comments and emails it back. This is not a workaround, this is the workflow. It is clean, professional, and mirrors exactly how the working world operates. It holds the student to the same standard of output and accountability as every other person in the room.
For Parents:
Do not wait for the school to take the lead. Advocate immediately and loudly for your child’s right to assistive technology and braille instruction.
If your child has a progressive eye condition, contact a TVI and assistive technology specialist today about beginning braille instruction, regardless of your child’s current functional vision level.
Set up a Windows PC at home with NVDA (free to download) and have your child use it for reading, homework, and exploration every single day.
Connect with the National Federation of the Blind, the American Foundation for the Blind, and your state’s Blind and Low Vision Services for resources, advocacy support, and community.
Believe, fiercely and without apology, that your child can compete. Then make sure they have the tools to prove it.
The Future Is Waiting. Start Today.
The child who is three years old today and begins braille and assistive technology instruction this year will walk into their first job interview at age twenty-two as a fully equipped, confident, and capable professional. The child who waits may walk in hoping for accommodations they may not receive, competing at a speed they were never trained to reach.
The tools exist. The research is clear. The need is urgent. All that is required is the will to act: now, not later, not after one more evaluation, not after the next IEP cycle. Now.
Every blind and low vision child deserves to compete. Give them the tools to do it.