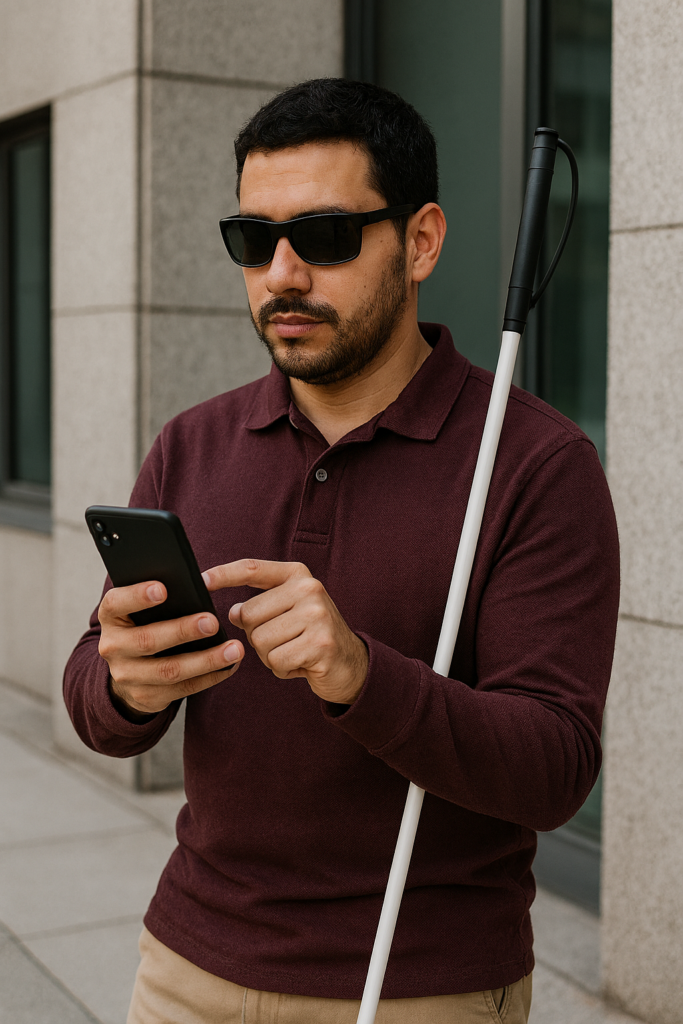
How Blind People Drop a Pin to Share: A blind man waits outside a building with his long white cane leaning against his shoulder while he taps his phone to share his location.
Share Your Location Using Siri and VoiceOver
Blind people can stay safer and more independent by learning how to share their location quickly using Siri and VoiceOver. If you want to know how blind people drop a pin to share location, the iPhone offers simple tools that allow blind users to contact trusted people, send their exact location, and request help with only a few commands. These steps explain how to set up location sharing, how to flick and navigate with VoiceOver, and how to share your location anytime support is needed.
Step 1: Add a Trusted Contact
A trusted contact can be a parent, partner, caregiver, or friend.
Open Contacts
Say, “Hey Siri, open Contacts.”
Add the contact
Touch the middle of the screen to find the list.
Flick right until VoiceOver says “Add Contact.”
Double-tap to open it.
Enter the person’s name.
Flick right to the phone number field.
Double-tap and enter the number.
Flick right until you hear “Done.”
Double-tap to save.
This contact becomes the person you can share your location with anytime.
Step 2: How Blind People Drop a Pin to Share and Turn On ‘Share My Location’
Location sharing must be activated before Siri can send your location.
Open Settings
Say, “Hey Siri, open Settings.”
Open your Apple ID
Touch the top of the screen.
VoiceOver speaks the user’s name.
Double-tap.
Open Find My
Flick right slowly until you hear “Find My.”
Double-tap to open it.
Enable location sharing
Flick right until you hear “Share My Location.”
Double-tap to turn it on.
Your iPhone can now send your live location when requested.
Step 3: How blind peopleShare Location With a Trusted Person Permanently
Open Messages
Say, “Hey Siri, open Messages.”
Open the trusted person’s conversation
Touch the center of the screen.
Flick right until you hear their name.
Double-tap.
Open contact details
Touch the upper right corner.
Flick right until VoiceOver says “Info” or “Details.”
Double-tap.
Share permanently
Flick right until you hear “Share My Location.”
Double-tap.
Flick right to “Share Indefinitely.”
Double-tap.
Your trusted person now sees your location anytime you choose to share it.
Step 4: How Blind People Drop a Pin toShare Your Location Quickly Using Siri
This is the fastest and safest method.
Say: “Hey Siri, share my location with Mom.” (or the name of your trusted contact)
Siri sends your exact GPS location through Messages. VoiceOver confirms the action.
This works indoors and outdoors.
Step 5: Share Your Location Manually in Messages
Open Messages
Say, “Open Messages.”
Send location
Open the trusted person’s conversation.
Flick right until you hear “Send My Current Location.”
Double-tap.
VoiceOver confirms the message.
This is helpful when you prefer not to dictate aloud.
Step 6: When Blind People Should Share Their Location
Location sharing helps when you:
Feel lost
Feel unsafe
Need help quickly
Need a ride
Experience a sudden change in plans
Want a trusted person to monitor your travel safely
This step protects blind travelers and supports independence in public places.
Step 7: A Simple Safety Script to Teach
Blind users can use this script anytime they need help:
Stop walking.
Hold your phone securely.
Face a quiet direction.
Say, “Hey Siri, share my location with Mom.”
Wait for VoiceOver to confirm.
Stay where you are until help arrives.
This gives blind travelers control during stressful or uncertain situations.
Why This Skill Matter
Location sharing supports blind people in daily travel. It strengthens communication and confidence. – helps families and caregivers respond quickly in emergencies. It enhances safety without reducing independence. – empowers blind users to manage real-world travel with greater security.
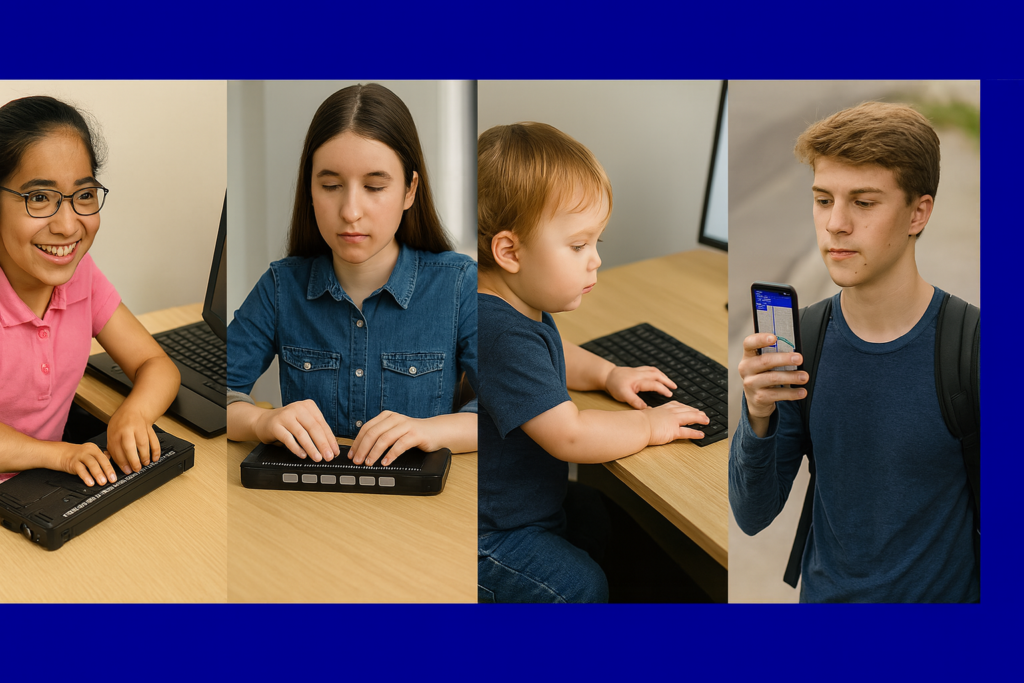
Person navigating LinkedIn with JAWS commands using braille display and screen reader
Navigating LinkedIn with JAWS commands or any screen reader doesn’t have to be overwhelming. With the right JAWS commands, blind and visually impaired professionals can confidently connect, network, apply for jobs, and build a strong online presence. This guide walks you through the essential JAWS shortcuts and navigation strategies that make LinkedIn fully accessible — whether you’re a student preparing for your first job search, a professional expanding your network, or an educator supporting blind learners. TechVision is committed to empowering every user with the tools they need for independence, confidence, and success online.
Keyboard shortcuts for LinkedIn with Jaws
Use LinkedIn with JAWS commands to move quickly through the interface. Press Ctrl+Home, then Tab through the first three items until you reach the options you want. Press Enter to open the shortcut menu and enable quick‑navigation features on the page. These are essential LinkedIn with JAWS commands for efficient navigation
Change your cursor insert z on or off based on what you need to do
To read every line insert z on and insert ; on then down arrow
Can’t Log in, forgot password: Computer showing errors
Forgotten Passwords & Login Problems
When you can’t log in — whether you forgot your password, never received the code, or your computer refuses to move past the first screen — everything stops. The frustration hits instantly, and it happens to everyone. The good news is that most login problems have simple, safe fixes. This guide walks you through the most effective steps to get back into your accounts, clean up the issues that cause login failures, and set up your devices so you don’t get locked out again — or at least know exactly what to do when a computer update suddenly changes your options. Keep that in mind: the problem may not be you. Sometimes an update quietly shifts the settings behind the scenes, and you just need to adjust to the new way your computer handles logins.
Forgotten Passwords & Login Problems: A Clear, Safe Guide to Getting Back In
People search for this more than almost any other tech issue. You are in Good company. Here’s a simple, accessible guide to help you get back into your accounts — and prevent future lockouts.
Start Easy: Hard Refresh the Page (Ctrl + Shift + R) on a PC and Command + Shift+ R on a Mac
1️.Locked Out of an Account? Start Here
Common symptoms
Password suddenly not working
Reset link not arriving
Multi‑factor authentication (MFA) asking for a code you can’t access
Endless login loops
These problems usually come from:
Browser cache issues
Old passwords stored in auto-fill
Conflicting authentication methods
Out‑of‑date recovery information
2️. Clear Your Browser Cache (This Fixes 50% of Login Problems)
Chrome
Press Ctrl + Shift + Delete
Choose Cached images and files
Click Clear data
Edge
Press Ctrl + Shift + Delete
Select Cached images and files
Click Clear now
Firefox
Press Ctrl + Shift + Delete
Select Cache
Click Clear
This removes corrupted login data and forces the site to load fresh.
Also Check Your Saved Passwords (Old Ones Cause Login Failures Too-delete them!)
After you clear your cache, take one more quick step: open your browser’s saved passwords and delete the outdated ones. Old passwords often override the new ones you type, which creates endless login loops.
Chrome
Press Alt + E to open the menu
Press S to jump to Settings
Select Auto-fill and Passwords
Open Google Password Manager
Search for the site you’re trying to log into
Delete any old or duplicate passwords
Edge
Press Alt + F to open the menu
Press S for Settings
Select Profiles
Choose Passwords
Search for the website
Delete outdated or incorrect entries
Firefox
Select Settings
Choose Privacy & Security
Scroll to Logins and Passwords
Open Saved Logins
Remove old or incorrect passwords
Why this matters
Browsers love to “help” by auto-filling passwords — even when they’re wrong. When you delete the old ones:
Your new password works correctly
The login screen stops looping
The reset process finally sticks
You avoid the “I know I typed it right!” frustration
3️. When You Set Up a Password — ALWAYS Connect It to Your Phone
This is the single most important step for preventing lockouts.
Set up the same password manager on your computer to pair with phone
Why?
Your phone becomes your identity key. If you forget your password, the system can verify you instantly.
You can also quickly go into your password manager and look up the password you need for any site on your computer.
Set Up the Same Password Manager on Your Phone and Computer
Using the same password manager on both devices keeps everything synced. When you update a password on your phone, it instantly updates on your computer — and that prevents almost every future lockout. And remember, you don’t have to use the password manager every time you log in. As you create accounts, save your usernames and passwords in your browser so you can keep logging in the same easy way you always have. The password manager simply becomes your reliable backup when something goes wrong.
Below are simple, universal steps that work for any major password manager (Microsoft Authenticator, Bitwarden, 1Password, etc.).
Step 1: Install the Password Manager on Your Phone
Open the App Store (iPhone) or Google Play Store (Android).
Search for your chosen password manager.
Tap Install.
Open the app and sign in or create an account.
Turn on sync if the app asks (most do automatically).
Your phone now becomes your secure “master key.”
Step 2: Install the Same Password Manager on Your Computer
Open your browser
Go to the password manager’s official website.
Download the desktop app or browser extension.
Sign in with the same account you used on your phone.
This pairs your computer and phone instantly.
Step 3: Turn On Sync Between Device
Most password managers sync automatically, but here’s how to confirm:
Open the password manager on your phone.
Go to Settings.
Look for Sync, Cloud Sync, or Account Sync.
Make sure it’s turned ON.
Now every password you save on one device appears on the other.
Step 4: Import or Save Your Password
You can now:
Save new passwords directly into the manager
Import passwords from your browser
Update old passwords and let the manager store them–This ensures you never rely on outdated browser auto-fill again.
Step 5: Choose How you want to Log in: Password Manager or From Browser
Option A: Keep using your browser’s saved passwords
This is the fastest way to log in day‑to‑day. Your browser auto-fills your username and password, and you move on with your work.
Option B: Use the password manager when needed
If something breaks —
a password doesn’t work
a browser update wipes your autofill
a site forces a reset — you can open your password manager and instantly look up the correct username and password.
This is the key detail: Your password manager acts as your backup vault, so you never lose access even if your browser forgets or changes something.
Why This Matters
When your phone and computer share the same password manager:
You always have the correct password stored somewhere safe
You can keep using your browser for fast logins
You avoid lockouts caused by old autofill entries
You stay in control even when updates change things
It’s the perfect balance of speed and security.
4️.Choose ONE Authentication Method (Not All of Them)
Using multiple authenticators confuses systems and causes login loops.
Here are the three main types, with simple visuals you can describe to your audience:
🔵 Option 1: Text Message (SMS)
Visual: A phone with a speech bubble containing a 6‑digit code. Best for: Beginners Pros: Easy, no app needed Cons: Not as secure as app‑based codes
🟢 Option 2: Authenticator App (Microsoft Authenticator, Google Authenticator, Duo)
Visual: A shield icon with a rotating 6‑digit code. Best for: Most users Pros: Fast, secure, works offline Cons: Must be installed on your phone
🟣 Option 3: Email Verification
Visual: An envelope with a key inside. Best for: People who check email constantly Pros: Simple Cons: Slow, sometimes goes to spam
5️. Windows Login Problems: Safe Steps You Can Do
Sometimes Windows won’t let you log in because of:
A stuck update
A corrupted profile
A password mismatch
A login option that’s blocking access (PIN, fingerprint, picture password)
Use SHIFT + RESTART to Access Windows Recovery Options
This is the only safe, built‑in way to reach troubleshooting tools.
Steps
On the login screen, click the Power icon (bottom right).
Hold SHIFT on your keyboard.
While holding SHIFT, click Restart.
Windows will open the Advanced Startup Menu.
From here, you can safely access:
✔ Startup Repair
Fixes boot issues.
✔ Safe Mode
Lets you log in with minimal drivers.
✔ Command Prompt
For advanced repairs (not needed for most users).
✔ Reset Password (Microsoft Account)
If you use a Microsoft account, you can reset it from here.
6️. Prevent Future Lockouts: Use a Password Manager on Your Phone
This is the long‑term solution that saves people from ever being locked out again.
Recommended password managers:
Microsoft Authenticator (has password storage built in)
Bitwarden (free, secure, cross‑platform)
1Password (paid, excellent for families)
Google Password App
LastPass (popular, but had past breaches — use with caution)
Why store passwords on your phone?
Your phone is always with you
You can look up usernames and passwords instantly
Syncs with your computer
Works even if your computer won’t turn on
You’re not alone — login problems happen to everyone. With these steps in place, you’ll stay in control and avoid the frustration of being locked out again.
Computer acting up, freezing up, slowing down, moving like a snail so you have to walk away (before you do something you will regret to it)? Browser freezing? Apps slowing down or refusing to open?
Network working like a snail?
These issues affect every Windows user — teachers, professionals, students, and anyone trying to get work done. The good news is that many of the most common problems can be fixed quickly with a few simple steps.
Here are essential Windows fixes every user should know:
1️. When your browser freezes
Press Ctrl + R or F5 to refresh the page.
If a site should be loading but isn’t, use a force refresh: Ctrl + Shift + R. This clears cached elements and forces the browser to reload everything.
2️. Speed up your computer by managing startup apps
Open Task Manager instantly with Ctrl + Windows + Escape.
Press Ctrl + Tab to move to Startup Apps.
Right‑click any program you don’t need at startup and choose Disable.
This doesn’t remove or break anything — it simply gives you control over what opens and when. Most computers are slowed down by unnecessary bloatware launching automatically. If you do not disable what you do not need it is slow to start up and remains slow because those programs are ALWAYS running in the background whether you know or not. Most do not hence the slow speed of your computer.
3️. Uninstall programs you don’t use
Press Windows and type in remove a which will take you to add remove programs
Arrow down through all programs and uninstall what you do not need or use. Picture yourself weighing 500 pounds and you are taking off 50 pounds at a time with each remove. You get lighter, you move faster.
With commands, Find programs you no longer need, press Tab once to reach the three dots, then select Uninstall.
Check each device (input and output) and adjust as needed.
Go through all options and adjust it to fit your needs.
This solves many audio problems without needing a full restart.
5️. Clear your Temp folder daily to improve speed
Press Windows + R to open the Run box.
Type %temp% and press Enter.
Press Ctrl + A to select everything.
Press Shift + Delete to permanently remove the files.
When prompted, enter on Yes, and another box opens, check the box that says do this for all (or ctrl A) , and press Alt + S to skip files currently in use.
Clearing this folder removes clutter and can even improve your internet speed by eliminating old cached data.
Clean Out System Garbage with Disk Cleanup
Next, press your Windows key and type disk. You’ll see Disk Cleanup populate — press Enter to open it.
Once it opens, press Enter again to scan your system. This reveals all the garbage that’s quietly collected on your computer.
Now Tab to or click on“Clean up system files.” Press Enter — and be patient. If you’ve never done this before, it may take a while to populate.
When the box opens, select everything you can see. You’ll notice gigabytes of waste clogging your system — old logs, temp files, update leftovers, and more.
Delete it all. One caveat: don’t delete your Downloads folder from here. Instead, go to Downloads manually and clean it out one item at a time. You may still need backups or haven’t saved things to proper folders yet.
These steps help all users, and they’re especially important for blind and visually impaired individuals who rely on consistent system behavior with JAWS or NVDA.
A few quick fixes can save time, reduce frustration, and keep your computer running the way it should.
Accessibility opens the world for blind and low-vision people. Access Tech Lessons can help users get the most out of these tools by offering step-by-step guides and support. It removes limits, builds confidence, and gives you real control of your daily life. With the right tools, navigation becomes possible, learning becomes smoother, and work becomes fully accessible.
This page brings together practical lessons that teach you how to use the technology that matters most. Each lesson stays simple, direct, and hands-on so you can learn with confidence. You will explore screen readers, braille displays, iPhone navigation, accessible math tools, and the skills needed to work, study, and travel independently.
As you move through each lesson, your skills will grow, and your world will open. Access becomes freedom. Freedom becomes opportunity. And opportunity builds a future filled with purpose and vision.
Best Computer PC Specs buying Guide for 2025 and beyond: RAM, CPU, SSD, graphics card, gaming and more explained
If you’re planning to buy a computer now, pause before diving into the best PC specs. Keep in mind that dealers often clear out older models during holiday sales. To make sure you know exactly what you’re getting, skip down to the section on ‘Older and Newer Naming’ of laptops.
Specs You Need and PC Details Explained
Memory (RAM): 64 GB DDR5 (4800–5600 MHz, dual channel, expandable to 128 GB on some models). Continue for more detailed advice, for Best Computer Specs Guide.
Storage (SSD): 2 TB PCIe Gen 4 NVMe SSD (blazing fast read/write speeds, optional dual SSDs up to 4–8 TB total)
Display: 14‑inch UHD (3840 × 2160) Mini‑LED, 120 Hz refresh rate, HDR support or 14- 16‑inch OLED, 240 Hz for gaming/creative workloads
Reduce Eye Strain with a High Resolution Curved Screen
Ultra HD / 4K: 3840 × 2160 pixels
8K UHD: 7680 × 4320 pixels
Highest Resolutions Available (2025)
8K UHD (7680 × 4320):
Currently the highest mainstream resolution for TVs and monitors.
It is Extremely sharp, but requires powerful GPUs and large screens to notice the difference.
Best Curved Monitors (2025)
Brand
Best Model
Size / Resolution
Use Case
Key Strengths
Samsung
Odyssey OLED G9
49″ Dual QHD (5120×1440)
Gaming / Immersion
240 Hz refresh, deep 1000R curve, HDR OLED
Dell / Alienware
Alienware AW3425DW
34″ QD‑OLED (3440×1440)
Gaming / Esports
Fast response, vivid colors, G‑Sync Ultimate
Dell UltraSharp
U4025QW
40″ 5K2K (5120×2160)
Productivity / Multitasking
Huge workspace, USB‑C hub, color accuracy
LG
UltraGear 45GR75DC
45″ WQHD (3440×1440)
Gaming / Creative
OLED panel, 240 Hz, immersive ultrawide
HP
E45c G5
45″ Dual QHD (5120×1440)
Productivity / Office
Replaces dual monitors, ergonomic design
Gigabyte
G27FC
27″ Full HD (1920×1080)
Budget Gaming / Entry Level
Affordable, decent curve, FreeSync support
Quick Recommendations
For Gaming Immersion: Samsung Odyssey OLED G9 or Alienware AW3425DW.
For Productivity/Work: Dell UltraSharp U4025QW or HP E45c G5.
For Budget Buyers: Gigabyte G27FC.
For Hybrid Use (Gaming + Creative): LG UltraGear 45GR75DC.
Other items you need for laptop and more USBs for a desktop
Ports & Connectivity:
2 × Thunderbolt 4 / USB‑C
3 × USB‑A 3.2
HDMI 2.1
Ethernet RJ‑45
Wi‑Fi 7 + Bluetooth 5.4
Keyboard: QWERTY keyboard, with Applications/Menu key
Around 4 pounds ≈ 1.81 kilograms.
How to Find Your Computer Specs (Windows 11, December 2025)
1: Using System Settings
Press Windows key + E to open File Explorer.
Press Shift + Tab to move focus to the Navigation Pane.
Arrow down to This PC (usually near the bottom).
Right‑click on This PC and choose Properties (or press Enter).
A window will open showing basic system information, including:
Device name
Processor (CPU)
Installed RAM
System type (32‑bit or 64‑bit)
Windows edition and version
2: Using Settings → About
Press Windows key + I to open Settings.
Navigate to System.
Scroll down and select About.
Under Device specifications, you’ll see:
Processor (CPU)
Installed RAM
Device ID
Product ID
System type
Under Windows specifications, you’ll see:
Edition (e.g., Windows 11 Pro)
Version and build number
3: Advanced Specs (Optional)
For deeper details like graphics card, storage, and drivers:
Press Windows key + R, type dxdiag, and press Enter.
This opens the DirectX Diagnostic Tool, showing CPU, RAM, GPU, and driver versions.
Summary
Basic specs (CPU, RAM, Windows version) → System → About or This PC → Properties.
Detailed specs (graphics card, drivers) → dxdiag.
These steps work with keyboard navigation and are accessible for screen reader users.
Find information in MSINFO32
MSINFO32 is the command that opens the System Information utility in Windows.
It provides a comprehensive overview of your computer’s hardware, software, and system components.
Unlike the simple “About” page, MSINFO32 gives deep technical details useful for troubleshooting, upgrades, or support.
How to Open MSINFO32
Press Windows key + R to open the Run dialog.
Type msinfo32 and press Enter.
The System Information window will appear.
What You’ll See in MSINFO32
System Summary (default view):
OS name and version
System manufacturer and model
Processor type and speed
Installed RAM
BIOS version/date
Boot mode (UEFI or Legacy)
Hardware Resources:
IRQs, DMA, I/O ports, memory addresses
Useful for diagnosing hardware conflicts
Components:
Display (graphics card details)
Storage (drives, controllers)
Network (adapters, protocols)
Input devices
Software Environment:
Loaded drivers
Running tasks
Services
Environment variables
Why It’s Useful
Troubleshooting: Quickly check BIOS version, drivers, and hardware conflicts.
Upgrades: Confirm RAM slots, CPU type, and expansion options.
Support: Export system info to share with IT or tech support.
Memory Details
These values describe how your computer uses RAM (physical memory) and virtual memory:
Installed Physical Memory (RAM): 64.0 GB The total amount of RAM physically installed in your system.
Total Physical Memory: 63.8 GB The usable portion of your installed RAM. A small amount is reserved for system hardware.
Available Physical Memory: 56.2 GB The amount of RAM currently free and available for use by applications and the system.
Total Virtual Memory: 67.8 GB This includes physical RAM plus page file space. Virtual memory allows your system to use disk space as extra memory when RAM is full.
Available Virtual Memory: 58.9 GB The portion of virtual memory that’s currently unused and available.
Page File Space: 4.00 GB The size of the page file (a reserved portion of your hard drive used as virtual memory).
Go to Programs and features and make sure you have all your security and power to run programs so do a find command for “run” and look for your .nets.
What .NET Does for a Computer—let’s just say it IS REALLY IMPORTANT
Runs Applications:it is software framework/platform .NET provides the Common Language Runtime (CLR), which acts like a virtual machine. It takes code written in languages like C#, F#, or VB.NET and makes sure it runs correctly on your computer.
Manages Resources: The CLR handles memory management, security, thread management, and error handling. This means programs don’t have to reinvent these functions — they rely on .NET to do it safely.
Provides Libraries: The Framework Class Library (FCL) is a huge collection of pre‑built code for everyday tasks:
Reading/writing files
Connecting to databases
Networking and internet communication
User interface controls
Math, cryptography, and more
Supports Multiple Languages: Developers can write programs in C#, F#, VB.NET, and others. .NET makes them interoperable, so code written in one language can work with another.
Cross‑Platform Evolution:
Go get those important computer items at: Ninite.com
Beat Graphics card for computers using screen readers or other access technologies: NVIDIA
GRAPHICs card RUN that screen reader–get a good one GAMING computers will get you the specs you need for a screen reader or just regular use
NVIDIA RTX cards dominate the high‑end market with unmatched ray tracing, AI features (DLSS, CUDA, Omniverse), and raw compute power.–the BEST for screen readers and older students–middle school up
AMD Radeon RX cards offer better value for money, strong rasterization performance, and more efficient power use, especially at 1440p and 4K gaming.
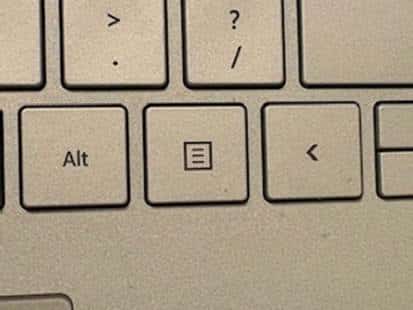
The applications key– is KEY of importance-the funny looking horseshoe on a gaming computer or square with lines in it on general computers–it is a right click of a mouse or 1 press of a key.
Basic specifications for a laptop: gaming computer will have the speed and video card needed for performance
Processor (CPU): some use the words i5, i7, i9 but the new words are Ultra 5,7 or 9 on machines–i9 is compared to ultra 9 and so on like this
Intel Naming Shift
Older naming convention (up to 13th Gen): so if you have this then know it is an older model and during holidays, this is what companies are selling cheaply to get rid of–so just be aware–
Intel Core i3, i5, i7, i9
Example: Intel Core i7‑12700H
New naming convention (14th Gen and newer):
Intel Core Ultra 5, Ultra 7, Ultra 9
Example: Intel Core Ultra 9 185H
The “Ultra” branding emphasizes AI acceleration and new architecture (Meteor Lake, Lunar Lake).
How They Compare
Core i5 → Core Ultra 5
Core i7 → Core Ultra 7
Core i9 → Core Ultra 9
Intel Core Ultra 9 285HX (24 cores, up to 5.5 GHz turbo) or AMD Ryzen 9 7945HX (16 cores, up to 5.4 GHz turbo)
Memory (RAM): 64 GB DDR5 (4800–5600 MHz, dual channel, expandable to 128 GB on some models)
Storage (SSD): 1 TB PCIe Gen 4 NVMe SSD (with option for dual SSDs up to 4 TB total)
Display: 17.3‑inch UHD (3840 × 2160) Mini‑LED, 120 Hz refresh rate, HDR support or 16‑inch OLED, 240 Hz for gaming/creative work
Favorite computers for running software such as JAWS, NVDA and other blind ware–You must have HIGH RAM and speed
Top Favorite: ASUS
ASUS Laptop Weights–based on student–
ZenBook Series (ultralight)
New ZenBook A14: as low as 2.18 lbs (0.99 kg)
VivoBook Series (mid‑range everyday use series)
ROG Gaming Series (heavy duty)
Zephyrus G14: ~3.53 lbs (1.6 kg)
Strix G15: ~5.07 lbs (2.3 kg)
Pic of ASUS-ROG-heavier with numpad
Surface Pro-top Favorite
Microsoft Surface Pro Weights–lightest and most powerful of laptops
Surface Pro 3–7: ~1.7 lbs (0.77 kg)
Surface Pro 8–10: ~1.94–1.96 lbs (0.88–0.89 kg)
Surface Pro 11 (latest): ~1.96 lbs (0.89 kg)
Surface Pro X (ARM model): ~1.7 lbs (0.77 kg)
comparing true laptop form factors, ASUS ultrabooks and Surface Laptop models are closer in weight, while Surface Pro remains the lightest option in the 2‑in‑1 category.
Different versions and do not suggest this collapsible one for students, that flips up–just too easy to flip down
Get Surface Pro with a true laptop lid that opens easily
HP computers
Be careful as most do not come with applications key any more–yes you can use Insert F10 but … takes 2 keys to implement a keystroked of right click
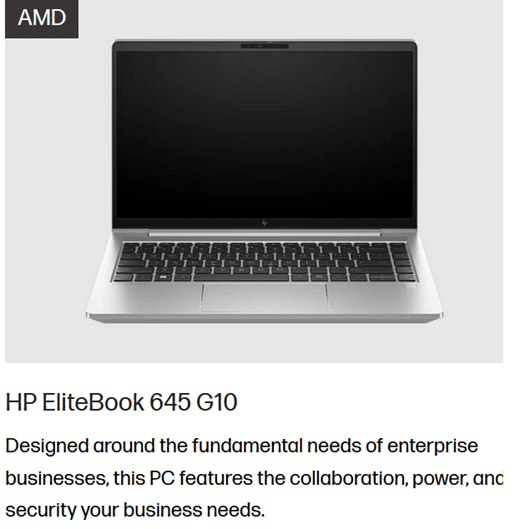
HP EliteBook 645 G10 includes a dedicated Applications/Menu key on its keyboard layout.
Build your computer: EliteBook 645 G10 is a lightweight, secure, and efficient business laptop with AMD Ryzen 7000 series power
Processor Options:
AMD Ryzen 5 7530U: 6 cores / 12 threads, up to 4.5 GHz-elementary and middle school
AMD Ryzen 7 7730U: 8 cores / 16 threads, up to 4.5 GHz-high school
These are efficient 7nm chips with solid multitasking and productivity performance.
Graphics:
Integrated AMD Radeon RX Vega 6 GPU
Suitable for office work, media playback, and light graphics tasks
Not designed for gaming or heavy 3D rendering.–but that is fine as that is not why you buy it
Memory:
Configurable up to 64 GB DDR4 RAM
Dual SO-DIMM slots, user-upgradable.
Storage:
PCIe SSD options, typically up to 1 TB
HP HP EliteBook 870 G11 (17‑inch) -4.1 lbs–keep in mind you want a laptop carry case for laptops
High‑Performance PC Laptop Models
HP ZBook Fury 16 G11 – workstation powerhouse for engineering, CAD, and 3D rendering
MSI Raider 18 HX AI – top‑tier gaming laptop with desktop‑class GPU
ASUS ROG Strix G18 / Zephyrus G16 – high‑end gaming and creator laptops
Do NOT overdo bump dots on keyboard to find position for touch typing-then student start counting dots to get to keys–create muscle memory which means you want to have them repeat typing skills–explanation below dot placements.
Place bump dots on keys: 5 and 0 on num row above qwerty keys-backspace is already large
Place dots on F4, F12–if all the keys run together then either F8 or F9. My F keys are broken up in panels from F1 to F4 and F5 to F8 and F9 to F12 so I do not need any bump dots–a gaming keyboard is divided up for speed of access so no bump dots needed
Many computers share the arrow keys with home, end pg up and pg down–only put a bump dot on up arrow to quickly move hand to the right while left hand holds down the FN key and right hand to do the pg up and so forth
Remember, the keyboard already has built in bump dots on f and j so do not place any more bump dots on keys
Dell is not my top choice of a computer but is a fine machine with specs you can get with:
Processors: Intel Core Ultra 7/9 or AMD Ryzen 9 HX — powerful x86 chips for heavy workloads.
Serviceability: Easier to upgrade storage, RAM, and wireless adapters
Memory: Configurable up to 64–128 GB DDR5 RAM, far beyond Surface’s 16–32 GB.
Storage: Options up to 2–8 TB PCIe NVMe SSDs.
Graphics: Dedicated NVIDIA RTX GPUs (e.g., RTX 5090 or workstation Ada cards).
Displays: Larger 16–18″ screens, often 2.5K or 4K OLED, high refresh rates.
Weight: Heavier (≈4 lbs / 1.8 kg), but more versatile for gaming, AI, or workstation tasks.
What I Use on a Daily Basis-I work very long hours
So I do have a Ultra HD / 4K: 3840 × 2160 pixels and it has changed my life with no more headaches from long hours at my screen and always have night light on-if you do not know about this feature, press your windows key and type night and night light will generate–decrease the brightness to more muted colors and it takes out more blue light which reduces eye strain. But the 4k does that by itself, then the night light takes away brightness–I am very light sensitive so light in general causes my eyes pain which gives headaches (I no longer have that issue with the 4k.). I use my screen reader often–hence the needed power in general.
My PC Computer Specs Explained
CLX computers are made by CLX Gaming, which is a division of Cybertron International Inc., a long‑standing U.S. system integrator based in Wichita, Kansas and an incredible company to work with for any product they sell.
About CLX
Founded: January 29, 2016, as a brand under Cybertron International.
Focus: Custom gaming PCs, workstations, and desktops tailored for gamers, content creators, and professionals.
Specialty:
Fully customizable builds (CPU, GPU, RAM, cooling, case design).
Award‑winning custom paint and chassis designs.
Product families named after Egyptian mythology (Ra, Set, Scarab, Horus, Osiris, Anubis).
Support: Free lifetime technical support, up to 3 years parts warranty, and lifetime labor coverage.
Why CLX Stands Out and why I picked it–I could build exactly what I wanted and needed and their service support is exceptional in the industry as if or when you call, you get a person who knows anything you ask.
Customization: You can configure nearly every component, from Intel/AMD CPUs to NVIDIA/AMD GPUs.
Performance: Builds range from mid‑tier gaming rigs to extreme workstations with 64–128 GB RAM and multi‑GPU setups.
Design: Known for bold, artistic case designs and RGB lighting.
Reliability: As part of Cybertron International (established in 1997), CLX benefits from decades of PC integration experience.
Takeaway
CLX computers are custom‑built in the USA by CLX Gaming (Cybertron International), offering high‑performance, highly customizable systems for gamers and professionals who want both power and personalization.
The CLX is the Best machine I have every owned and then I go portable with my Surface Pro which is also exceptional for power and portability
This session shows how users can start auto-read on the Focus Braille display with JAWS, adjust reading speed, and activate a full-read mode with ER + Space, even though many believed this feature did not exist. This video demonstrates the feature in action and explains how it works along with other useful commands. These commands allow you to fully control your computer exclusively using the Focus 40 or 80 Braille display-See video below
Use the modifier keys to simulate key combinations (keystrokes) that include CTRL, ALT, WINDOWS Key, SHIFT, or the JAWS Key (INSERT). To use these modifiers for the Focus Braille Display when typing a keystroke, do the following:
Hold down DOT 8 CHORD and then press the corresponding modifier keys in the keystroke. Modifier keystrokes are listed in the following table.
After you create the modifier portion of the keystroke, release the keys and press the remaining part of the keystroke. For example, to perform the keystroke CTRL+SHIFT+V, you press DOTS 3-7-8 CHORD, release the keys, and then press V (DOTS 1-2-3-6).
Focus Display combo Commands
Modifier Keys
Key Name
Keystroke
Function Keys (F1 through F12) For more information, see the Function Keys description.
DOT 1
INSERT
DOT 2 8 space
CTRL
DOT 3 8 space
WINDOWS Key
DOT 4 8 space
JAWS Key
DOT 5 8 space
ALT
DOT 6 8 space
SHIFT
DOT 7 8 space
APPLICATION Key
RIGHT SHIFT+DOT 2 CHORD
TAB
DOTS 4-5 CHORD
SHIFT+TAB
B CHORD
HOME
K CHORD
END
DOTS 4-6 CHORD
Select Prior Line
DOTS 1-7 CHORD
Select Next Line
DOTS 4-7 CHORD
Select to End of Line
DOTS 4-6-7 CHORD or 4,7, space
ESC
RIGHT SHIFT+DOT 1 or Z CHORD
DELETE
FOR CHORD
Select word
5,7, space
Selection Commands
Description
Braille Sign
Braille Dot Patterns
Select Next Character
LEFT SHIFT+DOT 6
LEFT SHIFT+DOT 6
Select Prior Character
LEFT SHIFT+DOT 3
LEFT SHIFT+DOT 3
Select Next Line
LEFT SHIFT+DOT 4
LEFT SHIFT+DOT 4
Select Prior Line
LEFT SHIFT+DOT 1
LEFT SHIFT+DOT 1
Select to End of Line
LEFT SHIFT+DOT 5
LEFT SHIFT+DOT 5
Select from Start of Line
LEFT SHIFT+DOT 2
LEFT SHIFT+DOT 2
Select from Top
LEFT SHIFT+L
LEFT SHIFT+DOTS 1-2-3
Select to Bottom
LEFT SHIFT+DOTS 4-5-6
LEFT SHIFT+DOTS 4-5-6
Select Next Screen
LEFT SHIFT+DOTS 4-6
LEFT SHIFT+DOTS 4-6
Select Prior Screen
LEFT SHIFT+K
LEFT SHIFT+DOTS 1-3
Select All
LEFT SHIFT+FOR Sign
LEFT SHIFT+DOTS 1-2-3-4-5-6
Select a Frame
RIGHT SHIFT+9
RIGHT SHIFT+DOTS 3-5
Select a Heading
RIGHT SHIFT+6
RIGHT SHIFT+DOTS 2-3-5
Select a Link
RIGHT SHIFT+7
RIGHT SHIFT+DOTS 2-3-5-6
Windows Commands
Description
Braille Sign
DOTS Pattern
ALT+TAB
LEFT SHIFT+DOTS 4-5
LEFT SHIFT+DOTS 4-5
Paste from Clipboard
LEFT SHIFT+V
LEFT SHIFT+DOTS 1-2-3-6
Copy to Clipboard
LEFT SHIFT+C
LEFT SHIFT+DOTS 1-4
Cut to Clipboard
LEFT SHIFT+X
LEFT SHIFT+DOTS 1-3-4-6
Undo
LEFT SHIFT+Z
LEFT SHIFT+DOTS 1-3-5-6
Delete
LEFT SHIFT+D
LEFT SHIFT+DOTS 1-4-5
Table of Multi-Control Functions
Function
Command
Toggle Auto Advance Mode or auto read
LEFT SELECT+RIGHT SELECT to start and stop down arrow – er+space is read all – if you want to auto read and hear words then down arrow and speed up as you want
Decrease Auto Advance Speed
LEFT SELECT
Increase Auto Advance Speed
RIGHT SELECT
Left Mouse Click
PANNING BUTTON+CURSOR ROUTING BUTTON or PANNING ROCKER UP+CURSOR ROUTING BUTTON or PANNING ROCKER DOWN+CURSOR ROUTING BUTTON
Control+Left Mouse Click
ROUTING BUTTON CHORD
Page Down
LEFT or RIGHT SELECT+ROCKER DOWN
Page Up
LEFT or RIGHT SELECT+ROCKER UP
Top of File
LEFT PANNING BUTTON+SELECT BUTTON or SELECT BUTTON+PANNING ROCKER UP
Bottom of File
RIGHT PANNING BUTTON+SELECT BUTTON or SELECT BUTTON+PANNING ROCKER DOWN
End
PANNING BUTTON+ROCKER BAR DOWN
Home
PANNING BUTTON+ROCKER BAR UP
Next Line
ROCKER BAR DOWN
Prior Line
ROCKER BAR UP
Pan Left
LEFT PANNING BUTTON or LEFT PANNING ROCKER UP
Pan Right
RIGHT PANNING BUTTON or RIGHT PANNING ROCKER UP
Select Text
RIGHT SELECT BUTTON+CURSOR ROUTING BUTTON
Select Block
SELECT BUTTON+CURSOR ROUTING BUTTON at beginning of block; repeat at end of block
Examples to show you how it all goes together:
restart jaws 2,8,space space, 1,8,space d
Windows search box with– right shift, 4
alt tab is 6,8, space then 4,5 space—or right shift 4 5
F6, space/1-8 f
Ctrl tab – 3 8 space the tab with 4,5 space
alt f4 – 1 6 8 space then d
read all, space/1-2-4-5-6, ER cord
say title of window – right shift/dots 1-2
Say time– right shift/dots1-2-3
read all — er chord
refresh screen -right shift z
in drive get contractions off and cursor off
Then –insert z cursor off-2,8,space then z
Or do slash for search—contractions off with g,7,space then dots 3,4
hush up jaws—3,8, space
HOME- K CHORD
END-DOTS 4-6 CHORD
PAGE UP-LEFT SHIFT+ROCKER BAR UP or RIGHT SHIFT+ROCKER BAR UP or DOTS 2-3-7 CHORD
PAGE DOWN-LEFT SHIFT+ROCKER BAR DOWN or RIGHT SHIFT+ROCKER BAR DOWN or DOTS 5-6-7 CHORD
DELETE–FOR CHORD as in 1,2,3,4,5,6 and space –the word chord is the language I grew up with, they made it space a couple decades ago as new people did not get term “chord”
Commands to get you going on Understanding more skills
esc is right shift dot 1
alt right shift dot 2 is
right click right shift dot 3
Windows search box with right shift+4
right shift dot 5 is window list
left shift 1 – select line
left shift 3 – select character
dot 6 8 space then d to URL
3 8 space that opens new tab
dot 3 8 space the tab with 4,5 space
alt tab is 6,8, space then 4,5 space
PC cursor is p space
taskbar is 4,8,6 then t
alt f4 – right shift dot then 1 6 8 space then d for do
F6, space/1-8 then f
read all, space/1-2-4-5-6, ER cord
Went over, say title of window using the Focus, right shift/dots 1-2
Space 4 8 to desktop
Say time with the Focus, right shift/dots1-2-3
say time with right shift 1 2 3
right shift z refresh screen
er chord is read all
8 4 space then t to taskbar
8 4 space then d to desktop
title with space/8-5 followed by T, but the shift/1-2 is just so much nicer.
To configure the Focus Braille Display SD card and Scratchpad, allowing you to copy files to and from the Micro SD card, make sure the unit is powered off and the supplied USB cable is connected to your PC. Next, press and hold the Left Panning button while simultaneously inserting the USB cable. The display powers on and the PC recognizes the Focus as a removable USB drive.
Note: If you use a screen reader such as JAWS over USB, it is recommended that you turn on speech or use a Bluetooth connection as braille will currently not work over USB when the Focus is being used as a storage device. You will also not be able to use the Scratchpad while in this mode.
Create .brf or .brl files in Braille Blaster or Duxbury or other braille translation APPs
Create .txt files in WORD, WordPad or another Braille editor
To transfer BRF and TXT files to the Micro SD card:
On the PC, open the folder containing the files you want to copy, select the files you want, and then press CTRL+C. This is key step when managing the Focus Braille Display SD card and Scratchpad option.
Windows E to file explorer and navigate to and open the USB drive to display the contents of the Micro SD card in navigation pane.
Open FSI, Focus5, Scratchpad, and then open the folder where you want to place the files and press CTRL+V. Files you want to edit should be placed into the Notes folder. Files placed into the Books folder cannot be modified.
To transfer TXT files created in Scratchpad:
Navigate to and open the USB drive to display the contents of the Micro SD card. Under This PC and navigation pane typically
Open FSI, Focus5, Scratchpad, Notes, and then select the TXT files you want to copy and press CTRL+C.
Navigate to the folder on your PC where you want to place the files and press CTRL+V. You can now use Notepad or another text editor to access these files.
Once you have finished transferring files, press the APPLICATIONS key on your computer while focused on the USB drive, and choose Eject. Power the Focus off and back on and you will once again be able to use the Scratchpad as well as receive braille output from your screen reader over USB.
Press right shift + x to close current file if u make changes it will prompt you to save or discard so you can use cursor router button or dot 8 to navigate thru options
If you want to temporarily leave the scratchpad in the background and resume connection to computer do menu +B (space + dot 1,2)
Get out of file by pressing menu and it pops to file menu and rocker down to file, open, etc. and enter on choice
Rocker down to open or what you want
Select folder-I save most books in books so I open that with enter
Rocker down to file you want to open
To edit and type in the Scratchpad of a Focus Braille Display (like the Focus 40 Blue), you’ll be using its onboard notepad feature. This is a standalone function that lets you jot down notes directly on the device without needing a connected screen reader. Here’s how to navigate and use it:
Accessing and Using the Scratchpad
Enter Scratchpad Mode
Press Menu button (in center of dots 1 and 4) and rocker down until you reach Scratchpad or N+Menu for new file and enter for options-fastest but sometimes does not work so go Menu option rocker down
Press a cursor router button above the word “Scratchpad” to select it or enter to open.
Brailling and Editing
Use Braille input keys to type your content.
Use cursor router buttons to move the cursor to specific characters.
Use DOTS 7 + character to delete backward.
Use DOTS 8 to insert a new line or confirm actions.
Save Your Work
After brailling what you want just right shift + X and enter and it will prompt you to save.
Exit Scratchpad
Right Shift + X
Connect to computer will be B space to switch back and forth between your Notes folder with file to type in info and your computer. See video
Tips for Efficient Use
You can transfer Scratchpad files to a PC via USB or SD card in reader on your PC.
Scratchpad supports BRF and TXT formats, ensuring that the Focus Braille Display and SD card work harmoniously.
Tips & Limitations
Only plain text (.TXT) files are editable in NOTES folder
Files transferred from PC must be in UTF-8 or ASCII format which is .txt as it takes all format out
Restore System & fix PC issues, Word Auto-save & Copilot, Restoring Desktop Icons, etc. This guide resolves big or small PC issues. The video explains how to use System Restore to fix various problems on your computer. It also provides tips for ensuring your work is always saved automatically in Microsoft Word and shows commands to keep or remove Copilot in 365. Additionally, it demonstrates steps to restore desktop icons if they disappear. Designed to help viewers troubleshoot and resolve these issues efficiently using keyboard commands or a mouse. This video is part of the #TechTricks series, aimed at making tech tutorials accessible and easy to follow.
In addition to these essential tips, the video explains how to optimize your PC’s performance by managing startup programs and clearing unnecessary files. Viewers will also learn how to customize their system settings for a smoother user experience. Moreover, the guide emphasizes practical solutions that can be easily implemented, making it a valuable resource for both novice and experienced users. By following the steps outlined in the video, you can ensure your computer runs efficiently and remains free of common issues, such as needing to restore your system to fix PC issues.
Resolve PC problems with Daily Tasks
Performing daily maintenance tasks on your PC is essential for keeping it running smoothly and efficiently. For example, fixing PC issues can prevent long-term problems. Additionally, using System Restore helps you quickly resolve unexpected issues. Ensuring your work is always saved automatically in Microsoft Word prevents data loss and keeps your projects on track. Furthermore, keeping your desktop icons organized and visible helps maintain a clutter-free workspace. By incorporating these habits into your daily routine, you can prevent common problems and ensure your computer remains in optimal condition. This proactive approach saves time and enhances your overall productivity and user experience. Remember to restore your system and fix PC issues as part of your routine.
The way to prevent due process for blind and visually impaired students is by proactively addressing their specialized needs. Ensuring compliance with FAPE (Free Appropriate Public Education) is essential. This fosters an educational environment that gives full access to all students. For blind and visually impaired students, this means specialized instruction using access technology, Braille, Nemeth/UEB Math, tactile tools, and more. TechVision ensures the right team is in place to teach your child in real time. Students learn exactly what their peers are learning. They use a PC computer, screen reader, and Braille display. They receive remote instruction from a TechVision staff member. This can be in their room or in a session with their TVI and transcriber.
TechVision Staff educate teachers on accessibility and train transcribers to make work accessible. Additionally, they help schools and parents understand what access to education truly means. Consequently, this approach enables schools and parents at home to support the independence of blind children. When these supports and accommodations are in place, visually impaired students can fully access their education and home environment, but ONLY with appropriate Access Technology Instructors.
Appropriate Instructors mean Access Instructors can totally use the technology themselves in all areas and subjects with keyboard commands, screen readers and braille display. As a result, students experience inclusion and have their right to a Free Appropriate Public Education (FAPE) upheld. Everything together allows FAPE. The right tools are nothing without proper instruction with it. Ultimately, this stops due process if it has begun or prevents it before it gets to this point. By utilizing these strategies, parents and schools play a crucial role in preventing any due process issues from arising.
Knowledgeable Instructors the STOP Due Process
TechVision, LLC, led by Dr. Denise M. Robinson, specializes in providing comprehensive educational services for blind and visually impaired students. Here are some ways TechVision can help prevent issues related to FAPE (Free Appropriate Public Education) violations:
1. Specialized Instruction: TechVision offers 1:1 remote instruction in technology, Braille, Nemeth code, and other blind skills. This ensures that students receive the necessary support to access their education effectively.
2. Collaboration with Schools: TechVision works closely with school districts, teachers, and other educational personnel to ensure that the needs of visually impaired students are met. This collaboration helps in creating an inclusive learning environment.
3. Training for Educators: TechVision provides training for school teams, including transcribers and teachers of the blind. This training equips educators with the skills and knowledge needed to support visually impaired students.
4. Advocacy and Support: TechVision advocates for the rights of visually impaired students and ensures that their educational needs are addressed. This includes working with families and schools to develop and implement appropriate educational plans.
5. Use of Technology: By leveraging cutting-edge technology, such as screen readers, Braille displays, and other assistive tools, TechVision empowers students to access information and navigate their education on an equal footing with their sighted peers.
By providing these services, TechVision helps ensure that visually impaired students receive the education they deserve, while also supporting parents and schools in creating an inclusive and effective learning environment. By providing these services, TechVision can help prevent FAPE violations and ensure that visually impaired students receive the education they deserve.
We are dedicated to resolving FAPE challenges in schools, ensuring that every student receives the education they need to access their education fully by supporting teachers, and helping schools on this exciting path to full inclusion.
Investing in Education: Redirecting Funds for Maximum Impact
When funds are no longer tied up in pre-process meetings or due process proceedings, they can be redirected to directly benefit students and teachers. This means more resources for specialized instruction, assistive technology, and accessible materials for visually impaired students, thus preventing due process from being needed. Teachers can receive better training and support, ensuring they are well-equipped to meet the needs of all students. Additionally, schools can invest in creating inclusive environments that foster independence and success for visually impaired children. By obtaining the right teachers for specialized instruction, like those from TechVision, schools can provide direct instruction tailored to each child’s needs. Ultimately, reallocating these funds enhances the overall educational experience and promotes a more equitable learning environment for everyone.
These links provide detailed information about FAPE laws, including what is covered and how they protect the rights of students with disabilities. Familiarizing with these laws is crucial in preventing due process issues from arising in the first place.
Access TechVision Instructors have helped many states and school districts resolve conflicts before reaching due process. We can teach your child the skills they need to succeed in school and life. Contact us for assistance in resolving any issues related to creating an accessible program for the blind and visually impaired at your school.