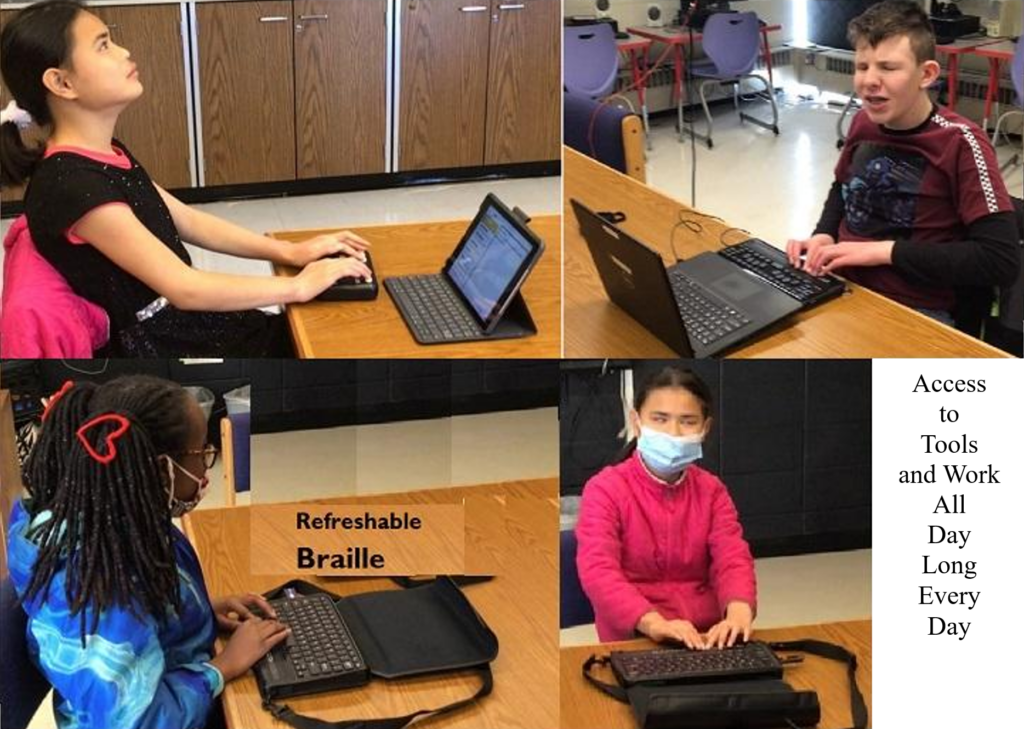
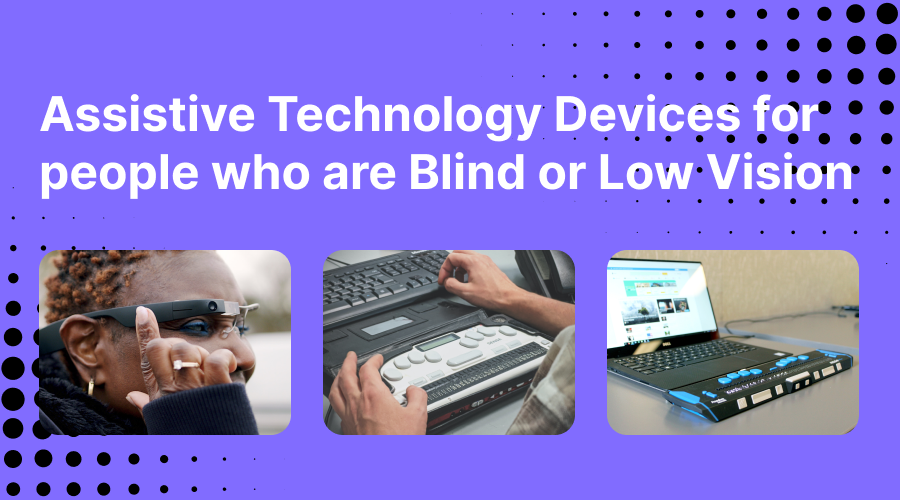
Blind Student completes Research & Writing Homework
Many people underestimate how quickly blind and low vision students can learn advanced technology skills when provided with direct, intensive instruction and real-time application within academic work. One inspiring example, of so many, is when a Blind Student completes Research & Writing successfully thanks to these supportive strategies.
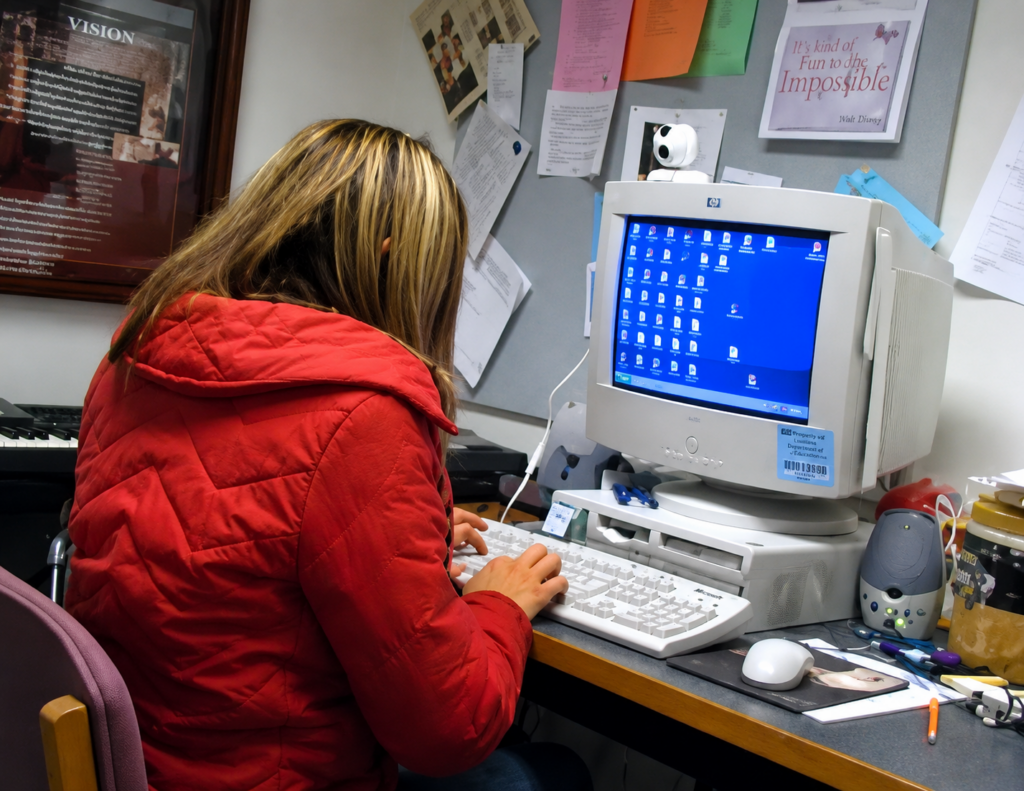
This student entered 10th grade with no keyboarding and computer efficiency skills. Within approximately 2.5 months of focused instruction, she was touch typing over 45 words per minute and independently completing research papers, writing assignments, email communication, and classroom work directly on the computer using a screen reader.
The speed and confidence demonstrated in this video were developed through:
Structured touch typing instruction
Screen reader training
Keyboard command mastery
Real-time academic application
Daily repetition and problem solving
Blind students do not fall behind because of blindness. They fall behind when they are not provided access and proper instruction early enough.
Once students understand:
keyboarding
screen reader navigation
workflow
digital access strategies
with consistent instruction
they can progress very quickly and begin functioning at the same pace as peers.
Technology instruction is not an “extra.” It is literacy, independence, education, and future employment.
Blind Teen Learns Jaws in 3 Months-Yelena poses for a camera
When students receive intensive, consistent instruction in access technology, independence changes quickly. This senior, who is was fully blind, demonstrates advanced JAWS screen reader skills. Within her first 3 months of focused instruction she learned English from her Russian Jaws and just continued to advance.
Watch her hands closely. Her fingers move across the keyboard faster than many sighted users while independently navigating email, documents, research, and computer tasks using speech feedback alone. This level of efficiency is not luck or “talent.” It comes from direct instruction, repetition, structured keyboarding, and access tech instruction while learning how to think through technology nonvisually.
Far too many blind and low vision students are never taught these skills early enough. Instead, they are often slowed down by inaccessible materials, over-reliance on visual methods, or limited technology instruction. True independence occurs when students learn the keyboard, screen reader commands, workflow, and problem-solving strategies necessary to keep pace with the real world.
JAWS is not simply a reading tool. It is access to:
Education
Employment
Communication
Research
Independence
The speed demonstrated in this video comes from mastering keyboard commands, touch typing, orientation to the computer environment, and daily use of technology in real academic tasks.
This is why early and intensive technology instruction matters.
Teach Touch Typing in Just 5 Hours-Proper Touch Typing position
Proper Placement of Fingers on Keyboard
Proper Placement of fingers on Keyboard-Alt Text Below
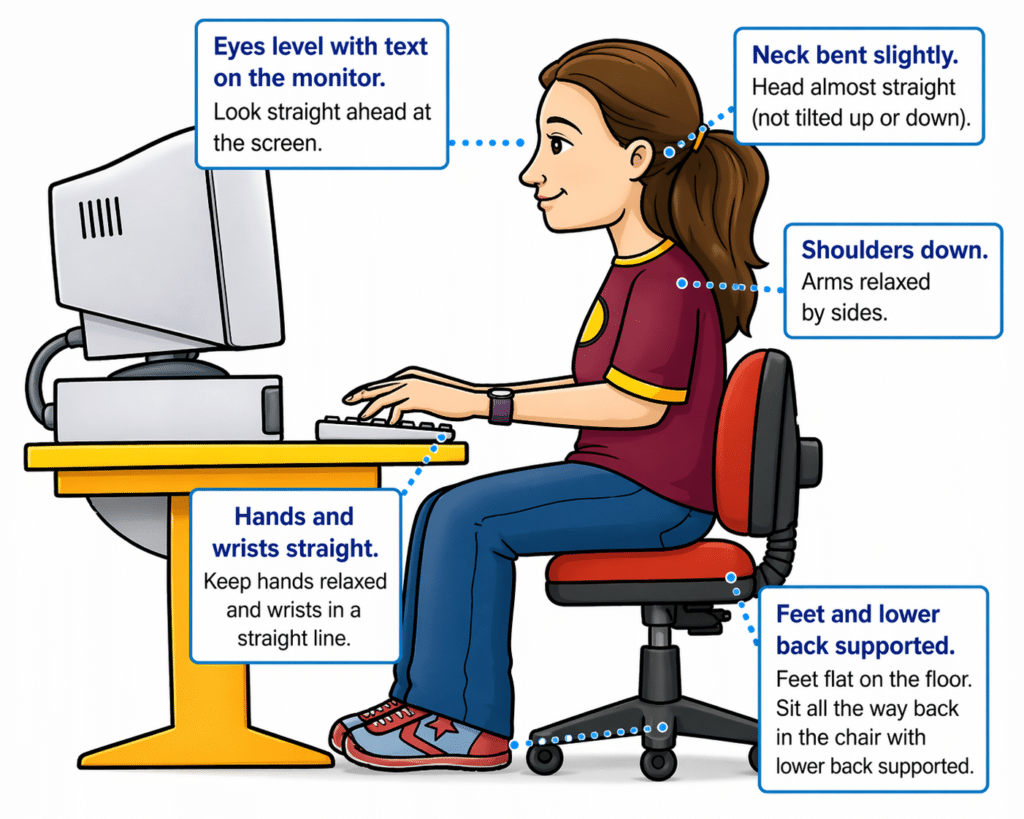
The way to sit and learn-this is critical for speed and accuracy:
Sit tall, back supported
Feet flat on the floor
Elbows at 90 degrees
Wrists straight and slightly raised
Hands hover over keys
Shoulders relaxed
Head up, eyes forward -do NOT look down–looking slows you down
Teaching line to repeat (great for kids)
“Sit tall, feet flat, wrists up, and let your fingers do the work.”
Begin with the home row keys:
Left hand: A S D F G Right hand: H J K L ; ‘
Practice moving forward and backward across these keys until movement feels natural and consistent. Focus on correct finger placement and returning to the home row after each key.
Once comfortable, begin typing the word series below.
After completing the first three sets of words, introduce capitalization by using the Shift key with the opposite pinky of the letter being typed. This builds correct habits for capital letters.
Next, introduce the period key, using the right ring finger (L finger down to period), and incorporate it into word and sentence practice below.
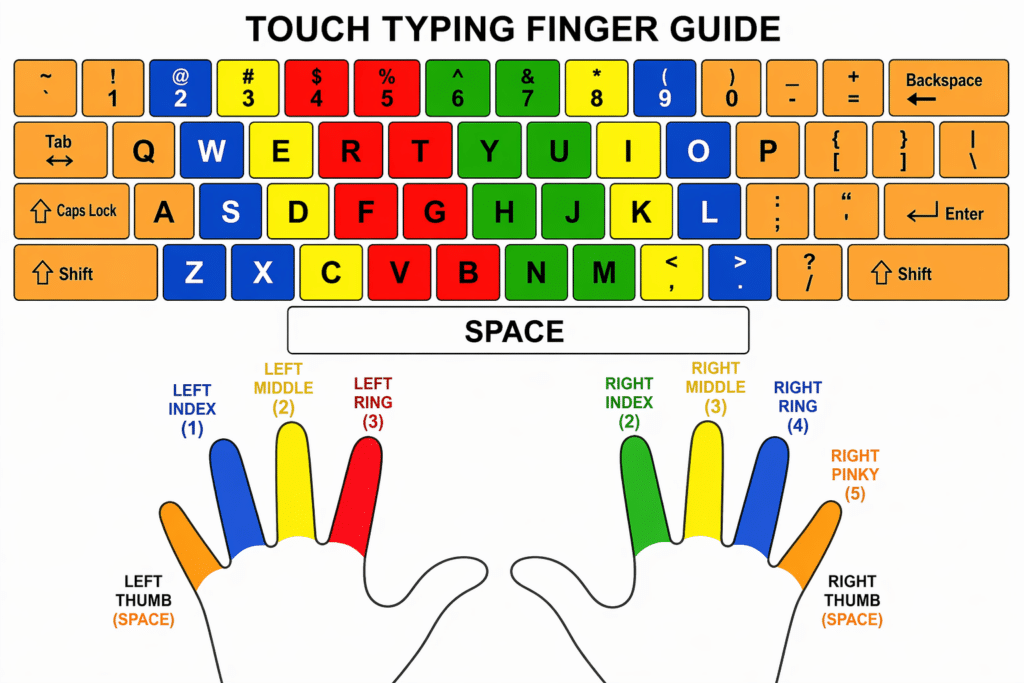
This image presents a color-coded keyboard and hand diagram designed to teach proper finger placement for touch typing.
Proper Placement of fingers on Keyboard-Alt Text Below
ALT Text: At the top of the image is a full keyboard layout. Each key is color-coded to show which finger should be used to press it. The keyboard includes all standard keys such as letters, numbers, punctuation, Shift, Enter, Backspace, Tab, and Space.
The keyboard is divided into sections by color:
Keys assigned to the left hand appear on the left side of the keyboard.
Keys assigned to the right hand appear on the right side of the keyboard.
Each finger is represented by a consistent color across both the keyboard and the hands shown below.
Touch Typing Finger Guide
This diagram shows a standard QWERTY keyboard with each key color‑coded to match the finger that should press it. Below the keyboard are two hands, each finger labeled with a number and color that corresponds to its assigned keys.
Left Hand Responsibilities
Left Pinky (Finger 5): Controls the far‑left keys: Tab, Caps Lock, Shift, the number 1, and the letter keys Q, A, Z. Also handles punctuation on that side.
Left Ring Finger (Finger 3): Controls 2, W, S, X.
Left Middle Finger (Finger 2): Controls 3, E, D, C.
Left Index Finger (Finger 1): Controls two vertical columns:
Left column: 4, R, F, V
Right column: 5, T, G, B
Right Hand Responsibilities
Right Index Finger (Finger 1): Controls two vertical columns:
Left column: 6, Y, H, N
Right column: 7, U, J, M
Right Middle Finger (Finger 2): Controls 8, I, K, comma.
Right Ring Finger (Finger 3): Controls 9, O, L, period.
Right Pinky (Finger 5): Controls the far‑right keys: 0, P, semicolon, apostrophe, slash, plus Enter, Backspace, Shift, and other right‑side punctuation.
Thumbs
Both thumbs press the Spacebar, with the right thumb used most often.
Overall Purpose
The diagram teaches correct touch‑typing technique by showing which finger should press each key. Each finger controls a specific vertical zone so students can type quickly without looking at the keyboard.
Key Concept
Each finger is responsible for a specific group of keys. The fingers return to the home row after each keystroke. This method allows typing without looking at the keyboard. Trying to look at keyboard will slow you down. Muscle memory is the key.
Purpose of the Diagram for teachers to teach skill
This visual supports learning:
correct finger placement
muscle memory
efficient, accurate typing without visual reliance
Simple Teaching Summary
Each finger has a job. Start on the home row. Reach, press, and return.
Videos to Watch of Students in Action with screen reader
Low Vision Students or students with Progressive Vision Loss—Start Early. Build Independence.
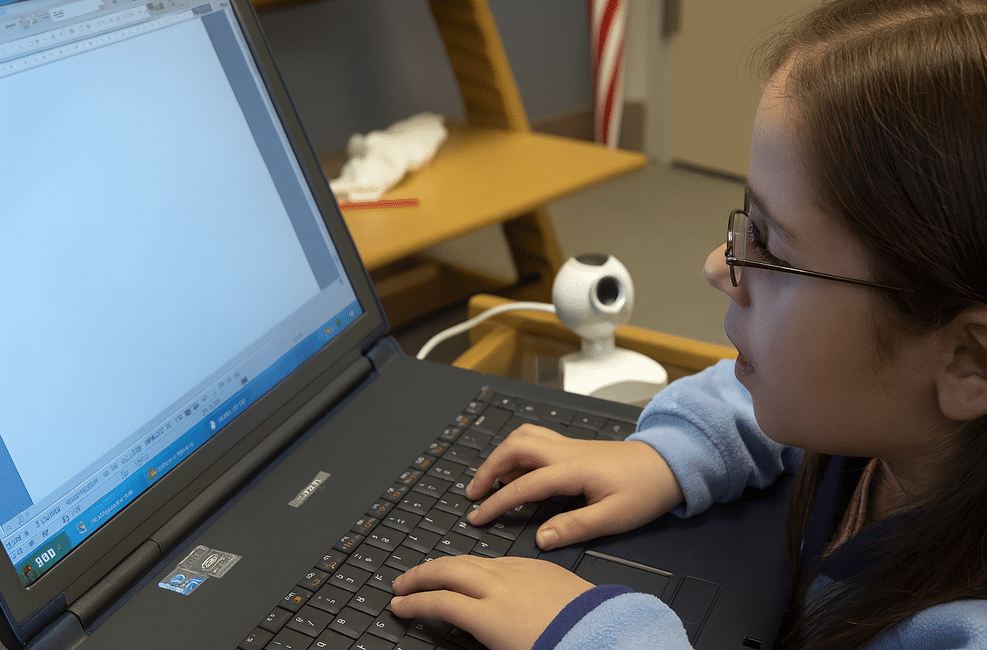
Watch a 2nd grade student master touch typing in just 3–4 months. Her fingers move quickly and confidently across the keyboard, showing what is possible when students are taught the right skills early.
This is why keyboarding must start young.
Students who learn to type early:
Build speed and efficiency
Gain independence in school
Keep pace with their peers
Develop confidence in their abilities
For blind and low vision students, keyboarding is not optional: it is the foundation for accessing all academic work using a computer, screen reader, and braille display…and giving them a future.
When instruction begins early and is consistent, students quickly move from learning the keys to using the computer for real work across all subjects.
The issue is not ability. The issue is access and instruction.
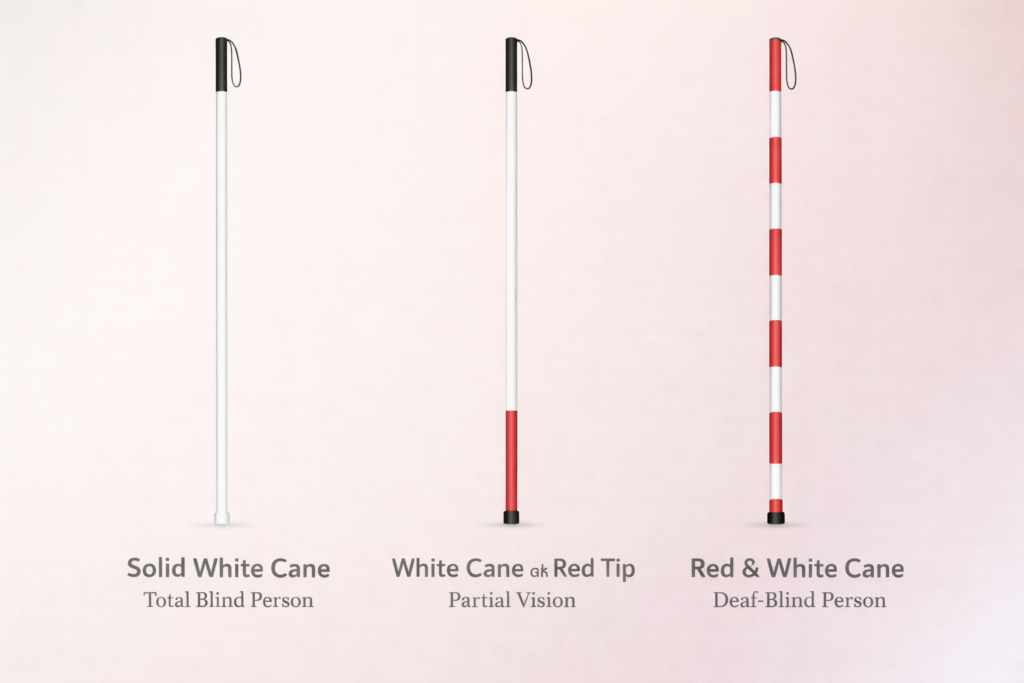
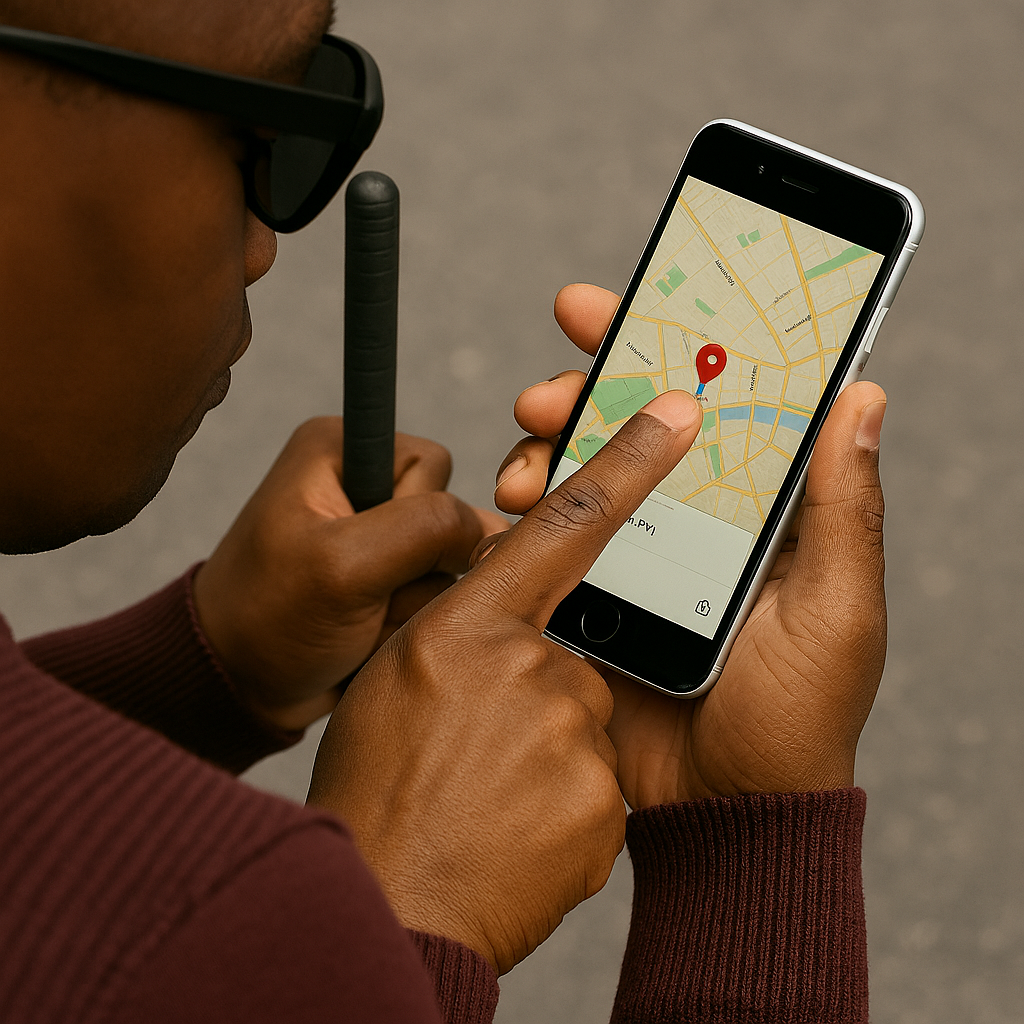
White canes help identify travelers with vision loss and support safe, independent navigation. Different cane markings communicate different levels of vision impairment. Understanding these differences helps the public respond appropriately and promotes safer environments for people who are blind or visually impaired.
Solid White Cane
A solid white cane commonly indicates that the traveler is blind or has very little functional vision. The cane serves two main purposes. First, it helps the traveler detect obstacles, steps, drop-offs, and changes in surface texture. Second, it alerts drivers and pedestrians that the individual may not see approaching hazards.
Orientation and mobility specialists often teach travelers to use the white cane with systematic scanning techniques that detect objects along the walking path. The cane becomes an extension of touch, allowing the traveler to move confidently and safely.
White Cane with a Red Tip
A white cane with a red tip or red section near the bottom typically indicates that the traveler has low vision or partial sight. The individual may see some shapes, movement, or contrast but still requires the cane to detect obstacles and navigate safely.
The red marking signals that the traveler may rely on a combination of remaining vision and tactile feedback from the cane. Even though some vision exists, obstacles and environmental hazards may still be difficult to detect without the cane.
Why Cane Identification Matters
Recognizing these cane markings helps others respond safely. Drivers should slow down and yield when a traveler with a white cane approaches a crossing. Pedestrians should provide space and avoid grabbing the cane or interfering with its movement.
White canes represent independence, mobility, and access to the world. Whether solid white or marked with red, the cane serves as an essential tool that allows individuals with vision loss to travel safely and confidently.
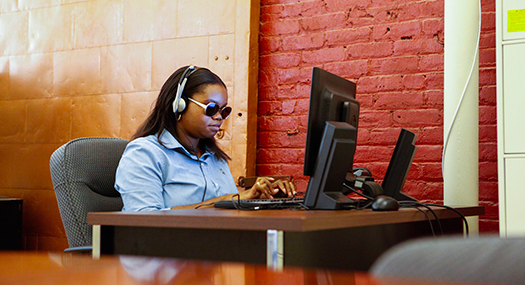
Title II Meaning for Vocational Rehabilitation: Person learning Technology at Rehab center
Title II creates major changes for vocational rehabilitation programs. It now requires full digital and program access for every adult with a disability. Rehab centers must provide equal access to training, websites, forms, online portals, and instruction. Programs can no longer rely on “we don’t have staff” as a reason for inaccessible services.
The rule also requires agencies to meet WCAG 2.1 AA for all digital content. This includes job portals, training modules, intake systems, emails, documents, and videos. Adults must receive the same information at the same time as everyone else.
This shift will affect many rehab centers because they often lack staff who understand blindness, low vision, or screen reader access and other advanced Technology training for all disabilities. Title II now places responsibility on the agency, not on the client. Agencies must ensure that all adults needing help can access training, job preparation, and digital tools without delay.
Many centers will need outside specialists to train adults in blindness skills and technology in general for all clients. They can partner with qualified programs and companies when they do not have trained staff. This is acceptable and expected under Title II.
The rule pushes agencies to modernize. It requires stronger systems, better training, and accessible job pathways. It opens the door for consistent and equal access that all adults who have need of services for decades.
For decades, families of children with disabilities have carried a quiet, heavy burden. You’ve watched your child struggle to access schoolwork that wasn’t designed for them. And You’ve fought for accommodations that came too late — or didn’t come at all. You’ve watched your child work twice as hard for half the access. You’ve been told to “wait,” “be patient,” or “we’ll try.”
But now, something extraordinary has changed. Those educational systems that do not comply will feel the impact as families who are affected by inaccessible schools have power to change what is happening.
In April 2024, the U.S. Department of Justice issued a landmark update to Title II of the Americans with Disabilities Act, requiring every public school, college, and state/local government to make their websites, digital learning platforms, documents, videos, and mobile apps accessible by following WCAG 2.1 Level AA — the most widely recognized accessibility standard in the world.
This is not a suggestion. It is not a guideline. This is federal law.
And for the first time, every child with a disability has a clear, enforceable right to full, equal, real‑time access to their education.
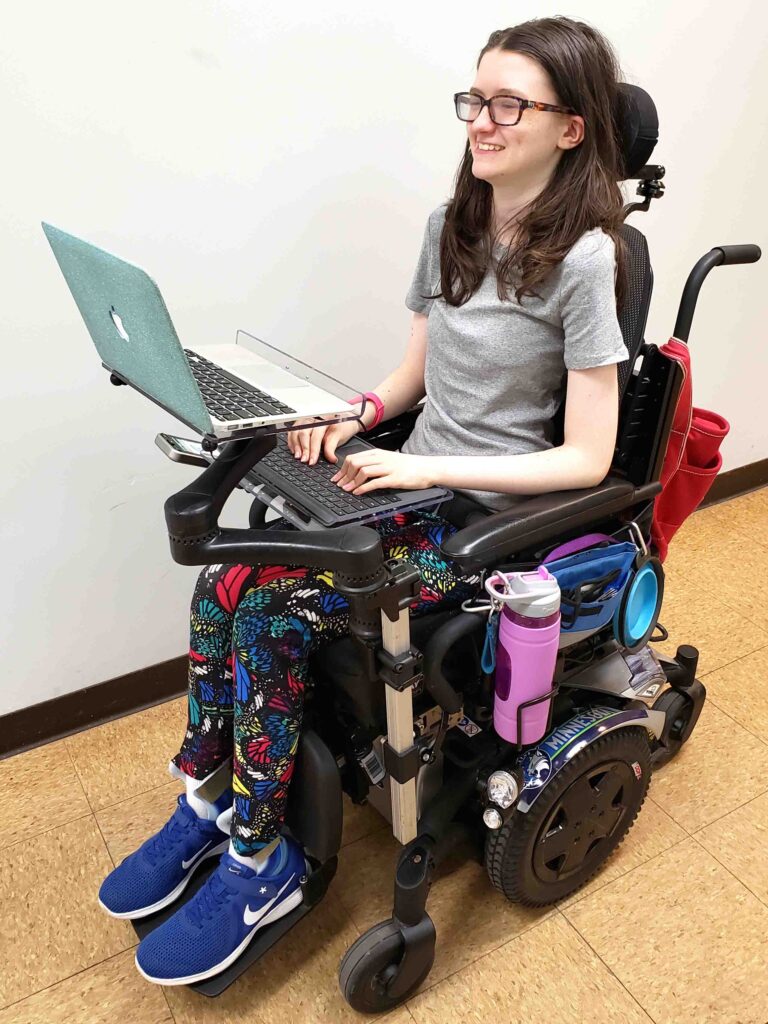
Title II With Teeth-young lady in Wheelchair with laptop
What This Means for Your Child — No Matter Their Disability
This rule protects children with:
Blindness or low vision
Deafness or hearing loss
Learning disabilities
Cognitive disabilities
Autism
Mobility impairments
Speech/language disabilities
Chronic health conditions
Multiple disabilities
Every child who needs accessible digital content is now covered.
Your child now has the right to:
Access schoolwork at the same time as their peers
Use assistive technology without barriers
Receive accessible videos, documents, and online lessons
Navigate school websites and apps independently
Participate fully in online learning
Receive materials in formats that work for them
Learn without waiting for someone to “fix” inaccessible content
This is the strongest protection children with disabilities have ever had.
Why This Rule Is a Turning Point
For years, schools relied on “accommodations” — reactive fixes that often came too late. This rule requires proactive accessibility, meaning:
Teachers must create accessible materials from the start
Districts must train staff
Vendors must provide accessible platforms
Colleges must ensure accessible admissions, financial aid, and coursework
Schools must test content for accessibility
Students must receive equal access in real time
This is a complete shift in how education must operate.
Title II With Teeth-Access All Work with peers
Why This Is Good News — Even If Schools Are Scrambling
Yes, schools and colleges are panicking. They are overwhelmed. Yes, they are realizing how much work they must do.
But that panic is not a bad thing.
It means the system is finally being held accountable. That families no longer have to beg for access. It means students no longer have to wait. It means the law is finally on your child’s side.
For the first time, the federal government has said clearly:
“Your child deserves equal access — and schools must provide it.”
What This Means for Teachers
Teachers are not expected to become accessibility experts overnight. But they are expected to learn the basics of accessible design — and districts are required to train them.
This rule gives teachers:
Clarity
Structure
Support
Training
Tools
A roadmap
And it gives them the ability to reach every learner, not just those who can see, hear, read, or process information in typical ways.
What This Means for Families
You now have:
A clear legal standard
A federal rule with deadlines
A right to accessible digital content
A right to equal participation
A right to real‑time access
A right to file complaints if access is denied
You no longer have to accept:
“We don’t know how”
“We’ll fix it later”
“We don’t have time”
“We don’t have training”
“We didn’t think about that”
Your child’s right to access is no longer negotiable.
What This Means for Students
This rule opens the door to:
Independence
Confidence
Dignity
Participation
Inclusion
Real learning
Real opportunity
Every child deserves to learn without barriers. And Every child deserves to be included. Every child deserves to be seen, heard, and supported.
And now, the law finally reflects that truth.
A Message of Hope
For every parent who has cried at the kitchen table. And For every teacher who has tried to help without the tools. For every child who has felt left out, behind, or invisible.
This is your moment.
A new era of accessibility has begun — one where your child’s right to learn is protected, enforced, and honored.
And we are going to make sure every child gets the education they deserve.
In April 2024, now delayed to Nov 2027, the U.S. Department of Justice published its final rule updating Title II of the ADA to require that state and local governments make their websites and mobile apps accessible by conforming to WCAG 2.1 Level AA. (WCAG 2.1 AA) or face the consequences.
This is the first time the DOJ has formally adopted a specific technical standard for digital accessibility under Title II.
All state and local government entities, including:
State agencies
Counties, cities, municipalities
Independent school districts
Special district governments
Contractors or vendors providing public‑facing digital services on behalf of these entities
This includes any third‑party platform used to deliver services (payment portals, scheduling systems, learning platforms, etc.).
Compliance deadlines
The DOJ set two compliance timelines:
April 24, 2026 → Entities with 50,000+ population
April 26, 2027 → Entities with <50,000 population and special districts
These dates apply to full conformance with WCAG 2.1 AA for all covered digital content.
What WCAG 2.1 AA requires
WCAG 2.1 AA addresses barriers affecting people with:
Blindness or low vision
Deafness or hearing loss
Cognitive or learning disabilities
Mobility or dexterity impairments
Key requirements include:
Text alternatives for images
Captioning and audio description for video
Keyboard accessibility for all functions
Sufficient color contrast
Logical heading structure
Resizable text and responsive layouts
Avoiding motion‑based inputs (e.g., shaking a device)
Touch target size and spacing for mobile apps
What content is covered?
The rule applies to all web content and mobile apps a public entity provides or makes available. This includes:
Websites
Mobile apps
Online forms
PDFs and digital documents
Portals and dashboards
Learning platforms
Third‑party tools used to deliver public services
What content is not required to comply?
The rule includes limited exceptions:
Archived web content
Preexisting traditional electronic documents (e.g., old PDFs)
Content posted by non‑affiliated third parties
Password‑protected individual documents
Preexisting social media posts
These exceptions are narrow—most active, public‑facing content must meet WCAG 2.1 AA.
Why the DOJ adopted WCAG 2.1 AA
The DOJ emphasized that inaccessible digital services create real barriers—for example:
Blind users unable to access images without alt text
Inaccessible forms blocking access to voting, tax info, or school services
Barriers to participating in civic events
The rule aims to ensure equal access to essential public services.
What this means schools, colleges and any educational institution
For blind/low‑vision students and families receive real‑time, nonvisual access to digital content. WCAG 2.1 AA now gives legal backbone for the accessibility standards people advocate for—especially around:
Alt text
Keyboard access
Logical structure
Screen‑reader compatibility
Accessible PDFs
Mobile app access ease with braille display or Voice Over
Captioning and audio description
This is a powerful tool for your advocacy with districts, IEP teams, and state agencies.
You’re not imagining it — public colleges and universities really are scrambling, and the panic is coming from several very real, structural reasons that the higher‑ed sector has been avoiding for years. Here’s what the current reporting and expert analysis show, grounded in the sources we just pulled.
Why colleges and Schools are panicking about the new Title II WCAG 2.1 rule
1. The rule is no longer “guidance” — it’s enforceable law
Public colleges and universities are now legally required to meet WCAG 2.1 AA across all digital services. This is a major shift from the old “best practice” era.
For higher ed, which has thousands of pages, PDFs, videos, portals, and legacy systems, this is a massive lift.
2. The deadlines are tight — especially for large institutions
Public institutions serving populations of 50,000+ must comply by April 24, 2026. Smaller ones have until April 26, 2027.
Most colleges are nowhere near WCAG 2.1 AA compliance today.
3. Higher ed has huge accessibility debt
Experts note that colleges have:
Decentralized web teams
Fragmented domains
Thousands of legacy PDFs
Inaccessible videos
Third‑party tools that aren’t compliant
This means they’re not starting from zero — they’re starting from negative.
4. Colleges have been relying on “accommodations,” not accessible design
For years, many institutions leaned on disability services offices to “fix” inaccessible content after the fact. The new rule requires proactive accessibility, not reactive accommodations.
This is a cultural shift higher ed has resisted for decades.
5. The exceptions are narrow — and colleges hoped they’d be broader
The DOJ’s exceptions (archived content, pre‑existing social media posts, third‑party content, etc.) are very limited.
Most active content must be fully accessible.
6. Colleges and schools fear litigation and OCR complaints
Higher ed is already a top target for ADA and Section 504 complaints. Now that WCAG 2.1 AA is the explicit legal standard, colleges know enforcement will increase.
7. They know they can’t fix this with a one‑time project
Experts warn that accessibility must become a digital operating model, not a “compliance project.”
That means governance, training, workflows, and accountability — areas where higher ed is historically weak.
As Our team teaches blind low vision, this article is directed toward that population but this is true for ALL populations of children.
For decades, blind and low‑vision students have been expected to “make do” with inaccessible schoolwork, delayed accommodations, and digital tools that were never designed for them. Parents have fought and Teachers of the visually impaired have patched and remediated-transcribed work until late in the evenings. Students have worked twice as hard for half the access.
But now, everything is changing.
In April 2024, the U.S. Department of Justice issued a landmark update to Title II of the Americans with Disabilities Act, requiring all state and local governments — including every public school district in the country — to make their websites, digital learning platforms, documents, and mobile apps accessible by following WCAG 2.1 Level AA.
This is not guidance or a suggestion. This is federal law.
And for the first time, our children have a clear, enforceable right to full, equal, real‑time access to their education.
Why this rule matters so much for blind and low‑vision students
Blind and low‑vision students have always been the most impacted by inaccessible digital content. When a worksheet is posted as an image, when a math assignment is scanned sideways, when a teacher uploads a PDF with no tags, when a learning platform isn’t keyboard accessible — that student is locked out.
The new rule changes that.
WCAG 2.1 AA requires schools to ensure:
All images have alt text
All documents are structured for screen readers
All videos have captions and audio description
All platforms work with keyboard navigation
All math and STEM content is accessible
All mobile apps are operable for non-visual users
All content is perceivable, operable, understandable, and robust
This is the first time the federal government has said, in clear language: “Your digital content must be accessible from the start.”
No more waiting or retrofitting. No more “we’ll fix it later” or “we didn’t know.”
Why schools are scrambling or should be scrambling— and why that’s good news
K–12 districts are suddenly realizing that:
Teachers create inaccessible content every day
Thousands of PDFs and worksheets must be remediated
Google Classroom, Schoology, Canvas, and other platforms must meet WCAG
Vendor tools must be accessible — and the district is responsible if they’re not
They need training, workflows, and accountability
They must comply by 2026 or 2027, depending on district size
This is overwhelming for them — but it’s also the first time blind and low‑vision students have the law fully on their side… as do all students!
So if you hear panic you’re it is not a bad thing. It’s the sound of a system finally being required to do what it should have done all along.
What this means for your child
It means your child has the right to:
Access their schoolwork at the same time as their peers
Use screen readers, magnification, braille displays, and other tools without barriers
Receive accessible math, science, and STEM content
Navigate school websites and portals independently
Access digital textbooks and curriculum materials
Participate fully in online learning
Receive materials in formats that work for them — every time
This is not optional. Or “if the teacher has time.” This is not “if the district can figure it out.”
This is their legal right.
What this means for teachers
Teachers are not expected to become accessibility experts overnight. But they are expected to learn the basics of accessible digital design — and districts are required to train them.
This rule gives teachers clarity, structure, and support. It gives them a roadmap. It gives them permission to slow down and do things right.
And it gives them the tools to reach every learner, not just those who can see the screen.
What this means for TVIs and accessibility professionals
For years, TVIs have been forced into the role of “fixer” — remediating inaccessible content after the fact, often late at night, often under pressure, often without the authority to change the system.
This rule changes your role.
You are no longer the emergency repair technician. You are now the accessibility leader your district must rely on.
Your expertise is finally recognized as essential, not optional.
Why this is a moment of hope
For the first time in U.S. history, blind and low‑vision (and all) students have a federal rule that:
Names the standard
Sets the deadlines
Defines the expectations
Holds districts accountable
Protects students’ right to equal access
This is the beginning of a new era — one where our children can learn, participate, and thrive without barriers.
And for families who have spent years advocating, fighting, and explaining the same issues over and over, this rule is a long‑awaited validation:
Your child deserves full access. All children deserve independence. Your child deserves equal opportunity. And now, the law finally backs you up.