Dr. Robinson demonstrates how to use the PixBlaster graphic embosser, showing its ease of use and efficiency for blind students. The PixBlaster produces tactile graphics, which students can emboss in either contracted or uncontracted braille. Additionally, PixBlaster is well-known as a graphic embosser with Tiger integration.
Using the Graphic Embosser with Tiger Software
To begin, Dr. Robinson turns on the PixBlaster (also called the Columbia Embosser) by pressing the power button and explains that it can connect wirelessly or via USB. She uses a USB connection for convenience. Next, she opens Microsoft Word and navigates using Alt + N to insert an image. She selects P for pictures, then O for online pictures. Dr. Robinson recommends searching for an outlined image, such as a Christmas tree, to avoid clutter in tactile graphics using the graphic embosser with Tiger.
Once the image is inserted, she accesses the picture settings with Alt + JP for picture format. To adjust the size, she presses SZ to open the size menu, locking the aspect ratio with Alt + A. She then adjusts the height and width using H for height and W for width. Dr. Robinson notes that students should always choose the largest dimension when resizing with their graphic embosser that uses Tiger software.
After inserting the graphic, Dr. Robinson types “Merry Christmas” and adds an exclamation mark using the Tiger software. She explains that it is critical to save the file before embossing. Once saved, she uses Ctrl + P to print the embossed graphic, ensuring the printer is set to the PixBlaster. Dr. Robinson advises tearing off the embossed paper by pulling it in a “V” shape to avoid damage created by the graphic embosser with integrated Tiger software.
Finally, she shows the completed embossed graphic, noting how clear and easy it is to read. The PixBlaster (Columbia), in combination with Tiger software, offers blind students a simple way to produce both tactile graphics and braille, enhancing their learning experience with the help of a graphic embosser with Tiger technology. Other Graphic embosser with Tiger Lessons.
Setting up Spanish Braille using JAWS-enabled Braille display involves a few key steps. First, configure the Braille profile in JAWS by pressing Insert + 6 to open the settings center. Navigate to the Braille mode settings and select Spanish (Spain International) as the default language. This ensures the Braille output is in Spanish Grade 1. You can quickly switch between languages using Ctrl + Shift + Windows + L or specific Braille display commands. Additionally, practice using symbols and contractions on the Braille display to become comfortable with the layout. This setup allows visually impaired users to work efficiently in Spanish, ensuring accurate Braille representation and seamless integration with their tasks.
Spanish-Española 1. Jaws settings: Set up braille profile – insert 6 (ctrl shift D for default but after you complete these steps, open settings again, to make sure they hold for just Word settings) type “braille mode” down twice to hear it, F6, alt g to languages and setup your choices.
This lesson is Spain (international) Input and Output are Spanish Grade 1
2. Tab to profile languages and set those up and enter to close Jaws settings
3. Alt 8 to make sure dots 7,8 show on display-accept and close settings
1. Set up Voice profile in Jaws-open context menu, options, voices, add a profile
1. In Word-change voice quickly: 2 options: on keyboard- ctrl shift window L to change profile or on Focus -2,3,4,5,7, space to change languages)
2. Insert+ctrl+S to change to Spanish profile or to other language
3. G+7+space on Focus to computer braille (which will output Spanish grade 1)– capital is dot 7 under capital letter on display
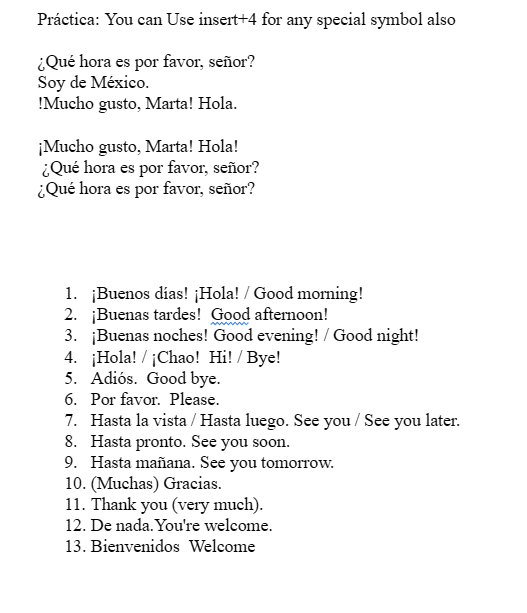
Práctica:
á 1,2,3,5,6
é 2,3,4,6
í 3,4
ó 3,4,6
ú 2,3,4,5,6
ü 1,2,5,6,8
ñ 1,2,4,5,6, 8
Punctuation for Spanish Braille using JAWS
! 2,3,5, 7
inverted ! is 2,3,5, 7, 8
and
. is dot 3
and
, is dot 2
? is dot 2, 6
inverted ? is 2,6,7
on keyboard:
Lower Case Letters
á (lower case a, acute accent) = Press Ctrl + ‘ (apostrophe), then the letter a é (lower case e, acute accent) = Press Ctrl + ‘ (apostrophe), then the letter e í (lower case i, acute accent) = Press Ctrl + ‘ (apostrophe), then the letter i ó (lower case o, acute accent) = Press Ctrl + ‘ (apostrophe), then the letter o ú (lower case u, acute accent) = Press Ctrl + ‘ (apostrophe), then the letter u ñ (lower case n, tilde accent) = Press Ctrl + Shift + ~ (tilde), then the letter n ü (lower case u, diaeresis accent) = Press Ctrl + Shift + : (colon), then the letter u
Upper Case Letters
Á (upper case A, acute accent) = Press Ctrl + ‘ (apostrophe), then Shift + a É (upper case E, acute accent) = Press Ctrl + ‘ (apostrophe), then Shift + e Í (upper case I, acute accent) = Press Ctrl + ‘ (apostrophe), then Shift + i Ó (upper case O, acute accent) = Press Ctrl + ‘ (apostrophe), then Shift + o Ú (upper case U, acute accent) = Press Ctrl + ‘ (apostrophe), then Shift + u Ñ (upper case N, tilde accent) = Press Ctrl + Shift + ~ (tilde), then Shift + n Ü (upper case U, diaeresis accent) = Press Ctrl + Shift + : (colon), then Shift + u
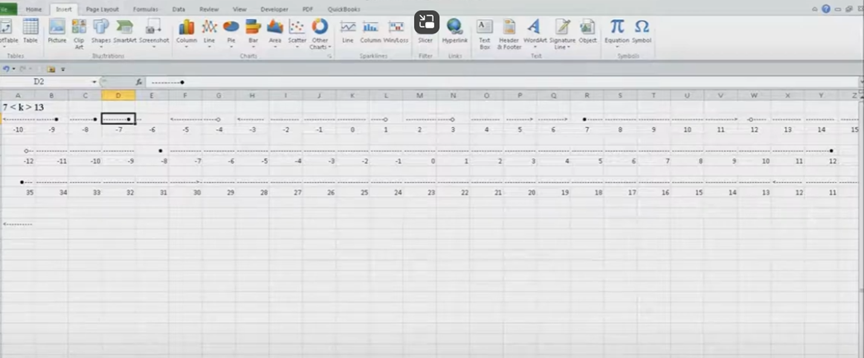
Dr. Robinson introduces a lesson on using Microsoft Excel to solve math work, specifically focusing on inequalities and graphs. She begins by guiding students on how to put Excel in focus to tackle various math problems in Excel. This helps students to optimize their math work in Excel effectively. Next, she instructs them to create a template using a number line. To insert symbols like less than or greater than signs, students use the Alt + N and then U commands to insert bullets or symbols.
For students with a numpad, Alt + 7 and Alt + 9 quickly insert a hollow or solid bullet, respectively. For those without a numpad, they can use the Insert + Symbols option. Students then align their number line by inserting a bullet in the middle, ensuring four dashes on each side for perfect centering when solving math work in Excel.
To center content, students use the Applications key and press F. They adjust the horizontal and vertical alignment to ensure everything is perfectly centered. This is a useful step when handling math problems in Excel. After completing their problems, students select the content using Shift + Right Arrow and copy it using Ctrl + C. This entire process enhances their skills in doing math work in Excel.
When pasting into Microsoft Word with Ctrl + V, students have various formatting options. By pressing the Control key and right arrow, they can select different formatting options for their pasted content. They can also Alt H to home and V to paste and right arrow through options. This flexibility allows blind students to format and customize their graphs just like their sighted peers when solving math problems in Excel. After the student pastes an image, they press the Applications key and up arrow to select Alt Text and type the description. Once they finish typing, they press Ctrl + Space and C to close the navigation pane and return to the document.
Dr. Robinson concludes by showing examples of completed math problems in Excel and graphs, demonstrating how well-formatted the number lines and inequalities look. Blind students can confidently create hollow and solid bullets, as well as inequalities, just like other students, thanks to the accessible features in Excel. This process ensures they stay engaged in their learning, achieving the same results as their peers when doing math work in Excel. Make sure your display is working well.
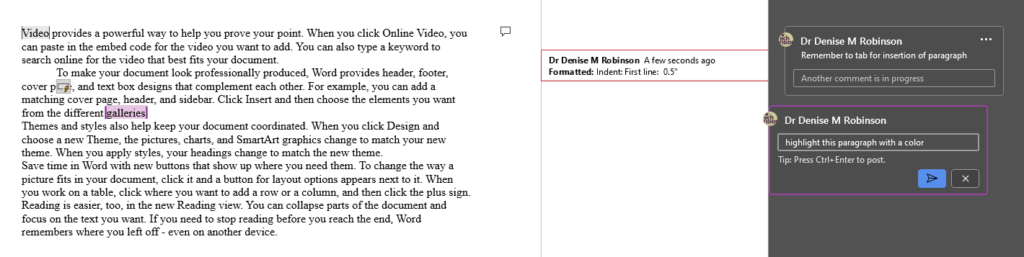
Track Changes in Microsoft Word is an essential tool for collaborative editing and document management. It allows multiple users to make and review edits, providing a clear, organized record of all changes. This feature is invaluable for maintaining the integrity of the original document while incorporating feedback from various contributors. By visually displaying insertions, deletions, and comments, Track Changes enhances transparency and accountability in the editing process. It also simplifies the task of accepting or rejecting modifications, ensuring that the final document meets the desired standards. The typical use is for students to create work and teachers to edit with comments, and it is possible to easily track changes with commands. This is easily done with any screen reader.
Track Changes with Commands in Microsoft Word is a powerful tool for collaborative editing and document management. Here are some key details on its importance and usage:
Key Benefits
Transparency: Track Changes provides a clear, organized record of all modifications made to a document.
Accountability: By displaying who made each change, Track Changes holds contributors accountable for their edits.
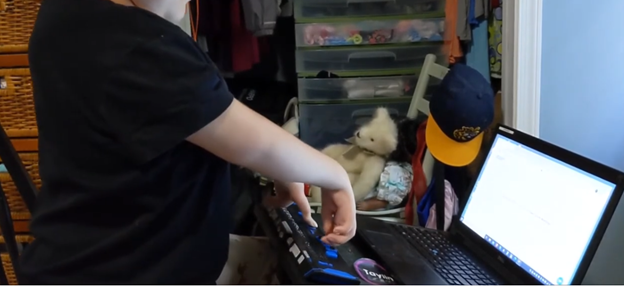
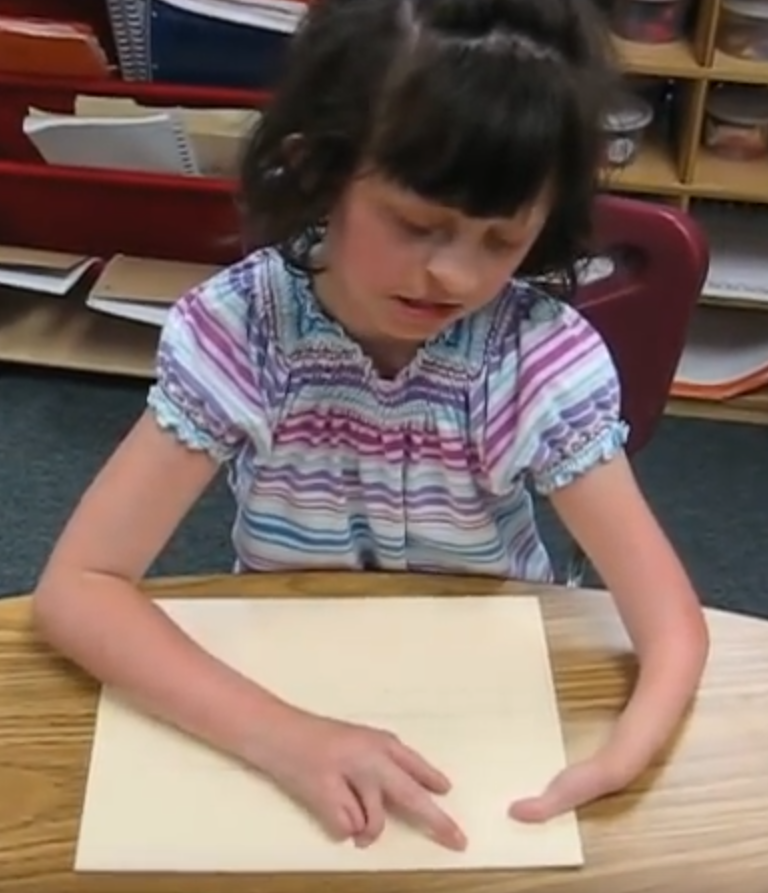
Kaleigh was born with very special hands. So, whether you have 10 fingers or 2 or 3, there is always an easy way to use a braille display to control your computer.
I (Dr. Robinson) began instruction with Kaleigh in the 3rd grade as she struggled to see large print at 2 inches. Here is a video of her first learning skills and as time passed, her typing with special hands was no problem as she quickly got up to 77 words per minute with her special hands.
Practice and Patience: Regular practice is crucial. Start with basic exercises in how to use each hand and gradually increase complexity. Focus on accuracy before speed. Using these techniques and applying this knowledge to her actual work, within 3 years she went from learning to typing at 77 wpm using JAWS screen reader. The above is true for learning braille also.
Typing with special handsSpecial hands reading Braille
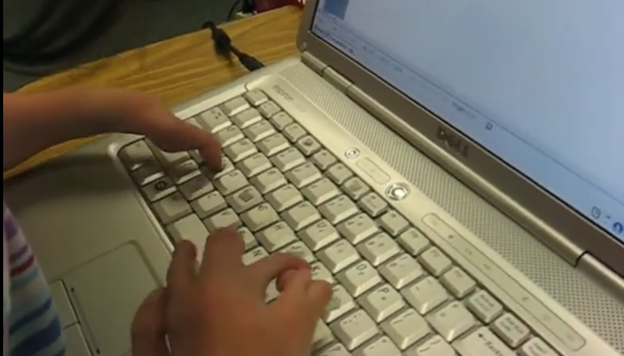
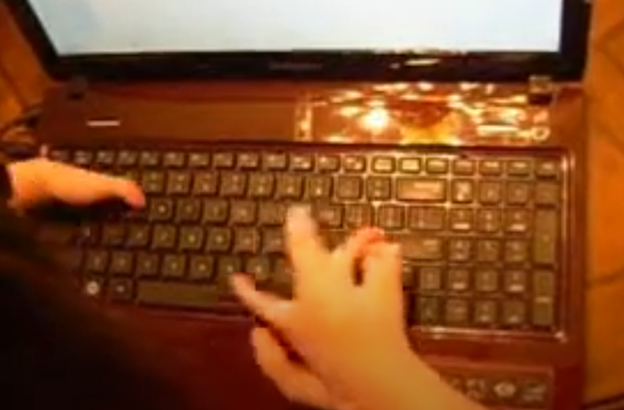
Typing with 3 Fingers on her laptop is made easier with practice.
A child with three fingers can type at over 77 words per minute by using adaptive strategies to access the same technology. Kaleigh is JUST learning the first steps in typing on a regular laptop.
Typing with 3 Fingers
First, they learn how to optimize their finger movements, reducing unnecessary motion. They focus on accuracy and gradually build speed through consistent practice. Children can learn to use the identical keyboard and computers as their peers. Using the center of the keyboard as positioning to the rest of the keyboard is part of the skill. The child practices finger coordination, mastering a rhythm that increases typing speed. Over time, these techniques combine to enable the child to exceed expectations and type as quickly as possible. More YouTube Channel Lessons
Other Kaleigh Videos typing as she advances to typing over 77 words per minute
Typing with 3 Fingers on her laptop is made easier with practice and now she is typing 77 word per minute. This impressive feat shows Kaleigh typing 77 wpm flawlessly.
A young lady with three fingers can type at over 77 words per minute. She is using adaptive strategies to access the same technology as peers. Kaleigh typing 77 wpm highlights her exceptional skills. Kaleigh has been learning and using these special skills based on her fingers for years. She uses a regular laptop with JAWS screen reader to do all of her work.
For individuals typing with one finger on one hand and two fingers on the other, specialized typing techniques can help improve speed and accuracy. Focus on positioning both hands in the center of the keyboard on homerow so the left single finger can move around that side of the keys. With the right 2 fingers, 1 is on the space bar at all times while other finger moves arund and presses keys. Moving together with a lot of practice, speed is gained. Start with slow, deliberate typing to reduce errors and gradually build up speed. Mastering typing speed similar to Kaleigh’s, started with such methods. Regular practice with phrases like “The quick brown fox jumps over the lazy dog” helps improve finger coordination. One such success story celebrating progress is Kaleigh typing 77 wpm.
With determination and keyboard practice with lots of instruction, students can accomplish anything. Kaleigh typing 77 wpm is a testament to this. See her series of progress.
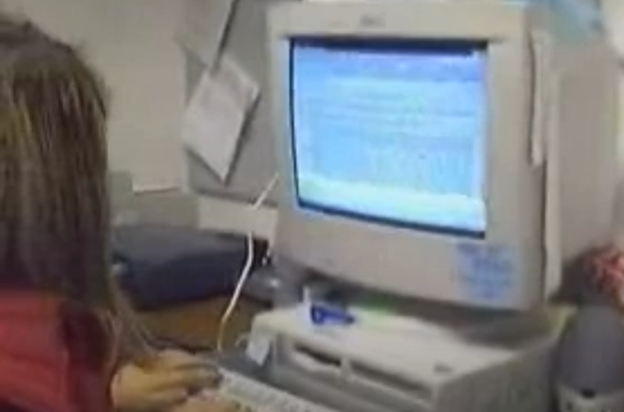
In 2002, Tasha, a 10th-grade student who moved from Ukraine, lost her sight quickly. She had never used a computer before. Jaws in English and Russian gave her the ability to learn English quickly. She switched back and forth in languages as needed. After learning to touch type, within 2 months is independent in the classroom due to her PC computer skills. Since laptop computers were not an option, desktop computers were wheeled on a cart from class to class for use. This is a case where a student learns keyboarding fast despite challenges.
In just two weeks, she learned to navigate a computer using screen reader software, unlocking newfound independence. Tasha rapidly mastered touch typing and easily switching between Word documents and the internet, demonstrating her impressive progress. A student learns keyboarding fast if given the right tools and support. Her journey is a powerful example of how technology can transform lives. Screen readers on PC computers provide crucial tools for independence, even in the face of significant challenges.
Tasha typing on keyboard learning English from Russian Jaws
Most students who lose sight rapidly have a significant or devastating health condition. Being in and out of hospitals for the brain tumor that took her vision, keeping up with work was far easier completing it on a computer. Today, students receive work digitally and can comfortably recuperate at home or hospital AND keep up with learning. When a student learns keyboarding fast, it makes managing their studies much easier.
Tasha and Dr. Robinson together decades after her education in high school–Great Friends
Access Braille Writing and PC Devices: The year is 2000 and I am blessed with meeting 3 siblings in a family of 8. I first met the oldest daughter who was in 2nd grade grade and her sister who was in preschool. Their young brother, was just born. All 3 have a VERY rare condition called: Spondylometaphyseal dysplasia with cone rod dystrophy. This was an exciting journey with all 3. All 3 live very successful lives now.
Early Education Leads to Access Braille Writing Devices
Starting at 3 months old: First, always teach the parents right along with the child–Teamwork is key! One crucial step was ensuring he could eventually access Braille writing devices to aid in his learning journey. Teach fun games on a computer as they learn like Starfall games and Inclusive Multi-Sensory Learning Tools. If you sense a visual impairment and glasses need to be work, try: Kids Bright Eye glasses or Eye patches
Pre-teaching a blind child from an early age involves fostering foundational skills that support sensory development, spatial awareness, and independence. Here’s how you can engage with a blind child from 3 months old to 3 years old and up to 3rd Grade, ensuring they develop crucial abilities at each stage:
At 3 Months Old in general:
At this stage, it’s all about sensory exploration and exposure. A blind infant learns through touch, sound, and smell. Parents and caregivers can begin pre-teaching through activities that engage the child’s remaining senses.
Tactile Exploration: Provide different textures for the baby to feel, such as soft cloth, textured toys, and various materials. This helps them develop an understanding of their environment through touch.
Auditory Stimulation: Introduce the baby to a variety of sounds, from gentle music to the sound of voices and everyday noises. Toys that make sounds or produce vibrations can also help the child associate movements with sounds.
Bonding with Language: Talk to the baby constantly, explaining what’s happening around them. Even at this age, exposing them to language and verbal interaction is key for cognitive development.
At 1 Year Old:
By the time the child is 1 year old, they are starting to gain more control over their movements and understand their surroundings through tactile and auditory feedback. The focus at this age is on expanding their sensory awareness and motor skills.
Mobility Encouragement: Support the child as they begin to crawl or walk. Encourage them to explore safe spaces, ensuring the environment is designed for them to navigate without harm.
Hands-on Learning: Let the child interact with everyday objects, describing what they are holding. This could include toys, household items, or safe objects they encounter daily.
Cane-have a cane around his/her toys so they get acquainted with the tool
Language Development: Continue talking to the child, narrating actions and surroundings. Introduce basic concepts like hot/cold, soft/hard, and big/small, as this builds vocabulary and concept understanding. Have them touch everything, giving purpose to what they interact with always.
A 4-year-old uses the Mountbatten, and a 2nd grader uses the Braille Lite with a Braille display to access Braille writing devices.
At 3 Years Old Access Braille writing devices and start typing on computer:
At 3 years old, the blind child is ready to begin more structured learning and independent exploration. Pre-teaching during this period focuses on more complex tasks, building independence, and preparing for future skills. Begin touch-typing on keyboard of computer and using other braille devices like the MouthBatten Brailler. This student learned all of the alphabet and several contractions.
Orientation and Mobility: Begin teaching basic orientation and mobility skills, using a cane for navigation. This will help the child build confidence in moving through space.
Fine Motor Skills: Encourage fine motor development through activities like threading beads, playing with textured blocks, or using simple tactile puzzles. This helps the child develop dexterity and hand-eye coordination.
Pre-Braille Exposure: Introduce early Braille awareness through tactile games or exposure to raised dots or objects. As they may not be ready to fully learn Braille, familiarization with textures and symbols helps lay the foundation for literacy. This includes touch typing on keyboard using braille on braille device like a Mouthbatten Brailler
Self-Care Skills: Teach simple self-care tasks like washing hands, dressing, and feeding themselves. These activities foster independence and help them gain confidence in daily living skills.
By consistently engaging the child’s senses and nurturing their curiosity, they will develop essential skills for future success. With each stage of growth, pre-teaching ensures they build a strong foundation. This approach prepares the child to easily learn more complex skills later, such as reading Braille, using assistive technology and navigating the world independently.
Continuing to teach a blind child in kindergarten through 2nd grade involves focusing on expanding their academic, social, and independence skills, while incorporating accessible tools and adaptive techniques. Here’s how you can approach teaching at each stage:
Kindergarten (K)-Access writing PC computers:
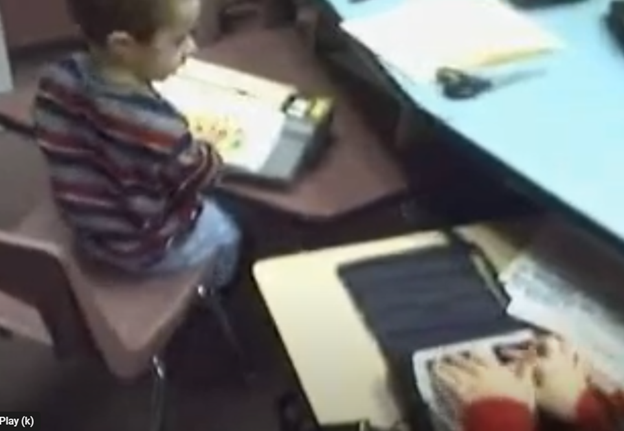
In kindergarten, the focus is on introducing basic academic concepts while fostering independence and confidence in social situations. This student was able to begin reading braille like his peers due to already knowing braille letters and symbols. He also know the keys on the computer to begin learning how to type out work to email to teacher. Teach how accessible Work is needed, including Math for now and later on.
Braille Literacy: Begin formal Braille instruction, introducing letters, numbers, and simple words. Use tactile books, raised alphabet cards, and manipulative’s to enhance literacy.
Orientation and Mobility: Continue reinforcing basic mobility skills such as using a cane and navigating familiar spaces like classrooms and playgrounds.
Interactive Learning: Incorporate multi-sensory learning activities, such as counting objects with tactile number lines and participating in songs or rhymes for phonics and vocabulary.
Technology Introduction: Introduce basic assistive technology, such as a Mountbatten Brailler or screen reader software, to support early writing and computer skills.
First Grade (1st Grade):
In first grade, the child should begin building on the foundations laid in kindergarten, focusing on more advanced academic and mobility skills.
Braille Proficiency: Increase fluency in Braille reading and writing. Introduce more complex words, sentences, and basic punctuation. Begin incorporating Braille reading into classroom activities.
Math Skills: Teach basic math concepts using tactile math tools like counting beads, tactile number lines, and raised math grids. Introduce early Nemeth Code for math symbols in Braille.
Social Integration: Encourage social interactions and group activities, teaching the child to collaborate with peers and practice conversational skills.
Assistive Technology Growth: Begin integrating more advanced technology, such as screen readers (e.g., JAWS or NVDA) and tactile graphics for learning new concepts.
Second Grade (2nd Grade):
By second grade, the goal is to strengthen the child’s academic abilities while fostering greater independence. His sisters immediately picked up keyboarding and were handing in all work within 2 months to teachers via email. They learned Braille reading
Advanced Braille: Continue advancing Braille reading and writing skills, incorporating full sentences and paragraphs. Increase reading speed and comprehension through practice. Teach how to braille or keyboard work on PC computer.
Math in Braille: Build on basic math skills, using tactile tools to teach addition, subtraction, and early multiplication. Enhance familiarity with the Nemeth Code for math. Teach how to output math on the computer using WORD
Independent Learning: Encourage more independent work by providing opportunities to complete assignments using accessible technology. Allow the child to practice retrieving and saving work on a computer or braille device.
Orientation and Mobility: Further develop mobility skills by teaching navigation in unfamiliar environments. Practicing independent travel in controlled settings, such as the school campus or nearby park is essential.
Assistive Technology Growth: Continue integrating more advanced technology, with screen readers (e.g., JAWS or NVDA) so they can advance om speed to keep up with outputting work with their peers.
Throughout kindergarten through 2nd grade, regular collaboration with teachers, mobility instructors, and other specialists is essential. Tailor instruction to the child’s progress and ensure their curriculum is fully accessible to set them up for long-term success. This type of collaboration must continue throughout school to Access Braille writing devices and PC Computers.