Search results for: “low vision”

  • Blind Teacher Lucas Navigates the Canvas Platform Using a Screen Reader

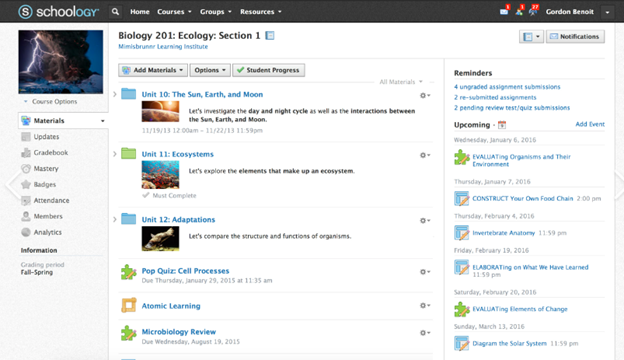
    Dr. Robinson and Lucas began the session by navigating Canvas, focusing on essential screen reader commands for effective navigation. They highlighted the importance of commands like Insert + F5, F6, and F7 to explore the page layout before moving through various elements. When discussing the Canvas school platform navigation, Dr. Robinson highlighted the need to recognize interactive elements like radio buttons and check-boxes to ensure smooth navigation in Canvas. By understanding these features, students can efficiently move through the platform and complete tasks effectively. Understanding Canvas school platform navigation is key for accessibility.

    To streamline their workflow, they used first-letter navigation, such as hitting “C” to quickly jump to courses. This method enables users to navigate faster without manually tabbing through multiple options. Lucas demonstrated how to access different sections of the Canvas interface, including courses and messages, using the appropriate keyboard commands. Mastering the navigation of the Canvas school platform efficiently requires knowing these shortcuts.

    InBox Management in Canvas school Platform Navigation

    For inbox management, Lucas efficiently used first-letter navigation to filter unread emails and compose a new message. Dr. Robinson guided him through composing an email, showing how typing the recipient’s name narrows down the list of available contacts. Lucas learned how to navigate, select recipients, and send messages within the Canvas interface. Canvas school platform navigation strategies significantly improved his inbox management skills.

    After addressing the inbox, they moved on to class assignments. Using heading and link navigation commands, Lucas accessed assignments and checked due dates. Dr. Robinson stressed the importance of using key commands, such as Insert + F7, to bring up lists of assignments and quickly navigate to relevant tasks on the Canvas school platform.

    Lastly, they tackled PDF accessibility. Dr. Robinson showed Lucas how to download and convert PDFs into Word documents for better accessibility and interaction. By converting documents, Lucas could add notes, adjust content, and work more effectively. These steps reinforced the power of screen reader commands, helping users stay organized and fully engaged in digital learning environments on the Canvas school platform.

  • Blind Student Campbell Demonstrates Google Slides Shortcut Commands with a Screen Reader

    Campbell demonstrates slides today. She opens a new tab (Ctrl +T) in Google Chrome and types “drive.google.com.” She navigates to her Google Drive and selects the presentation. Campbell prefers using the “Recents” tab to find files quickly. Campbell opens the presentation after discussing different search methods. To make her work more efficient, she uses various Google Slides shortcut commands. PowerPoint offers numerous accessibility and design features that enhance usability, making presentations more inclusive and visually appealing. Dr Robinson emphasizes the importance of picture placement and alt text for accessibility. She reviews the slides, noting that the designs are good but the pictures need adjustment. She guides through the process of fixing picture placement in Google Slides.

    google slide shortcut commands with picture adjusted properly
    Google Slides shortcut commands with picture adjusted properly

    Google Slides Shortcut Commands

    1. Open a new tab in Google Chrome:
      • CommandCtrl + T
      • Action: Opens a new tab.
    2. Navigate to Google Drive:
      • CommandCtrl + L, then type drive.google.com and press Enter
      • Action: Focuses on the address bar, types the URL, and navigates to Google Drive.
    3. Search in Google Drive:
      • CommandCtrl + /
      • Action: Opens the search bar in Google Drive.
    4. Open the “Recents” tab:
      • CommandCtrl + Alt + R
      • Action: Navigates to the “Recents” tab in Google Drive.
    5. Open a selected file:
      • CommandEnter
      • Action: Opens the selected file.
    6. Add alt text to pictures:
      • CommandCtrl + Alt + Y is an essential Google Slides Shortcut Command
      • Action: Opens the alt text dialog for the selected picture.
    7. Move to the canvas for picture placement:
      • CommandCtrl + Alt + Shift + C
      • Action: Moves focus to the canvas for adjusting picture placement.

    Crucial Alt Text= Ctrl + Alt +Y using More Google Shortcuts

    More Google Shortcuts

    Here are some additional useful keyboard shortcuts for Google Slides:

    Navigating Slides

    • Next slide: Right Arrow or Down Arrow
    • Previous slide: Left Arrow or Up Arrow
    • Jump to a specific slide: Ctrl + Shift + F

    Formatting Text

    • Bold: Ctrl + B
    • Italic: Ctrl + I
    • Underline: Ctrl + U
    • Increase font size: Ctrl + Shift + >
    • Decrease font size: Ctrl + Shift + <

    Working with Objects

    • Group objects: Ctrl + G
    • Ungroup objects: Ctrl + Shift + G
    • Duplicate object: Ctrl + D
    • Bring to front: Ctrl + Shift + Up Arrow
    • Send to back: Ctrl + Shift + Down Arrow

    Editing Slides

    • New slide: Ctrl + M
    • Duplicate slide: Ctrl + D
    • Delete slide: Ctrl + Shift + D
    • Move slide up: Ctrl + Up Arrow
    • Move slide down: Ctrl + Down Arrow

    Presenting Slides

    • Start presentation from current slide: Shift + F5
    • Start presentation from beginning: F5
    • Exit presentation mode: Esc

    General Shortcuts

    • Undo: Ctrl + Z
    • Redo: Ctrl + Y
    • Save: Ctrl + S
    • Find: Ctrl + F

    These shortcuts can help streamline your workflow and make navigating and editing your presentations more efficient.

    Creating PPT Sound transitions for all audiences to download slides to PPT

    These commands help streamline the process and ensure accessibility

  • Accessible Work at School: What Blind Students Need — by Eme

    Emery, a blind ninth-grader at Kalaheo, introduces herself and shares her love for math and technology. She uses a computer with a screen reader and Braille display to access her education. Eme navigates her world with a cane and texts friends using her phone. During the pandemic, her computer became essential for schoolwork. She explains how she uses various tools to access her education, including JAWS screen reader and Braille Display and other access technology. Eme highlights the importance of accessible assignments and demonstrates navigating an online platform despite its challenges. Accessible work at school is critical for her success.

    Emery uses tools like the JAWS screen reader and Braille display connected to her computer to navigate her studies. She emphasizes that accessible assignments are crucial because they allow her to engage with the same content as her peers. When assignments are not accessible, it creates significant barriers to her learning. It is evident that accessible work at school can make a big difference.

    Eme Making Work accessible on an inaccessible site
    Eme Making Work accessible on an inaccessible site

    By ensuring Teachers’ work is accessible, you empower students like Emery to succeed and participate fully in their education. Accessible materials foster a learning environment where all students can be included and thrive. Therefore, focusing on making work accessible at school helps all students.

    She thanks teachers for their commitment to making education accessible for everyone. Providing accessible work at school shows dedication to inclusion and highlights the importance of accessibility.

    Making Work Accessible:

    Complete Advanced Math with LaTex to finish math fast using Mathkicker.AI, JAWS, NVDA and/or display

    Math & AI =Mathkicker.ai convert PDF math or any work into WORD docx.

    Perfect Digital Math at all levels using only audio or tactile Braille or both in Mathkicker.ai

    Math & AI is MathKicker.ai — convert to .docx from clipboard- make inaccessible accessible

    Mathkicker.ai-take an image of math and make it perfect Math in Word Math editor with screen reader

    Mathkicker.AI -change Math PDF to text in WORD Math editor in less than a minute with screen reader

  • Miss Aubrey Learns to Work on a Braille Display and Computer

    Years ago, Aubrey was just learning how to learn remotely. Dr Robinson lived close by so was able to come over in person to help her with skills and hand under hand and hand over hand as needed to learn position of fingers. A major part of her lessons is to learn to do work on braille display and computer with keyboard shortcuts. This video is her just learning how to do math in WORD.

    To answer a Zoom call using keyboard shortcuts when on a braille display and computer, you can use the following:

    These shortcuts help you manage calls efficiently without needing to use a mouse. A braille display and computer can make these tasks smoother.

    Here are some additional keyboard shortcuts that Aubrey learned to enhance her navigation and accessibility experience:

    General Web Navigation on braille display and computer

    • Ctrl + L or Alt + D: Focus on the address bar.
    • Ctrl + T: Open a new tab when using a braille display and/or computer.
    • Ctrl + W: Close the current tab.
    • Ctrl + Shift + T: Reopen the last closed tab.
    • Ctrl + Tab: Switch to the next tab.
    • Ctrl + Shift + Tab: Switch to the previous tab.
    • Ctrl + R or F5: Refresh the current page.
    • Ctrl + F: Open the find bar to search within the page on your braille display and computer setup.

    Screen Reader Specific

    • Insert + F7: Open the links list in JAWS.
    • Insert + F6: Open the headings list in JAWS.
    • Insert + Down Arrow: Start reading continuously from the current position in JAWS.
    • Ctrl + Alt + Arrow Keys: Navigate by character, word, or line in NVDA for better synchronization with your braille display and computer.
    Aubrey using braille display and computer to learn how to complete math in WORD
    Aubrey using braille display and computer, to learn how to complete math in WORD

    Windows Accessibility commands for display and computer

    • Windows Key + U: Open the Ease of Access Center.
    • Windows Key + Plus (+): Turn on Magnifier and zoom in.
    • Windows Key + Minus (-): Zoom out with Magnifier.
    • Windows Key + Ctrl + N: Open Narrator settings.
    • Windows Key + Ctrl + O: Turn on the On-Screen Keyboard.

    Text Editing

    • Ctrl + C: Copy selected text.
    • Ctrl + X: Cut selected text.
    • Ctrl + V: Paste copied or cut text.
    • Ctrl + Z: Undo the last action.
    • Ctrl + Y: Redo the last undone action.

    These shortcuts can help you navigate more efficiently and make your web browsing and computer use more accessible. If you need more specific shortcuts or have other questions, feel free to ask!

  • Google Classroom and Spanish with JAWS

    Teacher of the Blind and Visually Impaired Jordana gives an overview of how to navigate Google Classroom for a Conversational Spanish Level 1 course using JAWS. The instructor, Jordana demonstrates how to join the class, navigate the main page, and access class materials. She is native born from Ecuador so English is her second language.

    Here are some useful keyboard commands for Google Classroom:

    General Navigation

    • Tab: Move through links and text fields on the page.
    • Space Bar: Works like a mouse click.
    • Ctrl + C: Copy
    • Ctrl + X: Cut
    • Ctrl + V: Paste
    • Ctrl + Z: Undo
    • Ctrl + K: Add a link (Use Command instead of Ctrl on a Mac)
    Google classroom layout and Spanish with Jaws
    Google classroom and Spanish with Jaws

    Specific to Google Classroom

    • Ctrl + F: Find specific text on the page.
    • Ctrl + Shift + N: Open a new incognito window (useful for testing student views).
    • Ctrl + Shift + T: Reopen the last closed tab.

    These shortcuts can streamline workflow navigation for ease, especially when using assistive technologies.

  • Rebuild the Microsoft Word Template When It Is Not Working Well

    You want to Rebuild Microsoft Word Template when you close WORD and it starts to ask: There are changes to the Normal Template, “Do you want to save the normal template?” You always want to say “NO” because if you do not it will start opening with the last work you did in it. If you want WORD to STOP asking that question or fix your goof, here is how to rebuild that Normal Template

    Commands to rebuild Word template when it gets messed up and constantly asks if you want to save it. Other Lessons to fix Tech

    Rebuild Microsoft Word Template with RUN
    Rebuild Microsoft Word Template with RUN
    1. Open the Run Dialog Box:
      • Press Windows + R.
      • Type %appdata%\Microsoft\Templates and press Enter.
    2. Delete the Normal Template:
      • In the opened folder, find normal.dotm (or the equivalent for your Office version).
      • Select it and press Delete.
    3. Reopen Word:
      • This action will rebuild the normal template automatically.
    4. Reconfigure Your Settings:
      • Fonts:
        • Press Ctrl + D to open the Font dialog box.
        • Set your desired font (e.g., Times New Roman, 12 pt).
        • Press Alt + D to set as default for all documents.
      • Paragraph Spacing:
        • Press Alt + O, then P to open the Paragraph dialog box.
        • Adjust spacing settings (e.g., single spacing).
        • Press Alt + D to set as default for all documents.

    This process ensures your Word template is reset and configured to your preferences. Here are some more fixes you can do

    Other WORD Lessons

    Optimizing Windows 11 Efficiency for Screen Reader with Key Settings and Configurations

    WORD Efficient Text Navigation and Selection

    Basic WORD JAWS commands with Typing Trick

    Rebuild Microsoft Word Template when it is not working well

    Microsoft Word MLA format with Christopher Duffley

    WORD accessible food chain for class using talking software

    Commands to change mouse -access programs fast, basics in Word font & movement

    Excel line plot graph-copy to Word for Math

    Complete an excel graph and copy into Word document with screen reader

    Essential WORD keyboard commands for setting defaults

    Track changes in Word-How teachers make corrections in work

    Track Changes with Commands-inserting comments and editing work

    Let us know how we can help you: Contact US: TechVisionTraining@yourtechvision.com

  • Games online for Blind Users

    Games online for Blind Users created by zanosoft.net, are associated with RS Games. This is a platform that provides accessible games for the blind and visually impaired. The RS Games client allows users to play various board, dice, and card games against each other through a central server. The platform supports multiple games and is designed to be accessible, making it easier for visually impaired users to enjoy gaming.

    RS Games for blind users
    RS Games Online for blind users

    RS Games – Over 20 games are currently available including Monopoly, Uno, Blackjack, Yahtzee, Farkle, and Cards Against Humanity. Click here to see a full list of games.

  • Select Noncontiguous folders and files in File Explorer

    In this video, Nate Kile will show how to select noncontiguous folders and files efficiently. This method will allow you to select as you need them.

    To select noncontiguous folders and files in File Explorer using keyboard shortcuts, follow these steps:

    1. Open File Explorer:
      • Press Windows + E to open File Explorer.
    2. Navigate to the Desired Folder:
      • Use the arrow keys to navigate to the folder containing the files or folders you want to select.
    3. Select the First Item:
      • Use the arrow keys to highlight the first file or folder you want to select.
      • Press Space to select it.
    4. Select Additional Non-Contiguous Items:
      • Hold down the Ctrl key.
      • Use the arrow keys to navigate to the next file or folder you want to select.
      • Press Space to select each additional item while still holding down the Ctrl key.
    5. Complete Your Selection:
      • Release the Ctrl key once you have selected all the desired files or folders.
    Select noncontiguous files and folders
    Select noncontiguous files and folders

    This method allows you to pick and choose individual files or folders that are not next to each other, giving you more flexibility in your selection.

    Our Mission and Purpose will take you where you want and need to go. Let us know how we can help you with noncontiguous folders and files. Contact US: TechVisionTraining@yourtechvision.com

  • Microsoft Word MLA format with Christopher Duffley

    Microsoft Word MLA format for papers is essential for several reasons. Firstly, it ensures consistency and clarity in academic writing. This makes it easier for readers to follow and understand the content. MLA format provides a standardized way to cite sources. This helps prevent plagiarism by giving proper credit to original authors. This format also allows students to present their work in a professional manner, which is crucial for academic credibility. Additionally, adhering to MLA guidelines demonstrates attention to detail and a commitment to academic integrity. These attributes are highly valued in educational settings. Overall, MLA format helps maintain a high standard of scholarly communication and fosters a culture of respect for intellectual property. If WORD is not working properly-Rebuild it!

    Set up an MLA format in Microsoft Word, follow these steps:

    1. Set the Margins:
      • Press Alt + P to open the Layout tab.
      • Press M to open the Margins menu.
      • Select Normal to set 1-inch margins on all sides.
    2. Set the Font and Font Size:
      • Press Ctrl + D to open the Font dialog box.
      • Select Times New Roman and set the font size to 12.
    3. Set Double Line Spacing:
      • Press Ctrl + A to select all text.
      • Press Ctrl + 2 to set double-spacing.
    4. Set the Header:
      • Alt V + H auto opens Header and down arrow to footer if needed
      • or Press Alt + N to open the Insert tab.
      • Press H to open the Header menu and select Blank.
      • Type your last name, press Space, then press Alt + Shift + P to insert the page number.
    5. Include Key Information on the First Page:
      • Type your name, instructor’s name, course, and date on separate lines.
      • Center-align the title of your paper by pressing Ctrl + E.
    6. Format the Works Cited Page:
      • Press Ctrl + Enter to insert a new page.
      • Type “Works Cited” and center-align it.
      • Use a hanging indent for each citation by pressing Ctrl + T.
    7. Alt + Q if you cannot remember a command

    These commands will help you format your document according to MLA guidelines.

    Properly Format a Paper

    How to Set Up and Use Microsoft WORD MLA Format – Help Desk Geek

  • Navigate Schoology with Jaws via Kim

    To Navigate Schoology with Jaws is easy using these useful keyboard commands for navigation. When you’re using a screen reader like JAWS or NVDA it is very accessible. Kim demonstrates her skills, showing how to navigate schoology with efficiency. She shares with others how this training has allowed her to access her education.

    Schoology Navigation Skills Video-General Commands to help navigate Schoology

    1. Navigate to Courses:
      • Press Insert + F7 to bring up the links list.
      • Use the arrow keys to navigate to the desired course and press Enter.
    2. Access Course Materials:
      • Press H to navigate through headings until you reach the course materials section.
      • Use the arrow keys to select the material you want to access.
    3. Navigate to Assignments:
      • Press Insert + F6 to bring up the headings list.
      • Use the arrow keys to find and select the “Assignments” heading.
    4. Access Notifications:
      • Press Insert + F5 to bring up the form fields list.
      • Navigate to the notifications section and press Enter.
    5. Navigate to Discussions:
      • Press H to move through headings until you reach the “Discussions” section.
      • Use the arrow keys to select and enter a discussion.
    6. General Navigation:
      • Use Tab and Shift + Tab to move forward and backward through interactive elements.
      • Press G to navigate to graphics and L to navigate to lists.
    7. One Trick to remember is when a PDF viewer of work opens, the download in WORD link is at the very bottom. Use your links list or ctrl end and up arrow to find it.

    More Schoology Lessons to help Navigate Schoology with Jaws

    Navigate schoology with JAWS
    Navigate schoology with JAWS

    Let us know how we can help you: Contact US: TechVisionTraining@yourtechvision.com