Lucas, a blind individual, demonstrates JAWS Commands using AI Descriptions and how to effectively use ChatGPT with DALL-E to generate and describe images. Starting with ChatGPT, Lucas opens the platform, which places him directly in the edit box. To navigate out, he presses the “up arrow” key. He then maximizes the screen with “Windows + up arrow,” enhancing readability for JAWS.
Next, Lucas demonstrates how to locate the DALL-E AI Description image generator by accessing the links list using Jaws Commands with “Caps Lock + F7.” He navigates to the search box using the “E” key and types “DALL-E” in all capitals, with the period included. After pressing “Enter,” he tabs through the search results until he finds the relevant link, then presses “Enter” again to open it.
Once inside the image generator, Lucas describes the process of inputting a prompt. He emphasizes the importance of being specific, including details about the setting, characters, and art style. For instance, he generates an image of a wizard casting a spell on a cliff-side in a realistic art style. By pressing “Enter,” the image generation process begins, typically producing two images by default. He demonstrates how to make the inaccessible-accessible.
To download an image, Lucas uses “Shift + B” to find the “Show Image” button, followed by pressing “Enter” and then down arrow to the “Download Image” button. He encounters a warning about the dialog not being focused, while the download proceeds. Remember to Email your beautiful creations to someone also.
For image descriptions, Lucas follows a similar process to find the “Image Description Assistant” link. After inputting his request and attaching the image file, he waits for the description to generate. To review the description, Lucas uses “Shift + G” to jump to the top of the graphic, then down arrows to read it. This methodical approach allows Lucas to create detailed images and receive comprehensive descriptions efficiently.
AI has transformed how screen reader users access their world, MathKicker.AI is a powerful MATH app that allows top level Math work. Do not let Low Vision issues or legal blindness stop you from accelerating in school.
Dr. Robinson introduces the Desmos 3D Graphing tool, an essential resource for educators working with blind and low vision students. This tool allows users to create and manipulate 3D objects, enhancing the learning experience for students who require tactile or visual aids. As a teacher of the blind, Dr. Robinson emphasizes the importance of providing accessible 3D objects that students can manipulate as they learn. She demonstrates how to use Desmos 3D Graphing, starting with a simple circle and transforming it into a 3D cylinder.
Throughout the demonstration, Dr. Robinson highlights the seamless integration of Desmos 3D Graphing with braille displays, ensuring the content is accessible to students with visual impairments. She manipulates the cylinder’s size and shape using various commands, showing how easy it is to adjust these parameters in real-time. This hands-on approach allows students to understand the relationship between mathematical equations and their 3D representations. A 3D printer can create image or acquire an actual can of soup to compare to a circle/cylinder for further student understanding.
Image of Cylinder created with Desmos 3-D Graphing
Dr. Robinson further explores Desmos 3D Graphing by adjusting a parabola into different shapes, including a “blob” that can be physically modeled using clay. This tactile method helps blind students grasp the concept of changing variables and their impact on the graph’s shape. The ability to adjust and visualize these graphs is particularly beneficial for students preparing for tests or needing to solidify their understanding of complex mathematical concepts. For real time learning, either 3-D emboss or 2-D emboss graphs. For ease, hand molding clay is cheap and easy for any object
In addition to demonstrating the tool’s functionality, Dr. Robinson encourages users to explore more on the Desmos website, including the blog and available shortcuts. The continuous improvements in Desmos 3D Graphing make it a powerful tool for blind and low vision students. By integrating this tool into their learning process, educators can significantly enhance the accessibility and engagement of math lessons. Desmos 3D Graphing provides an invaluable resource for making advanced math concepts accessible to all students. Regardless of their visual abilities, you can access Desmos Lessons.
Dr. Robinson demonstrates how to create and manipulate a parabola using the Desmos shaded parabolas using the graphing calculator. This process is specifically designed for blind and low vision students. She begins by typing an equation. Desmos automatically adds sliders, allowing the adjustment of the graph’s shape in real-time.
As Dr. Robinson runs the equation, the parabola expands, resembling the curve of a ball in motion. She explains the importance of embossing the graph so students can physically feel its structure on the XY plane. This tactile approach helps students understand mathematical concepts more concretely.
To enhance accessibility, Dr. Robinson uses the “Alt + T” command to activate the audio trace. This feature provides valuable auditory information about the graph. She also slows down the narration using “Control + Shift + Page Down,” ensuring clarity and comprehension.
Next, Dr. Robinson shares the graph with her students using the “Insert + F5” command. She exports the graph as a Braille-ready image, making it accessible for students who rely on tactile feedback. After downloading the image, she opens it in a photo editor to enhance contrast. This step ensures that the lines are clearly defined for the student.
Tiger Designer
Dr. Robinson then pastes the edited image of Desmos shaded parabolas into Tiger Designer, a software used to prepare tactile graphics for printing(emboss). Using “Control + P,” she embosses the graph on her ViewPlus embosser, allowing students to feel the parabola and compare it with what their sighted peers see.
This hands-on approach for STEM, ensures that blind students can fully participate in graphing activities. Dr. Robinson’s method integrates technology and tactile feedback, making math accessible and engaging. Through these steps, she empowers students to understand and interact with complex mathematical concepts. This demonstration showcases the effective use of Desmos and related tools to enhance learning for visually impaired students.
Dr. Robinson explains in video how to reduce a large PDF to just a few pages, so anyone can “copy” just a few pages out as needed or convert a whole inaccessible PDF to something accessible with a screen reader. She begins with a blurry PDF of “A Tale of Two Cities,” demonstrating how it turns blue when clicked, or a screen reader saying “empty document”. To make the PDF more manageable, she uses the “Control + P” command, which is the universal print command across browsers. She selects “Microsoft Print to PDF” from the printer options and then uses “Alt + G” to navigate quickly to the page selection. After selecting only two pages to save, she names the file and saves it to her downloads folder using “Alt + D” followed by “Alt + S.”
Next, Dr. Robinson uses MathKicker.AI, an AI program typically for math conversions but also converts anything to convert the PDF to a DOCX file. She opens Math Kicker, navigates to the convert to PDF button by pressing “B,” and waits for it to convert. Once the conversion is complete, she accesses the converted file using “Control + J” in a browser or “Windows + E” to open the file explorer. In file explorer and selects the newly saved PDF from her downloads folder.
Print Options to reduce a PDF
After verifying that the correct pages were saved, she adjusts the viewing size to 200% using “Alt + V” and then “Z” to make the text more readable in WORD. The text appears flawless, making it easy for screen readers to process and read aloud.
Dr. Robinson emphasizes that this method is particularly useful for low vision or blind students, allowing them to access only the necessary pages of a large PDF and allowing them to use a screen reader to read content. This approach also benefits fully sighted users who may struggle with poor-quality images. By converting and saving specific pages, users can create clear, readable text from even the blurriest PDFs. There are AI programs on the WEB that will do this also.
Track Changes in Microsoft Word is an essential tool for collaborative editing and document management. It allows multiple users to make and review edits, providing a clear, organized record of all changes. This feature is invaluable for maintaining the integrity of the original document while incorporating feedback from various contributors. By visually displaying insertions, deletions, and comments, Track Changes enhances transparency and accountability in the editing process. It also simplifies the task of accepting or rejecting modifications, ensuring that the final document meets the desired standards. The typical use is for students to create work and teachers to edit with comments, and it is possible to easily track changes with commands. This is easily done with any screen reader.
Track Changes with Commands in Microsoft Word is a powerful tool for collaborative editing and document management. Here are some key details on its importance and usage:
Key Benefits
Transparency: Track Changes provides a clear, organized record of all modifications made to a document.
Accountability: By displaying who made each change, Track Changes holds contributors accountable for their edits.
Access Braille Writing and PC Devices: The year is 2000 and I am blessed with meeting 3 siblings in a family of 8. I first met the oldest daughter who was in 2nd grade grade and her sister who was in preschool. Their young brother, was just born. All 3 have a VERY rare condition called: Spondylometaphyseal dysplasia with cone rod dystrophy. This was an exciting journey with all 3. All 3 live very successful lives now.
Early Education Leads to Access Braille Writing Devices
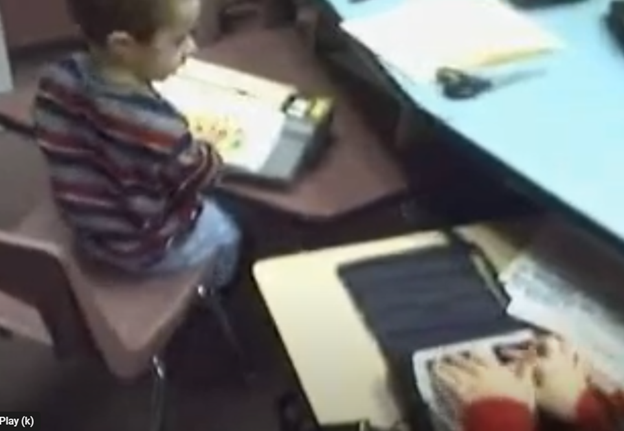
Starting at 3 months old: First, always teach the parents right along with the child–Teamwork is key! One crucial step was ensuring he could eventually access Braille writing devices to aid in his learning journey. Teach fun games on a computer as they learn like Starfall games and Inclusive Multi-Sensory Learning Tools. If you sense a visual impairment and glasses need to be work, try: Kids Bright Eye glasses or Eye patches
Pre-teaching a blind child from an early age involves fostering foundational skills that support sensory development, spatial awareness, and independence. Here’s how you can engage with a blind child from 3 months old to 3 years old and up to 3rd Grade, ensuring they develop crucial abilities at each stage:
At 3 Months Old in general:
At this stage, it’s all about sensory exploration and exposure. A blind infant learns through touch, sound, and smell. Parents and caregivers can begin pre-teaching through activities that engage the child’s remaining senses.
Tactile Exploration: Provide different textures for the baby to feel, such as soft cloth, textured toys, and various materials. This helps them develop an understanding of their environment through touch.
Auditory Stimulation: Introduce the baby to a variety of sounds, from gentle music to the sound of voices and everyday noises. Toys that make sounds or produce vibrations can also help the child associate movements with sounds.
Bonding with Language: Talk to the baby constantly, explaining what’s happening around them. Even at this age, exposing them to language and verbal interaction is key for cognitive development.
At 1 Year Old:
By the time the child is 1 year old, they are starting to gain more control over their movements and understand their surroundings through tactile and auditory feedback. The focus at this age is on expanding their sensory awareness and motor skills.
Mobility Encouragement: Support the child as they begin to crawl or walk. Encourage them to explore safe spaces, ensuring the environment is designed for them to navigate without harm.
Hands-on Learning: Let the child interact with everyday objects, describing what they are holding. This could include toys, household items, or safe objects they encounter daily.
Cane-have a cane around his/her toys so they get acquainted with the tool
Language Development: Continue talking to the child, narrating actions and surroundings. Introduce basic concepts like hot/cold, soft/hard, and big/small, as this builds vocabulary and concept understanding. Have them touch everything, giving purpose to what they interact with always.
A 4-year-old uses the Mountbatten, and a 2nd grader uses the Braille Lite with a Braille display to access Braille writing devices.
At 3 Years Old Access Braille writing devices and start typing on computer:
At 3 years old, the blind child is ready to begin more structured learning and independent exploration. Pre-teaching during this period focuses on more complex tasks, building independence, and preparing for future skills. Begin touch-typing on keyboard of computer and using other braille devices like the MouthBatten Brailler. This student learned all of the alphabet and several contractions.
Orientation and Mobility: Begin teaching basic orientation and mobility skills, using a cane for navigation. This will help the child build confidence in moving through space.
Fine Motor Skills: Encourage fine motor development through activities like threading beads, playing with textured blocks, or using simple tactile puzzles. This helps the child develop dexterity and hand-eye coordination.
Pre-Braille Exposure: Introduce early Braille awareness through tactile games or exposure to raised dots or objects. As they may not be ready to fully learn Braille, familiarization with textures and symbols helps lay the foundation for literacy. This includes touch typing on keyboard using braille on braille device like a Mouthbatten Brailler
Self-Care Skills: Teach simple self-care tasks like washing hands, dressing, and feeding themselves. These activities foster independence and help them gain confidence in daily living skills.
By consistently engaging the child’s senses and nurturing their curiosity, they will develop essential skills for future success. With each stage of growth, pre-teaching ensures they build a strong foundation. This approach prepares the child to easily learn more complex skills later, such as reading Braille, using assistive technology and navigating the world independently.
Continuing to teach a blind child in kindergarten through 2nd grade involves focusing on expanding their academic, social, and independence skills, while incorporating accessible tools and adaptive techniques. Here’s how you can approach teaching at each stage:
Kindergarten (K)-Access writing PC computers:
In kindergarten, the focus is on introducing basic academic concepts while fostering independence and confidence in social situations. This student was able to begin reading braille like his peers due to already knowing braille letters and symbols. He also know the keys on the computer to begin learning how to type out work to email to teacher. Teach how accessible Work is needed, including Math for now and later on.
Braille Literacy: Begin formal Braille instruction, introducing letters, numbers, and simple words. Use tactile books, raised alphabet cards, and manipulative’s to enhance literacy.
Orientation and Mobility: Continue reinforcing basic mobility skills such as using a cane and navigating familiar spaces like classrooms and playgrounds.
Interactive Learning: Incorporate multi-sensory learning activities, such as counting objects with tactile number lines and participating in songs or rhymes for phonics and vocabulary.
Technology Introduction: Introduce basic assistive technology, such as a Mountbatten Brailler or screen reader software, to support early writing and computer skills.
First Grade (1st Grade):
In first grade, the child should begin building on the foundations laid in kindergarten, focusing on more advanced academic and mobility skills.
Braille Proficiency: Increase fluency in Braille reading and writing. Introduce more complex words, sentences, and basic punctuation. Begin incorporating Braille reading into classroom activities.
Math Skills: Teach basic math concepts using tactile math tools like counting beads, tactile number lines, and raised math grids. Introduce early Nemeth Code for math symbols in Braille.
Social Integration: Encourage social interactions and group activities, teaching the child to collaborate with peers and practice conversational skills.
Assistive Technology Growth: Begin integrating more advanced technology, such as screen readers (e.g., JAWS or NVDA) and tactile graphics for learning new concepts.
Second Grade (2nd Grade):
By second grade, the goal is to strengthen the child’s academic abilities while fostering greater independence. His sisters immediately picked up keyboarding and were handing in all work within 2 months to teachers via email. They learned Braille reading
Advanced Braille: Continue advancing Braille reading and writing skills, incorporating full sentences and paragraphs. Increase reading speed and comprehension through practice. Teach how to braille or keyboard work on PC computer.
Math in Braille: Build on basic math skills, using tactile tools to teach addition, subtraction, and early multiplication. Enhance familiarity with the Nemeth Code for math. Teach how to output math on the computer using WORD
Independent Learning: Encourage more independent work by providing opportunities to complete assignments using accessible technology. Allow the child to practice retrieving and saving work on a computer or braille device.
Orientation and Mobility: Further develop mobility skills by teaching navigation in unfamiliar environments. Practicing independent travel in controlled settings, such as the school campus or nearby park is essential.
Assistive Technology Growth: Continue integrating more advanced technology, with screen readers (e.g., JAWS or NVDA) so they can advance om speed to keep up with outputting work with their peers.
Throughout kindergarten through 2nd grade, regular collaboration with teachers, mobility instructors, and other specialists is essential. Tailor instruction to the child’s progress and ensure their curriculum is fully accessible to set them up for long-term success. This type of collaboration must continue throughout school to Access Braille writing devices and PC Computers.
The difference between inaccessible and accessible website content when using screen readers is significant. It affects how efficiently users can navigate the web. On inaccessible websites, screen readers struggle to interpret poorly structured content. This makes it difficult for users to understand the layout or find essential information. For example, missing alt text on images or unlabeled buttons can leave blind or low vision users guessing about the content. In contrast, accessible websites provide clear navigation with properly labeled elements, such as headings, links, and buttons. This allows users to move through pages with ease. Additionally, accessible sites use ARIA (Accessible Rich Internet Applications) roles to improve interactions between the website and the screen reader. By following accessibility guidelines, developers make content more usable for everyone, including screen reader users, creating a more inclusive digital environment.
Difference between inaccessible and accessible website content is in the ease of keyboard commands
Quick Heading Navigation:
Next heading at level 1:1
Next heading at level 2:2
Next heading at level 3:3 (Continue for headings 4–6)
Link Navigation:
Next link:L
Previous link:Shift + L
List of all links:Insert + F7
Activate a link:Enter
Forms and Form Controls:
Move to next form field:F
Next combo box:C
Next edit field:E
Next button:B
Next radio button:A
Next check box:X
List of all form controls:Insert + F5
Tables:
Move to the next table:T
Next cell in a row:Ctrl + Alt + Right Arrow
Previous cell in a row:Ctrl + Alt + Left Arrow
Next cell in a column:Ctrl + Alt + Down Arrow
Previous cell in a column:Ctrl + Alt + Up Arrow
Table reading mode (on/off):Insert + Spacebar, then T
Miscellaneous:
Refresh page:Insert + Esc
List of headings:Insert + F6
List of frames:Insert + F9
List of form fields:Insert + F5
Move to the next non-link text element:N
Move to the previous non-link text element:Shift + N
Move to the next visited link:V
These commands allow the difference between inaccessible and accessible website content and allow efficient navigation and interaction with web content using JAWS. With properly coding a website, the inaccessible becomes accessible for all users.
Starfall.com is a wonderful website for kids. It provides free and subscription-based learning games and resources for young children. It focuses on early literacy, math, and foundational skills. Initially created to teach reading through phonics, Starfall has since expanded to include interactive content in math, social studies, and more. Go to: https://www.starfall.com/h/accessibility.php which is on the first page so your child can access the site also.
Key Features of Starfall.com Website for kids:
Phonics and Reading: The website offers various phonics-based reading games and activities, helping children build vocabulary and comprehension skills.
Math: Starfall includes interactive games and exercises that teach basic math concepts such as counting, addition, subtraction, and geometry.
Language Arts: Activities to help kids understand grammar, sentence building, and other language concepts.
Science and Social Studies: Limited resources are available for early science and social studies learning.
While Starfall.com website for kids aim to be accessible (most of it is) BUT, you must use: https://www.starfall.com/h/accessibility.php for accessible play for interactive games and animations, which are a major component of Starfall’s appeal.
VoiceOver (iOS): Some parts of Starfall are accessible when using VoiceOver on iOS devices. However, many interactive elements may not be read or described in full by the screen reader, making navigation difficult.
JAWS and NVDA (Windows): Starfall’s web-based activities have mixed results with JAWS and NVDA. Some of the educational content is accessible, but much of the visual and interactive games may not be fully usable. The site does not appear to have been fully optimized for these tools.
Keyboard Navigation: For users who rely on keyboard navigation, Starfall might be challenging since many games require dragging and dropping or clicking on specific items that are visually represented.
Text Descriptions and Audio Narration: Starfall includes a lot of audio instructions and narrated text, which can be helpful for users with low vision or reading difficulties, but this is often tied to specific animations or games that may not be fully accessible to blind children.
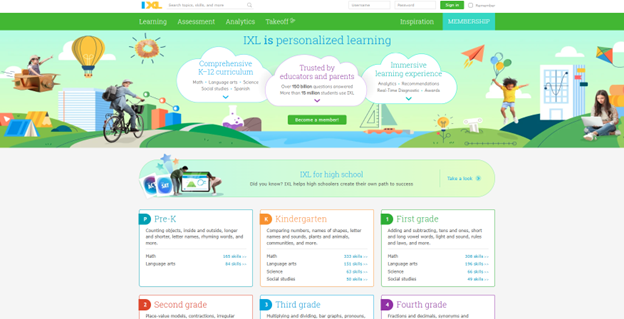
IXL.com offers accessible learning experiences for students with disabilities, including those who are blind or visually impaired. As an accessible learning tool, IXL.com ensures the platform is compatible with screen readers, enabling students to navigate lessons, answer questions, and receive feedback through auditory cues. IXL’s user interface allows customization of text size, color contrast, and keyboard navigation, enhancing usability for individuals with low vision. Additionally, the platform’s alignment with educational standards ensures that all learners, regardless of ability, can engage with comprehensive curriculum content, fostering inclusion and independence in the learning process.
Here are some useful JAWS keyboard shortcuts that can help you navigate IXL.com an accessible learning tool.
General Navigation
Go Back a Page: ALT + LEFT ARROW or BACKSPACE
Go Forward a Page: ALT + RIGHT ARROW
Next Link: TAB
Previous Link: SHIFT + TAB
Open Link: ENTER
List Links: INSERT + F7
List Headings: INSERT + F6
List Frames: INSERT + F9
IXL.com accessible learning tool
Forms and Fields
Enter Forms Mode: ENTER
Exit Forms Mode: NUM PAD PLUS
Next Form Field: F
Previous Form Field: SHIFT + F
List Form Fields: INSERT + F5
Next Edit Box: E
Previous Edit Box: SHIFT + E
List Edit Boxes: CTRL + INSERT + E
Tables
Next Table: T
Previous Table: SHIFT + T
List Keystrokes for Table Navigation: INSERT + SPACEBAR, followed by T, then QUESTION MARK
TechVision Team Specialists have provided remote instruction worldwide since 2007.Additionally, under the leadership of Dr. Denise M. Robinson, they empower students through comprehensive education for the blind. Furthermore, with expertise in screen readers, braille displays, braille, Nemeth code, and assistive technologies, the team delivers individualized instructional support for every learner.
A defining strength of the TechVision Team specialists is that over 90% of our instructors are blind themselves. They use the same technology they teach. This brings unmatched authenticity, lived experience, and practical mastery to every lesson. Alongside a small number of sighted specialists, this blended team works together with purpose and unity. They model independence, confidence, and real‑world problem‑solving for every student they serve.
Their commitment to equal access in education guides every aspect of their work.Additionally, they provide real‑time, one‑on‑one instruction and collaborative school‑team training to support full educational access. Furthermore, every TechVision Team Specialist shares a mission of removing barriers and creating pathways to independence.
TechVision Team Specialists create global impact through a mission‑driven approach to education for the blind. I Additionally, they provide personalized, one‑on‑one remote instruction for learners of all ages.
Our specialists hold advanced degrees and certifications in Orientation & Mobility (O&M), Teaching Students with Visual Impairments (TVI), Assistive and Access Technology, and Special Education. Each instructor uses specialized blind and low vision technology daily at an expert level, allowing them to deliver direct instruction across all subject areas including math, science, English, and history aligned to each learner’s individual needs. Instruction supports individuals of all ages from early childhood through adulthood and emphasizes real-world application, independence, and full access to the general education curriculum.
This real-time, individualized instruction empowers students and clients to compete equally in school, work, and daily life. TechVision specialists: both blind and sighted, are central to this mission, ensuring every learner has the tools, skills, and access they need to succeed.
TechVision Director, Assistant Director and Director of Business
Dr. Denise M. Robinson is dedicated to empowering students to reach their full potential.Additionally, she leads a team of expert instructors who share her commitment to excellence and inclusion. Together, they provide comprehensive blind skills instruction across all areas of education.
Furthermore, with deep expertise in instructional technology, Dr. Denise ensures that students of all ages receive essential, on‑demand educational skills. As a result, her leadership continues to guide the transformative work of the TechVision team.
In addition, as a passionate program developer and nationally recognized speaker, she creates innovative instructional models that merge technology with blind skills. Through this work, she equips learners with the tools they need to pursue education, careers, and independence.
Dedication
TechVision’s dedication stems from a deep belief in the transformative power of education and the right of every individual to be fully included in the world. By merging technology with blind skills, the team works to eliminate barriers and ensure equal access and opportunity for all students.
Outside of her professional work, Dr. Denise enjoys spending time outdoors—working with tractors and equipment, hiking daily, gardening, and meeting new people. She finds joy in the diversity of the world and the meaningful connections it brings.
Beth Sellers
Assistant Director of Educational Programming, MA Teaching AT, Braille, Nemeth & Additional Skills
Beth Sellers is a graduate of James Madison University and Eastern Mennonite University, where she earned her master’s degree in education. With more than 20 years of experience in special education and community-based disability services, Beth brings extensive expertise in assistive technology and blind skills instruction.
At TechVision, she teaches braille and access technology and provides consulting services to school divisions in assistive technology. Beth is a former president of the Virginia Chapter of the National Organization of Parents of Blind Children and volunteers with the AMCSI Conference Planning Team and her local SPCA.
In her spare time, Beth and her children enjoy time on the lake, caring for their two dogs and many rescue cats, and exploring new activities—including cross-country skiing with Ski for Light.
James Robinson
Director of Business Services, BS
James Robinson brings extensive administrative experience to TechVision, having previously served as an administrator in care facilities. As TechVision expanded to meet the growing demand for high‑quality remote instruction, he transitioned his leadership and operational expertise into the role of Director of Business Services.
In this capacity, James oversees all business operations, including accounting, billing, financial coordination, and organizational systems. His strong background in management and service administration ensures that TechVision functions efficiently and that both the instructional team and clients receive consistent, reliable support. His work is essential to sustaining TechVision’s growth and mission‑driven impact.