Search results for: “typing”

  • Perfect Touch Typing leads to Fast keyboarding for Blind Student

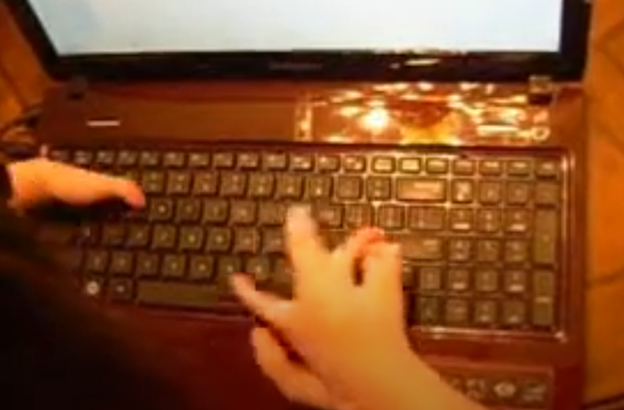
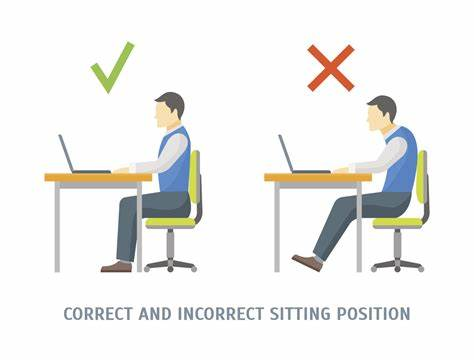
    Becoming a Perfect Touch-Typing expert, especially for someone who is young and relies on a screen reader or needs an electric brailler to learn touch typing on braille keys, involves consistent practice and proper technique. Start by familiarizing yourself with the keyboard layout, focusing on the home row keys where your fingers should rest. Maintain good posture, with your feet flat on the floor and your wrists slightly elevated. Use all ten fingers and avoid looking at the keyboard (which is easy for her), relying on muscle memory instead. Practice regularly with typing exercises and tests available on websites like Typingclub.com. Aim for accuracy first, then gradually increase your speed. Over time, these habits will help you type quickly and efficiently, especially with the assistance of a screen reader.

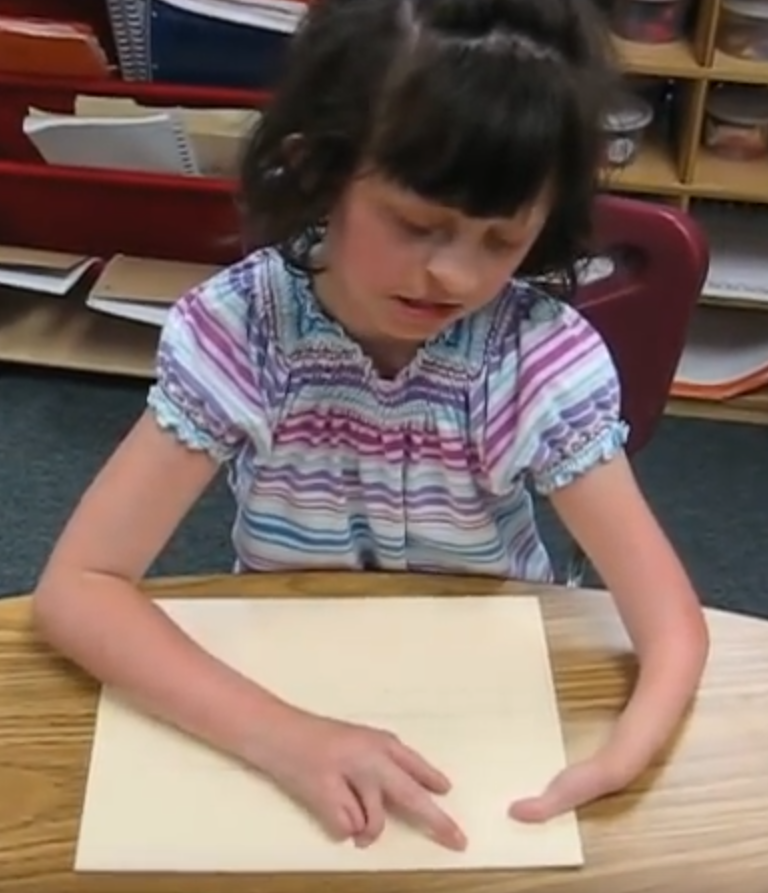
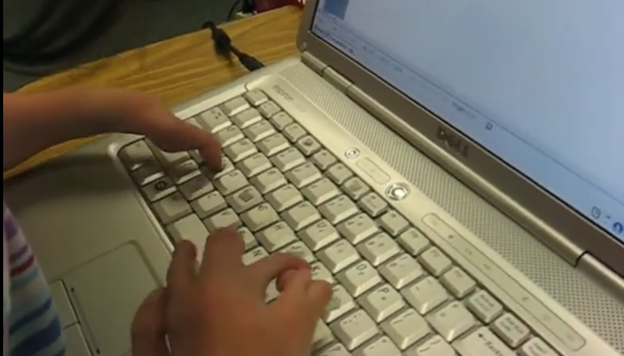
    Mikaela moved to my (Dr. Robinson’s) district when she was in 2nd grade. At that time, I was Miss Mehlenbacher, and all my students had fun with who could spell my name the fastest. Mikaela always won. We immediately began with all thing’s technology instruction, and this is her typing on her laptop just 5 months later. I apologize for many of the blurry pictures on this site, but most of them are from the year 2000-2010 and computer cameras were not that great back then.

    Perfect Touch Typing leads to Fast keyboarding
    Perfect Touch Typing leads to Fast keyboarding

    More lessons on Proper touch-typing methods and fast braille reading which is what these students do also

    Buying Guide for Computers-Find our what Computer Specs are and what you need.

  • Kaleigh typing with special hands at 77 WPM with 3 fingers

    I (Dr. Robinson) began instruction with Kaleigh in the 3rd grade as she struggled to see large print at 2 inches. Here is a video of her first learning skills and as time passed, her typing with special hands was no problem as she quickly got up to 77 words per minute with her special hands.

    Practice and Patience: Regular practice is crucial. Start with basic exercises in how to use each hand and gradually increase complexity. Focus on accuracy before speed. Using these techniques and applying this knowledge to her actual work, within 3 years she went from learning to typing at 77 wpm using JAWS screen reader. The above is true for learning braille also.

    Typing with special hands
    Typing with special hands
    Special hands reading Braille
    Special hands reading Braille

    More lessons Here

    Other special Hands lessons

    3 fingers IS enough

  • Typing with 3 fingers- Kaleigh learning to Type

    Typing with 3 Fingers on her laptop is made easier with practice.

    A child with three fingers can type at over 77 words per minute by using adaptive strategies to access the same technology. Kaleigh is JUST learning the first steps in typing on a regular laptop.

    Typing with 3 Fingers

    Kaleigh typing with 3 fingers on a laptop

    First, they learn how to optimize their finger movements, reducing unnecessary motion. They focus on accuracy and gradually build speed through consistent practice. Children can learn to use the identical keyboard and computers as their peers. Using the center of the keyboard as positioning to the rest of the keyboard is part of the skill. The child practices finger coordination, mastering a rhythm that increases typing speed. Over time, these techniques combine to enable the child to exceed expectations and type as quickly as possible. More YouTube Channel Lessons

    Other Kaleigh Videos typing as she advances to typing over 77 words per minute

    Tay with Special Hands learning keyboarding and Math

  • Basic WORD JAWS commands with Typing Trick

    Dr. Robinson’s video covers basic JAWS screen reader commands for Office Word, no matter what version of WORD you use. First, she opens a new document using “Ctrl + N” and teaches key formatting skills, such as right-aligning text with “Ctrl + R” and inserting the date using old and new Office commands. She emphasizes the importance of listening to the software to ensure accuracy. Dr. Robinson guides through bold, underline, and italics commands before typing and spell-checking with keyboard shortcuts. These are all Basic WORD JAWS commands you need to know.

    More Commands to Learn

    Adjusting speech speed helps beginners better understand software. Learning commands ensures efficient and accurate work, especially Basic WORD JAWS commands.

    Gain Typing Speed in WORD

    To practice typing skills use a phrase like: “The quick brown fox jumps over the lazy dog.” Type it repeatedly in a Word document by starting slow to gain speed. Use the keyboard shortcuts taught in the video, such as “Ctrl + Left Arrow” and “Ctrl + Right Arrow” to move between words, and “End” to check if you’re at the end of the line. Regular practice, at least 10-15 minutes daily or more, helps build speed. Turn off autocorrect options to avoid automatic changes that may confuse the student and disrupt learning. Focus on accuracy before increasing typing speed. Mastering JAWS commands for WORD is essential for efficient practice.

    Other Lessons:

    Optimizing Windows 11 Efficiency for Screen Reader with Key Settings and Configurations

    WORD Efficient Text Navigation and Selection

    Basic WORD JAWS commands with Typing Trick

    Rebuild Microsoft Word Template when it is not working well

    Microsoft Word MLA format with Christopher Duffley

    WORD accessible food chain for class using talking software

    Commands to change mouse -access programs fast, basics in Word font & movement

    Excel line plot graph-copy to Word for Math

    Complete an excel graph and copy into Word document with screen reader

    Essential WORD keyboard commands for setting defaults

    Track changes in Word-How teachers make corrections in work

    Track Changes with Commands-inserting comments and editing work

    With Learned commands–then focus on getting a job.

  • Kaleigh typing 77 wpm with 3 fingers and JAWS

    Typing with 3 Fingers on her laptop is made easier with practice and now she is typing 77 word per minute. This impressive feat shows Kaleigh typing 77 wpm flawlessly.

    A young lady with three fingers can type at over 77 words per minute. She is using adaptive strategies to access the same technology as peers. Kaleigh typing 77 wpm highlights her exceptional skills. Kaleigh has been learning and using these special skills based on her fingers for years. She uses a regular laptop with JAWS screen reader to do all of her work.

    image of Kaleigh typing 77 wpm on keyboard

    For individuals typing with one finger on one hand and two fingers on the other, specialized typing techniques can help improve speed and accuracy. Focus on positioning both hands in the center of the keyboard on homerow so the left single finger can move around that side of the keys. With the right 2 fingers, 1 is on the space bar at all times while other finger moves arund and presses keys. Moving together with a lot of practice, speed is gained. Start with slow, deliberate typing to reduce errors and gradually build up speed. Mastering typing speed similar to Kaleigh’s, started with such methods. Regular practice with phrases like “The quick brown fox jumps over the lazy dog” helps improve finger coordination. One such success story celebrating progress is Kaleigh typing 77 wpm.

    With determination and keyboard practice with lots of instruction, students can accomplish anything. Kaleigh typing 77 wpm is a testament to this. See her series of progress.

  • Fixing Jaws typing echo and cursor issues in google classroom by Taylin

    Miss Taylin and Dr. Robinson addressed two common accessibility issues students face while navigating educational tools with JAWS. First, they resolved the issue of characters not being heard when typed, which prevents users from verifying their input. After adjusting the typing echo settings in JAWS, they enabled the device to read both characters and words aloud, providing better control and feedback during typing. Fixing Jaws typing echo significantly improved user experience. On the fly, you can also insert + 2 to change echo options.

    The second issue involved difficulties navigating through web links in the classroom browser, with JAWS sometimes reporting “no form fields” or “no lists available.” The problem arises when both the virtual and PC cursors are not enabled. Dr. Robinson explained that the virtual cursor is essential for browsing web pages, while the PC cursor helps manage navigation within a page. Miss Taylin accessed the links list and navigated classroom content efficiently by using “Insert + Z” to enable the virtual cursor. She ensured the PC cursor was active with the command “Insert + ;” which improved her browsing experience. Fixing Jaws typing and echo settings along with other settings changes, enhances productivity.

    Jaws settings and set default to permanently make changes to fix Jaws typing echo issues
    Jaws settings and set default to permanently make changes to typing echo

    Dr. Robinson emphasized the need to regularly check both cursor settings whenever JAWS encounters issues. This practice ensures smooth and uninterrupted navigation for users. Additionally, these steps empower students using screen readers to interact more effectively with digital learning platforms. These adjustments create an efficient workflow for students to complete assignments and navigate classroom tools seamlessly. Overall, addressing the issue of fixing Jaws typing echo and other settings ensure that students can fully participate in their learning environment with complete accessibility.

    See other lessons for navigation. For more on fixing Jaws typing echo, explore related resources.

  • Proper Touch Typing Methods on the Keyboard

    Proper touch typing methods and sitting positions are crucial for efficiency and preventing strain or injury.

    Here are some key points to consider:

    Proper touch typing methods and Techniques

    1. Home Row Position:
      • Place your fingers on the home row keys: A, S, D, F for the left hand and J, K, L, ; for the right hand.
      • Your thumbs should rest on the spacebar.
    2. Finger Placement:
      • Each finger is responsible for specific keys. For example, the left index finger covers F, G, R, T, V, and B, while the right index finger covers J, H, U, Y, N, and M.
    3. Typing Without Looking:
      • Practice typing without looking at the keyboard. This helps build muscle memory and increases typing speed and accuracy.
    4. Consistent Practice:
      • Regular practice is essential. Use typing software or online tools to improve your skills.

    Proper Sitting Position

    1. Chair and Desk Height:
      • Adjust your chair so that your feet are flat on the floor and your knees are at a 90-degree angle.
      • Your desk should be at a height where your elbows are also at a 90-degree angle when typing.
    2. Back Support:
      • Sit up straight with your back supported by the chair. Avoid slouching to prevent back strain.
    3. Monitor Position:
      • Place your monitor at eye level, about 20-30 inches away from your eyes. This helps reduce neck strain.
    4. Keyboard and Mouse Placement:
      • Keep your keyboard and mouse close enough to avoid reaching. Your wrists should be straight and not resting on the desk while typing.
    5. Breaks and Stretches:
      • Take regular breaks to stand, stretch, and move around. This helps prevent repetitive strain injuries (RSIs) and keeps you comfortable.
    correct (sitting straight up and feet flat on floor and incorrect sitting position with legs out and person hunched over keyboard

    By following these techniques and maintaining a proper sitting position, you can enhance your typing efficiency and reduce the risk of discomfort or injury.

    If you have any more questions or need further details, feel free to ask!

    Proper touch typing methods and Typing Tips

    Let us know what we can do for you with 1:1 instruction

  • Complete iPhone Access Guide for Blind and Low Vision

    Complete iphone guide
    Complete iPhone Access Guide

    The iPhone is the most powerful accessibility tool available to blind and low‑vision students today. With the right skills, it becomes a map, a magnifier, a reader, a communication device, a travel tool, and a pathway to independence.

    This guide gives students, parents, teachers, and O&M instructors everything needed to build real-world iPhone skills from basic Siri commands and VoiceOver gestures to advanced navigation and daily-living tools. Use it as a curriculum, a quick reference, or a step-by-step learning path.

    A TechVision Core Resource

    The iPhone gives blind and low-vision students real independence. With the right skills, it becomes a map, a reader, a magnifier, a travel tool, and a partner for daily life. This guide helps students, parents, and teachers build strong iPhone skills one clear step at a time.


    Lessons- follow these steps


    1. Getting Started

    The guide begins with simple setup steps that build confidence fast.

    Accessibility ShortcutYou can press home button at any time and just say: “Siri open Accessibility” or wherever you need to go for what you need to do

    Where to find it:
    Settings → Accessibility → Accessibility Shortcut
    Students turn features on and off with a quick triple-click.

    Key tasks:

    • Set VoiceOver, Zoom, or Magnifier
    • Set up Siri for hands-free support
    • Add emergency contacts
    • Customize Control Center
    • Organize the Home Screen

    Core Access Features

    • VoiceOver
    • Zoom
    • Magnifier
    • Display and text adjustments

    First Skills to Teach

    • Turn VoiceOver on or off
    • Learn basic gestures
    • Use Siri for fast tasks
    • Adjust speech rate
    • Open and close apps

    2. VoiceOver Skills

    Students grow from simple gestures to full digital literacy.

    Beginner

    Where to find it:
    Settings → Accessibility → VoiceOver

    • Explore the screen
    • Activate items
    • Use basic Rotor options
    • Start typing with VoiceOver

    Intermediate

    • Edit text
    • Use the App Switcher
    • Navigate long pages
    • Move by headings or links
    • Use dictation

    Advanced

    Where to find it:
    Settings → Accessibility → VoiceOver → Activities / Braille / Rotor Actions

    • Customize the Rotor
    • Use Activity profiles
    • Use Braille Screen Input
    • Work in complex apps

    3. Navigation & O&M with iPhone

    Orientation Tools

    • Look Around-outside navigation
    • Compass
    • Landmarks
    • Spatial audio
    • Seeing AI
    • Clew-inside navigation
      Where to find them: Maps and Compass apps

    Dropping Pins

    • Drop a pin with VoiceOver:
      Maps → Current Location → Rotor → Drop Pin
    • Drop a pin with Siri: “Drop a pin.”
    • Label and save locations
    • Add Favorites
    • Create walking routes

    Real-World Travel Skills

    • Walking directions
    • Bus stop navigation
    • Checking surroundings
    • Soundscape-style apps
    • Safe campus routines

    Safety Tools

    Where to find them:
    Settings → Emergency SOS, Find My, Messages

    • Emergency SOS
    • Location sharing
    • Device tracking
    • Safe communication practices

    4. Apps for Daily Living

    Vision Support Apps

    Where to find them: App Store

    • Seeing AI
    • Be My Eyes
    • Envision
    • Magnifier

    Productivity Tools

    • Reminders
    • Calendar
    • Notes
    • Shortcuts
    • Timer and alarms

    School & Work

    • Files
    • Email
    • Safari
    • Reading apps
    • Document scanning

    5. Low Vision Tools & Strategies

    Visual Settings

    Where to find them:
    Settings → Accessibility → Display & Text Size

    • Contrast
    • Bold text
    • Reduce transparency
    • Color filters
    • Invert colors

    Magnification Tools

    Where to find them:
    Settings → Accessibility → Zoom
    Control Center → Magnifier

    • Zoom
    • Magnifier
    • Camera zoom
    • Flashlight for clarity

    Reduce Fatigue

    • When to switch from Zoom to VoiceOver
    • When audio improves endurance
    • How stands and holders help

    6. Parent Guide

    Parents help skills grow through simple routines.

    Focus areas:

    • What to teach at each age
    • How to practice safely
    • How to reduce frustration
    • When to add new apps
    • How to build daily habits

    Where to find key tools:
    Settings → Screen Time, Settings → Emergency SOS


    7. Teacher Guide

    Teachers integrate iPhone skills into daily instruction.

    Teach VoiceOver

    • Skill progression
    • Gesture modeling
    • Rotor instruction
    • Text-editing practice

    Then Navigation

    • Classroom → hallway → campus
    • Pinning school locations
    • Safe movement routines

    Teach Organization

    Where to find it:
    Press and hold any app → Edit Home Screen

    • Folder creation
    • Notifications
    • Calendar and reminders

    Assessment

    • Define mastery
    • Measure progress
    • Write goals and objectives

    8. Learning Paths

    Beginner Path

    1. Activate Accessibility Shortcut
    2. Learn basic gestures
    3. Practice the Rotor
    4. Use Siri for quick tasks
    5. Drop a first pin

    Intermediate Path

    1. Edit text
    2. Navigate long pages
    3. Use Maps
    4. Use Seeing AI
    5. Organize the Home Screen

    Advanced Path

    1. Braille Screen Input
    2. Custom Rotor
    3. Advanced Maps skills
    4. Shortcuts automation
    5. Real-world travel practice

    9. Lesson Index

    This section lists all iPhone lessons.
    Each item includes:

    • A clear title
    • A short description
    • A consistent layout

    This turns the page into a complete curriculum hub.


    10. What to Learn Next

    • Advanced VoiceOver
    • Tech-supported O&M
    • JAWS and PC access
    • Accessible STEM tools
    • Low-vision strategies

    iPhone Lessons

  • JAWS UEB/Nemeth Settings + Accessible Math in Word & Braille Editor

    JAWS UEB/Nemeth Settings-Word and Braille Math Editor
    JAWS UEB MATHS/Nemeth Settings-Word and Braille Math Editor

    If you’ve ever struggled to get JAWS to read math correctly on your computer, this walk-through will make your life much easier. In this video, I demonstrate how to set JAWS for either UEB Maths or Nemeth math using the JAWS UEB/Nemeth Settings, then show you how to create accessible math using Word’s Math Editor and the Braille Math Editor. Whether you’re a TVI (Teacher of the Blind), a student, or an AT (Access Technology) specialist, these steps will help you produce clear, accurate, and accessible math every time.


    WORD MATH EDITOR Setup

    1. Open the Math Editor

    • Alt + =

    2. Open the Equation Tools tab

    • Alt + J, E

    3. Open Math Options (Settings)

    • T, 1
      (This opens the Math Options dialog.)

    4. Set Alignment to Left
    Inside the Math Options dialog:

    • Alt + J → moves to Justification
    • L → Left alignment
    • Alt + D → Set as Default
    • Tab, Tab → to OK
    • Enter
    • When asked to save as default, choose Yes
      (This saves the settings to the Normal template.)

    5. Check Conversion (if math looks wrong)

    While inside a math zone:

    • Alt + =
    • Alt + J, E
    • C → Convert
    • Make sure it is set to Professional

    WORD MATH EDITOR — Command Sequence (JAWS + Keyboard)

    Open the Math Editor

    • Press Alt + =
      This inserts a new math zone and opens the Word Math Editor.

    Move in and out of the math zone

    • Right Arrow → move into the math zone
    • Right Arrow again → move through elements
    • Left Arrow → move backward
    • Esc → exit the math zone and return to normal text

    Insert common structures

    • FractionCtrl + /
    • ExponentCtrl + Shift + =
    • SubscriptCtrl + =
    • Square root → type \sqrt then press Space
    • Matrix → type \matrix then press Space
    • Parentheses → type ( then ) (Word auto‑sizes them)

    Insert math symbols using LaTeX shortcuts

    • \pi + Space → π
    • \alpha + Space → α
    • \neq + Space → ≠
    • \le + Space → ≤
    • \ge + Space → ≥
    • \div for divide
    • \times for times
    • \sqrt for square root

    (Word’s Math Editor accepts most LaTeX commands-check out list in link.)

    Navigate inside structures

    • Right Arrow → move to next placeholder
    • Left Arrow → move back
    • Ctrl + Right Arrow → jump out of a structure
    • Ctrl + Left Arrow → jump into previous structure
    • To read the braille the easiest–OPEN BME

    BRAILLE MATH EDITOR (BME) — Command Sequence (JAWS + Keyboard)

    Open the Braille Math Editor

    • Press Alt + Shift + =
      (This opens the BME window for UEB contracted math input.)

    Choose UEB or Nemeth

    Inside BME:

    • Press Alt + M → opens Math Code menu
    • Press U → UEB Math
    • Press N → Nemeth Math

    (You can teach students to confirm the code before typing.)

    Enter math using braille input

    • Type using six‑key entry on the braille display or keyboard
    • Use Space to confirm symbols
    • Use Backspace to correct braille cells

    Navigate inside the math expression

    • Left Arrow → move left
    • Right Arrow → move right
    • Ctrl + Left Arrow → jump to previous element
    • Ctrl + Right Arrow → jump to next element

    Insert common structures

    • Fraction → dots 3‑4 then 3‑4 (opening and closing fraction indicators)
    • Superscript → dot 5
    • Subscript → dot 2
    • Square root → dots 1‑2‑3‑5
    • Parentheses → dots 1‑2‑6 and 3‑5‑6

    (These follow UEB math rules; Nemeth uses different indicators.)

    Send math back to Word

    • Press Alt + S → Save and return to Word
    • The math appears in the document as a fully formatted math object

    Exit without saving

    • Press Alt + F4
    • Choose No if you don’t want to insert the math