Search results for: “setup”

  • Using VoiceOver to Learn What You Can Do in an App

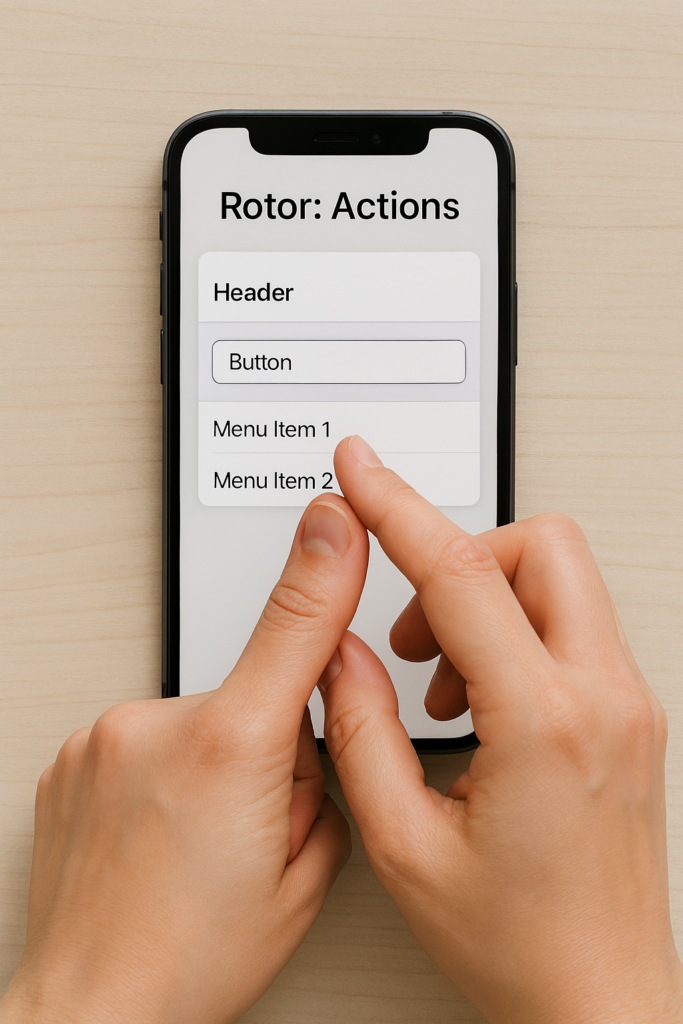
    Using VoiceOver to Learn What You Can Do in an App using rotor with 2 fingers
    Using VoiceOver to Learn What You Can Do in an App-using rotor action

    Lesson:

    Objective

    Learners will understand how to use VoiceOver’s built‑in help features — including the four‑finger double‑tap — to explore gestures, discover available actions, and learn what options exist inside any app.


    1. What the Four‑Finger Double‑Tap Does

    VoiceOver Help Mode

    A four‑finger double‑tap turns VoiceOver Help on or off.

    When Help Mode is ON:

    • VoiceOver explains every gesture you perform
    • Nothing on the screen activates
    • It is a safe space to practice
    • You can explore without fear of opening apps or changing settings

    To exit Help Mode, simply four‑finger double‑tap again.

    This gesture does not give information about the app itself — it teaches VoiceOver gestures.


    2. How to Learn What You Can Do in an App

    VoiceOver offers several ways to discover menus, actions, and options inside any app.

    A. Explore by Touch

    • Gently lay finger on screen and Move your finger around the screen-top left to right and down
    • VoiceOver announces buttons, tabs, menus, and controls
    • This helps you build a mental map of the app layout

    Example:
    “Home, tab, 1 of 4.”
    “Settings, button.”
    “More Options, button.”


    B. Use the Rotor to Find Hidden Actions

    The Rotor is a powerful tool for discovering what’s possible.

    To use it:

    1. Place two fingers on the screen with 1 hand to “turn knob”; or some find it easier with pointer finger from each hand mimicking a circle
    2. Twist like turning a dial
    3. Stop when you hear Actions, More Options, or similar choices
    4. Swipe up or down to explore available actions

    Common rotor actions include:

    • “More Info”
    • “Details”
    • “Menu”
    • “Help”
    • “Show Options”
    • “Edit”
    • “Delete”
    • “Open Settings”

    This is often where apps hide extra features.

    You can add features in Settings just ask Siri to “open Accessibility and flick to Voice Over and when you open-pay attention to every detail her then open rotor settings”


    C. Turn On VoiceOver Hints

    Hints tell the learner what they can do on each item.

    To enable:

    Settings → Accessibility → VoiceOver → Hints

    When hints are on, VoiceOver may say:

    • “Double‑tap to activate.”
    • “Swipe up or down to adjust.”
    • “Double‑tap and hold to open menu.”

    Hints help learners understand available actions without guessing.


    D. Look for App‑Specific Help or Menus

    Many apps include:

    • A Help button
    • A Menu or More tab
    • A Settings area

    VoiceOver will announce these when the learner explores the screen.


    3. Practice Activity Steps

    Have the learner:

    1 — Enter Help Mode

    • Perform a four‑finger double‑tap
    • Try gestures: flicks, taps, rotor turns
    • Listen to VoiceOver explain each one

    2 — Explore an App

    • Touch around the screen to hear what’s available
    • Find tabs, buttons, and menus

    3 — Use the Rotor

    • Turn the rotor to Actions
    • Swipe up/down to hear what actions are available

    4 — Turn on Hints

    • Listen for instructions VoiceOver provides

    4. Key Takeaways

    • Four‑finger double‑tap = VoiceOver Help Mode, not app information
    • To learn what you can do in an app, use:
      • Explore by Touch
      • Rotor → Actions
      • VoiceOver Hints
      • App menus and help sections

    Other iPhone Lessons

  • Aira Glasses Navigation: How Blind Travelers Navigate Safely and Independently

    AIRA Navigation using Google Glasses

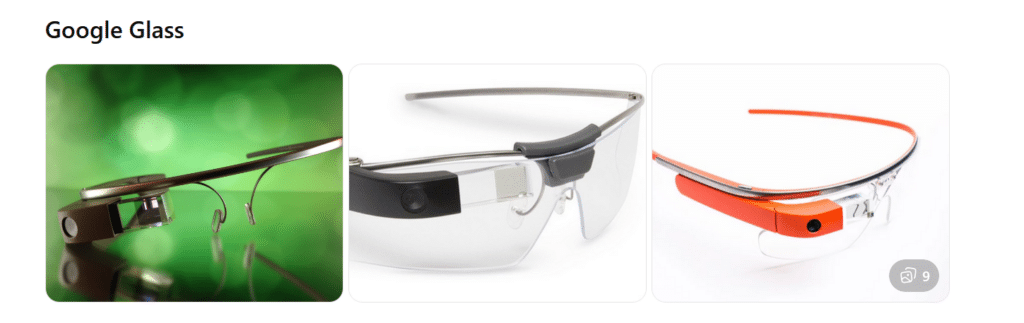
    Google Glass Options

    What they are:
    Lightweight smart glasses with a small display above the right eye. Originally released for consumers, now mostly used in enterprise and medical settings.

    Key features:

    • Small prism display
    • Voice-activated commands (“OK Google…”)
    • Camera (varies by model)
    • Touch pad on the right side
    • Designed for hands-free information access

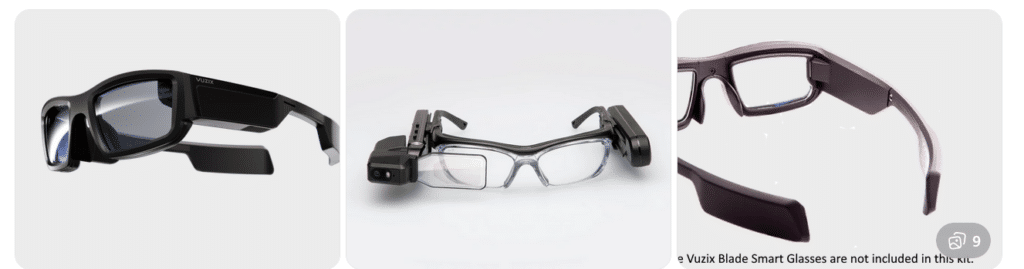
    Vuzix Smart Glasses (Blade / M400 / Shield Series)

    What they are:
    A family of AR smart glasses built for industrial, medical, and field environments. Models vary in shape and display size.

    Key features:

    • Larger, brighter AR displays
    • Camera options up to 4K
    • Rugged designs for work environments
    • Voice, touch, and head-tracking controls
    • Works with Android-based apps

    Aira and Smart Glasses for Blind Navigation: Modern Tools for Safe, Independent Travel

    Whether you’ve been blind for years or you’re just beginning to lose vision, today’s tools offer more options than ever for navigating the world with confidence. Smart glasses and services like Aira give you access to real‑time visual information—indoors, outdoors, at work, on campus, or in everyday life. For some, it’s an exciting next step in expanding independence. For others, it’s a gentle bridge toward accepting support without feeling like they’re giving up who they are. Wherever you are on that journey, these tools can help you move safely, work more efficiently, and stay connected to the world around you.

    If you want, I can also craft a shorter version for a carousel cover slide or a more emotional version that speaks directly to the reader.

    Helping a Young Adult Losing Vision: When They’re Not Ready for the Cane… Yet

    Losing vision as a young adult is complicated. It’s not just about mobility—it’s about identity, pride, and the fear of being seen as “blind” before they’re ready to claim that word for themselves.

    Many young adults tell us:

    • “I don’t want people staring at me.”
    • “I’m not blind enough for a cane.”
    • “I can still get by if I try harder.”
    • “I don’t want to look different.”

    These feelings are real. They deserve respect, not pressure.

    But they also deserve safety, dignity, and access to the world.

    That’s where Aira can become a bridge—not a replacement for cane skills, not a long‑term solution, but a gentle first step toward accepting support.


    Why Aira Works for Someone Who Isn’t Ready for the Cane

    Aira gives visual information without announcing disability to the world.

    For a young adult who is still grieving vision loss, this matters.

    Aira lets them:

    • Move through a college campus without guessing at signs
    • Navigate stores, offices, or new environments without pretending
    • Read menus, labels, and screens without asking friends
    • Travel safely in unfamiliar places
    • Do their job or schoolwork without feeling exposed

    It’s discreet. Very private. It’s on their terms.

    And most importantly—it gives them a taste of what independence with support feels like.

    That experience often becomes the turning point.


    The Emotional Shift: From “I Don’t Want to Look Blind” to “I Deserve to Move Safely”

    When a young adult uses Aira, something powerful happens:

    They realize they don’t have to choose between:

    • Looking blind
      and
    • Being unsafe

    Aira shows them that support doesn’t take away independence—it protects it.

    Once they feel the relief of not guessing, not hiding, not pretending…
    they often become more open to the cane.

    Not because someone forced them.
    But because they finally understand:

    Independence isn’t about doing everything alone.
    It’s about having the right tools at the right time.


    Real Examples: A Young Adult Losing Vision Who Wants a Career in Film, Photography, or Other Visual Fields

    Let’s say this young adult has 20/200–20/400 vision or worse and dreams of photography, cinematography, or other highly visual careers that require sharp editing and image capture.

    They’re talented. They are creative. They’re determined.

    But they’re also scared of being seen as “blind.”

    Aira can help them:

    • Frame shots
    • Check lighting
    • Review images
    • Navigate sets
    • Identify equipment
    • Move safely in unfamiliar locations

    They get to keep their identity as a creator and keep their dignity.
    They get to keep their dreams alive.

    And slowly, gently, they begin to understand:

    Blindness doesn’t take away creativity.
    It just changes the tools.


    How We Bring Them Along—Without Shame, Pressure, or Fear

    Here’s the message we give young adults:

    “You don’t have to be ready for the cane today.
    But you do deserve to move safely today.
    Aira can help you do that while you figure out the rest.”

    We meet them where they are and honor their feelings.
    We give them a tool that supports them privately.
    And we let confidence do the rest.

    Because once they feel what safe, supported independence is like…
    the cane stops looking like a symbol of blindness
    and starts looking like a symbol of freedom.


    Real Example for all users with Airport Navigation and Traveling Using Aira

    Airports can be some of the most challenging environments for blind and low‑vision travelers—constant construction, changing layouts, crowded terminals, and signage that’s almost entirely visual. Aira gives travelers real‑time visual support from the moment they step out of the rideshare to the moment they reach their gate. And when paired with Aira’s own smart glasses—designed to look just like the everyday eyewear everyone else is wearing—travelers get discreet, hands‑free access to visual information without standing out or feeling different.

    In fact, the only way anyone would know a traveler is blind is if they’re using a cane. You can even call an Aira Agent while the plane is still on the runway so you’re fully set up to step off the aircraft and head confidently to your next gate with live guidance. Agents can help locate check‑in counters, identify the correct security line, read flight boards, navigate terminals, find restrooms or restaurants, and guide travelers through gate changes or last‑minute updates. Whether you’re a seasoned blind traveler or someone newly adjusting to vision loss, Aira adds a layer of confidence and clarity that makes airport travel smoother, safer, and far less stressful.

    Other iPhone Lessons

  • Blind Users Retrace Indoor Routes with Clew

    Audience: Blind or low‑vision students (middle school through adult)
    Skills: Indoor navigation, spatial awareness, cane + tech integration
    Tools Needed: iPhone with Clew installed, long cane, safe indoor route

    Blind Users Retrace Indoor Routes with Clew
    Blind Users Retrace Indoor Routes with Clew

    Lesson: Learning to Use Clew for Indoor Route Retracing

    Lesson Overview

    Clew is a free iPhone app that helps you retrace a route indoors.
    You walk a path once, and Clew guides you back along that same path using sound, vibration, and spoken cues.

    Clew does not use maps, GPS, Wi‑Fi, or beacons.
    It works in any building because it relies on the path you walked.

    Your cane provides safety and obstacle detection.
    Clew provides directional alignment.

    Together, they support confident indoor travel.


    Learning Objectives

    By the end of this lesson, the student will be able to:

    • Download and open the Clew app
    • Allow necessary permissions
    • Hold the phone correctly for AR tracking
    • Record a route independently
    • Retrace the route using Clew’s cues
    • Use cane skills throughout the process
    • Explain what Clew can and cannot do

    Step 1 — Download the Clew App

    1. Open the App Store
    2. Tap Search
    3. Type “Clew”
    4. Select the app named Clew
    5. Tap Get
    6. Open the app once it installs

    Note: Clew is iPhone‑only.


    Step 2 — Allow Camera Access

    When Clew opens for the first time, it will ask for permission to use the camera.

    Tell the student:

    “Clew uses the camera to track your movement. It does not record video — it only uses the camera to understand the path you walk.”

    Tap Allow.


    Step 3 — Phone Positioning

    Before recording a route, teach the student to hold the phone:

    • upright
    • at chest height
    • camera facing forward
    • steady, not swinging

    This is essential for Clew’s AR tracking.

    Cue:
    “Cane leads. Phone observes.”


    Step 4 — Record a Route

    Choose a simple, safe route such as:

    • hallway → classroom
    • classroom → office
    • seat → door

    Have the student:

    1. Open Clew
    2. Tap Record Route
    3. Walk the path using solid cane skills
    4. Stop recording at the destination

    Reinforce:

    • “Your cane tells you what’s on the ground.”
    • “Clew is only tracking the path — it does not detect obstacles.”

    Step 5 — Retrace the Route

    Now guide the student through returning to the starting point.

    1. Tap Return to Start
    2. Follow Clew’s cues:
      • Haptic taps for turns
      • Audio beeps for alignment
      • Voice prompts for direction

    Encourage the student to:

    • Pause if unsure
    • Re‑center the phone
    • Sweep with the cane
    • Continue when aligned

    Step 6 — Troubleshooting Practice

    Teach the student what to do if:

    Clew says “You’re off route”

    • Stop
    • Re‑center the phone
    • Sweep with the cane
    • Slowly adjust direction

    The phone tilts

    • Bring it back to upright
    • Keep it steady

    The student drifts

    • Use the cane to find the wall or landmark
    • Realign with Clew’s cues

    Step 7 — Reflection and Understanding

    Ask the student:

    • “What did Clew help you do?”
    • “What did your cane tell you that Clew didn’t?”
    • “When would Clew be useful in your school or home?”

    This builds independence and decision‑making.


    What Clew CAN Do

    • Retrace a route you walked
    • Guide you back with sound, vibration, and voice
    • Work in any building
    • Handle multiple turns
    • Support spatial memory
    • Help you return to a seat, office, or classroom

    What Clew CANNOT Do

    • It cannot guide you to a new destination
    • It cannot save routes after the app closes
    • It cannot detect obstacles
    • It cannot replace cane skills
    • It does not use maps

    Student‑friendly explanation:
    “Clew doesn’t know the building. It only knows the path you walked.”


    Assessment Checklist

    The student can:

    • Download and open Clew
    • Hold the phone correctly
    • Record a route independently
    • Retrace the route safely
    • Interpret Clew’s cues
    • Use cane skills throughout
    • Explain Clew’s limitations
    • Identify real‑life situations where Clew is helpful

    Teacher Notes

    • Clew is a reverse‑route tool, not a navigation system
    • Works beautifully for returning to a known point
    • Reinforces spatial memory
    • Builds confidence in unfamiliar buildings
    • Must always be paired with cane skills

    Other iPhone Lessons

  • Indoor Navigation for Blind Users: Using Seeing AI with iPhone

    Indoor Navigation for the Blind with Seeing AI
    Indoor Navigation for the Blind with Seeing AI

    At this time, there is no fully reliable indoor navigation app that works in all buildings without special equipment such as QR codes, Bluetooth beacons, or professional indoor mapping. GPS does not function accurately indoors, and current mobile apps cannot provide turn‑by‑turn indoor directions. Indoor Navigation for Blind Users remains a significant technical challenge due to these limitations.

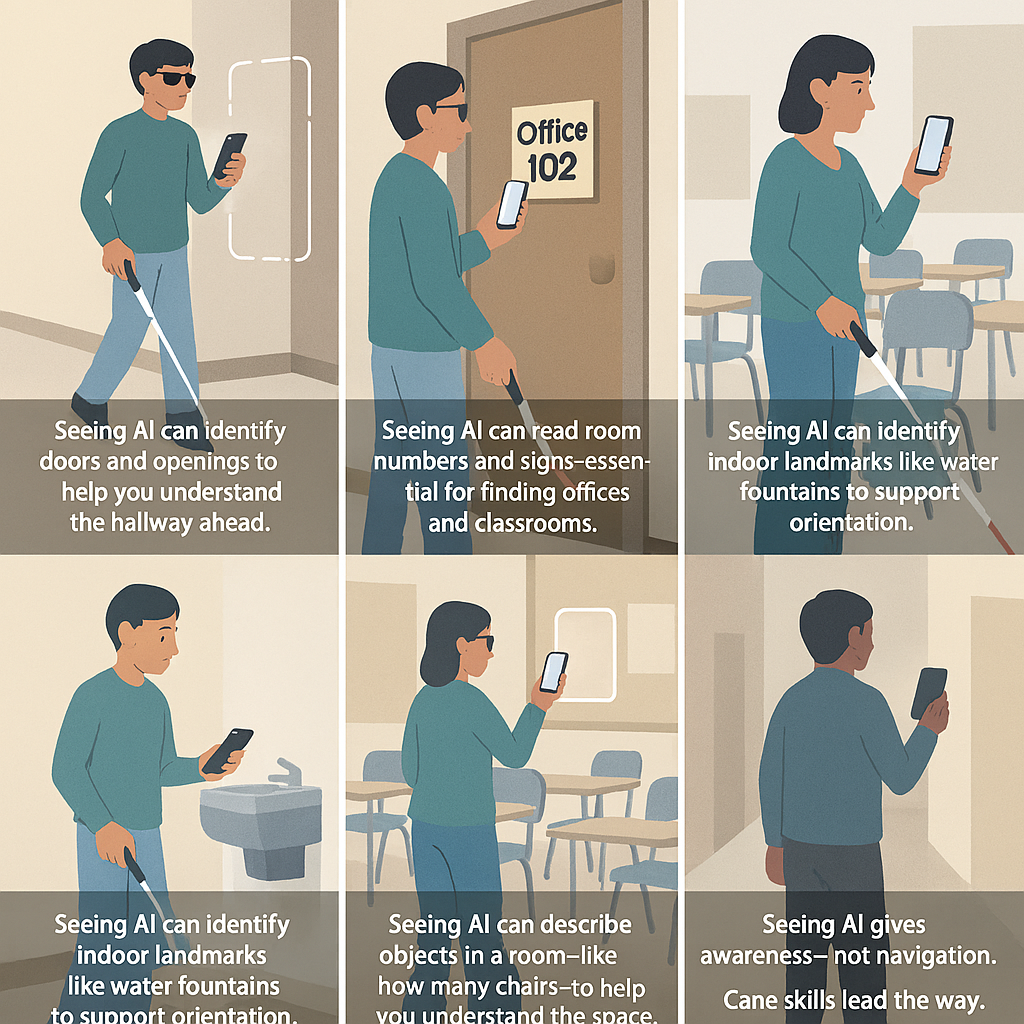
    However, Seeing AI is the closest tool we have for indoor orientation that you can use immediately. It can describe rooms, identify doors, read signs, and recognize objects. When combined with strong cane skills, Seeing AI gives blind travelers meaningful visual feedback that supports safe and confident movement inside any home, school, or building. AND most importantly, can use anywhere and immediately.

    Lesson: Indoor Navigation for Blind Users Using Seeing AI (iPhone)

    Skills: Indoor navigation, route following, spatial awareness, tech + cane integration
    Tools: iPhone with Seeing AI, long cane, school hallway or building


    Lesson: Indoor Orientation Using Seeing AI

    What it CAN do, what it CANNOT do, and how blind travelers can use it safely and effectively.

    Strong cane travel skills are the foundation of safe and independent mobility. Great cane training will always take you where you need to go. Seeing AI can add helpful information about the environment, but it is the cane that provides the reliable, real‑time feedback a blind traveler depends on.


    Skills: Indoor orientation, environmental awareness, object identification, sign reading, cane + tech integration
    Tools: iPhone with Seeing AI, long cane, any indoor environment


    Lesson Overview

    Seeing AI is not an indoor navigation app.
    It does not map buildings, create routes, or give turn‑by‑turn directions.

    But it is the most powerful indoor visual feedback tool available today for blind travelers — and when paired with strong cane skills, it becomes a reliable way to:

    • identify rooms
    • confirm locations
    • understand layout
    • detect doors and openings
    • recognize objects
    • read signs
    • build mental maps

    This lesson teaches students how to use Seeing AI as an indoor orientation partner, not a navigation system.


    Learning Objectives

    By the end of this lesson, the student will be able to:

    • Use Seeing AI to identify doors, signs, and room numbers
    • Use the World and Scene channels to understand layout
    • Use Short Text to read labels, signs, and posted information
    • Use object recognition to identify furniture and landmarks
    • Combine cane skills + Seeing AI feedback to move safely
    • Understand the limits of Seeing AI indoors
    • Use Seeing AI as a supplement, not a replacement, for O&M skills

    What Seeing AI CAN Do Indoors

    Describe what the camera sees

    • furniture
    • doors
    • hallways
    • people
    • objects
    • appliances
    • stairs
    • obstacles

    Read signs and room numbers

    • classroom numbers
    • office signs
    • restroom labels
    • posted instructions
    • bulletin boards

    Identify objects and landmarks

    • tables
    • chairs
    • vending machines
    • water fountains
    • cabinets
    • shelves

    Help build a mental map

    By scanning left, right, and ahead, the student can understand:

    • where openings are
    • where walls are
    • where intersections are
    • where furniture is located

    Confirm they’ve reached the correct room

    Short Text + Scene = “Yes, this is Room 214.”

    Support safe indoor travel when paired with cane skills

    Seeing AI gives visual information.
    The cane gives tactile information.
    Together, they create a complete picture.


    What Seeing AI CANNOT Do Indoors

    It cannot navigate

    turn‑by‑turn directions or indoor routes.
    Nor give hallway guidance.

    It cannot map a building

    No saved indoor locations, or indoor POIs.
    No floor detection.

    It cannot guide you back to a room

    Markers and audio beacons are GPS‑based and only work outdoors.

    It cannot detect exact indoor positions

    GPS accuracy indoors is too poor.

    It cannot replace cane skills

    It supplements orientation — it does not provide mobility.


    “Seeing AI helps you understand what’s around you indoors. It can describe rooms, read signs, and identify objects. It cannot guide you like a GPS, but it gives visual information that supports your cane skills.”


    Explore the World Channel

    Explore

    • hold the phone at chest level
    • slowly scan left to right
    • listen to descriptions

    Listen for:

    • “What openings do you hear?”
    • “What objects are in front of you?”
    • “What does it say about the hallway?”

    Identify Doors and Openings

    Use the camera to:

    • find doorways
    • detect open vs closed doors
    • identify intersections
    • confirm hallway direction

    Think about:

    • “Where is the door located?”
    • “Is it open or closed?”
    • “What does your cane confirm?”

    Read Room Numbers and Signs

    Switch to Short Text.

    Now

    • locate room numbers which should have braille
    • read office signs
    • read restroom labels
    • read posted instructions

    This builds literacy + orientation.


    Object Identification

    Use the Describe to identify:

    • tables
    • chairs
    • cabinets
    • appliances
    • vending machines
    • water fountains
    • anything

    Think about

    • “What object did it identify?”
    • “How does that help you understand the space?”

    Build a Mental Map

    Walk a hallway or room.

    • scan ahead
    • scan left
    • scan right
    • use cane to confirm
    • describe the layout

    Then combine:

    • visual feedback
    • tactile feedback
    • spatial reasoning

    Reflection

    • “What did Seeing AI help you understand?”
    • “What did your cane tell you that Seeing AI didn’t?”
    • “How did the two work together?”
    • “What can Seeing AI NOT do indoors?”

    This reinforces realistic expectations.


    If you are teaching this here is an Assessment Checklist

    Student demonstrates mastery when they can:

    • Identify doors and openings using Seeing AI
    • Read room numbers and signs
    • Identify objects and landmarks
    • Build a mental map of a hallway or room
    • Use Seeing AI + cane skills together
    • Explain what Seeing AI cannot do indoors

    Teacher Notes

    • Seeing AI is the best indoor orientation tool available today
    • It is NOT indoor navigation
    • It gives visual information, not directions
    • It works in any building
    • It supports independence when paired with cane skills

    Other iPhone Lessons

  • Use Seeing AI and Compass to Navigate Inside Building 3 & 4

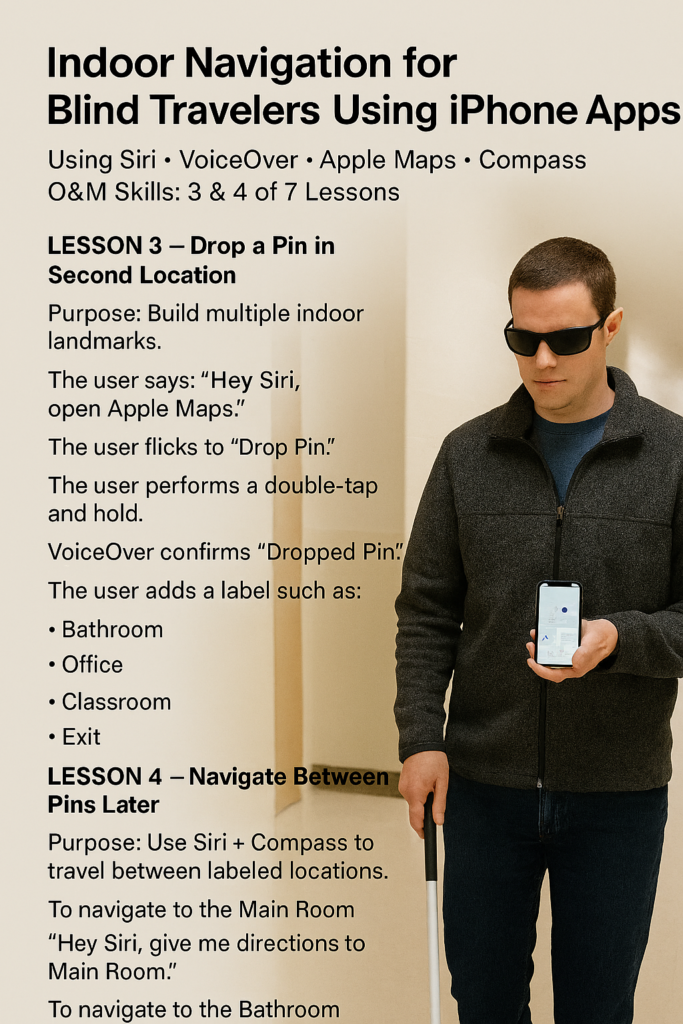
    Indoor Navigation for Blind Travelers Using iPhone Apps

    Using Siri • VoiceOver • Compass • Seeing AI O&M Skills: 3 & 4 of 9 Lessons

    Use Dropped Pins to Navigate Inside Building navigating with cane
    Use Dropped Pins to Navigate Inside Building

    Use Seeing AI and Landmarks to Navigate Inside Buildings

    Navigating indoors with an iPhone becomes a powerful skill when blind travelers learn to use Seeing AI, environmental landmarks, and directional awareness. This lesson builds on foundational mobility techniques by teaching students to identify key locations—such as bathrooms, offices, and exits—using visual recognition, text reading, and object identification. Students then use VoiceOver cues, Compass alignment, and consistent routes to move confidently between locations. With these tools, unfamiliar indoor spaces become structured, predictable, and navigable.


    LESSON — Identify Key Locations Using Seeing AI (Bathroom, Office, Exit)

    Purpose: Build reliable indoor landmarks using real-world identification instead of map-based pins.

    The user says:
    “Open Seeing AI.”

    Then selects modes such as:

    • Short Text
    • Document
    • Product
    • Scene

    The user scans the environment to identify:

    • Signs (Bathroom, Exit, Room Numbers)
    • Doorways and landmarks
    • Printed materials

    VoiceOver reads detected text and descriptions.ment and hallway cues, which assists anyone aiming to use Dropped Pins for indoor building navigation.

    The user pairs this information with physical landmarks such as:

    • Wall direction
    • Door placement
    • Hallway turns

    Navigate Between Locations Using Siri, Compass, and Landmarks

    Purpose: Use consistent routes and directional cues to travel between identified locations.

    To return to the Main Room:
    “Hey Siri, open Compass.”

    The user aligns direction based on known orientation.

    To locate the Bathroom or Exit:
    The user uses:

    • Previously identified landmarks
    • Hallway structure
    • Door counts and turns

    VoiceOver supports with:

    • Heading direction
    • Orientation feedback

    The student follows consistent routes, reinforcing spatial understanding and independence.


    Using Seeing AI on iPhone

    What Seeing AI is

    Seeing AI is a free app from Microsoft that uses your iPhone camera to:

    • Read text aloud
    • Identify objects and scenes
    • Recognize products and barcodes
    • Describe environments

    It turns visual information into speech feedback in real time

    Why it matters for blind users

    Seeing AI supports:

    • Independent reading
    • Indoor navigation support
    • Identifying locations and objects
    • Understanding surroundings quickly

    It is a support tool, not a replacement for O&M skills


    Main features (channels) and how to use them

    1. Short Text (fast reading)

    Use for:

    • Signs
    • Door labels
    • Room numbers

    How:

    • Open Seeing AI
    • Swipe to Short Text
    • Point camera toward text

    It reads instantly as soon as text is detected


    2. Document (longer reading)

    Use for:

    • Papers
    • Handouts
    • Mail

    How:

    • Swipe to Document
    • Hold phone above page
    • Listen for guidance:
      • “Move left”
      • “Move right”
    • Double tap to capture

    Reads full document clearly


    3. Scene (environment awareness)

    Use for:

    • Understanding a room
    • Locating objects
    • Getting general layout

    How:

    • Swipe to Scene
    • Point camera around slowly

    Example output:

    • “Hallway with doors”
    • “Table and chairs”

    4. Product (barcode scanning)

    Use for:

    • Food items
    • Products
    • Bottles

    How:

    • Swipe to Product
    • Move camera slowly
    • Listen for beep when barcode is found

    Reads product name


    5. People (optional)

    Use for:

    • Detecting faces
    • Estimating distance

    How to use Seeing AI for indoor navigation

    Step 1: Identify locations

    Use:

    • Short Text → read signs
    • Scene → understand layout

    Example:

    • “Bathroom” sign
    • “Room 204”

    Step 2: Build mental map

    Combine:

    • What you hear from Seeing AI
    • O&M skills:
      • hallway direction
      • turns
      • landmarks

    Step 3: Move with direction

    Use:

    • Compass
    • Consistent routes
    • Landmark recall

    Seeing AI helps identify
    You move using orientation + memory

    Important limitations

    • Does NOT give turn-by-turn indoor navigation
    • Requires:
      • good lighting
      • steady hand
    • Can misread complex environments

    It supports navigation—it does NOT replace it

    Best teaching strategy

    Teach students to:

    1. Scan → Identify → Confirm
    2. Pair app feedback with physical landmarks
    3. Repeat routes until consistent

    Quick commands (VoiceOver users)

    • Swipe left/right → change channels
    • Double tap → capture (Document)
    • Two-finger scrub → go back

    Bottom line

    Seeing AI helps users:

    👉 Read
    👉 Identify
    👉 Understand

    But independence comes from:

    Combining it with O&M + directional awareness


    iPhone Lessons

  • Use Seeing AI + Lazarillo + Compass for Inside Navigation

    Indoor Navigation for Blind Travelers Using iPhone App-2

    Using Siri • VoiceOver • Compass • O&M Skills: 2 of 9 Lessons

    Navigate Indoors with Siri + Compass

    Purpose: Use Siri’s heading cues and Compass to walk straight in a path. If you need to Navigate Indoors with Siri + Compass, this guide will help you do it effectively.

    Step 1: Open Compass

    Siri gives:

    • A heading (North, South, East, West)
    • A distance (20 feet, 50 feet)

    Even indoors, this information is reliable and as you navigate, read the braille labels on doors to become familiar with locations.

    Step 2: Open Compass to Align the Body

    1. The user says: “Hey Siri, open Compass.”
    2. VoiceOver announces the current heading using degrees.

    Step 3: Match Siri’s Direction

    Examples:

    • If Siri says “Head west,” user turns until Compass says 260–280 degrees.
    • If Siri says “Head north,” user turns until Compass says 350–10 degrees.

    Step 4: Begin Walking Straight

    1. The user holds the phone flat against the stomach.
    2. The user walks forward.
    3. If headings drift, user adjusts slightly.

    Siri Orientation Commands

    These help instantly:

    • “Hey Siri, which way am I facing?”
    • “Hey Siri, point me north.”
    • “Hey Siri, what’s my heading?”

    Navigate Indoors


    Navigate Indoors Using Seeing AI + Lazarillo + Compass

    Purpose

    The student will learn to orient themselves indoors and move with direction by combining environmental identification (Seeing AI), global orientation (Lazarillo), and body alignment (Compass) with O&M skills.


    Build Orientation and Navigate with Direction


    Step 1: Establish Global Orientation Using Lazarillo

    Purpose: Understand where you are in relation to the outside world.

    1. Say:
      “Hey Siri, open Lazarillo.”
    2. Listen as Lazarillo announces-outside streets so you can relate inside to outside locations:
      • Nearby streets
      • Intersections
      • Points of interest
    3. The student determines:
      • “The front of the building faces Main Street.”
      • “The parking lot is behind me.”

    This creates a global reference point, even while indoors.


    Step 2: Align the Body Using Compass

    Purpose: Establish consistent direction.

    1. Say:
      “Hey Siri, open Compass.”
    2. VoiceOver announces heading in degrees.
    3. The student aligns to a known direction:
      • North ≈ 0°
      • East ≈ 90°
      • South ≈ 180°
      • West ≈ 270°
    4. The student notes:
      • “Hallway runs east to west”
      • “Classroom is on the north side”

    This builds directional consistency, not guessing.


    Step 3: Identify Indoor Landmarks Using Seeing AI

    Purpose: Locate and confirm key points inside the building.

    1. Open Seeing AI:
      “Hey Siri, open Seeing AI.”
    2. Use:
      • Short Text → read signs (Bathroom, Exit, Room numbers)
      • Scene → understand layout
    3. The student identifies:
      • Doors
      • Signs
      • Hallway intersections
    4. Pair with physical awareness:
      • Door on right
      • Second hallway on left

    This creates reliable indoor landmarks


    Step 4: Move with Direction and Landmarks

    Purpose: Travel with control and accuracy.

    1. The student:
      • Aligns direction using Compass
      • Confirms location using Seeing AI
      • Uses Lazarillo for global awareness
    2. The student walks forward while:
      • Maintaining heading
      • Counting doorways
      • Listening for environmental cues
    3. If drift occurs:
      • Stop
      • Recheck Compass
      • Reconfirm with Seeing AI

    Commands:

    • “Hey Siri, which way am I facing?”
    • “Hey Siri, what’s my heading?”
    • “Hey Siri, open Compass”
    • “Hey Siri, open Lazarillo”

    Siri provides instant orientation support

    Key Instructional Concept

    • Lazarillo → tells you where you are in the world
    • Compass → tells you which direction you are facing
    • Seeing AI → tells you what is around you
    • O&M skills → allow you to move safely and independently

    Important Note

    No app provides true indoor turn-by-turn navigation.
    Independence comes from combining:

    • Technology
    • Direction
    • Landmarks
    • Repetition

    Outcome

    The student will be able to:

    • Establish orientation indoors using external reference points
    • Align direction using Compass
    • Identify locations using Seeing AI
    • Move between locations using consistent routes

    iPhone Lessons

    Navigate: Drop a Pin and Save Routes with Siri and VoiceOver

    Complete iPhone Access Guide for Blind and Low Vision

    Drop Pins and Navigate with Maps: iPhone and VoiceOver Skills for the Blind
    iPhone: Set Up Face ID, Touch ID, and Passcode with VoiceOver

    iPhone-Setting Up Email Using Siri & VoiceOver

    Using VoiceOver to Learn What You Can Do in an App

    iPhone Setup: Turning On Siri and VoiceOver

    Aira Glasses Navigation: How Blind Travelers Navigate Safely and Independently

    Blind Users Retrace Indoor Routes with Clew

    Indoor Navigation for Blind Users: Using Seeing AI with iPhone

    Look Around APP: Outdoor iPhone Navigation for Blind People: 7 & 8


  • Navigate: Drop a Pin and Save Routes with Siri and VoiceOver

    Blind Travelers Drop a Pin and Save Routes Using Siri, VoiceOver, Apple Maps, and Compass

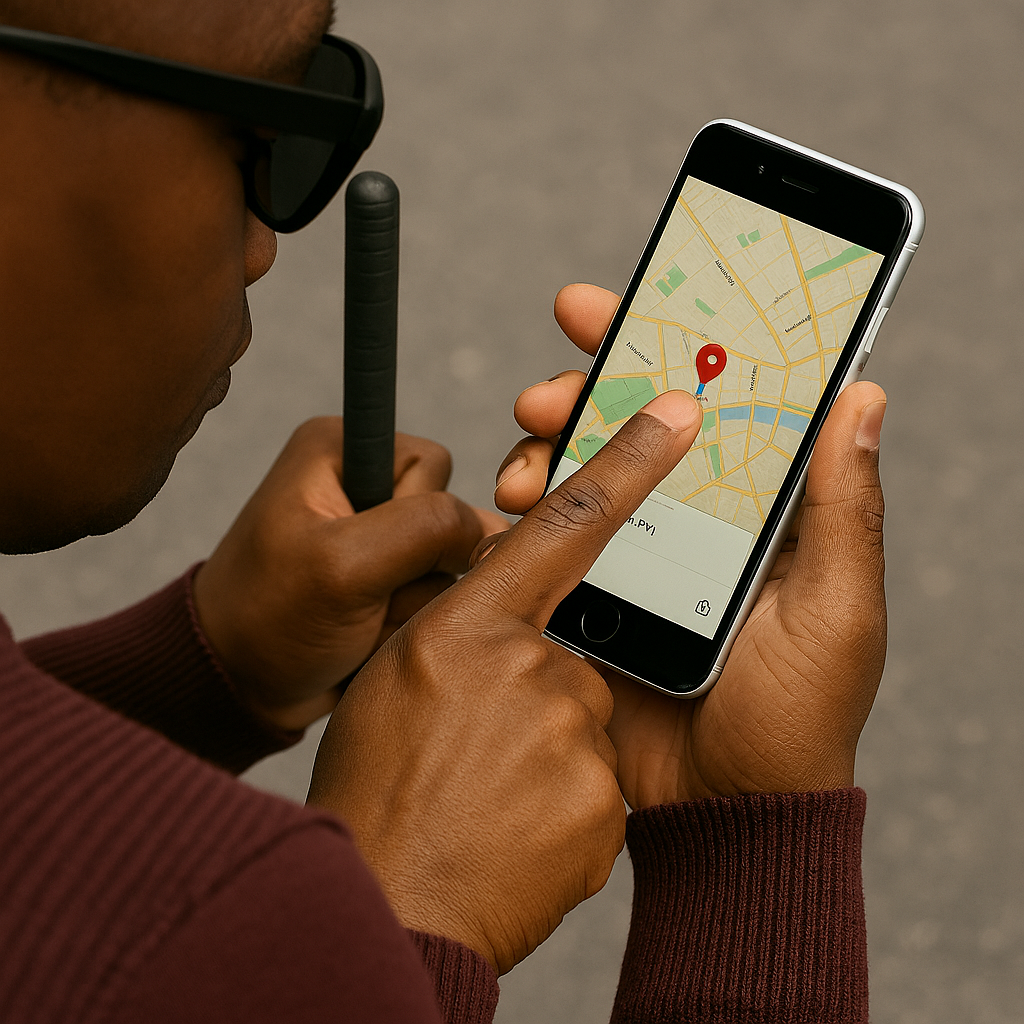
    Person uses iPhone navigation tools to walk safely and independently.

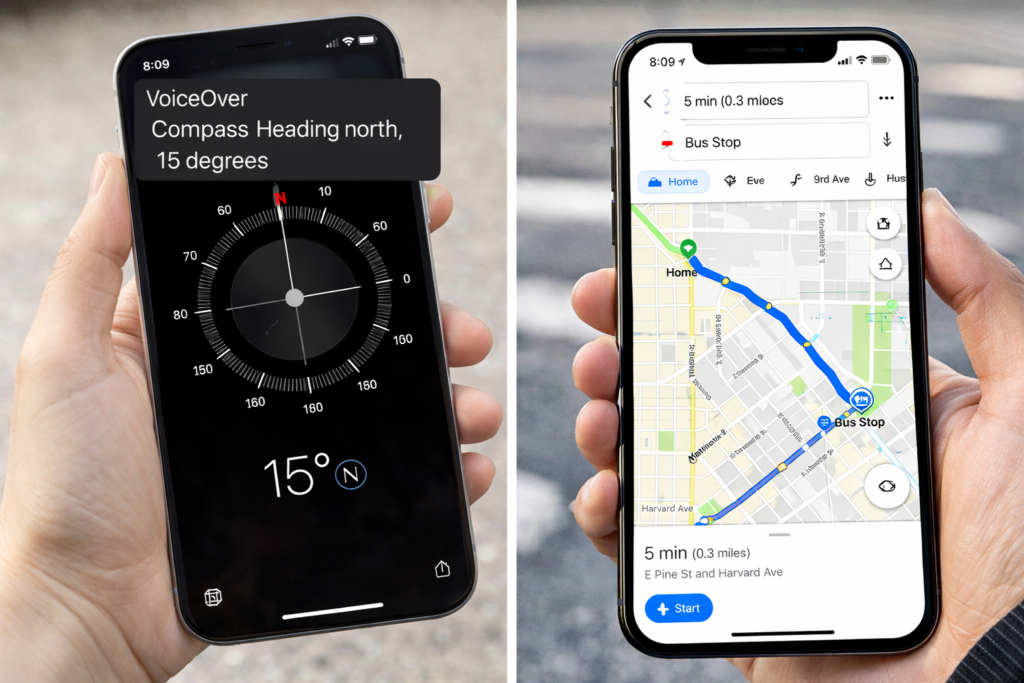
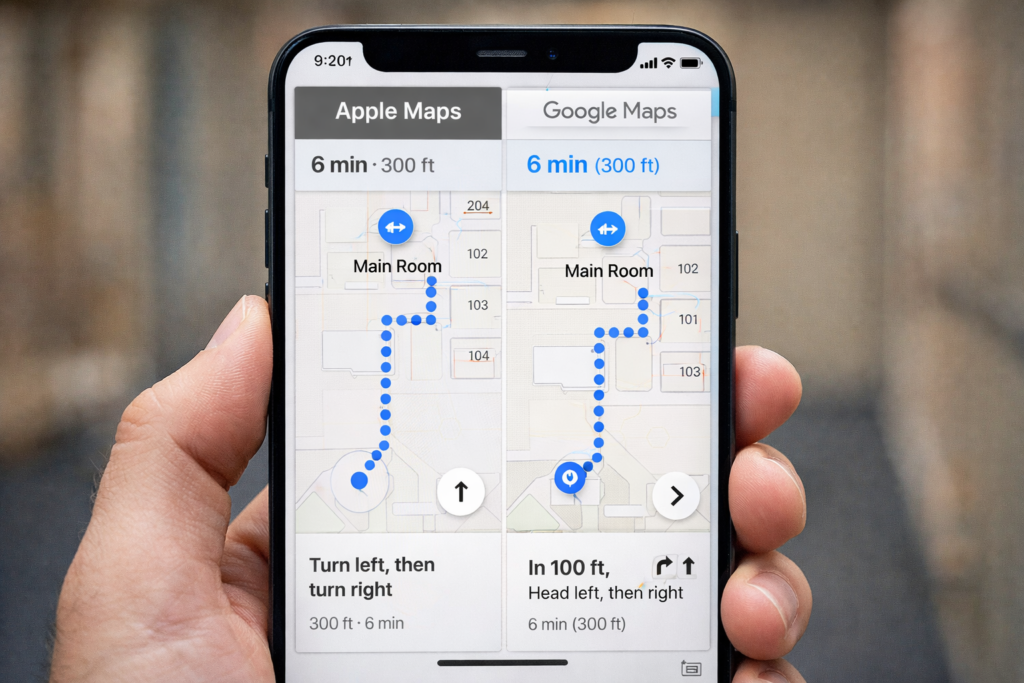
    Compass and Route showing on iphone Google Maps
    Navigate: Drop a Pin and save routes: Images show compass on 1 side and on Google Maps route on the other

    Students and adults need reliable ways to travel from a drop-off or pick-up point to their destination. This skill matters at home, school, work, and in the community. This resource, called Navigate: Drop a Pin and Save Routes, teaches travelers how to drop a pin, save routes, and use Siri, VoiceOver, Apple Maps, Google Maps, and the Compass app to move with confidence. It was created for students, yet anyone building independent travel skills will find it helpful.

    A. Dropping a Pin at Home

    1. Open Maps
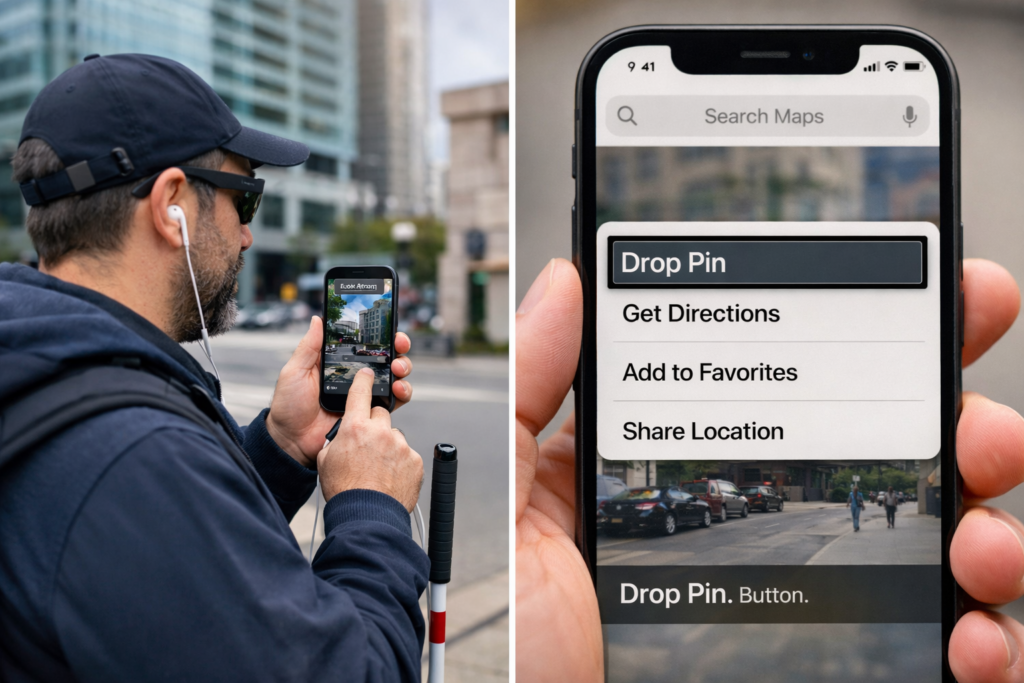
    Say: “Hey Siri, open Apple Maps.”

    2. Drop your home pin Outside

    • VoiceOver says “Current Location.”
    • Flick right to “Drop Pin.”
    • Double-tap.
    • Flick to “Add Label.”
    • Double-tap.
    • Say: “Home.”
    • Activate “Done.”

    Now Siri always knows your home.


    B. Dropping a Pin at School

    Person does this at the front door or the main entrance of school outside.

    1. Open Maps
    Say: “Hey Siri, open Apple Maps.”

    2. Drop your school pin

    • Flick to “Drop Pin.”
    • Double-tap.
    • Flick to “Add Label.”
    • Say: “School.”
    • Activate “Done.”

    C. Dropping a Pin at Your Pick-Up Van Location

    Do this standing exactly where you wait each day outside

    1. Say:
    “Hey Siri, open Apple Maps.”

    2. Drop the pin

    • Flick to “Drop Pin.”
    • Double-tap.

    3. Label it

    • Flick to “Add Label.”
    • Say: “Pick-Up Van.”
    • Activate “Done.”

    Now you can find your pickup vehicle every day.


    D. Navigating to Saved Pins

    Go from Home to School

    Say:
    “Siri, give me walking directions to School.”

    Go from School to Pick-Up Van

    Say:
    “Siri, give me walking directions to Pick-Up Van.”

    Go from Pick-Up Van to School Door

    Say:
    “Siri, walking directions to School.”

    Go from School to Home

    Say:
    “Siri, give me walking directions to Home.”

    Siri will speak the direction and distance.
    Person follows the heading using Compass and hallway cues.


    E. Using the Compass

    1. Open Compass
    Say: “Hey Siri, open Compass.”

    2. Listen to headings
    VoiceOver speaks numbers.

    3. Basics
    North = 0
    East = 90
    South = 180
    West = 270

    4. Staying straight
    When Siri says “Head west,” Person turns until Compass says “270.”

    Compass keeps her on track indoors and outside.


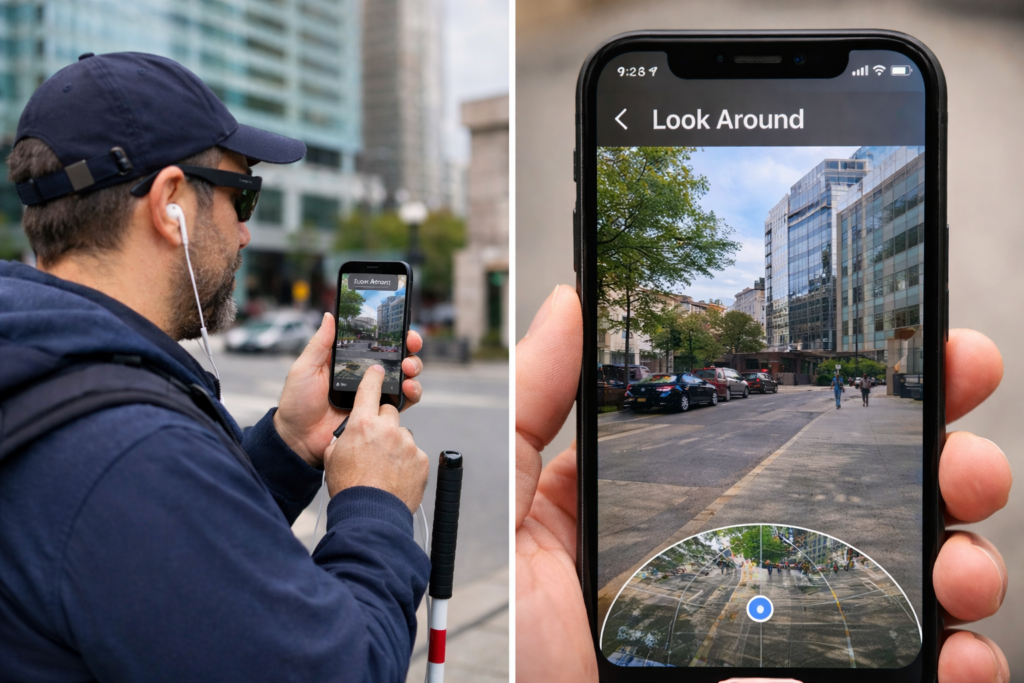
    F. Using Look Around

    Look Around works outside the building.
    It helps Person understand the campus layout.

    1. Open Look Around
    Say: “Open Apple Maps.”
    Search for “Colonial Heights Middle School.”
    Flick to Look Around.
    Double-tap.

    VoiceOver describes:

    • Doors
    • Parking
    • Roads
    • Campus layout

    This helps her know where she is before entering the school.


    G. Daily Routine for Person

    Morning

    1. Say: “Siri, directions to School.”
    2. Use Compass to hold the heading.
    3. Follow the route to the door.

    Afternoon

    1. Say: “Siri, directions to Pick-Up Van.” or Bus or spot you need to get to
    2. Follow hall cues and Compass.
    3. Arrive at the van spot.

    Evening

    1. When dropped off- Say: “Siri, directions to Home.”
    2. Walk with confidence.

    H. Notes for Parents and Instructors

    • Siri uses the pins Person labels.
    • Pins stay saved unless she deletes them.
    • She can use them every day with one command.
    • She should practice the routes with support first.
    • Please encourage her to use Siri daily for consistency.

    Blind Travelers Drop a Pin and Save Routes Using Siri, VoiceOver, Apple Maps, and Compass

    Other iPhone Lessons

  • JAWS UEB/Nemeth Settings + Accessible Math in Word & Braille Editor

    JAWS UEB/Nemeth Settings-Word and Braille Math Editor
    JAWS UEB MATHS/Nemeth Settings-Word and Braille Math Editor

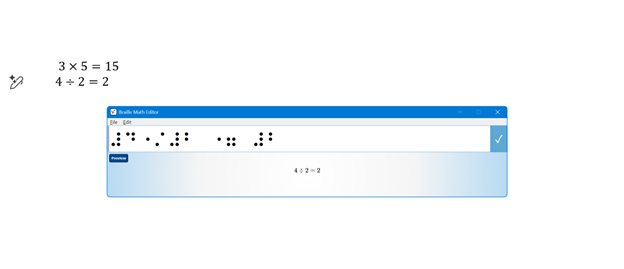
    If you’ve ever struggled to get JAWS to read math correctly on your computer, this walk-through will make your life much easier. In this video, I demonstrate how to set JAWS for either UEB Maths or Nemeth math using the JAWS UEB/Nemeth Settings, then show you how to create accessible math using Word’s Math Editor and the Braille Math Editor. Whether you’re a TVI (Teacher of the Blind), a student, or an AT (Access Technology) specialist, these steps will help you produce clear, accurate, and accessible math every time.


    WORD MATH EDITOR Setup

    1. Open the Math Editor

    • Alt + =

    2. Open the Equation Tools tab

    • Alt + J, E

    3. Open Math Options (Settings)

    • T, 1
      (This opens the Math Options dialog.)

    4. Set Alignment to Left
    Inside the Math Options dialog:

    • Alt + J → moves to Justification
    • L → Left alignment
    • Alt + D → Set as Default
    • Tab, Tab → to OK
    • Enter
    • When asked to save as default, choose Yes
      (This saves the settings to the Normal template.)

    5. Check Conversion (if math looks wrong)

    While inside a math zone:

    • Alt + =
    • Alt + J, E
    • C → Convert
    • Make sure it is set to Professional

    WORD MATH EDITOR — Command Sequence (JAWS + Keyboard)

    Open the Math Editor

    • Press Alt + =
      This inserts a new math zone and opens the Word Math Editor.

    Move in and out of the math zone

    • Right Arrow → move into the math zone
    • Right Arrow again → move through elements
    • Left Arrow → move backward
    • Esc → exit the math zone and return to normal text

    Insert common structures

    • FractionCtrl + /
    • ExponentCtrl + Shift + =
    • SubscriptCtrl + =
    • Square root → type \sqrt then press Space
    • Matrix → type \matrix then press Space
    • Parentheses → type ( then ) (Word auto‑sizes them)

    Insert math symbols using LaTeX shortcuts

    • \pi + Space → π
    • \alpha + Space → α
    • \neq + Space → ≠
    • \le + Space → ≤
    • \ge + Space → ≥
    • \div for divide
    • \times for times
    • \sqrt for square root

    (Word’s Math Editor accepts most LaTeX commands-check out list in link.)

    Navigate inside structures

    • Right Arrow → move to next placeholder
    • Left Arrow → move back
    • Ctrl + Right Arrow → jump out of a structure
    • Ctrl + Left Arrow → jump into previous structure
    • To read the braille the easiest–OPEN BME

    BRAILLE MATH EDITOR (BME) — Command Sequence (JAWS + Keyboard)

    Open the Braille Math Editor

    • Press Alt + Shift + =
      (This opens the BME window for UEB contracted math input.)

    Choose UEB or Nemeth

    Inside BME:

    • Press Alt + M → opens Math Code menu
    • Press U → UEB Math
    • Press N → Nemeth Math

    (You can teach students to confirm the code before typing.)

    Enter math using braille input

    • Type using six‑key entry on the braille display or keyboard
    • Use Space to confirm symbols
    • Use Backspace to correct braille cells

    Navigate inside the math expression

    • Left Arrow → move left
    • Right Arrow → move right
    • Ctrl + Left Arrow → jump to previous element
    • Ctrl + Right Arrow → jump to next element

    Insert common structures

    • Fraction → dots 3‑4 then 3‑4 (opening and closing fraction indicators)
    • Superscript → dot 5
    • Subscript → dot 2
    • Square root → dots 1‑2‑3‑5
    • Parentheses → dots 1‑2‑6 and 3‑5‑6

    (These follow UEB math rules; Nemeth uses different indicators.)

    Send math back to Word

    • Press Alt + S → Save and return to Word
    • The math appears in the document as a fully formatted math object

    Exit without saving

    • Press Alt + F4
    • Choose No if you don’t want to insert the math

  • Drop a Pin with iPhone- Google Maps and VoiceOver Navigation for the Blind

    Google Maps, and VoiceOver Skills for the Blind

    Drop a Pin with iPhone using Google Maps and Voice Over to share location with someone to come pick you up


    Blind travelers build custom indoor and outdoor routes using Siri, Apple Maps, Google Maps, VoiceOver gestures, and the Compass app. These tools work together and create a reliable navigation system. Each step supports confidence and helps travelers move safely through any building or surrounding area.

    Google Maps remains helpful outdoors. Apple Maps remains best for dropping labeled pins and using Siri for fast navigation.


    Part 1 — Drop a Pin Using Siri and VoiceOver (Apple Maps)

    Dropping labeled pins works best in Apple Maps, because Siri supports pin creation and VoiceOver announces label options clearly.

    A. Drop a Pin at the Starting Location

    1. Say, “Hey Siri, open Apple Maps.”
    2. Wait until VoiceOver announces “Current Location.”
    3. Flick right until you hear “Drop Pin.”
    4. Perform a double-tap and hold to drop the pin.
    5. Flick right to “Add Label.”
    6. Double-tap.
    7. Dictate a label such as “Main Room.”
    8. Flick right to “Done.”
    9. Double-tap to save.

    B. Drop a Pin at the Next Location

    Repeat the process at any hallway, office, bathroom, or exit.

    1. Say, “Hey Siri, open Apple Maps.”
    2. Flick to “Drop Pin.”
    3. Double-tap and hold.
    4. Flick to “Add Label.”
    5. Double-tap.
    6. Dictate “Bathroom.”
    7. Flick to “Done.”
    8. Double-tap.

    Part 2 — Navigate Between Custom Pins (Apple Maps + Google Maps)

    Siri provides indoor headings and distance even when indoor maps do not exist.
    Google Maps adds strong outdoor accuracy when needed.

    A. Navigate to the Main Room (Apple Maps)

    1. Say, “Siri, walking directions to Main Room.”
    2. VoiceOver reads distance and direction.

    B. Navigate to the Bathroom (Apple Maps)

    1. Say, “Siri, walking directions to Bathroom.”
    2. Follow hall cues and maintain alignment.

    C. Use Google Maps When Outdoors

    1. Say: “Hey Siri, open Google Maps.”
    2. Use VoiceOver to choose Walking.
    3. Follow turn-by-turn directions with outdoor accuracy.

    Google Maps excels outdoors. Apple Maps excels for labeled pins indoors.


    Part 3 — Teach Compass Skills for Indoor Orientation

    A. Open Compass

    1. Say, “Hey Siri, open Compass.”
    2. VoiceOver reads the heading.

    B. Teach Basic Directions

    • North equals 0 degrees.
    • East equals 90 degrees.
    • South equals 180 degrees.
    • West equals 270 degrees.

    C. Practice Turning

    1. Face forward.
    2. Listen to the heading.
    3. Turn left or right.
    4. Listen as VoiceOver updates the heading.

    D. Connect Compass to Pins

    1. Say, “Siri, walking directions to Bathroom.”
    2. Listen for cues like “Head west.”
    3. Match the heading in Compass.
    4. Walk in that direction.

    Part 4 — Build Route Memory Using O&M Skills

    A. Notice Landmarks

    Teach the traveler to notice:

    • Floor textures
    • Temperature changes
    • Echo patterns
    • Doorframes
    • Rails
    • Open spaces

    B. Teach Step Counting

    1. Start at the first labeled pin.
    2. Count steps to the next point.
    3. Stop at each turn.
    4. Record distances.

    C. Teach Repetition

    1. Practice with guidance.
    2. Practice with shadowing.
    3. Practice with verbal prompts.

    D. Teach Reverse Routing

    Walk the route backward using opposite turns.


    Using Look around app on iPhone to “see” what is around the traveler

    Part 5 — Use Look Around with Apple Maps

    Look Around helps travelers understand the outside of a building.

    A. When Look Around Works

    • On public streets
    • At building entrances
    • Around sidewalks and driveways

    B. Open Look Around

    1. Say, “Hey Siri, open Apple Maps.”
    2. Search for the building.
    3. Flick until VoiceOver says “Look Around available.”
    4. Double-tap to open it.

    C. What Look Around Teaches

    • Street layout
    • Sidewalk positions
    • Entrance locations

    D. What Look Around Cannot Do

    • No hallways
    • No interior rooms
    • No indoor turn-by-turn directions

    Create Custom Routes


    Part 6 — A Complete Custom Route Routine

    1. Use Look Around outside to understand the area.
    2. Drop labeled pins at important indoor locations.
    3. Use Siri for walking directions to any saved pin.
    4. Use Compass to match the required heading.
    5. Use Google Maps for outdoor paths when needed.
    6. Build step counts and turns for each route.
    7. Use landmarks for confirmation.
    8. Practice until the traveler moves independently.

    Share Location, Get Directions, Add to Favorites and more using Google Maps, Voice Over and Siri

    Part 7 — Share Your Location Quickly for Pickup or Safety

    Blind people often need to share their exact location so family, friends, or rides can find them. Siri and VoiceOver make this process fast and hands-free.

    This skill works indoors and outdoors. It also works when someone feels unsafe, confused, or needs help immediately.


    A. Share Your Location with Siri (Fastest Method)

    1. Say: “Hey Siri, share my location with Mom.”
      (Replace “Mom” with any trusted contact.)
    2. Siri sends your exact GPS location.
    3. VoiceOver confirms: “Sent your current location.”

    This method works even when you cannot identify where you are.


    B. Share Your Location in Messages (Manual Method)

    1. Say: “Hey Siri, open Messages.”
    2. Touch the center of the screen.
    3. Flick right until you hear the contact’s name.
    4. Double-tap to open the conversation.
    5. Flick right until you hear “Send My Current Location.”
    6. Double-tap to send it.
    7. VoiceOver confirms the message.

    This method helps when someone prefers not to dictate aloud.


    C. Share Your Location Permanently With a Trusted Contact

    This helps a helper monitor travel when needed.

    1. Say: “Hey Siri, open Messages.”
    2. Open the trusted contact’s conversation.
    3. Flick to “Details” or “Info.”
    4. Double-tap.
    5. Flick to “Share My Location.”
    6. Double-tap.
    7. Flick to “Share Indefinitely.”
    8. Double-tap to activate.

    The trusted person can now find your location anytime you share it.


    D. When Lost

    1. Stop walking.
    2. Hold the phone in both hands.
    3. Face a quiet direction.
    4. Say: “Hey Siri, share my location with Mom,” or person.
    5. Wait for VoiceOver to confirm.
    6. Stay in place until person arrives.

    E. Combine Location Sharing With Dropped Pins


    You can do both:

    1. Drop a pin at the pickup point.
    2. Label it with VoiceOver.
    3. Share their location with Siri so the pickup person receives the exact spot.
    4. Use Compass to stay oriented until they arrive.

    This gives the safest and most accurate pickup routine.


    Other iPhone Lessons

  • Drop Pins and Navigate with Maps: iPhone and VoiceOver Skills for the Blind
    navigation with drop a Pin
    Drop Pins and Navigate with Apple Maps

    Goal:

    • Mark and label the location
    • Walk to the bus stop or another destination
    • Drop a second pin
    • Create a reusable walking route
    • Reuse that same route when returning home

    VoiceOver + Siri Navigation Workflow: Drop Pins, Mark Locations, Save Routes, Reuse Them

    PART 1 — Drop a Pin at Home (Using Siri or VoiceOver)

    Option A: Using Siri

    1. Say: “Hey Siri, drop a pin.”
    2. Siri will place a pin at your exact GPS location.
    3. Say: “Hey Siri, mark my location as Home.”
      • This saves it permanently in Maps.

    Option B: Using VoiceOver

    1. Open Maps.
    2. Touch the screen until you hear “Current Location.”
    3. One‑finger double‑tap to select it.
    4. Swipe right until you hear “More” or “Actions available.”
    5. Use the Actions Rotor → choose “Drop Pin.”
    6. Double‑tap to confirm.
    7. Swipe to “Add to Favorites” → double‑tap.
    8. Type or dictate: “Home.”

    PART 2 — Walk to the Bus Stop and Drop a Pin There

    1. Walk to the bus stop.
    2. Once standing at the exact spot, say:
      “Hey Siri, drop a pin.”
    3. Or use the VoiceOver method again:
      • Current Location → Actions Rotor → Drop Pin.
    4. Add it to Favorites and label it “Bus Stop.”

    PART 3 — Create a Walking Route Between Home and Bus Stop

    From Home to Bus Stop

    1. Open Maps.
    2. In Favorites, choose “Bus Stop.”
    3. Swipe to “Directions.”
    4. Choose “Walking.”
    5. Double‑tap “Go.”
    6. Maps now has a reusable route from Home → Bus Stop.

    Save the Route

    Apple Maps doesn’t have a “Save Route” button, but you can save it by:

    • Keeping Home and Bus Stop in Favorites
    • Maps will always generate the same walking route between two saved points
    • You can also add both to a Guide (optional)

    PART 4 — Reuse the Route When Returning Home After Getting Off the Bus

    When you get off the bus:

    Option A: Siri

    Say:
    “Hey Siri, give me walking directions to Home.”

    Option B: VoiceOver

    1. Open Maps.
    2. Go to Favorites.
    3. Select Home.
    4. Swipe to Directions → choose WalkingGo.

    This automatically recreates the same route you used earlier.


    Easy Summary Script

    Here’s a simple version you can teach directly:

    1. At home: “Hey Siri, drop a pin. Mark this as Home.”
    2. Walk to bus stop: “Hey Siri, drop a pin. Mark this as Bus Stop.”
    3. To go to the bus stop: Open Maps → Favorites → Bus Stop → Directions → Walking → Go.
    4. To go home after the bus: “Hey Siri, walking directions to Home.”

    Other iPhone Lessons