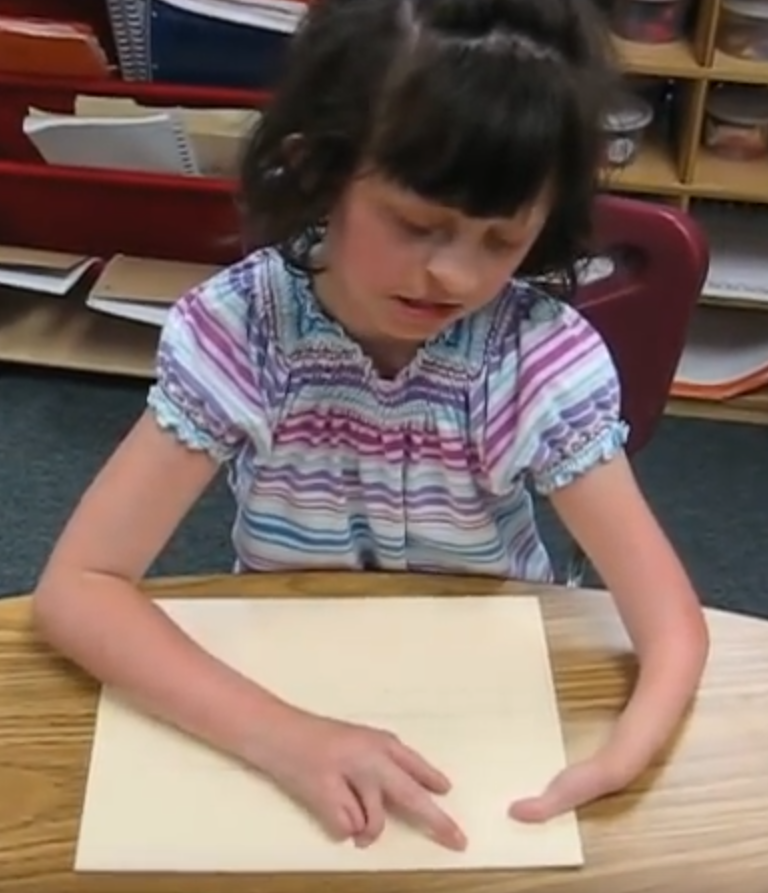
I (Dr. Robinson) began instruction with Kaleigh in the 3rd grade as she struggled to see large print at 2 inches. Here is a video of her first learning skills and as time passed, her typing with special hands was no problem as she quickly got up to 77 words per minute with her special hands.
Practice and Patience: Regular practice is crucial. Start with basic exercises in how to use each hand and gradually increase complexity. Focus on accuracy before speed. Using these techniques and applying this knowledge to her actual work, within 3 years she went from learning to typing at 77 wpm using JAWS screen reader. The above is true for learning braille also.
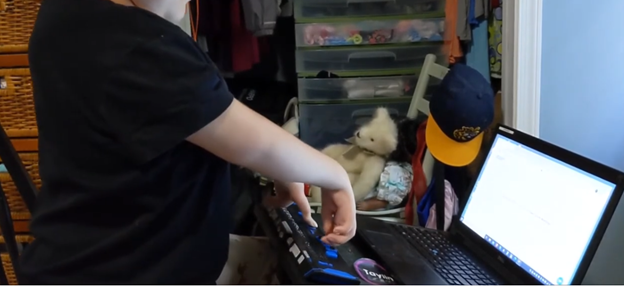
Typing with special handsSpecial hands reading Braille
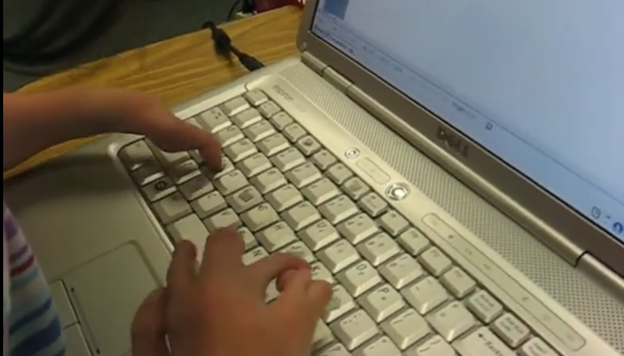
Typing with 3 Fingers on her laptop is made easier with practice.
A child with three fingers can type at over 77 words per minute by using adaptive strategies to access the same technology. Kaleigh is JUST learning the first steps in typing on a regular laptop.
Typing with 3 Fingers
First, they learn how to optimize their finger movements, reducing unnecessary motion. They focus on accuracy and gradually build speed through consistent practice. Children can learn to use the identical keyboard and computers as their peers. Using the center of the keyboard as positioning to the rest of the keyboard is part of the skill. The child practices finger coordination, mastering a rhythm that increases typing speed. Over time, these techniques combine to enable the child to exceed expectations and type as quickly as possible. More YouTube Channel Lessons
Other Kaleigh Videos typing as she advances to typing over 77 words per minute
Typing with 3 Fingers on her laptop is made easier with practice and now she is typing 77 word per minute. This impressive feat shows Kaleigh typing 77 wpm flawlessly.
A young lady with three fingers can type at over 77 words per minute. She is using adaptive strategies to access the same technology as peers. Kaleigh typing 77 wpm highlights her exceptional skills. Kaleigh has been learning and using these special skills based on her fingers for years. She uses a regular laptop with JAWS screen reader to do all of her work.
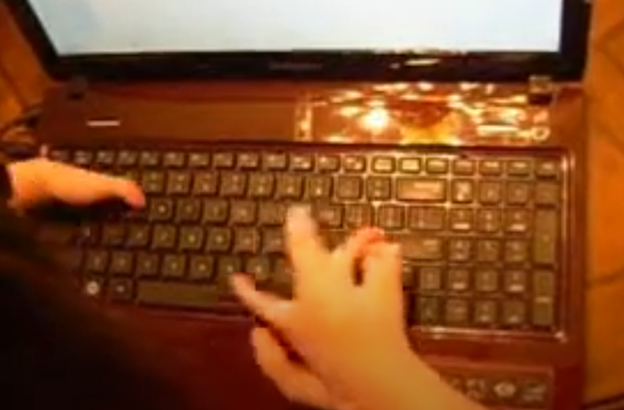
For individuals typing with one finger on one hand and two fingers on the other, specialized typing techniques can help improve speed and accuracy. Focus on positioning both hands in the center of the keyboard on homerow so the left single finger can move around that side of the keys. With the right 2 fingers, 1 is on the space bar at all times while other finger moves arund and presses keys. Moving together with a lot of practice, speed is gained. Start with slow, deliberate typing to reduce errors and gradually build up speed. Mastering typing speed similar to Kaleigh’s, started with such methods. Regular practice with phrases like “The quick brown fox jumps over the lazy dog” helps improve finger coordination. One such success story celebrating progress is Kaleigh typing 77 wpm.
With determination and keyboard practice with lots of instruction, students can accomplish anything. Kaleigh typing 77 wpm is a testament to this. See her series of progress.
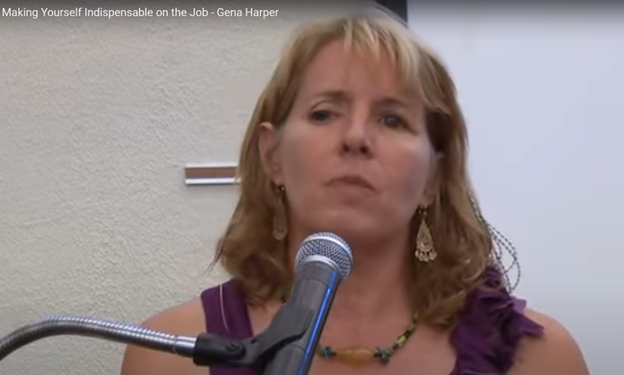
At the Employment Summit, Gena Harper delivered an insightful presentation on making oneself indispensable in the workplace. She emphasized the importance of adaptability in an ever-changing job market. Harper explained that employees must continuously develop new skills to remain valuable. She encouraged attendees to identify gaps in their current knowledge and seek training opportunities to fill them.
Highlights-Be open and Honest about Who you are
Harper also highlighted the power of proactive communication. By regularly updating supervisors on progress and challenges, employees demonstrate their commitment to the organization’s goals. This proactive approach builds trust and positions employees as reliable problem solvers. Even if you are physically limited, you can still do it.
Another key point was the value of networking within the company. Harper advised forming strong connections with colleagues across departments. These relationships not only enhance teamwork but also increase visibility within the organization. When employees are well-connected, they are more likely to be considered for new opportunities.
More Strategies for Becoming Indispensable at Work
Harper stressed the importance of understanding the company’s vision and aligning personal goals with it. By showing that your work directly contributes to the organization’s success, you reinforce your indispensable role. She recommended that employees regularly review their contributions to ensure they align with the company’s objectives.
In addition, Harper discussed the significance of a positive attitude. She noted that a can-do attitude and a willingness to take on new challenges make employees stand out. Positive employees often inspire their peers, creating a more productive work environment. Dive in and learn.
In conclusion, Gena Harper provided valuable strategies for becoming indispensable at work. By focusing on continuous learning, proactive communication, strong networking, goal alignment, and maintaining a positive attitude, employees can secure their place as vital members of their organizations. These practices not only enhance individual careers but also contribute to the overall success of the company.
Kaleigh was born with very special hands. So, whether you have 10 fingers or 2 or 3, there is always an easy way to use a braille display to control your computer.
Navigating IXL with a screen reader like JAWS allows blind students to access educational content easily. Using specific keyboard commands enables quick access to various elements on the page. For example, pressing H moves between headings, helping students locate sections in lessons or practice activities. When working on subtraction exercises in Focus 40 IXL, pressing B navigates to buttons like “Submit” or “Check Answer,” allowing students to interact with controls smoothly.
Another helpful command is Insert + F7, which opens a list of links on the page. This makes moving between sections, such as practice questions and feedback, more efficient. Students can also use F to quickly jump to answer boxes or search fields. To read questions or instructions, pressing Insert + Up Arrow reads the current line, while Ctrl + Down Arrow skips ahead to the next section when working on Focus 40 IXL subtraction.
JAWS Navigation Commands
By using these commands, students navigate IXL independently, completing exercises and reviewing answers efficiently. The screen reader provides real-time feedback, guiding students as they interact with IXL’s educational content related to subtraction problems. This empowers students to fully engage in their learning experience.
Essential IXL keyboard commands for navigating with JAWS:
Navigate headings: Press H to jump between headings, allowing you to quickly move through sections of the page during subtraction practice.
Navigate links: Use Insert + F7 to bring up a list of all links, and then use the arrow keys to select the desired one.
Move to next button: Press B to navigate through buttons on the screen, such as “Submit” or “Check Answer” while working on subtraction in Focus 40 IXL.
Move to form fields: Use F to jump between input fields, such as answer boxes or search fields.
Navigate by list: Press L to move through lists of questions or answer choices, ensuring efficient navigation during subtraction lessons.
Read the current line: Press Insert + Up Arrow to read the current line, useful for verifying questions or feedback.
Repeat the last spoken phrase: Use Insert + 5 on the numpad to repeat the last spoken message.
Skip to the next section: Press Ctrl + Down Arrow to quickly skip paragraphs and reach the next section of text, which can be especially useful in Focus 40 IXL subtraction lessons.
Focus Display Commands
Navigating IXL subtraction math using the Focus 40 Braille Display and JAWS enhances accessibility for blind students. By combining keyboard commands and tactile feedback, students can efficiently work through subtraction problems. Solving subtraction on a display is also easier than just audio feedback. Pressing H on the keyboard or using the Router Keys on the Focus 40 allows them to jump between headings, locating sections like instructions or problem sets quickly.
Taylin using Focus 40 Display with 1 finger on left hand and 2 knuckles on right hand
For Focus 40 IXL subtraction problems, students can use E for edit or the Cursor Routing Buttons to jump directly to the answer input fields. As they enter their responses, the Braille display provides real-time feedback, ensuring accuracy. Pressing Insert + Up Arrow or using the Braille Display’s Line Reading feature reads the current subtraction problem, helping students verify their work. To check answers or move to the next problem, they can press B to navigate to buttons like “Submit,” or use the Panning Buttons to scroll through the page.
Focus 40 Braille Display with JAWS
The Focus 40 Braille Display, paired with JAWS, offers students the tactile and auditory support they need to complete all math problems independently in IXL. This combination enhances their confidence and accuracy in solving subtraction problems.
Dr. Betsey Doane shared her experience teaching math for over 50 years and the importance of making math accessible to all students, including those with visual impairments. She began by introducing the software MathType, essential for creating accessible math content. The software integrates into Word and allows users to write math that is accessible to both screen readers and braille displays. Her efforts truly embody the concept of Advanced Math Made Accessible.
Dr. Doane explained the basics of LaTeX, a text-based language used for writing math. She demonstrated how to input and translate common math expressions such as fractions, square roots, and equations using LaTeX in Word. Her instructions included using the Focus 40 Braille Display and ensuring proper configurations for students to view math content in braille. This approach makes advanced math more accessible for everyone.
LaTex using Mathtype to insert perfect Advanced math made accessible
She emphasized the importance of understanding both the visual and non-visual ways of presenting math, highlighting that students need the right software and commands to work effectively. By using LaTeX and MathType, both sighted and blind students can access and solve math problems, ensuring inclusion in any classroom setting. This makes advanced math accessible and easier to understand.
She highlighted the use of MathType software, which integrates seamlessly with Microsoft Word, allowing users to create and present math content that is accessible through screen readers like JAWS and braille displays like the Focus 40. Dr. Doane explained how MathType enables students and educators to write complex equations, such as fractions, square roots, and exponents, in both visual and non-visual formats. This ensures that blind students can access the same content as their sighted peers, making advanced math more accessible.
Advanced Math Made Accessible with LaTex
Dr. Doane also provided an introduction to LaTeX, a powerful text-based language used for writing mathematical expressions. She demonstrated how to write math using LaTeX syntax, such as using backslashes for commands like fractions and square roots. By using LaTeX in Word with MathType, math content can be rendered correctly on both screen readers and braille displays, making it easier for blind students to follow along in class and complete assignments. This is another way to make advanced math accessible.
Furthermore, Dr. Doane stressed the importance of configuring braille displays correctly, ensuring that input is set to computer braille and output is set to grade 2. She provided step-by-step instructions for adjusting these settings on the Focus 40 Braille Display, ensuring that students can navigate math content effectively, contributing to the overall goal of making advanced math accessible.
In conclusion, Dr. Doane encouraged educators to adopt these tools and techniques to create an inclusive learning environment where both sighted and blind students can excel in mathematics. Her detailed instructions and practical advice offer a clear path toward accessible math education for all.
Kaleigh, one of my (Dr Robinson) students since 2007, learned to Complete an excel graph in this lesson. She began with in-person lessons before transitioning to remote instruction. My husband and I moved 3,000 miles away to care for his parents, and we continued lessons via Skype, later advancing to Zoom. Over time, Kaleigh progressed from basic lessons to more sophisticated ones, covering her educational needs from third grade through graduation. By the time she finished, she was fully prepared for college and capable of completing all the work necessary to succeed in her future academic endeavors.
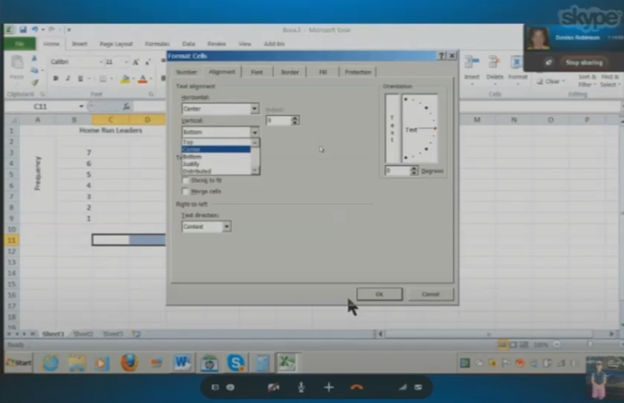
In this lesson, I teach her to navigate Excel using keyboard commands. She starts by creating a new document with CTRL + N and merges cells using ALT + H, M to set up graph labels. She inputs data from her Braille Display, with Excel’s talking software aiding her understanding. As she works on the histogram, she ensure she selects the correct cells and counts for the X and Y axes. She then adds and formats axis titles using ALT + J, A, I, adjusting the text orientation as needed.
Encouragement is Key
I consistently encourage her to check her data, ensuring she relies on assistive technology for accuracy. For formatting, she uses CTRL + C and CTRL + V to copy and paste sections, speeding up the process. We also cover coloring the graph, where I allow her to choose colors freely. I advise her to use consistent formats for simplicity. She shades sections of the histogram based on her data, using keyboard commands to control her workflow efficiently. This reinforces her independence and accuracy throughout the lesson.
Complete an excel graph Settings Option
After finishing the graph, she reviews her work using CTRL + Home to ensure all elements are correct. Satisfied, she copies the graph into Word and prepares to email it. This exercise demonstrates her effective use of keyboard shortcuts and assistive technology. Her growing independence in mastering Excel for academic tasks shows through her efficient and accurate work. The lesson highlights how the student combines guidance and technology to complete a detailed graph with confidence.
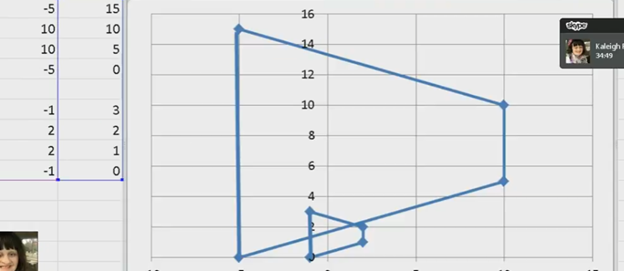
kaleigh takes images from a PDF and creates Geometry shapes such as vertices in Excel for perfect graphing.
In Excel, you can create vertices (edit points on a line) when working with shapes or lines. Here are the keyboard commands to manipulate vertices:
Always create a table with all pertinant numbers based on the math from your Work. Kaleigh took her work from a PDF and transported it into excel. If you make a space in excel leaving cells empty, you can create 2 intersecting graphs.
Basic Overview of Geometry using Excel Shapes
Insert a Shape:
Press ALT + N, SH to open the Shapes menu.
Use the arrow keys to select a line or shape and press Enter.
Edit Vertices:
Select the shape.
Press Shift + F10 (context menu) and choose “Edit Points” by using the arrow keys and pressing Enter.
Move Vertices:
Use arrow keys to move vertices around once in edit mode.
These steps allow for creating and editing vertices in Excel. More Excel lessons.