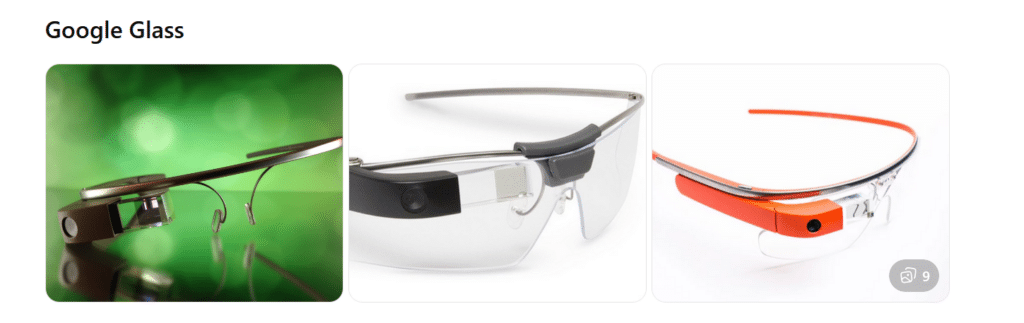
What they are: Lightweight smart glasses with a small display above the right eye. Originally released for consumers, now mostly used in enterprise and medical settings.
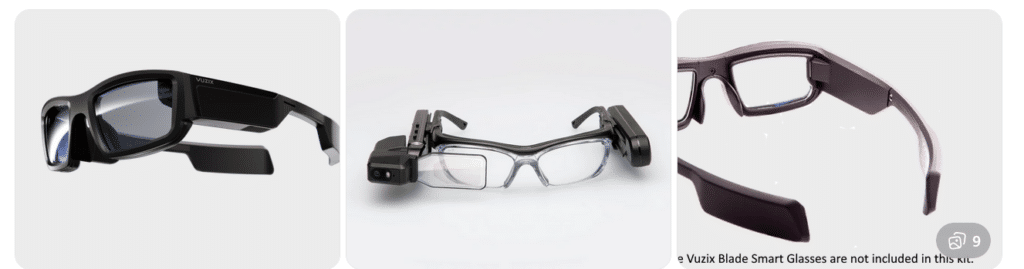
What they are: A family of AR smart glasses built for industrial, medical, and field environments. Models vary in shape and display size.
Key features:
Larger, brighter AR displays
Camera options up to 4K
Rugged designs for work environments
Voice, touch, and head-tracking controls
Works with Android-based apps
Aira and Smart Glasses for Blind Navigation: Modern Tools for Safe, Independent Travel
Whether you’ve been blind for years or you’re just beginning to lose vision, today’s tools offer more options than ever for navigating the world with confidence. Smart glasses and services like Aira give you access to real‑time visual information—indoors, outdoors, at work, on campus, or in everyday life. For some, it’s an exciting next step in expanding independence. For others, it’s a gentle bridge toward accepting support without feeling like they’re giving up who they are. Wherever you are on that journey, these tools can help you move safely, work more efficiently, and stay connected to the world around you.
If you want, I can also craft a shorter version for a carousel cover slide or a more emotional version that speaks directly to the reader.
Helping a Young Adult Losing Vision: When They’re Not Ready for the Cane… Yet
Losing vision as a young adult is complicated. It’s not just about mobility—it’s about identity, pride, and the fear of being seen as “blind” before they’re ready to claim that word for themselves.
Many young adults tell us:
“I don’t want people staring at me.”
“I’m not blind enough for a cane.”
“I can still get by if I try harder.”
“I don’t want to look different.”
These feelings are real. They deserve respect, not pressure.
But they also deserve safety, dignity, and access to the world.
That’s where Aira can become a bridge—not a replacement for cane skills, not a long‑term solution, but a gentle first step toward accepting support.
Why Aira Works for Someone Who Isn’t Ready for the Cane
Aira gives visual information without announcing disability to the world.
For a young adult who is still grieving vision loss, this matters.
Aira lets them:
Move through a college campus without guessing at signs
Navigate stores, offices, or new environments without pretending
Read menus, labels, and screens without asking friends
Travel safely in unfamiliar places
Do their job or schoolwork without feeling exposed
It’s discreet. Very private. It’s on their terms.
And most importantly—it gives them a taste of what independence with support feels like.
That experience often becomes the turning point.
The Emotional Shift: From “I Don’t Want to Look Blind” to “I Deserve to Move Safely”
When a young adult uses Aira, something powerful happens:
They realize they don’t have to choose between:
Looking blind and
Being unsafe
Aira shows them that support doesn’t take away independence—it protects it.
Once they feel the relief of not guessing, not hiding, not pretending… they often become more open to the cane.
Not because someone forced them. But because they finally understand:
Independence isn’t about doing everything alone. It’s about having the right tools at the right time.
Real Examples: A Young Adult Losing Vision Who Wants a Career in Film, Photography, or Other Visual Fields
Let’s say this young adult has 20/200–20/400 vision or worse and dreams of photography, cinematography, or other highly visual careers that require sharp editing and image capture.
They’re talented. They are creative. They’re determined.
But they’re also scared of being seen as “blind.”
Aira can help them:
Frame shots
Check lighting
Review images
Navigate sets
Identify equipment
Move safely in unfamiliar locations
They get to keep their identity as a creator and keep their dignity. They get to keep their dreams alive.
And slowly, gently, they begin to understand:
Blindness doesn’t take away creativity. It just changes the tools.
How We Bring Them Along—Without Shame, Pressure, or Fear
Here’s the message we give young adults:
“You don’t have to be ready for the cane today. But you do deserve to move safely today. Aira can help you do that while you figure out the rest.”
We meet them where they are and honor their feelings. We give them a tool that supports them privately. And we let confidence do the rest.
Because once they feel what safe, supported independence is like… the cane stops looking like a symbol of blindness and starts looking like a symbol of freedom.
Real Example for all users with Airport Navigation and Traveling Using Aira
Airports can be some of the most challenging environments for blind and low‑vision travelers—constant construction, changing layouts, crowded terminals, and signage that’s almost entirely visual. Aira gives travelers real‑time visual support from the moment they step out of the rideshare to the moment they reach their gate. And when paired with Aira’s own smart glasses—designed to look just like the everyday eyewear everyone else is wearing—travelers get discreet, hands‑free access to visual information without standing out or feeling different.
In fact, the only way anyone would know a traveler is blind is if they’re using a cane. You can even call an Aira Agent while the plane is still on the runway so you’re fully set up to step off the aircraft and head confidently to your next gate with live guidance. Agents can help locate check‑in counters, identify the correct security line, read flight boards, navigate terminals, find restrooms or restaurants, and guide travelers through gate changes or last‑minute updates. Whether you’re a seasoned blind traveler or someone newly adjusting to vision loss, Aira adds a layer of confidence and clarity that makes airport travel smoother, safer, and far less stressful.
Best Computer PC Specs buying Guide for 2025 and beyond: RAM, CPU, SSD, graphics card, gaming and more explained
If you’re planning to buy a computer now, pause before diving into the best PC specs. Keep in mind that dealers often clear out older models during holiday sales. To make sure you know exactly what you’re getting, skip down to the section on ‘Older and Newer Naming’ of laptops.
Specs You Need and PC Details Explained
Memory (RAM): 64 GB DDR5 (4800–5600 MHz, dual channel, expandable to 128 GB on some models). Continue for more detailed advice, for Best Computer Specs Guide.
Storage (SSD): 2 TB PCIe Gen 4 NVMe SSD (blazing fast read/write speeds, optional dual SSDs up to 4–8 TB total)
Display: 14‑inch UHD (3840 × 2160) Mini‑LED, 120 Hz refresh rate, HDR support or 14- 16‑inch OLED, 240 Hz for gaming/creative workloads
Reduce Eye Strain with a High Resolution Curved Screen
Ultra HD / 4K: 3840 × 2160 pixels
8K UHD: 7680 × 4320 pixels
Highest Resolutions Available (2025)
8K UHD (7680 × 4320):
Currently the highest mainstream resolution for TVs and monitors.
It is Extremely sharp, but requires powerful GPUs and large screens to notice the difference.
Best Curved Monitors (2025)
Brand
Best Model
Size / Resolution
Use Case
Key Strengths
Samsung
Odyssey OLED G9
49″ Dual QHD (5120×1440)
Gaming / Immersion
240 Hz refresh, deep 1000R curve, HDR OLED
Dell / Alienware
Alienware AW3425DW
34″ QD‑OLED (3440×1440)
Gaming / Esports
Fast response, vivid colors, G‑Sync Ultimate
Dell UltraSharp
U4025QW
40″ 5K2K (5120×2160)
Productivity / Multitasking
Huge workspace, USB‑C hub, color accuracy
LG
UltraGear 45GR75DC
45″ WQHD (3440×1440)
Gaming / Creative
OLED panel, 240 Hz, immersive ultrawide
HP
E45c G5
45″ Dual QHD (5120×1440)
Productivity / Office
Replaces dual monitors, ergonomic design
Gigabyte
G27FC
27″ Full HD (1920×1080)
Budget Gaming / Entry Level
Affordable, decent curve, FreeSync support
Quick Recommendations
For Gaming Immersion: Samsung Odyssey OLED G9 or Alienware AW3425DW.
For Productivity/Work: Dell UltraSharp U4025QW or HP E45c G5.
For Budget Buyers: Gigabyte G27FC.
For Hybrid Use (Gaming + Creative): LG UltraGear 45GR75DC.
Other items you need for laptop and more USBs for a desktop
Ports & Connectivity:
2 × Thunderbolt 4 / USB‑C
3 × USB‑A 3.2
HDMI 2.1
Ethernet RJ‑45
Wi‑Fi 7 + Bluetooth 5.4
Keyboard: QWERTY keyboard, with Applications/Menu key
Around 4 pounds ≈ 1.81 kilograms.
How to Find Your Computer Specs (Windows 11, December 2025)
1: Using System Settings
Press Windows key + E to open File Explorer.
Press Shift + Tab to move focus to the Navigation Pane.
Arrow down to This PC (usually near the bottom).
Right‑click on This PC and choose Properties (or press Enter).
A window will open showing basic system information, including:
Device name
Processor (CPU)
Installed RAM
System type (32‑bit or 64‑bit)
Windows edition and version
2: Using Settings → About
Press Windows key + I to open Settings.
Navigate to System.
Scroll down and select About.
Under Device specifications, you’ll see:
Processor (CPU)
Installed RAM
Device ID
Product ID
System type
Under Windows specifications, you’ll see:
Edition (e.g., Windows 11 Pro)
Version and build number
3: Advanced Specs (Optional)
For deeper details like graphics card, storage, and drivers:
Press Windows key + R, type dxdiag, and press Enter.
This opens the DirectX Diagnostic Tool, showing CPU, RAM, GPU, and driver versions.
Summary
Basic specs (CPU, RAM, Windows version) → System → About or This PC → Properties.
Detailed specs (graphics card, drivers) → dxdiag.
These steps work with keyboard navigation and are accessible for screen reader users.
Find information in MSINFO32
MSINFO32 is the command that opens the System Information utility in Windows.
It provides a comprehensive overview of your computer’s hardware, software, and system components.
Unlike the simple “About” page, MSINFO32 gives deep technical details useful for troubleshooting, upgrades, or support.
How to Open MSINFO32
Press Windows key + R to open the Run dialog.
Type msinfo32 and press Enter.
The System Information window will appear.
What You’ll See in MSINFO32
System Summary (default view):
OS name and version
System manufacturer and model
Processor type and speed
Installed RAM
BIOS version/date
Boot mode (UEFI or Legacy)
Hardware Resources:
IRQs, DMA, I/O ports, memory addresses
Useful for diagnosing hardware conflicts
Components:
Display (graphics card details)
Storage (drives, controllers)
Network (adapters, protocols)
Input devices
Software Environment:
Loaded drivers
Running tasks
Services
Environment variables
Why It’s Useful
Troubleshooting: Quickly check BIOS version, drivers, and hardware conflicts.
Upgrades: Confirm RAM slots, CPU type, and expansion options.
Support: Export system info to share with IT or tech support.
Memory Details
These values describe how your computer uses RAM (physical memory) and virtual memory:
Installed Physical Memory (RAM): 64.0 GB The total amount of RAM physically installed in your system.
Total Physical Memory: 63.8 GB The usable portion of your installed RAM. A small amount is reserved for system hardware.
Available Physical Memory: 56.2 GB The amount of RAM currently free and available for use by applications and the system.
Total Virtual Memory: 67.8 GB This includes physical RAM plus page file space. Virtual memory allows your system to use disk space as extra memory when RAM is full.
Available Virtual Memory: 58.9 GB The portion of virtual memory that’s currently unused and available.
Page File Space: 4.00 GB The size of the page file (a reserved portion of your hard drive used as virtual memory).
Go to Programs and features and make sure you have all your security and power to run programs so do a find command for “run” and look for your .nets.
What .NET Does for a Computer—let’s just say it IS REALLY IMPORTANT
Runs Applications:it is software framework/platform .NET provides the Common Language Runtime (CLR), which acts like a virtual machine. It takes code written in languages like C#, F#, or VB.NET and makes sure it runs correctly on your computer.
Manages Resources: The CLR handles memory management, security, thread management, and error handling. This means programs don’t have to reinvent these functions — they rely on .NET to do it safely.
Provides Libraries: The Framework Class Library (FCL) is a huge collection of pre‑built code for everyday tasks:
Reading/writing files
Connecting to databases
Networking and internet communication
User interface controls
Math, cryptography, and more
Supports Multiple Languages: Developers can write programs in C#, F#, VB.NET, and others. .NET makes them interoperable, so code written in one language can work with another.
Cross‑Platform Evolution:
Go get those important computer items at: Ninite.com
Beat Graphics card for computers using screen readers or other access technologies: NVIDIA
GRAPHICs card RUN that screen reader–get a good one GAMING computers will get you the specs you need for a screen reader or just regular use
NVIDIA RTX cards dominate the high‑end market with unmatched ray tracing, AI features (DLSS, CUDA, Omniverse), and raw compute power.–the BEST for screen readers and older students–middle school up
AMD Radeon RX cards offer better value for money, strong rasterization performance, and more efficient power use, especially at 1440p and 4K gaming.
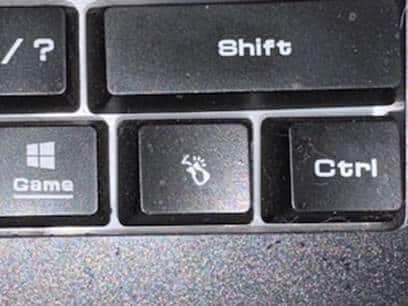
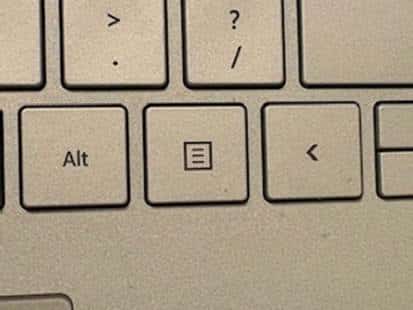
The applications key– is KEY of importance-the funny looking horseshoe on a gaming computer or square with lines in it on general computers–it is a right click of a mouse or 1 press of a key.
Basic specifications for a laptop: gaming computer will have the speed and video card needed for performance
Processor (CPU): some use the words i5, i7, i9 but the new words are Ultra 5,7 or 9 on machines–i9 is compared to ultra 9 and so on like this
Intel Naming Shift
Older naming convention (up to 13th Gen): so if you have this then know it is an older model and during holidays, this is what companies are selling cheaply to get rid of–so just be aware–
Intel Core i3, i5, i7, i9
Example: Intel Core i7‑12700H
New naming convention (14th Gen and newer):
Intel Core Ultra 5, Ultra 7, Ultra 9
Example: Intel Core Ultra 9 185H
The “Ultra” branding emphasizes AI acceleration and new architecture (Meteor Lake, Lunar Lake).
How They Compare
Core i5 → Core Ultra 5
Core i7 → Core Ultra 7
Core i9 → Core Ultra 9
Intel Core Ultra 9 285HX (24 cores, up to 5.5 GHz turbo) or AMD Ryzen 9 7945HX (16 cores, up to 5.4 GHz turbo)
Memory (RAM): 64 GB DDR5 (4800–5600 MHz, dual channel, expandable to 128 GB on some models)
Storage (SSD): 1 TB PCIe Gen 4 NVMe SSD (with option for dual SSDs up to 4 TB total)
Display: 17.3‑inch UHD (3840 × 2160) Mini‑LED, 120 Hz refresh rate, HDR support or 16‑inch OLED, 240 Hz for gaming/creative work
Favorite computers for running software such as JAWS, NVDA and other blind ware–You must have HIGH RAM and speed
Top Favorite: ASUS
ASUS Laptop Weights–based on student–
ZenBook Series (ultralight)
New ZenBook A14: as low as 2.18 lbs (0.99 kg)
VivoBook Series (mid‑range everyday use series)
ROG Gaming Series (heavy duty)
Zephyrus G14: ~3.53 lbs (1.6 kg)
Strix G15: ~5.07 lbs (2.3 kg)
Pic of ASUS-ROG-heavier with numpad
Surface Pro-top Favorite
Microsoft Surface Pro Weights–lightest and most powerful of laptops
Surface Pro 3–7: ~1.7 lbs (0.77 kg)
Surface Pro 8–10: ~1.94–1.96 lbs (0.88–0.89 kg)
Surface Pro 11 (latest): ~1.96 lbs (0.89 kg)
Surface Pro X (ARM model): ~1.7 lbs (0.77 kg)
comparing true laptop form factors, ASUS ultrabooks and Surface Laptop models are closer in weight, while Surface Pro remains the lightest option in the 2‑in‑1 category.
Different versions and do not suggest this collapsible one for students, that flips up–just too easy to flip down
Get Surface Pro with a true laptop lid that opens easily
HP computers
Be careful as most do not come with applications key any more–yes you can use Insert F10 but … takes 2 keys to implement a keystroked of right click
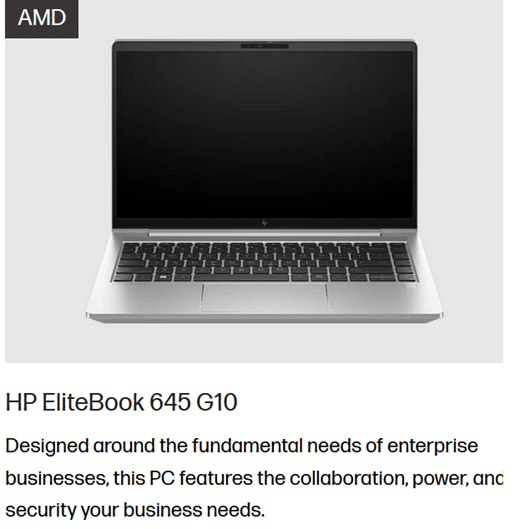
HP EliteBook 645 G10 includes a dedicated Applications/Menu key on its keyboard layout.
Build your computer: EliteBook 645 G10 is a lightweight, secure, and efficient business laptop with AMD Ryzen 7000 series power
Processor Options:
AMD Ryzen 5 7530U: 6 cores / 12 threads, up to 4.5 GHz-elementary and middle school
AMD Ryzen 7 7730U: 8 cores / 16 threads, up to 4.5 GHz-high school
These are efficient 7nm chips with solid multitasking and productivity performance.
Graphics:
Integrated AMD Radeon RX Vega 6 GPU
Suitable for office work, media playback, and light graphics tasks
Not designed for gaming or heavy 3D rendering.–but that is fine as that is not why you buy it
Memory:
Configurable up to 64 GB DDR4 RAM
Dual SO-DIMM slots, user-upgradable.
Storage:
PCIe SSD options, typically up to 1 TB
HP HP EliteBook 870 G11 (17‑inch) -4.1 lbs–keep in mind you want a laptop carry case for laptops
High‑Performance PC Laptop Models
HP ZBook Fury 16 G11 – workstation powerhouse for engineering, CAD, and 3D rendering
MSI Raider 18 HX AI – top‑tier gaming laptop with desktop‑class GPU
ASUS ROG Strix G18 / Zephyrus G16 – high‑end gaming and creator laptops
Do NOT overdo bump dots on keyboard to find position for touch typing-then student start counting dots to get to keys–create muscle memory which means you want to have them repeat typing skills–explanation below dot placements.
Place bump dots on keys: 5 and 0 on num row above qwerty keys-backspace is already large
Place dots on F4, F12–if all the keys run together then either F8 or F9. My F keys are broken up in panels from F1 to F4 and F5 to F8 and F9 to F12 so I do not need any bump dots–a gaming keyboard is divided up for speed of access so no bump dots needed
Many computers share the arrow keys with home, end pg up and pg down–only put a bump dot on up arrow to quickly move hand to the right while left hand holds down the FN key and right hand to do the pg up and so forth
Remember, the keyboard already has built in bump dots on f and j so do not place any more bump dots on keys
Dell is not my top choice of a computer but is a fine machine with specs you can get with:
Processors: Intel Core Ultra 7/9 or AMD Ryzen 9 HX — powerful x86 chips for heavy workloads.
Serviceability: Easier to upgrade storage, RAM, and wireless adapters
Memory: Configurable up to 64–128 GB DDR5 RAM, far beyond Surface’s 16–32 GB.
Storage: Options up to 2–8 TB PCIe NVMe SSDs.
Graphics: Dedicated NVIDIA RTX GPUs (e.g., RTX 5090 or workstation Ada cards).
Displays: Larger 16–18″ screens, often 2.5K or 4K OLED, high refresh rates.
Weight: Heavier (≈4 lbs / 1.8 kg), but more versatile for gaming, AI, or workstation tasks.
What I Use on a Daily Basis-I work very long hours
So I do have a Ultra HD / 4K: 3840 × 2160 pixels and it has changed my life with no more headaches from long hours at my screen and always have night light on-if you do not know about this feature, press your windows key and type night and night light will generate–decrease the brightness to more muted colors and it takes out more blue light which reduces eye strain. But the 4k does that by itself, then the night light takes away brightness–I am very light sensitive so light in general causes my eyes pain which gives headaches (I no longer have that issue with the 4k.). I use my screen reader often–hence the needed power in general.
My PC Computer Specs Explained
CLX computers are made by CLX Gaming, which is a division of Cybertron International Inc., a long‑standing U.S. system integrator based in Wichita, Kansas and an incredible company to work with for any product they sell.
About CLX
Founded: January 29, 2016, as a brand under Cybertron International.
Focus: Custom gaming PCs, workstations, and desktops tailored for gamers, content creators, and professionals.
Specialty:
Fully customizable builds (CPU, GPU, RAM, cooling, case design).
Award‑winning custom paint and chassis designs.
Product families named after Egyptian mythology (Ra, Set, Scarab, Horus, Osiris, Anubis).
Support: Free lifetime technical support, up to 3 years parts warranty, and lifetime labor coverage.
Why CLX Stands Out and why I picked it–I could build exactly what I wanted and needed and their service support is exceptional in the industry as if or when you call, you get a person who knows anything you ask.
Customization: You can configure nearly every component, from Intel/AMD CPUs to NVIDIA/AMD GPUs.
Performance: Builds range from mid‑tier gaming rigs to extreme workstations with 64–128 GB RAM and multi‑GPU setups.
Design: Known for bold, artistic case designs and RGB lighting.
Reliability: As part of Cybertron International (established in 1997), CLX benefits from decades of PC integration experience.
Takeaway
CLX computers are custom‑built in the USA by CLX Gaming (Cybertron International), offering high‑performance, highly customizable systems for gamers and professionals who want both power and personalization.
The CLX is the Best machine I have every owned and then I go portable with my Surface Pro which is also exceptional for power and portability
What Screen Readers Can’t See: A Wake-Up Call for Educators
Many teachers rely on tools like Snip & Clip or download entire packets of image-based worksheets. But it’s important to understand that most resources on popular teacher websites—especially those behind paywalls—are completely inaccessible to blind and low vision students. These materials are often just images or scanned PDFs. Consequently, screen readers can’t read this type of content at all.
This video demonstrates how these inaccessible formats appear to a screen reader user. It shows how nothing reads, nothing speaks, and the content remains out of reach.
It also shows how older students who have been taught tech skills for years, transcribers or teachers, can quickly make the material accessible. This is especially helpful for a screen reader user who is not yet able to do it independently.
Google slide image of work-all inaccessible to a screen reader user
Commands to know: Use EDGE and its built in AI with -CTRL+Shift+period, so the AI can see the pages you are on. (Do not do banking of any kind without using a private window and a non-AI browser.)
Watch the video to get all the steps down. It can change your life to the inaccessible world. Alternatively, transcribers and teachers can do it for you until you learn the skills well yourself.
Other School Platforms that are inaccessible can be resolved with this solution also now
To configure the Focus Braille Display SD card and Scratchpad, allowing you to copy files to and from the Micro SD card, make sure the unit is powered off and the supplied USB cable is connected to your PC. Next, press and hold the Left Panning button while simultaneously inserting the USB cable. The display powers on and the PC recognizes the Focus as a removable USB drive.
Note: If you use a screen reader such as JAWS over USB, it is recommended that you turn on speech or use a Bluetooth connection as braille will currently not work over USB when the Focus is being used as a storage device. You will also not be able to use the Scratchpad while in this mode.
Create .brf or .brl files in Braille Blaster or Duxbury or other braille translation APPs
Create .txt files in WORD, WordPad or another Braille editor
To transfer BRF and TXT files to the Micro SD card:
On the PC, open the folder containing the files you want to copy, select the files you want, and then press CTRL+C. This is key step when managing the Focus Braille Display SD card and Scratchpad option.
Windows E to file explorer and navigate to and open the USB drive to display the contents of the Micro SD card in navigation pane.
Open FSI, Focus5, Scratchpad, and then open the folder where you want to place the files and press CTRL+V. Files you want to edit should be placed into the Notes folder. Files placed into the Books folder cannot be modified.
To transfer TXT files created in Scratchpad:
Navigate to and open the USB drive to display the contents of the Micro SD card. Under This PC and navigation pane typically
Open FSI, Focus5, Scratchpad, Notes, and then select the TXT files you want to copy and press CTRL+C.
Navigate to the folder on your PC where you want to place the files and press CTRL+V. You can now use Notepad or another text editor to access these files.
Once you have finished transferring files, press the APPLICATIONS key on your computer while focused on the USB drive, and choose Eject. Power the Focus off and back on and you will once again be able to use the Scratchpad as well as receive braille output from your screen reader over USB.
Press right shift + x to close current file if u make changes it will prompt you to save or discard so you can use cursor router button or dot 8 to navigate thru options
If you want to temporarily leave the scratchpad in the background and resume connection to computer do menu +B (space + dot 1,2)
Get out of file by pressing menu and it pops to file menu and rocker down to file, open, etc. and enter on choice
Rocker down to open or what you want
Select folder-I save most books in books so I open that with enter
Rocker down to file you want to open
To edit and type in the Scratchpad of a Focus Braille Display (like the Focus 40 Blue), you’ll be using its onboard notepad feature. This is a standalone function that lets you jot down notes directly on the device without needing a connected screen reader. Here’s how to navigate and use it:
Accessing and Using the Scratchpad
Enter Scratchpad Mode
Press Menu button (in center of dots 1 and 4) and rocker down until you reach Scratchpad or N+Menu for new file and enter for options-fastest but sometimes does not work so go Menu option rocker down
Press a cursor router button above the word “Scratchpad” to select it or enter to open.
Brailling and Editing
Use Braille input keys to type your content.
Use cursor router buttons to move the cursor to specific characters.
Use DOTS 7 + character to delete backward.
Use DOTS 8 to insert a new line or confirm actions.
Save Your Work
After brailling what you want just right shift + X and enter and it will prompt you to save.
Exit Scratchpad
Right Shift + X
Connect to computer will be B space to switch back and forth between your Notes folder with file to type in info and your computer. See video
Tips for Efficient Use
You can transfer Scratchpad files to a PC via USB or SD card in reader on your PC.
Scratchpad supports BRF and TXT formats, ensuring that the Focus Braille Display and SD card work harmoniously.
Tips & Limitations
Only plain text (.TXT) files are editable in NOTES folder
Files transferred from PC must be in UTF-8 or ASCII format which is .txt as it takes all format out
Dr. Robinson demonstrates Tech Tricks on How to Properly Format a Paper. Such as how to correct formatting issues in a document, emphasizing the importance of proper indentation, font usage, and spacing. She also explains how to rebuild a normal template, adjust page views, and input a header correctly. Lastly, she discusses the process of correcting formatting issues in a document, particularly for works cited or reference pages, and stresses the importance of following specific requirements when formatting papers.
Step by Step directions on:
Properly Format of a Paper
When your word template is not adjusting or working the way it needs to, then rebuild it.
Delete Normal Template
Windows R and type %appdata%\Microsoft\Templates and enter.
Press N for normal and hit delete and get rid of it. Alt F4 and close
Go back to WORD
Rebuild the Normal template
Alt O then P to your paragraph spacing.
Alt F to “after” spacing and you will hear 8 pt, so type 0
tab once hit S for single spacing and make sure it is selected then tab.
save as default with Alt D then Alt A to save all documents based on the normal template.
Close dialog box
Now control D to your font dialog box and you can select any font that is required by APA or MLA, but we typically use Times New Roman so type Tim
Down arrow to Times New Roman
Tab twice and make sure the font size is 12.
Set default with Alt D then Alt A for all documents based on the normal template.
Close dialog box
Your WORD Template is now ready to go for a Properly Formatted Paper
If you have already written your paper, then open it up
select it all with ctrl A then ctrl C to copy it.
Alt Tab to the new WORD document and you will paste in using this option to get rid of all formats.
Alt H to home, V to paste and T to keep text only.
Ctrl A to select all and Ctrl 1 to truly make sure it is single spaced.
If you start a New writing assignment-keep it single spaced and then when done, do the following also. We are humans and make mistakes.
Control home to make sure you are at the top of the paper.
Down arrow one line at a time and listen for any line that says blank and backspace or delete and get rid of it.
You do not want any blank lines in this document because it is now single space. If you are just typing it out, do not hit enter twice but only when you begin a new paragraph
When you hear: Works Cited or References: press control enter to make a brand-new page to stand alone. Do this for all: Works Cited or References for a new page
When you get to the bottom of your References or if you are typing it out, then when at the end
control shift up arrow to select all your citations then do a Ctrl T for hanging indent which means the first line is the longest and every line thereafter will be indented ½ inch.
How to Properly Format a Paper
To Begin a Proper Paper or to Double check it
F12 to save as and name it properly and place it in proper folder:
Ctrl Shift N makes a new folder,
type the name of the class and enter to solidify name of class.
Then enter to open folder
Alt n to file name again to make sure it is correct. Retype if it changed.
Alt S to save it.
place paper there and all other drafts.
Enter into the header first (that is the white space of the margin) with Alt V, H
Insert your page number first:
Alt N to insert NU to number (listen for top of page and enter or right arrow to open)
down arrow to Plain number 3 which places your number on the right-hand side of your header and press enter.
Now type in your last name and press space to put a space between your last number and page number and hit escape to get out of your header.
Now type a proper heading:
Type your name and enter.
Type the professors or teachers’ name and enter.
Type the subject and enter.
insert the date the professor requires for either MLA or APA with Alt N, D, then down arrow to the proper format requested and enter and it will automatically insert into paper.
Now Check Format of Paper
control home
Make proper paragraphs.
Ctrl down arrow jumps you 1 paragraph at a time so tab 1 time and hear indent 1.5 inches. That means margin is 1 inch and indent is .5 inches.
Listen carefully and feel your display as when you ctrl down arrow and you see spaces then there is already a bad indent there so delete it until it is 1 inch which you can feel on your display also, then tab and hear 1.5 inches and continue. Be incredibly careful that you do not go into the works cited page so listen carefully and stop at the end of the paper.
When done with indents, Ctrl home.
control A to select the whole document and control 2 for double space.
Down arrow to your title and control E to center your title and make sure it is in title case. Insert f3 takes you through case formats so you do not need to retype.
Now control home once again and press F7 for the editor .
Your screen reader will tell you what percentage score you have, and you want to get it to 100 percent.
Tab once and make sure it says formal writing. You have three options under here, but formal writing is the default:
Tab to corrections and you hear spelling then down arrow to grammar and make sure those are down to zero when you are done.
Tab to refinements then down arrow through clarity, conciseness, formality, inclusiveness, punctuation conventions, resume, sensitivity geopolitical references and vocabulary.
Keep in mind if it starts selecting proper nouns you can always tab to ignore as you are going through your options.
When you lose focus of the editor or escape to jump back into paper to add or change paper details, just F7 to resume editor.
Tab To the next option of similarity and check for similarity to online sources (this is what your professor or teacher does to make sure you did not plagiarize. Make corrections as needed so you are not plagiarizing.
Tab to insights where document stats will be and enter.
This dialog box tells you what level you are writing at so if you need to write at a college level make sure you are writing at your grade level or above.
As you make all the corrections that the editor suggests it will immediately improve your scores.
If you check your paper and you accept improper formats or spelling, then do the following to tell the editor to recheck your paper.
Alt F to file and T to tools then P to proofreading:
First, Alt w to writing style and make sure you have the grammar and refinements option selected.
alt K to recheck your paper and enter to close, then F7 to recheck your paper again.
Continue Learning on how to Properly Format a Paper with:
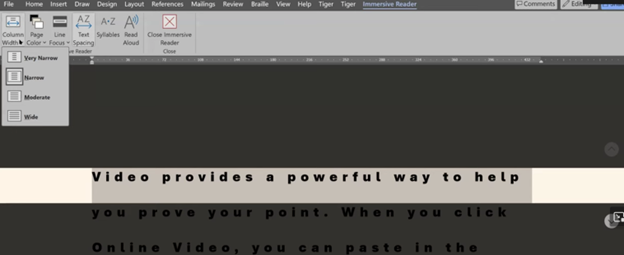
Low-vision users enhance visibility and accessibility using tech tricks for screen scaling, mouse visibility, and reading tools. Immersive Reader in Microsoft Word, accessible from the View tab, adjusts text spacing, column width, and background color. UsersThese Low Vision Computer Tricks improve readability by customizing these settings to suit their visual needs efficiently. In Microsoft Edge, Immersive Reader activates on supported pages to simplify reading and navigation. These tools combine to provide low-vision users with a personalized, accessible digital experience.
Dr. Robinson teaches strategies to enhance accessibility using low-visionLow toolsVision Computer Tricks in Microsoft Word, Edge, and system settings. First, she demonstrates how to adjust display settings for optimized visibility using the Windows key. By typing “display,” users can access scaling options, which enlarge screen content for better readability. Additionally, increasing mouse pointer size and inverting its color improves navigation while reducing eye strain.
Next, in Microsoft Word, Dr. Robinson highlights Immersive Reader, available in the View tab, to enhance readability and adjust text settings. For instance, users can change font styles and sizes with Ctrl+A and Ctrl+Shift+> or Ctrl+Shift+< for better clarity. These Low Vision Computer Tricks include changing font styles and sizes with Ctrl+A and Ctrl+Shift+> or Ctrl+Shift+< for better clarity. Furthermore, the Line Focus feature reduces clutter by focusing on one or a few lines, aiding users with dyslexia. Moreover, Read Aloud, activated with Alt+Ctrl+Space, provides text-to-speech support with adjustable speed and voice options.
In Edge, pressing F9 activates Immersive Reader, which simplifies web pages by removing clutter for a cleaner reading experience. Users can also customize text preferences or enable Read Aloud for auditory assistance. These Low Vision Computer Tricks also include customizing text preferences or enabling Read Aloud for auditory assistance. Notably, Dr. Robinson recommends Edge for its built-in accessibility commands, though Chrome and Firefox offer similar tools.
Immersive reader for low vision
Finally, she emphasizes using Night Light mode to reduce blue light exposure and protect long-term eye health. These tools, combined with her strategies, empower low-vision users to navigate technology effectively.
Learning how to teach or learn Nemeth math using assistive technology can seem challenging, but with the right tools and approach, it becomes manageable and effective. Whether you’re a parent helping your child, an educator supporting students, or an independent learner, using a Focus 40 Braille Display and JAWS screen reader provides an accessible way to master Nemeth code. In this guide, I will walk you through setting up your technology and using the Braille Math Editor to confidently teach and learn math concepts from basic arithmetic to advanced algebra. Let’s simplify the process and enhance your skills.
Setup Nemeth with JAWS
Start by setting JAWS to the proper Nemeth settings. Access the JAWS Settings Center with Insert + 6 then Control+Shift+D to set default: type “Braille m” in the search box. Navigate to “Braille Mode” and make sure you hear “Structured” mode, ensuring that both the active cursor and Braille cursor follow each other. This will allow you to track what the student is doing on their display.
Alt + F to language profiles, and alt + D to details. Once open Alt + M to math options and up arrow to Nemeth if it is not selected. This will ensure that math expressions are correctly read and displayed in Nemeth Braille. Enter to close, Alt + A to apply and enter to close.
Teach or learn Nemeth JAWS, braille display and BME
Using the Braille Math Editor is key to teaching and learning math effectively. Type out equations like “1+2=3” or more complex algebraic expressions, and feel the Braille output directly on your Braille display. Correct mistakes quickly using the Braille display and JAWS auditory feedback, making it easy to follow along. Use the Braille Viewer to see it visually and compare with the Braille Display by opening JAWS context menu, go to Utilities and Braille Viewer to turn it on.
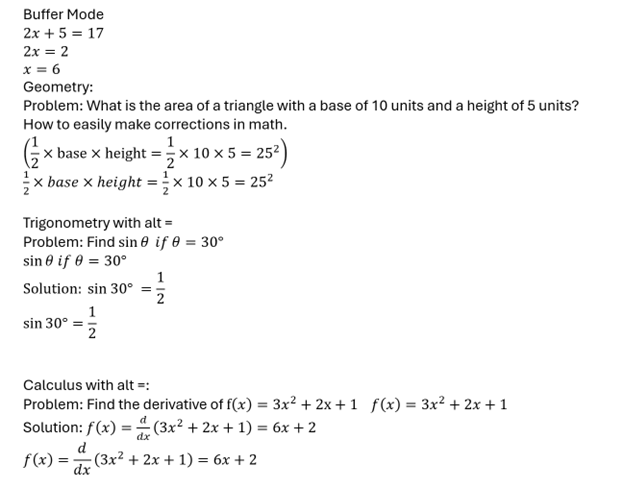
This step-by-step approach works for basic arithmetic to complex math such as algebra, Trigonometry, calculus and beyond. Both the Braille Math Editor and Word Math Editor can help you visualize and interact with Nemeth code to easily learn it and/or teach others. Practice consistently to improve your tactile reading skills and build confidence in math.
By following this guide, you’ll gain the tools to teach and learn Nemeth math efficiently, whether for yourself or for your students.
In this lesson, you’ll learn how to teach and practice Unified English Braille (UEB) math using a Focus or Brailliant Braille display with JAWS. Start by setting up the correct Braille settings in JAWS, ensuring your Braille display and cursor follow each other for accurate feedback. Adjust your language profiles and choose UEB Grade 2 for output and input. Navigate through basic arithmetic and algebra problems using JAWS’ Braille Math Editor, making corrections easily. This step-by-step method will help both new and experienced teachers guide students in learning UEB math effectively.
First, set up JAWS properly by accessing the JAWS Settings Center Insert + 6 followed by (Ctrl+Shift+D) to set default. Type out and Navigate to “Braille mode” and ensure your display is set to “Structured” mode. Enable the settings that allow the active cursor to follow the Braille display and vice versa. This ensures that wherever your student is on the screen, you can follow along on your display. Turn on the Braille Viewer also to see the braille at the top of your monitor if you have sight.
Next, Alt + F to Language profiles then Alt + D to details and open and confirm UEB Grade 2 and Unicode by default. You can continue to Tab or Alt + M for math and select the UEB Math option in JAWS settings. Enter to close then Alt A to apply and enter to close. You are ready to go.
Practice using the Braille Math Editor
For practicing, you’ll use JAWS Braille Math Editor to create and edit math expressions as 1 option. Other options are WORD Math editor and LaTex as another as you become more advanced. Start with basic arithmetic, typing out equations such as “1+2=3,” and use the Braille display to feel the corresponding Braille output. This method works for both teaching and self-learning. As you advance to algebra, geometry, Trigonometry and calculus, use the WORD Math editor or Braille Math Editor to navigate complex equations. The editor allows easy error correction, reinforcing concepts as students work through problems.
Teach Math with Jaws and braille display-Basic to advanced math formulas
This method also helps auditory learners who can listen to JAWS while simultaneously feeling the Braille on the display. Practicing consistently with both the Braille Math Editor and JAWS will solidify UEB math skills and improve teaching efficacy.
To enter college, you need a foundation in Algebra and Geometry. For STEM fields, add Calculus and Trigonometry. Trigonometry studies the relationships between angles and sides of triangles. With tools like Trigonometry with Math Editor, Braille Math Editor and screen readers, you can easily explore these relationships. It uses sine, cosine, and tangent functions to relate angles to side lengths. These functions are essential in physics, engineering, and astronomy. They help solve problems involving distances and angles. For example, trigonometry determines the height of a building or the distance across a river without direct measurement.
Trigonometry provides tools to model and solve problems involving angles and distances. It is fundamental to mathematics and its applications.
Going to College
If you go into STEM field IN college, you need advanced classes in but not limited to college algebra, trigonometry and calculus. When you are a screen reader and Braille user, these skills will allow you the options and opportunities to complete work as sighted peers.
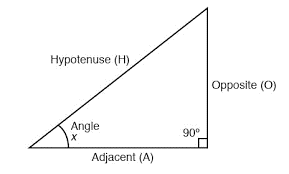
Let’s talk about: Trigonometry which is a branch of mathematics that studies the relationships between the angles and sides of triangles
Right triangle for Trigonometry with math editor
You can copy this content and paste into WORD OFFICE 365. Make sure you select Math 1 at a time and alt = to turn into true math. Then you can Ctrl = to change to professional or keep the LaTex then enter and braille it in again using Nemeth or UEB Math or practice LaTex.
Problem 1: Finding the Length of a Side
Given: A right triangle with one angle of 30° and the hypotenuse of 10 units. Find: The length of the side opposite the 30° angle.