The Hidden Setting Causing the Problem of Microsoft Edge Switching Accounts
Microsoft Edge includes a feature called Automatic Profile Switching. It’s designed to “help” by choosing the profile it thinks matches the website you’re visiting.
In reality, it often does the opposite—forcing you back into the first account ever used on the device.
To quickly change profiles: Ctrl+Shift+M
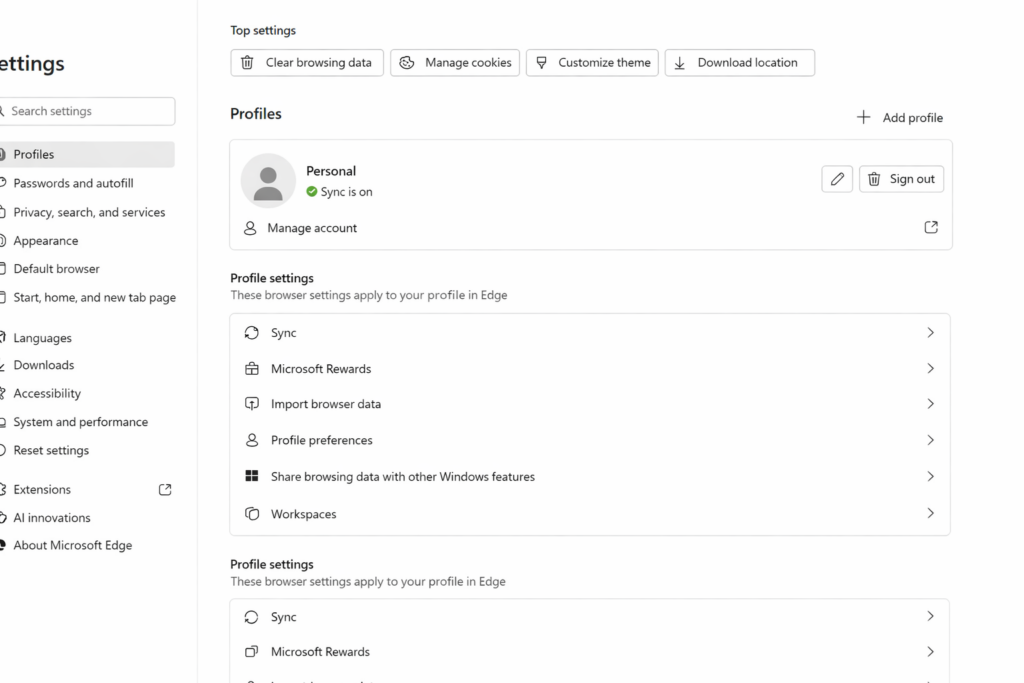
How to turn it off
Open Microsoft Edge
Go to Settings
Select Profiles
Click or Tab to profile preferences
Turn OFF: Automatic sign in on Edge and Tab and turn off Allow single sign-on..
Once this is off, Edge will finally stop overriding your login and let you choose the account you actually want.
What If You Want Both Accounts to Share the Same Information?
This is the part that confuses most persons.
Turning off automatic switching stops Edge from forcing the wrong account, but it does not merge or sync data between accounts. Microsoft does not allow two accounts to share:
bookmarks
passwords
OneDrive files
emails
sync history
app licenses
school‑managed content
So the person must decide what they actually want:
Option 1 — Keep the Accounts Separate (Recommended for Most Persons)
This is the cleanest, safest setup.
Do this if the person wants:
A school or work account and a personal account
No mixing of data
No login conflicts
A simple way to choose which account to use
How to set it up:
Create two separate Edge profiles
Turn OFF automatic profile switching
Turn ON sync only for the primary profile they use daily
Keep both profiles visible in the top‑right corner: Ctrl+Shift+M allows for fast switching so tab to other profile and enter
This keeps everything organized and prevents school-work restrictions from spilling into personal life.
Option 2 — Move Data From One Account Into the Other
If the person wants “everything in one place,” they must choose a primary account and manually move what’s movable.
What can be moved:
Bookmarks → export from one profile, import into the other
Passwords → export/import through Edge Password Manager
Files → manually move from OneDrive A to OneDrive B
Emails → forward or export/import
What cannot be merged:
Sync history
School‑managed settings
Microsoft Store purchases
Xbox/Game Pass data
Anything tied to an organizational account
This is more work and not always advisable for persons on school or work‑managed devices.
How to Help a Person Decide
Here’s the exact question to ask:
“Do you want your accounts to stay separate, or do you want everything from your school-work account to move into your personal account?” Typically you do not.
Once they answer, the path is clear.
TechVision Bottom Line
If Edge keeps logging you into the wrong account, it’s not you—it’s the browser. Turn off Automatic Profile Switching, and the problem disappears instantly.
If you use two accounts, keep them separate with two profiles. If you want everything in one place, choose a primary account and migrate what you can.
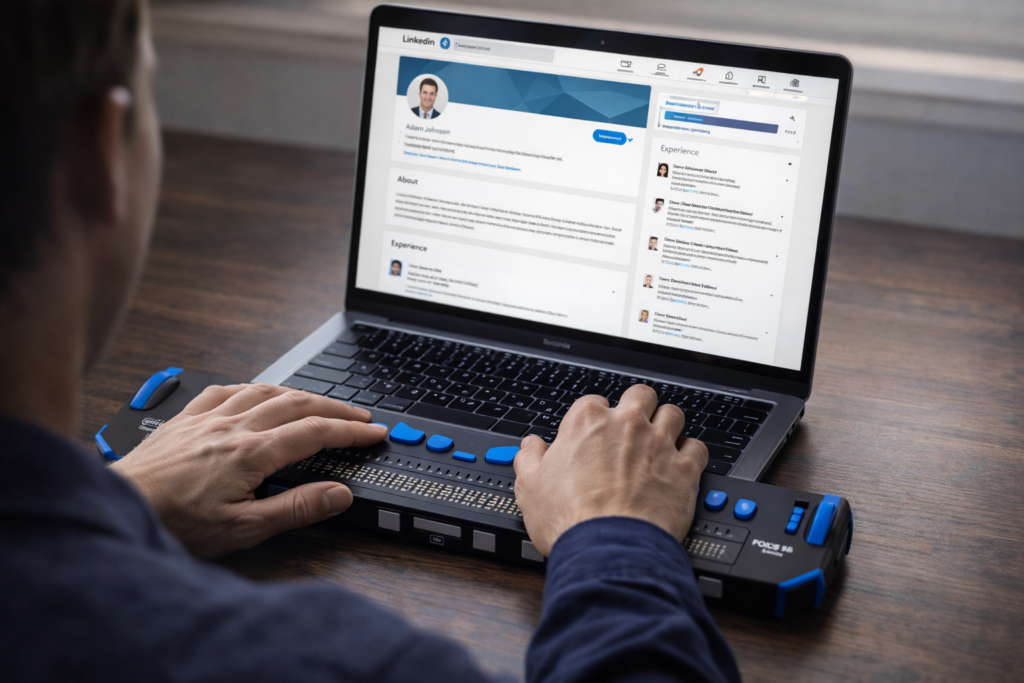
Person navigating LinkedIn with JAWS commands using braille display and screen reader
Navigating LinkedIn with JAWS commands or any screen reader doesn’t have to be overwhelming. With the right JAWS commands, blind and visually impaired professionals can confidently connect, network, apply for jobs, and build a strong online presence. This guide walks you through the essential JAWS shortcuts and navigation strategies that make LinkedIn fully accessible — whether you’re a student preparing for your first job search, a professional expanding your network, or an educator supporting blind learners. TechVision is committed to empowering every user with the tools they need for independence, confidence, and success online.
Keyboard shortcuts for LinkedIn with Jaws
Use LinkedIn with JAWS commands to move quickly through the interface. Press Ctrl+Home, then Tab through the first three items until you reach the options you want. Press Enter to open the shortcut menu and enable quick‑navigation features on the page. These are essential LinkedIn with JAWS commands for efficient navigation
Change your cursor insert z on or off based on what you need to do
To read every line insert z on and insert ; on then down arrow
For students who are blind or legally blind, accessing visual information on a computer screen can be one of the biggest barriers to learning unless you have an APP like Be My Eyes on Computer. Whether it’s a graph in science class, a diagram in math, a picture in a digital textbook, or an unlabeled image on a website, visual content often goes unexplained — unless someone is available to describe it.
Be My Eyes now solves this problem directly on your computer.
What Be My Eyes Can Do on a Computer
When installed on a PC or Mac, Be My Eyes can:
Describe graphs, charts, and diagrams
Explain pictures, illustrations, and maps
Identify objects or images in digital textbooks
Summarize visual layouts on websites
Clarify icons, buttons, or menus that are not labeled
Provide context for images that screen readers cannot interpret
This is especially powerful for students who are legally blind and need immediate access to visual information without waiting for a teacher, aide, or parent.
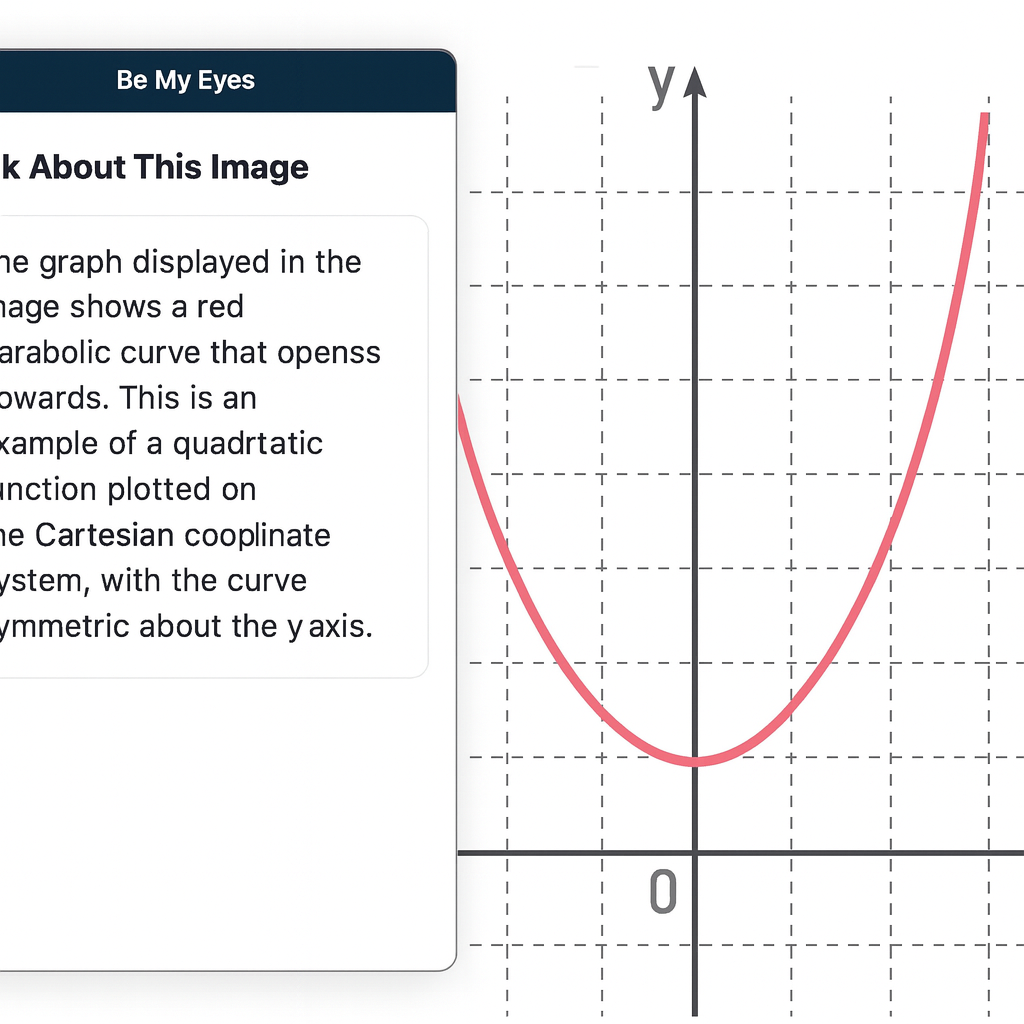
How It Works
Open the Be My Eyes app on your computer.
Take a screenshot or upload the image you want described.
Use the “Ask About This Image” feature.
Type your question — or simply ask:
“What is shown in this graph?”
“Describe the picture on the screen.”
“What does this diagram represent?”
“What is happening in this image?”
The AI will give a clear, detailed description that students can use immediately for classwork, homework, or studying.
Why This Matters for Blind and Low‑Vision Students
Visual content is everywhere in school — especially in math, science, social studies, and digital learning platforms. Without access, students fall behind academically and lose independence.
Be My Eyes gives students the ability to:
Access visual information instantly
Work independently without waiting for help
Understand graphs and diagrams in real time
Participate fully in class assignments
Build confidence and autonomy
For students who are legally blind, this tool is not optional — it is essential.
When to Use Be My Eyes vs. Other Tools
Be My Eyes: For describing images, graphs, diagrams, pictures, and anything visual.
Screen Readers (JAWS/NVDA): For reading text, navigating websites, writing, researching, and completing assignments.
CCTV: Only for viewing pictures or visual diagrams — not for reading.
Together, these tools create a complete access system.
Set Up iPhone Security with VoiceOver using Face ID
Goal
Student independently sets up device security and understands how to authenticate downloads. This lesson will help you Set Up iPhone Security with VoiceOver for a more accessible and safe experience.
PART 1: Set Up a Passcode (Must Be Done First before you can acquire apps)
Face ID and Touch ID require a passcode.
Step 1: Open Settings
Press and hold Side button.
Say:
“Open Settings.”
Step 2: Go to Face ID & Passcode
(Or Touch ID & Passcode on older phones)
• Flick right until you hear: “Face ID & Passcode” • Double-tap.
If it says “Turn Passcode On,” double-tap.
Step 3: Create a Passcode
You will hear:
“Enter a six-digit passcode.”
• Double-tap each number OR • Use braille display if connected
Enter code twice.
Choose a code the student can remember but others cannot guess.
Teach: Do not use birthdays.
Passcode is now active.
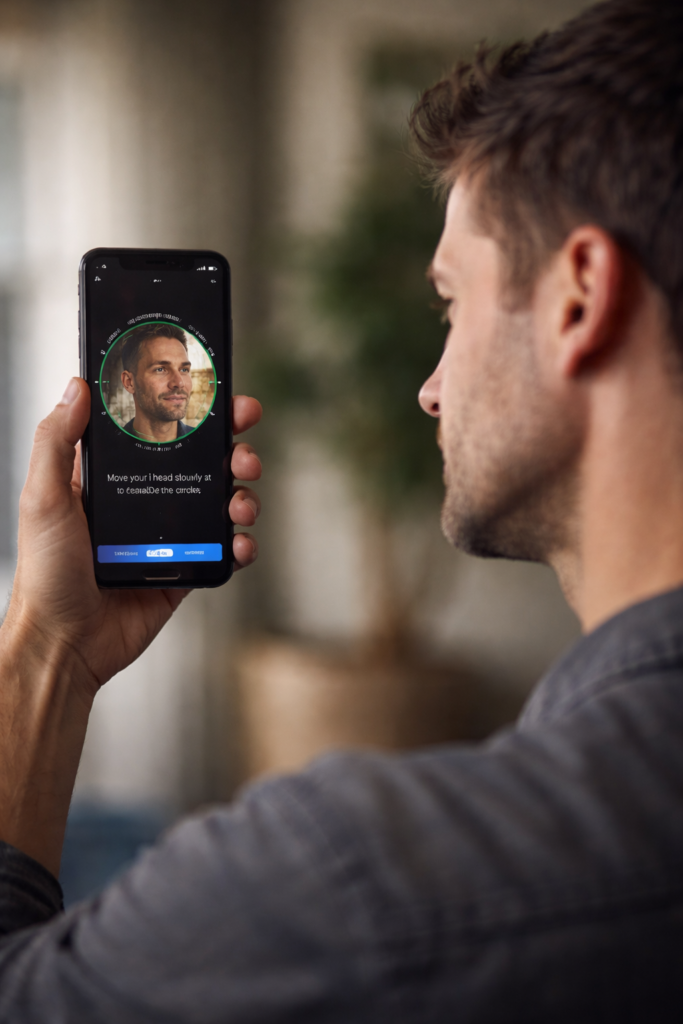
PART 2: Set Up Face ID (Newer Phones)
Step 1: In Face ID & Passcode Menu
• Flick right to “Set Up Face ID” • Double-tap.
VoiceOver will guide.
Step 2: Position Face
If by yourself, place phone on your forehead then move straight back
iPhone-Setting Up Email Using Siri & Voice Over-sending a text
Phase 1-Setup Email
Goal
Student independently adds an email account and verifies it works. This guide covers iPhone-Setting Up Email Using Siri & VoiceOver to simplify the process for users who need accessibility support.
Step 1: Open Settings with Siri
Press and hold the Side button. Or Say “Hey Siri” if set up
Say:
“Open Settings.”
VoiceOver will say “Settings.”
Double-tap if needed.
Step 2: Navigate to Mail
• Flick right until you hear “Mail” • Double-tap
Inside Mail:
• Flick right to “Accounts” • Double-tap
Step 3: Add Account
• Flick right to “Add Account” • Double-tap
Choose account type:
iCloud
Google
Outlook
Yahoo
Other
Flick to correct provider. Double-tap.
Step 4: Enter Email Information
You will land in a text field.
To type:
• Double-tap in field • Dictate email address OR • Type using keyboard
Move to next field:
• Flick right
Enter password carefully. VoiceOver will say “Secure text field.”
After entering:
• Flick right to “Next” • Double-tap
Step 5: Verify Mail is Turned On
After account connects:
Make sure “Mail” toggle is ON.
Flick to it. Double-tap if needed.
Then flick right to “Save.” Double-tap.
Email is now active.
Phase 2 – Open and Use Mail
Now the student can begin using Mail.
Activate Siri:
“Open Mail.”
Proceed with:
• Flick right to inbox • Double-tap to open messages • Reply and send
Important Teaching Notes
Teach these concepts early:
✔ Every text field requires a double-tap before typing ✔ Listen fully before moving ✔ Flick slowly and intentionally ✔ Passwords must be entered accurately
If login fails:
• Recheck password • Ensure Wi-Fi is connected • Use Siri to say “Turn Wi-Fi on” if needed
Skill Check
Student should be able to:
Open Settings with Siri
Add an email account
Open Mail
Read one message
Send one reply
You are building digital independence.
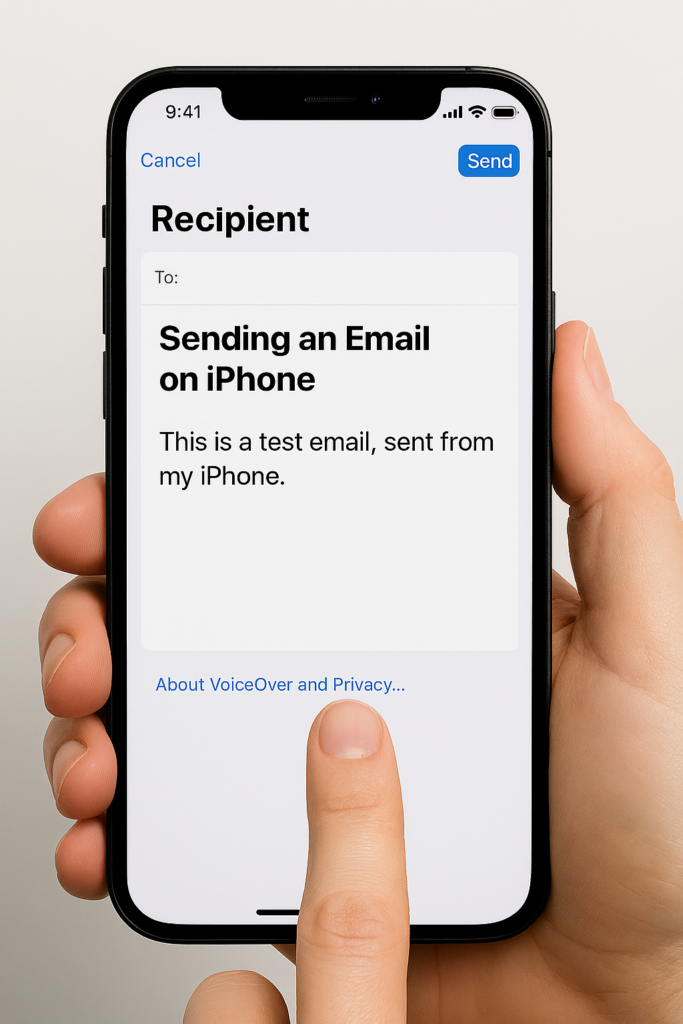
Phase 3
Setting Up and Using Email with Siri & VoiceOver
Goal:
Student can open Mail, read messages, and send a simple email independently.
Step 1: Open the Mail App
Activate Siri: Hold the Side button or say:
“Hey Siri, open Mail.”
VoiceOver will announce: “Mail.”
Double-tap if needed.
Step 2: Navigate Inbox
• Flick right to move through emails • VoiceOver reads sender and subject • Double-tap to open
Teach: Listen fully before moving.
Step 3: Read Email
• Flick right to move line by line • Use rotor to change reading level
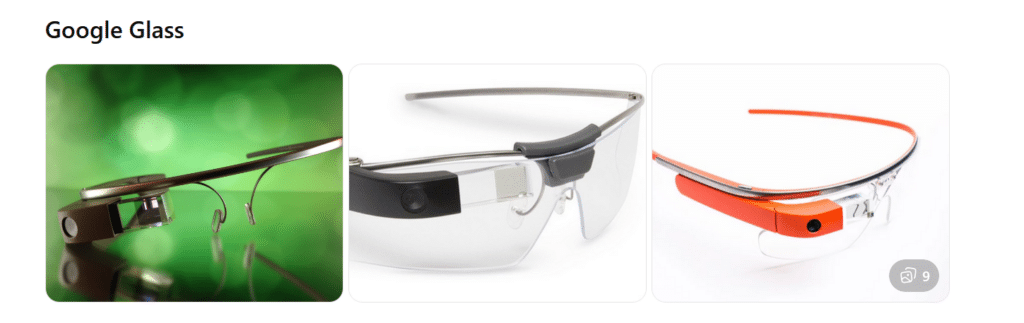
What they are: Lightweight smart glasses with a small display above the right eye. Originally released for consumers, now mostly used in enterprise and medical settings.
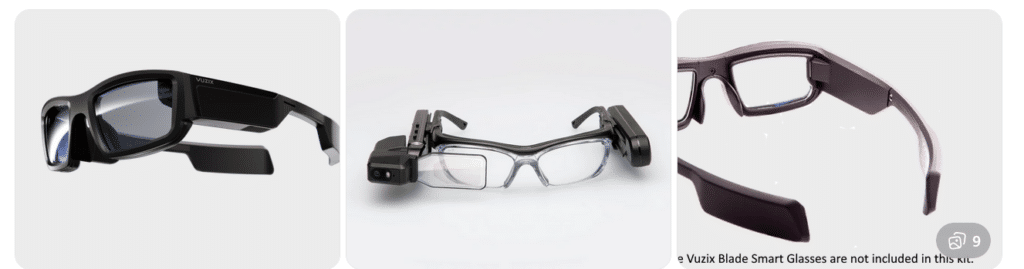
What they are: A family of AR smart glasses built for industrial, medical, and field environments. Models vary in shape and display size.
Key features:
Larger, brighter AR displays
Camera options up to 4K
Rugged designs for work environments
Voice, touch, and head-tracking controls
Works with Android-based apps
Aira and Smart Glasses for Blind Navigation: Modern Tools for Safe, Independent Travel
Whether you’ve been blind for years or you’re just beginning to lose vision, today’s tools offer more options than ever for navigating the world with confidence. Smart glasses and services like Aira give you access to real‑time visual information—indoors, outdoors, at work, on campus, or in everyday life. For some, it’s an exciting next step in expanding independence. For others, it’s a gentle bridge toward accepting support without feeling like they’re giving up who they are. Wherever you are on that journey, these tools can help you move safely, work more efficiently, and stay connected to the world around you.
If you want, I can also craft a shorter version for a carousel cover slide or a more emotional version that speaks directly to the reader.
Helping a Young Adult Losing Vision: When They’re Not Ready for the Cane… Yet
Losing vision as a young adult is complicated. It’s not just about mobility—it’s about identity, pride, and the fear of being seen as “blind” before they’re ready to claim that word for themselves.
Many young adults tell us:
“I don’t want people staring at me.”
“I’m not blind enough for a cane.”
“I can still get by if I try harder.”
“I don’t want to look different.”
These feelings are real. They deserve respect, not pressure.
But they also deserve safety, dignity, and access to the world.
That’s where Aira can become a bridge—not a replacement for cane skills, not a long‑term solution, but a gentle first step toward accepting support.
Why Aira Works for Someone Who Isn’t Ready for the Cane
Aira gives visual information without announcing disability to the world.
For a young adult who is still grieving vision loss, this matters.
Aira lets them:
Move through a college campus without guessing at signs
Navigate stores, offices, or new environments without pretending
Read menus, labels, and screens without asking friends
Travel safely in unfamiliar places
Do their job or schoolwork without feeling exposed
It’s discreet. Very private. It’s on their terms.
And most importantly—it gives them a taste of what independence with support feels like.
That experience often becomes the turning point.
The Emotional Shift: From “I Don’t Want to Look Blind” to “I Deserve to Move Safely”
When a young adult uses Aira, something powerful happens:
They realize they don’t have to choose between:
Looking blind and
Being unsafe
Aira shows them that support doesn’t take away independence—it protects it.
Once they feel the relief of not guessing, not hiding, not pretending… they often become more open to the cane.
Not because someone forced them. But because they finally understand:
Independence isn’t about doing everything alone. It’s about having the right tools at the right time.
Real Examples: A Young Adult Losing Vision Who Wants a Career in Film, Photography, or Other Visual Fields
Let’s say this young adult has 20/200–20/400 vision or worse and dreams of photography, cinematography, or other highly visual careers that require sharp editing and image capture.
They’re talented. They are creative. They’re determined.
But they’re also scared of being seen as “blind.”
Aira can help them:
Frame shots
Check lighting
Review images
Navigate sets
Identify equipment
Move safely in unfamiliar locations
They get to keep their identity as a creator and keep their dignity. They get to keep their dreams alive.
And slowly, gently, they begin to understand:
Blindness doesn’t take away creativity. It just changes the tools.
How We Bring Them Along—Without Shame, Pressure, or Fear
Here’s the message we give young adults:
“You don’t have to be ready for the cane today. But you do deserve to move safely today. Aira can help you do that while you figure out the rest.”
We meet them where they are and honor their feelings. We give them a tool that supports them privately. And we let confidence do the rest.
Because once they feel what safe, supported independence is like… the cane stops looking like a symbol of blindness and starts looking like a symbol of freedom.
Real Example for all users with Airport Navigation and Traveling Using Aira
Airports can be some of the most challenging environments for blind and low‑vision travelers—constant construction, changing layouts, crowded terminals, and signage that’s almost entirely visual. Aira gives travelers real‑time visual support from the moment they step out of the rideshare to the moment they reach their gate. And when paired with Aira’s own smart glasses—designed to look just like the everyday eyewear everyone else is wearing—travelers get discreet, hands‑free access to visual information without standing out or feeling different.
In fact, the only way anyone would know a traveler is blind is if they’re using a cane. You can even call an Aira Agent while the plane is still on the runway so you’re fully set up to step off the aircraft and head confidently to your next gate with live guidance. Agents can help locate check‑in counters, identify the correct security line, read flight boards, navigate terminals, find restrooms or restaurants, and guide travelers through gate changes or last‑minute updates. Whether you’re a seasoned blind traveler or someone newly adjusting to vision loss, Aira adds a layer of confidence and clarity that makes airport travel smoother, safer, and far less stressful.
How to get a Job-Woman at PC with display and iPhone
Most jobs today use the same tools: a PC, a smartphone, and Windows workplace software. If students want a job later, they must learn these tools early. If anyone wants a job, you must master those tools with excellence. Character, consistency, loyalty, and trust — combined with strong tech skills — help people gain and keep lasting employment.
Blind and low-vision students need the same skills. They also need a screen reader, braille display, and tactile learning to access the world on equal terms.
This is why instruction cannot start late. It must start educationally at age three-as a baby from the womb just teaching parents how to help child.
Early learning builds kindergarten readiness. It keeps blind students even with their peers. Strong IEPs then protect continued teaching in tech, tactiles, and braille each year so they can keep pace with their peers.
When schools teach the right tools early, blind students enter the future ready to work, ready to compete, and ready to thrive.
Global Employment — All People
According to the International Labour Organization (ILO) and global labor data:
Employment Rate Worldwide
About 58% of people aged 15–64 are employed globally. (This includes full-time, part-time, formal and informal work.)
Another ~26% are outside the labor force (students, homemakers, retired)
~6–10% are officially unemployed (actively seeking work)
Key takeaway:Most people around the world have some form of work.
Technology Use at Work — General Global Trends
People use a mixture of technology on the job depending on industry, income level, and region.
Most tech adoption statistics come from large surveys, including:
International Telecommunication Union (ITU)
Statista digital economy surveys
World Bank ICT data
Global Workplace Analytics
These show broad patterns across sectors.
Computer Access at Work (Global Estimate)
About 70–75% of office workers worldwide use a computer at work. This includes laptops, desktops, and workstation terminals.
This varies by region:
High-income countries: ~85–90% computer use at work
Middle-income countries: ~60–75%
Low-income countries: ~30–50%
Smartphone Use at Work
Smartphones are extremely common globally, even where desktop PC penetration is lower.
Global estimates show:
85–90% of working adults use a smartphone at least daily for communication, email, scheduling, messaging, and business apps.
In many service, retail, field, and informal jobs, the smartphone is the primary computing tool.
PC vs. Mac vs. Other at Work (Global Split)
There is no exact global “one number,” but multiple tech market share sources give a snapshot of the device ecosystem used professionally:
PC / Windows
Estimated 75–80% of computers used in the workplace run Windows. This includes desktops, laptops, workstations, and enterprise systems.
Windows dominates business environments because:
Longstanding enterprise support
Broad software compatibility
Legacy systems in large organizations
Mac (macOS)
Estimated 15–20% of workplace computers.
Higher share in:
creative industries (design, media, publishing)
education and research institutions
startups and technology firms
some small business environments
Other (Linux, Chrome OS, Thin Clients)
5–10% combined share. These are more common in:
tech-savvy organizations
cloud-centric workplaces
specialized development environments
Technology People Use on the Job
Here is how technology breaks down by task:
Office / Knowledge Work
PC (Windows + Office)
Laptops, desktops
Email, Office suites, cloud apps
Collaboration tools (Slack, Teams, Zoom)
Data entry, spreadsheets
Creative / Design / Media
Mac systems are popular
Adobe Creative Suite
Video and audio editing tools
IT / Development
Split between Mac, PC, and Linux
Code editors (VS Code, Vim)
Cloud and DevOps tools
Data / Analysis
PCs for spreadsheets and databases
Macs for visualization and coding
Mobile-First Roles
Smartphones for:
communication (call, message)
scheduling
mobile apps (CRM, logistics)
Especially in:
retail
transportation
field service
Global Smartphone vs Computer at Work
Here’s a broad estimate:
Technology Type
Approx. Global Usage at Work
Smartphones
~85–90%
Desktop/Laptop Computers
~70–75%
Windows PCs
~75–80% of computer share
Macs
~15–20%
Other OS (Linux, Chrome OS)
~5–10%
Note: These percentages overlap — most people use both smartphones and computers.
WHY TECH ADOPTION LOOKS THIS WAY
Smartphones have high adoption because:
They are affordable
Widely available
Used for email, messaging, forms
Often required by employers for mobile work
PC (Windows) dominates because:
Enterprise software is built for it
IT infrastructure around Windows is mature
It’s cost-effective at scale
Mac is strong in:
Creative industries
Technology startups
Higher education
Design and media fields
SUMMARY — GLOBAL View
Employment: ~58% of adults globally are employed Smartphone use: ~85–90% use at work Computer use (general): ~70–75% use a PC/laptop Windows share: ~75–80% Mac share: ~15–20% Other OS: ~5–10%
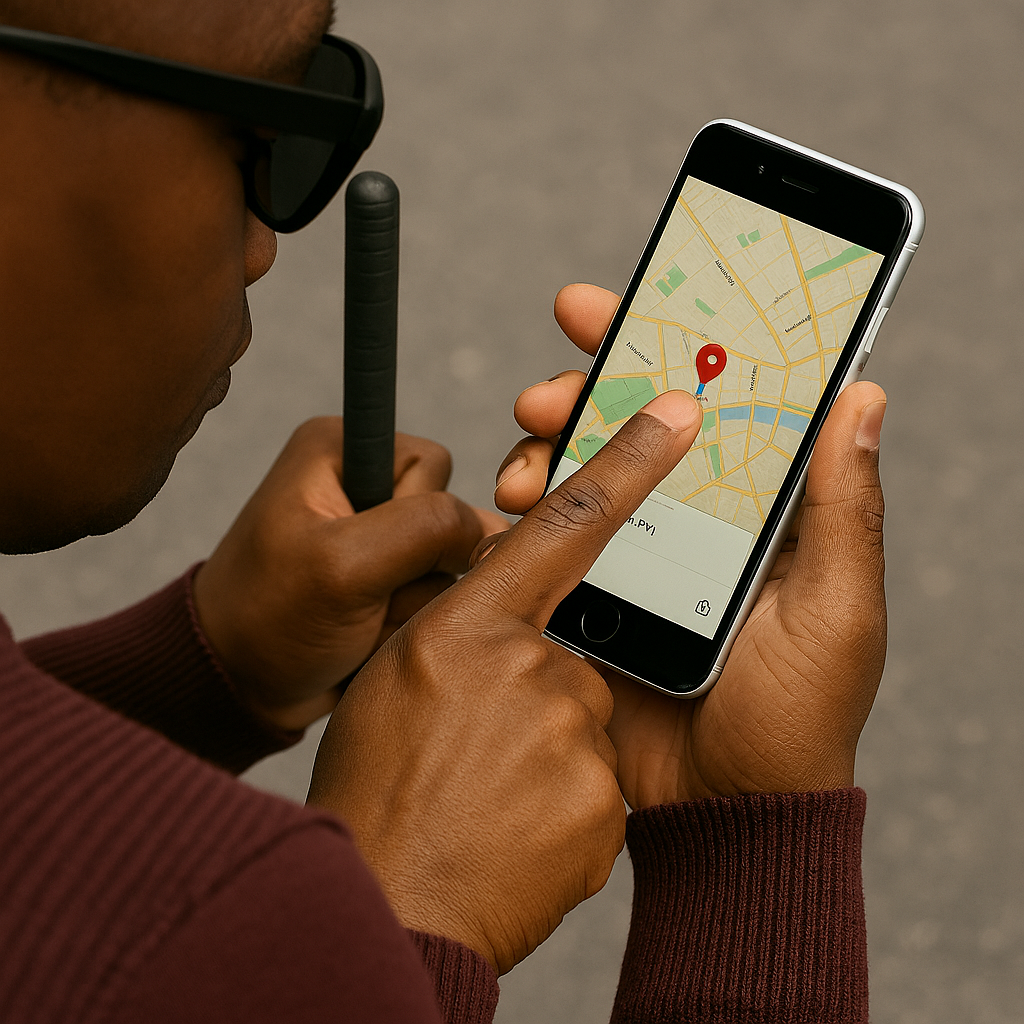
Audience: Blind or low‑vision students (middle school through adult) Skills: Indoor navigation, spatial awareness, cane + tech integration Tools Needed: iPhone with Clew installed, long cane, safe indoor route
Blind Users Retrace Indoor Routes with Clew
Lesson: Learning to Use Clew for Indoor Route Retracing
Lesson Overview
Clew is a free iPhone app that helps you retrace a route indoors. You walk a path once, and Clew guides you back along that same path using sound, vibration, and spoken cues.
Clew does not use maps, GPS, Wi‑Fi, or beacons. It works in any building because it relies on the path you walked.
Your cane provides safety and obstacle detection. Clew provides directional alignment.
Together, they support confident indoor travel.
Learning Objectives
By the end of this lesson, the student will be able to:
Download and open the Clew app
Allow necessary permissions
Hold the phone correctly for AR tracking
Record a route independently
Retrace the route using Clew’s cues
Use cane skills throughout the process
Explain what Clew can and cannot do
Step 1 — Download the Clew App
Open the App Store
Tap Search
Type “Clew”
Select the app named Clew
Tap Get
Open the app once it installs
Note: Clew is iPhone‑only.
Step 2 — Allow Camera Access
When Clew opens for the first time, it will ask for permission to use the camera.
Tell the student:
“Clew uses the camera to track your movement. It does not record video — it only uses the camera to understand the path you walk.”
Tap Allow.
Step 3 — Phone Positioning
Before recording a route, teach the student to hold the phone:
upright
at chest height
camera facing forward
steady, not swinging
This is essential for Clew’s AR tracking.
Cue: “Cane leads. Phone observes.”
Step 4 — Record a Route
Choose a simple, safe route such as:
hallway → classroom
classroom → office
seat → door
Have the student:
Open Clew
Tap Record Route
Walk the path using solid cane skills
Stop recording at the destination
Reinforce:
“Your cane tells you what’s on the ground.”
“Clew is only tracking the path — it does not detect obstacles.”
Step 5 — Retrace the Route
Now guide the student through returning to the starting point.
Tap Return to Start
Follow Clew’s cues:
Haptic taps for turns
Audio beeps for alignment
Voice prompts for direction
Encourage the student to:
Pause if unsure
Re‑center the phone
Sweep with the cane
Continue when aligned
Step 6 — Troubleshooting Practice
Teach the student what to do if:
Clew says “You’re off route”
Stop
Re‑center the phone
Sweep with the cane
Slowly adjust direction
The phone tilts
Bring it back to upright
Keep it steady
The student drifts
Use the cane to find the wall or landmark
Realign with Clew’s cues
Step 7 — Reflection and Understanding
Ask the student:
“What did Clew help you do?”
“What did your cane tell you that Clew didn’t?”
“When would Clew be useful in your school or home?”
This builds independence and decision‑making.
What Clew CAN Do
Retrace a route you walked
Guide you back with sound, vibration, and voice
Work in any building
Handle multiple turns
Support spatial memory
Help you return to a seat, office, or classroom
What Clew CANNOT Do
It cannot guide you to a new destination
It cannot save routes after the app closes
It cannot detect obstacles
It cannot replace cane skills
It does not use maps
Student‑friendly explanation: “Clew doesn’t know the building. It only knows the path you walked.”
Assessment Checklist
The student can:
Download and open Clew
Hold the phone correctly
Record a route independently
Retrace the route safely
Interpret Clew’s cues
Use cane skills throughout
Explain Clew’s limitations
Identify real‑life situations where Clew is helpful
Teacher Notes
Clew is a reverse‑route tool, not a navigation system