Search results for: “WORD”

  • What Does 20/70 Vision Look Like?

    what does 20/70 vision look like seeing a whiteboard 20 feet in the front of the classroom-very blurry and you can struggle to make out most words

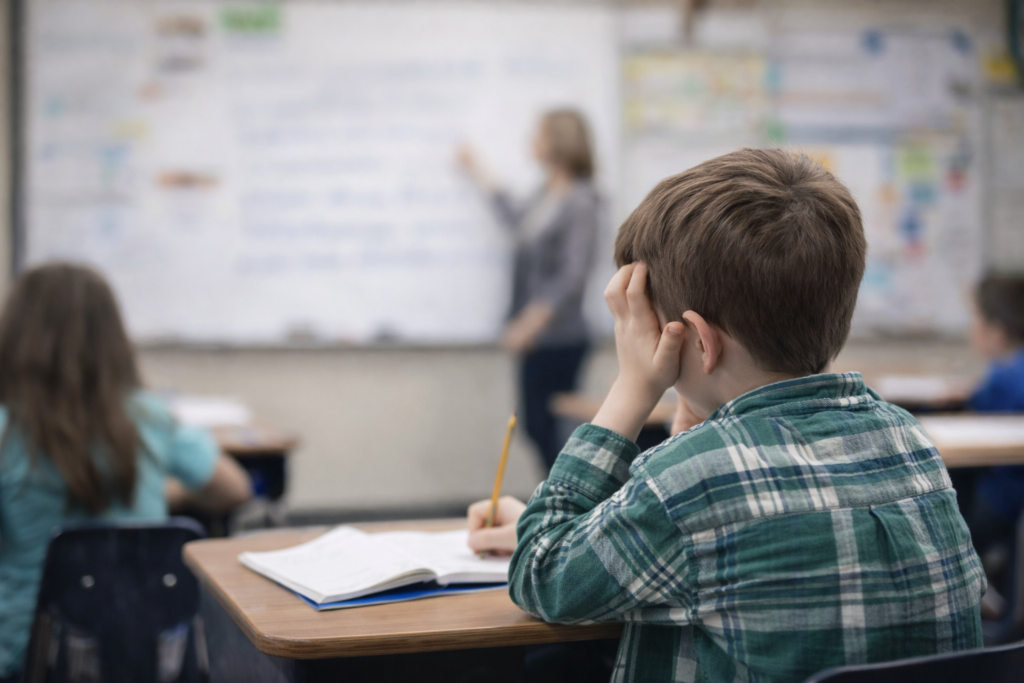
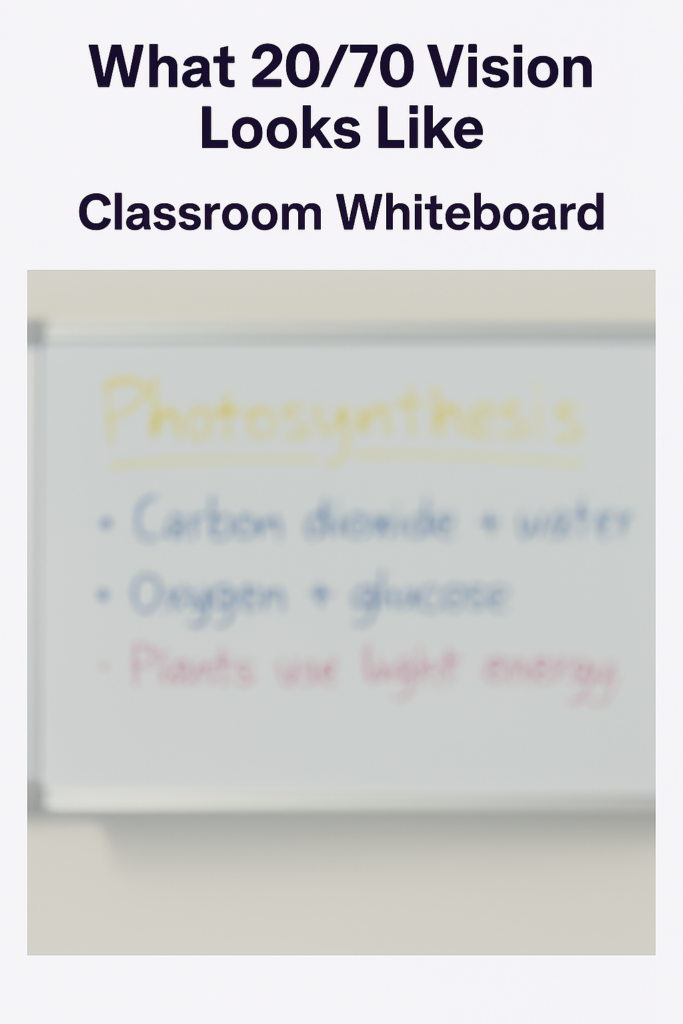
    20/70 Vision Looking at whiteboard 20 feet ahead in a room

    Overview

    Many people wonder, What Does 20/70 Vision Look Like in everyday life? 20/70 vision means a person must stand 20 feet away to see what someone with typical 20/20 vision can see at 70 feet. It represents moderate low vision and often affects reading, recognizing faces, and seeing details at a distance — especially in classrooms, hallways, and outdoor environments.

    This page gives you:

    • A simple explanation
    • Real‑world examples
    • Functional impact
    • Classroom implications
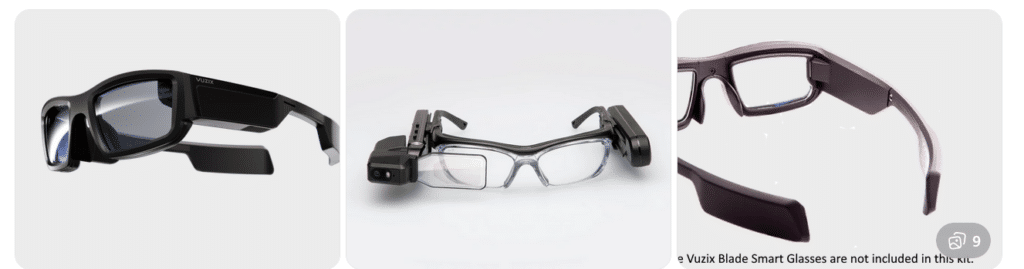
    • Technology supports
    • A visual simulation (we’ll add images next)

    Simple Definition

    20/70 vision is a measurement of visual acuity, describing how clearly a person sees detail.

    • 20 = the testing distance
    • 70 = the distance at which a person with 20/20 vision sees the same detail

    So:

    If a student with 20/20 vision can read a sign at 70 feet,
    a student with 20/70 vision must move to 20 feet to see it.

    What 20/70 Vision Looks Like in Daily Life

    People with 20/70 vision often describe:

    • Blurry details at a distance
    • Difficulty reading small print
    • Needing to move closer to see faces clearly
    • Trouble with classroom boards or projectors
    • Missing fine details in worksheets or diagrams
    • Needing brighter lighting to see comfortably

    They can usually navigate independently but may struggle with:

    • Street signs
    • Bus numbers
    • Classroom whiteboards
    • Small text on screens
    • Low‑contrast materials

    Real‑World Examples

    (We’ll create images for each of these.)

    1. Classroom Whiteboard

    • Letters appear soft or fuzzy
    • Thin markers are difficult to see
    • Low‑contrast colors (yellow, light blue) nearly disappear

    2. Reading a Book or Worksheet

    • Small print blurs
    • Crowded text becomes tiring
    • Students may hold materials close

    3. Recognizing Faces Across a Room

    • Facial features blur
    • Expressions are harder to read
    • Social cues may be missed

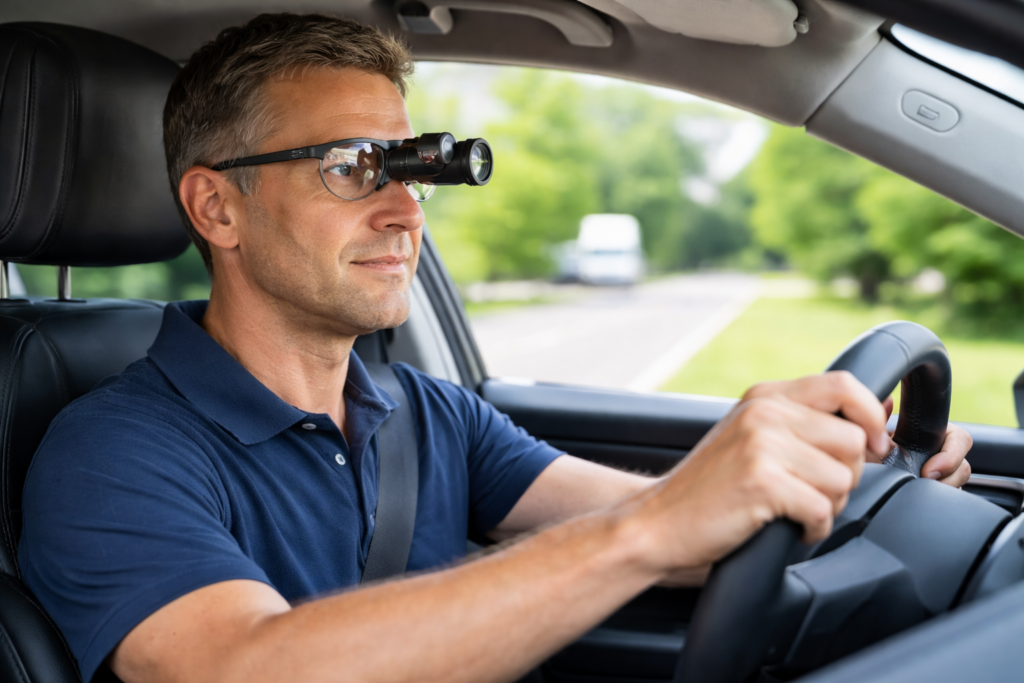
    4. Street Signs or Hallway Signs

    • Letters blur at a distance
    • Students may walk closer to read room numbers

    Functional Impact in School

    Students with 20/70 vision may:

    • Miss information written on the board
    • Struggle with fast‑paced visual instruction
    • Fatigue quickly during reading
    • Need more time for visual tasks
    • Prefer sitting closer to the front
    • Benefit from bold, high‑contrast materials

    They often compensate well but may appear:

    • Distracted
    • Slow to copy notes
    • Unsure of directions
    • Hesitant in new environments

    These are vision‑based challenges, not cognitive ones.

    Supports That Help

    Students with 20/70 vision often benefit from:

    Classroom Supports

    • Preferential seating
    • High‑contrast markers
    • Bold print materials
    • Larger text (14–18 pt)
    • Clear, uncluttered worksheets
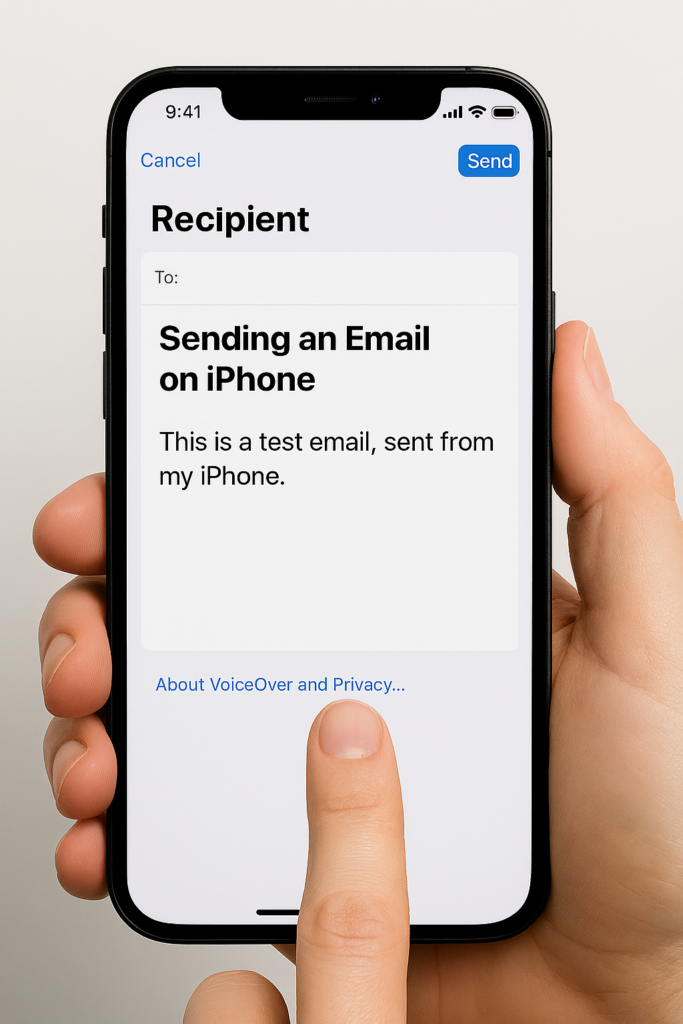
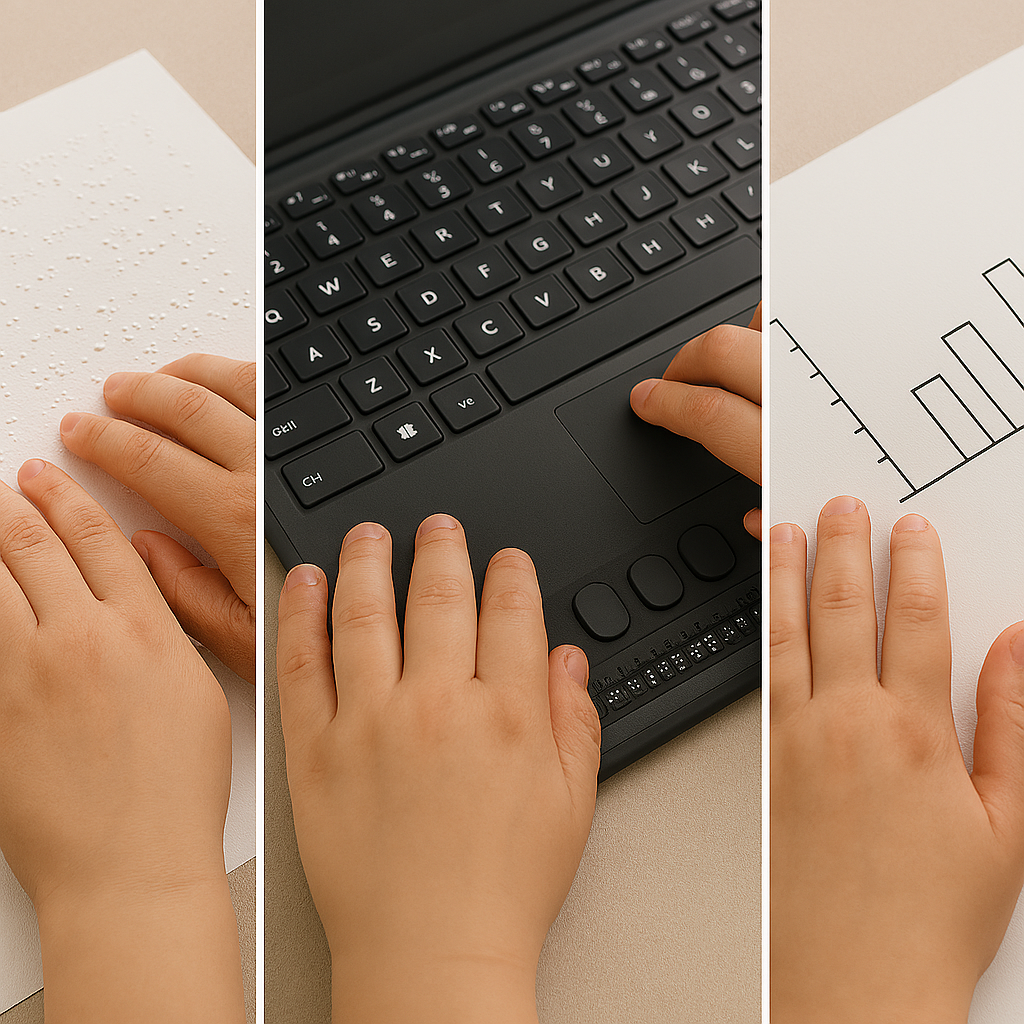
    Technology Supports

    • Zoom or magnification tools
    • High‑contrast mode
    • Larger font settings
    • Screen readers for longer text
    • Digital copies of board notes

    Environmental Supports

    • Good lighting
    • Reduced glare
    • Clear signage
    • High‑contrast labels

    Is 20/70 Vision Considered Legally Blind?

    No.

    Legal blindness is defined as:

    • 20/200 or worse in the better eye with correction,
      or
    • A visual field of 20 degrees or less.

    20/70 is moderate low vision, not legal blindness.

    Frequently Asked Questions

    Is 20/70 vision correctable?

    Sometimes. Glasses or contacts may improve clarity, but many students still function in the low‑vision range even with correction.

    Can a student with 20/70 vision read regular print?

    Yes — but they may need larger print, bold text, or better lighting to reduce fatigue.

    Does 20/70 vision affect mobility?

    Most students navigate independently, but may struggle with signs, steps, or low‑contrast obstacles.

    Is 20/70 vision stable?

    It depends on the underlying condition. Some remain stable; others may change over time.

    Understanding Vision in Children: What Visual Acuity Really Means

      Signs of Low Vision in Children Even when they Pass Screening

      What 20/40 Vision Means and Why “Almost Normal” Still Matters

      20/70 Vision Explained: What It Really Means and How It Affects Daily Life

      What does 20/100 vision look like?

      20/200 Vision Explained: What Everyone Gets Wrong About “Legal Blindness”

      What Does 20/400 Vision Look Like?

      What does 20/800 vision look like?

      When Vision Problems Look Like Misbehavior: What Parents and Teachers Miss

  • Be My Eyes for Computer: Describe Images, Graphs, and Screens Instantly

    Be My Eyes App on Computer
    Be My Eyes App on Computer

    Be My Eyes for Computer

    For students who are blind or legally blind, accessing visual information on a computer screen can be one of the biggest barriers to learning unless you have an APP like Be My Eyes on Computer. Whether it’s a graph in science class, a diagram in math, a picture in a digital textbook, or an unlabeled image on a website, visual content often goes unexplained — unless someone is available to describe it.

    Be My Eyes now solves this problem directly on your computer.

    What Be My Eyes Can Do on a Computer

    When installed on a PC or Mac, Be My Eyes can:

    • Describe graphs, charts, and diagrams
    • Explain pictures, illustrations, and maps
    • Identify objects or images in digital textbooks
    • Summarize visual layouts on websites
    • Clarify icons, buttons, or menus that are not labeled
    • Provide context for images that screen readers cannot interpret

    This is especially powerful for students who are legally blind and need immediate access to visual information without waiting for a teacher, aide, or parent.

    How It Works

    1. Open the Be My Eyes app on your computer.
    2. Take a screenshot or upload the image you want described.
    3. Use the “Ask About This Image” feature.
    4. Type your question — or simply ask:
      • “What is shown in this graph?”
      • “Describe the picture on the screen.”
      • “What does this diagram represent?”
      • “What is happening in this image?”

    The AI will give a clear, detailed description that students can use immediately for classwork, homework, or studying.

    Why This Matters for Blind and Low‑Vision Students

    Visual content is everywhere in school — especially in math, science, social studies, and digital learning platforms. Without access, students fall behind academically and lose independence.

    Be My Eyes gives students the ability to:

    • Access visual information instantly
    • Work independently without waiting for help
    • Understand graphs and diagrams in real time
    • Participate fully in class assignments
    • Build confidence and autonomy

    For students who are legally blind, this tool is not optional — it is essential.

    When to Use Be My Eyes vs. Other Tools

    • Be My Eyes: For describing images, graphs, diagrams, pictures, and anything visual.
    • Screen Readers (JAWS/NVDA): For reading text, navigating websites, writing, researching, and completing assignments.
    • CCTV: Only for viewing pictures or visual diagrams — not for reading.

    Together, these tools create a complete access system.

    Be My Eyes App on Computer using Tiger in WORD to complete Math work

  • iPhone: Set Up Face ID, Touch ID, and Passcode with VoiceOver

    Set Up iPhone Security with VoiceOver using Face ID
    Set Up iPhone Security with VoiceOver using Face ID

    Goal

    Student independently sets up device security and understands how to authenticate downloads. This lesson will help you Set Up iPhone Security with VoiceOver for a more accessible and safe experience.


    PART 1: Set Up a Passcode (Must Be Done First before you can acquire apps)

    Face ID and Touch ID require a passcode.


    Step 1: Open Settings

    Press and hold Side button.

    Say:

    “Open Settings.”


    Step 2: Go to Face ID & Passcode

    (Or Touch ID & Passcode on older phones)

    • Flick right until you hear:
    “Face ID & Passcode”
    • Double-tap.

    If it says “Turn Passcode On,” double-tap.


    Step 3: Create a Passcode

    You will hear:

    “Enter a six-digit passcode.”

    • Double-tap each number
    OR
    • Use braille display if connected

    Enter code twice.

    Choose a code the student can remember but others cannot guess.

    Teach:
    Do not use birthdays.

    Passcode is now active.


    PART 2: Set Up Face ID (Newer Phones)


    Step 1: In Face ID & Passcode Menu

    • Flick right to “Set Up Face ID”
    • Double-tap.

    VoiceOver will guide.


    Step 2: Position Face

    If by yourself, place phone on your forehead then move straight back

    Hold phone at arm’s length.

    VoiceOver says:

    “Move iPhone lower/higher.”

    Follow instructions.

    Rotate head slowly in circle.

    Complete two scans.

    Face ID is now enabled.


    Step 3: Turn On for App Store

    Still inside Face ID settings:

    Ensure toggles are ON for:

    • iPhone Unlock
    • App Store
    • Password AutoFill

    Double-tap to toggle if needed.


    PART 3: Set Up Touch ID (Older Phones)


    Step 1: Go to Touch ID & Passcode

    • Double-tap “Add a Fingerprint.”


    Step 2: Place Finger on Home Button

    Lift and rest repeatedly.

    VoiceOver will say:

    “Adjust your grip.”

    Continue until complete.


    Step 3: Enable for App Store

    Ensure toggle for:

    “iTunes & App Store”

    is ON.


    PART 4: How Authentication Works During Downloads

    When downloading an app:

    If Face ID is enabled:

    • Double-click Side button
    • Look at phone

    VoiceOver says:
    “Face ID successful.”

    If Touch ID:

    • Rest registered finger on Home button

    If Passcode:

    • Enter six-digit code

    Download begins.


    Practice Drill

    Have student:

    1. Lock phone
    2. Unlock with Face ID or Touch ID
    3. Open App Store
    4. Attempt free app download
    5. Complete authentication

    Repeat until smooth.


    Teaching Notes

    Teach this clearly:

    Authentication = Protection.

    It protects:

    • Money
    • Private data
    • Email
    • Contacts

    Students must understand it is a safety tool.


    Other iPhone navigation lessons:

  • iPhone Setup: Turning On Siri and VoiceOver

    iPhone Setup: Turning  on Siri and Voice Over
    iPhone Setup: Turning on Siri and Voice Over

    Lesson:

    Step 1: Turn On Siri Using the Home or Side Button

    If the phone is locked: Here’s how you can begin the process for iPhone Setup: Turning On Siri and VoiceOver.

    1. Press and hold the Home button (older phones)
      OR
      Press and hold the Side button (newer phones)
    2. When you hear the Siri tone, say clearly:

    “Turn on Siri.”

    If Siri is already enabled, continue.


    Step 2: Use Siri to Turn On VoiceOver

    Once Siri responds, say:

    “Turn on VoiceOver.”

    The phone will say:

    “VoiceOver on.”

    Now the screen is accessible.


    Now the Lesson Can Begin

    Once VoiceOver is on, the learner can use gestures.


    Basic VoiceOver Navigation

    Move Forward

    Flick right with one finger.

    Move Backward

    Flick left with one finger.

    Activate Item

    Double-tap anywhere on the screen.

    Stop Speech

    Two-finger tap.

    Go Back

    Two-finger scrub (draw a Z).


    Moving Around the Home Screen

    Move Between Apps

    Flick right or left.

    Open an App

    Double-tap.

    Move Between Pages

    Three-finger swipe left or right.


    Using the Rotor

    1. Place two fingers on the screen.
    2. Twist like turning a dial.
    3. Listen for options such as:
      • Words
      • Characters
      • Headings
      • Links
    4. Flick up or down to move within that selection.

    The rotor allows precise navigation.

    Change rotor based on need, based on App


    Using Siri After VoiceOver Is On

    Siri continues to work alongside VoiceOver.

    Activate Siri:

    • Say “Hey Siri”
      OR
    • Hold Side button

    Examples:

    “Open Maps.”
    “Call Mom.”
    “Send a text.”
    “What’s around me?”
    “Turn Bluetooth on.”

    VoiceOver confirms each action.


    Critical Teaching Order

    Teach in this order:

    1. Turn on Siri
    2. Turn on VoiceOver
    3. Flick right
    4. Flick left
    5. Double-tap
    6. Three-finger swipe
    7. Rotor
    8. 4 finger double tap teaches child “VoiceOver help mode”

    Confidence comes from mastering movement first.


    Go to All iPhone Lessons

    Drop Pins and Navigate with Maps: iPhone and VoiceOver Skills for the Blind

  • Signs of Low Vision in Children Even when they Pass Screening

    Signs of Low Vision in Children: Cannot see board work
    Signs of Low Vision in Children: Cannot see board work

    Many children pass school vision screenings but still struggle to see clearly. Screenings check distance blur, not functional vision. Parents and teachers should watch closely for signs of low vision in children, because children may look fine on paper, yet daily tasks reveal hidden challenges. They squint at the board, lose place in text, miss expressions, and tire quickly. These behaviors reflect low vision, not lack of effort.


    Many children pass school vision screenings but still struggle to see clearly. Screenings check distance blur, not functional vision. Children may look fine on paper, yet daily tasks reveal hidden challenges. They squint at the board, lose place in text, miss expressions, and tire quickly. These behaviors reflect low vision, not lack of effort.


    Short Attention Span Optimized

    1. They squint at the board even from the front row

    Squinting signals effort, not attitude. The student works harder to sharpen distant detail.

    Strategy: Increase contrast, use bold markers, and provide digital access. Squinting means they’re working hard, not misbehaving.

    2. They move reading material close to their face

    Children may hold books only inches away. They are trying to capture clarity, not misbehaving.

    Strategy: Allow close viewing without correction. Offer magnification, larger print, or digital zoom. This is a strategy, not a problem.

    3. They lose place or skip lines while reading

    Low contrast and visual strain make tracking difficult. This shows visual fatigue, not poor skills.

    Strategy: Use line guides, high‑contrast text, and uncluttered layouts. Tracking improves when visual strain decreases. Use immersive reader on laptop in WORD. Teach Screen reader to listen to content versus all visual.

    4. They avoid worksheets with dense text

    Heavy print strains the eyes. Students may stall, fidget, or rush because the task hurts.

    Strategy: Break text into smaller chunks, increase spacing, and reduce clutter. Avoidance is often about discomfort, not motivation. Teach screen reader Access technology.

    5. They miss facial expressions and social cues

    Low vision reduces detail in faces. Children may misunderstand reactions, jokes, or emotions.

    Strategy: Pair spoken cues with visual ones. Teach peers to use clear gestures and verbal confirmation. Low vision makes faces low‑contrast.

    6. They trip or bump into objects others avoid easily

    Low detail and reduced depth perception affect safe movement. These students need clear pathways.

    Strategy: Keep pathways clear, reduce visual clutter, and ensure consistent classroom layouts. This is an access issue, not coordination.

    7. They tire long before they complain

    Visual fatigue builds fast. A child may appear distracted after lunch simply because their eyes are tired.

    Strategy: Build in visual breaks, rotate tasks, and allow alternative formats. Visual fatigue shows up as “inattention.”

    8. They improve dramatically with better contrast or lighting

    When small changes help instantly, the issue is vision, not motivation.

    Strategy: Adjust lighting, reduce glare, and use bold, high‑contrast materials. Quick improvement means the issue is vision, not effort.


    Low Vision Issues

    A child can pass a screening yet still experience low vision daily. These signs reflect access needs, not ability. With early support and the right tools, children learn confidently and keep pace with peers.

    Understanding Vision in Children: What Visual Acuity Really Means

      Signs of Low Vision in Children Even when they Pass Screening

      What 20/40 Vision Means and Why “Almost Normal” Still Matters

      20/70 Vision Explained: What It Really Means and How It Affects Daily Life

      What does 20/100 vision look like?

      20/200 Vision Explained: What Everyone Gets Wrong About “Legal Blindness”

      What Does 20/400 Vision Look Like?

      What does 20/800 vision look like?

      When Vision Problems Look Like Misbehavior: What Parents and Teachers Miss

    What Does Legally Blind Look Like?

  • Aira Glasses Navigation: How Blind Travelers Navigate Safely and Independently

    AIRA Navigation using Google Glasses

    Google Glass Options

    What they are:
    Lightweight smart glasses with a small display above the right eye. Originally released for consumers, now mostly used in enterprise and medical settings.

    Key features:

    • Small prism display
    • Voice-activated commands (“OK Google…”)
    • Camera (varies by model)
    • Touch pad on the right side
    • Designed for hands-free information access

    Vuzix Smart Glasses (Blade / M400 / Shield Series)

    What they are:
    A family of AR smart glasses built for industrial, medical, and field environments. Models vary in shape and display size.

    Key features:

    • Larger, brighter AR displays
    • Camera options up to 4K
    • Rugged designs for work environments
    • Voice, touch, and head-tracking controls
    • Works with Android-based apps

    Aira and Smart Glasses for Blind Navigation: Modern Tools for Safe, Independent Travel

    Whether you’ve been blind for years or you’re just beginning to lose vision, today’s tools offer more options than ever for navigating the world with confidence. Smart glasses and services like Aira give you access to real‑time visual information—indoors, outdoors, at work, on campus, or in everyday life. For some, it’s an exciting next step in expanding independence. For others, it’s a gentle bridge toward accepting support without feeling like they’re giving up who they are. Wherever you are on that journey, these tools can help you move safely, work more efficiently, and stay connected to the world around you.

    If you want, I can also craft a shorter version for a carousel cover slide or a more emotional version that speaks directly to the reader.

    Helping a Young Adult Losing Vision: When They’re Not Ready for the Cane… Yet

    Losing vision as a young adult is complicated. It’s not just about mobility—it’s about identity, pride, and the fear of being seen as “blind” before they’re ready to claim that word for themselves.

    Many young adults tell us:

    • “I don’t want people staring at me.”
    • “I’m not blind enough for a cane.”
    • “I can still get by if I try harder.”
    • “I don’t want to look different.”

    These feelings are real. They deserve respect, not pressure.

    But they also deserve safety, dignity, and access to the world.

    That’s where Aira can become a bridge—not a replacement for cane skills, not a long‑term solution, but a gentle first step toward accepting support.


    Why Aira Works for Someone Who Isn’t Ready for the Cane

    Aira gives visual information without announcing disability to the world.

    For a young adult who is still grieving vision loss, this matters.

    Aira lets them:

    • Move through a college campus without guessing at signs
    • Navigate stores, offices, or new environments without pretending
    • Read menus, labels, and screens without asking friends
    • Travel safely in unfamiliar places
    • Do their job or schoolwork without feeling exposed

    It’s discreet. Very private. It’s on their terms.

    And most importantly—it gives them a taste of what independence with support feels like.

    That experience often becomes the turning point.


    The Emotional Shift: From “I Don’t Want to Look Blind” to “I Deserve to Move Safely”

    When a young adult uses Aira, something powerful happens:

    They realize they don’t have to choose between:

    • Looking blind
      and
    • Being unsafe

    Aira shows them that support doesn’t take away independence—it protects it.

    Once they feel the relief of not guessing, not hiding, not pretending…
    they often become more open to the cane.

    Not because someone forced them.
    But because they finally understand:

    Independence isn’t about doing everything alone.
    It’s about having the right tools at the right time.


    Real Examples: A Young Adult Losing Vision Who Wants a Career in Film, Photography, or Other Visual Fields

    Let’s say this young adult has 20/200–20/400 vision or worse and dreams of photography, cinematography, or other highly visual careers that require sharp editing and image capture.

    They’re talented. They are creative. They’re determined.

    But they’re also scared of being seen as “blind.”

    Aira can help them:

    • Frame shots
    • Check lighting
    • Review images
    • Navigate sets
    • Identify equipment
    • Move safely in unfamiliar locations

    They get to keep their identity as a creator and keep their dignity.
    They get to keep their dreams alive.

    And slowly, gently, they begin to understand:

    Blindness doesn’t take away creativity.
    It just changes the tools.


    How We Bring Them Along—Without Shame, Pressure, or Fear

    Here’s the message we give young adults:

    “You don’t have to be ready for the cane today.
    But you do deserve to move safely today.
    Aira can help you do that while you figure out the rest.”

    We meet them where they are and honor their feelings.
    We give them a tool that supports them privately.
    And we let confidence do the rest.

    Because once they feel what safe, supported independence is like…
    the cane stops looking like a symbol of blindness
    and starts looking like a symbol of freedom.


    Real Example for all users with Airport Navigation and Traveling Using Aira

    Airports can be some of the most challenging environments for blind and low‑vision travelers—constant construction, changing layouts, crowded terminals, and signage that’s almost entirely visual. Aira gives travelers real‑time visual support from the moment they step out of the rideshare to the moment they reach their gate. And when paired with Aira’s own smart glasses—designed to look just like the everyday eyewear everyone else is wearing—travelers get discreet, hands‑free access to visual information without standing out or feeling different.

    In fact, the only way anyone would know a traveler is blind is if they’re using a cane. You can even call an Aira Agent while the plane is still on the runway so you’re fully set up to step off the aircraft and head confidently to your next gate with live guidance. Agents can help locate check‑in counters, identify the correct security line, read flight boards, navigate terminals, find restrooms or restaurants, and guide travelers through gate changes or last‑minute updates. Whether you’re a seasoned blind traveler or someone newly adjusting to vision loss, Aira adds a layer of confidence and clarity that makes airport travel smoother, safer, and far less stressful.

    Other iPhone Lessons

  • Low Vision Driving Aids: Bioptics,Prism Glasses, Adaptive Devices, and Safe Driving Options Explained

    Many driving with Low Vision aid Biopitic glasses
    Low Vision Driving Aids: Man driving with Bioptic glasses

    Many students with low vision can increase independence through safe and well-designed optical tools. Low Vision Driving Aids such as bioptic telescopes, prism glasses, and adaptive driving technology help students identify road signs, lane markings, and distant objects with greater clarity. These devices do not replace safe driving skills, but they support eligible students who meet vision requirements and receive proper training. Teachers and parents play a central role by learning these options early, guiding students toward evaluations, and helping them build strong visual skills long before driving becomes possible.


    Bioptic Telescopic Lenses

    Bioptic telescopes are small telescopes mounted on glasses. They magnify distant objects such as road signs and traffic signals. The driver uses normal vision for steering but briefly glances through the telescope for critical details.

    How bioptics work:
    A small telescope at the top of the lenses increases clarity for distant targets.

    How drivers use them:
    Drivers use natural vision for general driving and glance through the telescope to read signs or detect details.

    Safety:
    Research shows bioptic drivers succeed with training. Proper instruction remains essential for safety and confidence.


    Adaptive Driving Technology (ADAS)

    Many students benefit from modern vehicle safety systems such as:

    • Lane-keeping assist
    • Blind-spot detection
    • Adaptive cruise control
    • Automatic emergency braking

    These systems improve awareness and support safe driving decisions. They do not replace skill, but they strengthen safety for drivers with visual limitations.


    Vision Enhancement Devices

    Some students use electronic eyewear or enhanced optical devices to support mobility. Tools like eSight improve clarity for reading street names, viewing dashboards, or spotting road markers. These devices help with general visual access rather than driving tasks themselves.


    Prism Glasses for Low Vision

    What Prism Glasses Do

    Prism glasses bend light to move an image into a student’s stronger visual field. They help the student locate print and objects more quickly. They do not change the eye, but they make vision tasks easier and less tiring.

    Who Benefits

    Prism glasses help students who:

    • Miss objects on one side
    • Lose their place when reading
    • Experience double vision
    • Have trouble tracking words
    • Struggle with visual focus
    • Have CVI or field loss

    Prisms reduce searching and help the brain find information faster.

    How Prism Glasses Help in School

    Prisms can:

    • Improve tracking
    • Reduce eye strain
    • Support board-to-desk copying
    • Increase reading stamina
    • Strengthen early print recognition

    Teachers often see smoother reading, fewer errors, and better endurance.

    Types of Prism Glasses

    Students may use:

    • Reading prisms for near work
    • Field-shifting prisms to move images into better visual fields
    • Yoked prisms to shift the entire image
    • Non-yoked prisms for specific alignment issues

    A low vision optometrist chooses the correct type.


    Legal and Clinical Requirements

    State Laws and Bioptics

    Thirty-seven states permit some form of bioptic driving. Each state sets different rules about visual acuity, visual field, telescope power, and required training. Some states allow drivers to meet acuity standards through the bioptic if they reach a level such as 20/40 through the telescope.

    DMV -Department of Motor Vehicles- Vision Standards

    Most state DMVs require:

    • Minimum acuity (often 20/40 for unrestricted licenses)
    • A certain visual field range
    • Medical reports from a low-vision specialist

    Where to Go for Evaluations and Training

    Low Vision Optometrists

    Families should begin with a low vision optometrist who can:

    • Test remaining vision
    • Evaluate driving potential
    • Determine whether bioptics or prism glasses will help
    • Prescribe optical devices

    Search using IALVS or regional low vision centers.

    Certified Driving Rehabilitation Specialists (CDRS)

    If bioptics are appropriate, a CDRS provides:

    • Behind-the-wheel training
    • Scanning and hazard-detection practice
    • Safe bioptic use techniques
    • Pre-licensure assessments

    This step is required in many states.

    DMV Vision Evaluation Services

    Families should contact the DMV to:

    • Review state vision rules
    • Obtain medical vision forms
    • Schedule low-vision driving tests
    • Determine if bioptic training is necessary

    How Families and Schools Should Start

    1. Schedule a low-vision evaluation with a trained optometrist.
    2. Discuss bioptics, prism glasses, and vision enhancement devices.
    3. Ask about training with a Certified Driving Rehabilitation Specialist.
    4. Review state DMV laws for low vision and bioptic drivers.
    5. Build visual efficiency long before students reach driving age.

  • How Do Blind Students Learn?

    Blind student reading Braille on paper, using a Braille display with a computer, and exploring a tactile graphic
    Blind student reading Braille on paper, using a Braille display with a computer, and exploring a tactile graphic

    Understanding Linear Learning vs. Spatial Learning

    When people ask, “How do blind students learn?” the most important starting point is this:

    Blind students learn linearly. Sighted students learn spatially.

    This single difference explains why blind learners need different teaching strategies, different tools, and different test accommodations: not because they are less capable, but because they access information through a completely different pathway.

    Let’s break down what this means, why it matters, and how it affects everything from classroom instruction to standardized testing.


    1. Spatial Learning (Sighted Students)

    Sighted students take in information all at once, in a broad visual field. They can:

    • Glance at a page and see the whole layout
    • Jump between paragraphs instantly
    • Scan charts, maps, and diagrams in seconds
    • Compare two areas of a page without losing their place
    • Hold visual relationships in mind (left/right, above/below, bigger/smaller)

    This is spatial learning — fast, simultaneous, and visually anchored.


    2. Linear Learning (Blind Students)

    Blind students access information one piece at a time– one character at a time, in a straight line, through:

    • Screen readers (JAWS, NVDA, VoiceOver)
    • Braille displays
    • Audio
    • Tactile graphics

    They cannot “look around” a page or see the question and the paragraph all at the same time, nor skim a diagram. They must:

    • Move character by character or part by part
    • Move line by line
    • Navigate with commands
    • Build the mental picture sequentially
    • Hold details in working memory

    This is linear learning — accurate, powerful, but fundamentally different from spatial learning.

    Braille readers who build fluency up to 400–450 words per minute — and some even higher — can move through text quickly, but they still must slow down when deep comprehension is required. In parallel, trained blind students can listen at speeds well above 400 words per minute. Because audio processing becomes a major access route for academic content, teaching efficient high‑speed listening is an essential skill alongside Braille fluency.

    This instruction must begin early if the goal is for the child to maintain pace with sighted peers, as early tactile and access‑skills training prevents the academic delays that occur when these foundations are introduced later. This includes early keyboarding instruction and learning to use a PC computer with screen reader commands, both of which are essential access tools for blind students throughout school and into adulthood.
    For blind children, it is essential to start developing tactile readiness, tactile discrimination, and early Braille concepts by age 3. These foundational tactile skills support later Braille fluency, spatial understanding through touch, and efficient access to academic materials.

    For children with low vision and a progressive eye condition, instruction should begin as soon as the condition is identified — not after vision loss occurs. Early access training ensures the child builds the skills they will rely on later, preventing academic delays and reducing the emotional and cognitive burden of “catching up” after vision decreases.

    Early instruction in tactile skills, Braille readiness, and high‑speed listening lays the groundwork for the advanced literacy and access skills blind students need throughout school and into adulthood.


    3. Why This Matters in Real Learning Situations

    A. Refer‑Back (Test) Questions

    Many work but especially standardized tests require students to:

    1. Read a question
    2. Refer back to a paragraph
    3. Return to the question
    4. Choose the correct answer

    Sighted students do this in seconds because the question and paragraph are both visible at once.

    Blind students must:

    • Stop reading
    • Navigate backward through headings or lines
    • Find the correct paragraph
    • Reread it
    • Navigate forward again
    • Try to remember both the question and the paragraph

    This is not a reading‑comprehension task — it becomes a navigation and memory task.

    Why it’s inaccessible

    • Screen readers present content linearly, not spatially.
    • Blind students lose the visual proximity sighted students rely on.
    • Cognitive load doubles because they must juggle navigation + content.
    • They lose significant time through no fault of their own.

    Appropriate accommodation

    On the student’s IEP (Individualized Education Program), include a sighted human reader as an accommodation. This restores equal access by allowing the student to:

    • Braille students has fingers on a braille display if test is electronic or on hard copy braille then
    • Asks reader for the referenced paragraph
    • Answers immediately based on knowledge, not navigation

    This is not an advantage — it is equivalent access.


    B. Image‑Based Test Questions

    Charts, diagrams, maps, graphs, and labeled pictures are inherently spatial.

    Sighted students can instantly see:

    • Layout
    • Labels
    • Patterns
    • Relationships
    • Direction
    • Relative size

    Blind students cannot access any of this unless the description is complete — using methods appropriate for blind learners, since most tests are created by sighted people using sighted terms rather than blind terms — and, most importantly, unless they have been explicitly taught how to “read” and interpret graphs through tactile and auditory methods. This is also where a sighted human reader becomes essential, someone who knows the student and can relay information using blind‑appropriate terminology and concepts.

    Why inadequate alt text fails

    Alt text like:

    • “A chart”
    • “A diagram of a cell”
    • “A map of the U.S.”

    …provides none of the information needed to answer questions.

    Screen readers cannot “see” the image. They only read the text provided. If the description is incomplete, the student receives incomplete information — and cannot answer accurately.

    Appropriate accommodation

    A trained sighted describer, with tactile graphics when appropriate, can:

    • Describe the full spatial layout as student moves their hands across the graphic
    • Identify labels and relationships
    • Provide the structure needed to understand the image
    • Support the student without giving away answers

    This ensures the blind test taker has access to the same information sighted peers see.


    4. What Teachers and Parents Need to Know

    Blind students are fully capable of mastering the same academic content — when the information is delivered in a way they can access.

    To support linear learners:

    • Present information in clear, sequential linear order
    • Avoid “look at the chart above” without providing a full description
    • Use headings, structure, and consistent formatting
    • Provide tactile graphics for spatial concepts
    • Teach screen reader navigation explicitly
    • Allow extra time for tasks that require back‑and‑forth reference
    • Use human readers or describers when needed

    These are not “extras.” They are equity.


    5. Why This Matters for Every Classroom and Every Test

    When educators understand the difference between linear and spatial learning, everything becomes clearer:

    • Why blind students need more time
    • Why they need tactile graphics
    • Why they need structured digital materials
    • Why refer‑back questions are inaccessible
    • Why image‑based items require human description
    • Why blind students may appear “slower” when they are actually processing more steps

    Blind students are not struggling with content — they are navigating a world built for spatial learners.


    6. Final Thought

    Blind students learn differently, not less.
    Their learning is sequential, structured, and deeply conceptual.
    When we remove the visual barriers, their abilities shine.

  • Blind Teen Masters JAWS

    Blind Teen Masters JAWS on computer
    Blind Teen Masters JAWS on computer

    A remarkable transformation unfolded in 2000 when a blind teenage girl arrived from the Ukraine–Russia border region. Her journey would soon be defined by the inspiring story of how a Blind Teen Masters JAWS. She had lost her sight due to a brain tumor and survived medical hardship. In addition, she entered the United States without knowing a single word of English. She faced dozens of surgeries to remove the tumor. She was brave, brilliant, and determined — but she faced a world that she feared. Her first English words to me were: “I want to die cause blind can’t do anything!”

    I was determined to change that idea as done with other Students.

    When she first sat down at the computer, the only screen reader available to her was English JAWS. To bridge the gap, I sought out someone who became friend in Russian to get Jaws scripts for Russian JAWS. This allowed her to switch seamlessly between Russian and English. This simple act opened a doorway. She could hear her native language, type in English, and move back and forth between the two as she learned. Within 3 months she was interpreting the language for her family. She could speak smoothly and understandably to her peers and teachers. The next crucial skill skill was connecting her to friends in Ukraine via email. THAT was the secret. The journey was possible because this blind teen truly mastered JAWS and pushed through the barriers.

    And she learned fast. Within that 3 months, she told me: I do not want to die anymore because the technology has changed everything for me and shows me my future. I can do what I want and need.

    Every day she practiced navigating the keyboard, reading with JAWS, writing, and communicating. She used the bilingual setup to teach herself English while mastering the technology that would give her independence. Her confidence grew with every keystroke.

    Three months later, the young teen who once arrived frightened and silent was now speaking fluent English. She was using JAWS like she had been doing it for years. In the video below, she demonstrates her skills entirely in English: reading email, writing messages, attaching files, and navigating her computer with flawless precision. Her success is a striking example of what happens when a blind teen sets out to master JAWS. She is breaking new ground for herself and others.

    Her journey is a powerful reminder that access changes everything.
    When students receive the right tools, the right training, and unwavering belief, they rise. They thrive. They discover who they were always meant to be.

    This is why access technology matters. Watch her incredible journey in 3 months.

    Another Inspired Story