Search results for: “WORD”

  • IXL.com: Accessible Learning Tool for All Subjects

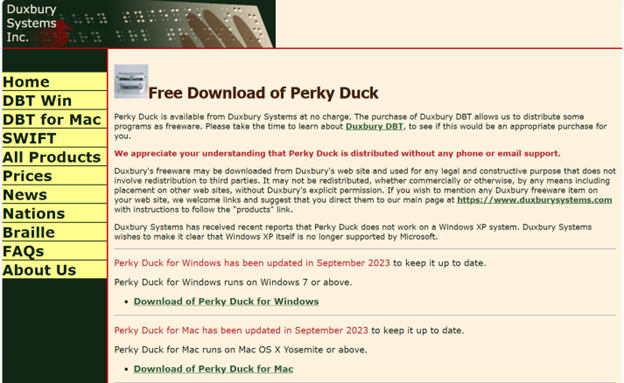
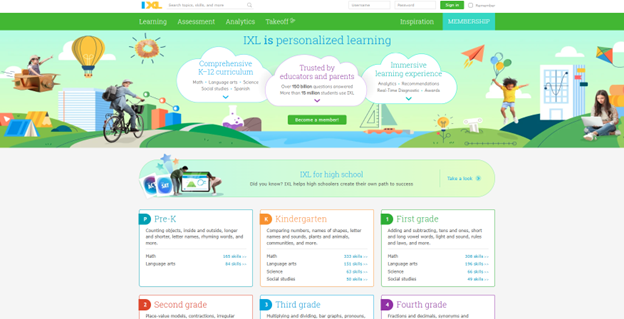
    IXL.com offers accessible learning experiences for students with disabilities, including those who are blind or visually impaired. As an accessible learning tool, IXL.com ensures the platform is compatible with screen readers, enabling students to navigate lessons, answer questions, and receive feedback through auditory cues. IXL’s user interface allows customization of text size, color contrast, and keyboard navigation, enhancing usability for individuals with low vision. Additionally, the platform’s alignment with educational standards ensures that all learners, regardless of ability, can engage with comprehensive curriculum content, fostering inclusion and independence in the learning process.

    Here are some useful JAWS keyboard shortcuts that can help you navigate IXL.com an accessible learning tool.

    General Navigation

    • Go Back a PageALT + LEFT ARROW or BACKSPACE
    • Go Forward a PageALT + RIGHT ARROW
    • Next LinkTAB
    • Previous LinkSHIFT + TAB
    • Open LinkENTER
    • List LinksINSERT + F7
    • List HeadingsINSERT + F6
    • List FramesINSERT + F9
    IXL.com accessible learning tool
    IXL.com accessible learning tool

    Forms and Fields

    • Enter Forms ModeENTER
    • Exit Forms ModeNUM PAD PLUS
    • Next Form FieldF
    • Previous Form FieldSHIFT + F
    • List Form FieldsINSERT + F5
    • Next Edit BoxE
    • Previous Edit BoxSHIFT + E
    • List Edit BoxesCTRL + INSERT + E

    Tables

    • Next TableT
    • Previous TableSHIFT + T
    • List Keystrokes for Table NavigationINSERT + SPACEBAR, followed by T, then QUESTION MARK

    Reading and Navigation

    • Read Current LineINSERT + UP ARROW
    • Read Next LineDOWN ARROW
    • Read Previous LineUP ARROW
    • Read Current WordINSERT + NUM PAD 5
    • Read Next WordINSERT + RIGHT ARROW
    • Read Previous WordINSERT + LEFT ARROW

    These shortcuts should help you navigate IXL.com more efficiently with JAWS. More Videos with Commands and Access Training

  • Raveena Fixes Computer Issues, Display Problems, and Uploads Perky Duck Program

    Raveena shows how to fix basic computer and screen problems and then explains how to install the Perky Duck braille program. She starts by helping users solve common computer or display issues with easy steps. After that, Raveena Fixes Computer Issues by walking through downloading and setting up the Perky Duck program, which helps create and translate braille. Her simple instructions make it easier for students and teachers to use the program and keep their devices running smoothly.

    To upload a file in the Perky Duck braille transcription program, you can follow these steps using keyboard commands. Raveena Fixes Computer Issues by providing clear steps to follow:

    1. Open Perky Duck:
      • Press Windows Key, type “Perky Duck”, and press Enter to open the program.
    2. Open File Dialog:
      • Press Alt + F to open the File menu.
      • Press O to select “Open”.
    3. Navigate to Your File:
      • Use the arrow keys to navigate through your directories.
      • Press Enter to open folders.
      • Once you find your file, press Enter to upload it.
    Perky Duck free braille translator
    Perky Duck free braille translator

    These commands should help you efficiently upload a file in Perky Duck. If you need more detailed instructions or have any other questions, feel free to ask! That’s how Raveena Fixes Computer Issues efficiently. Other ways to fix your computer

    Let us know how we cn help you: Contact US: TechVisionTraining@yourtechvision.com

  • Love Fast Braille Reading

    Becoming a fast Braille reader requires regular practice, strong finger sensitivity, and familiarity with Braille symbols. It is important to develop consistent reading habits, starting with simple texts and gradually increasing difficulty. Mastery of the Braille code, including contractions in Grade 2 Braille, helps increase reading speed by reducing the number of characters to recognize. Using both hands efficiently—one to read ahead and the other to track—can improve flow and speed. Building tactile sensitivity through exercises or activities that engage the fingers is also important for faster recognition of Braille patterns. To truly love fast Braille reading, it typically requires about 2.5 hours of daily practice for two months to reach up to 450+ words per minute. Then after achieving this speed, maintaining progress involves consistent reading each week to keep improving and retain fluency. This is true of sighted people reading print also.

    Starting to read Braille at the age of 3 helps build a strong foundation for lifelong reading skills. Early exposure to Braille allows children to develop familiarity with the tactile symbols and patterns, making reading feel natural as they grow. As they explore stories and books, they often gain a love for reading, which motivates them to practice regularly. This consistent practice, combined with early learning, can significantly increase reading speed over time, even reaching over 450+ words per minute. The combination of early introduction and a passion for reading helps develop both fluency and speed in Braille. This is true of sighted people reading print also who love fast Braille reading.

    Integrate braille everywhere to reach the standards for Braille Reading Speed

  • MLA and APA Format Paper Writing — Tech Tip

    Formatting an APA format paper writing style using keyboard commands is an efficient way to create a properly structured document without relying on a mouse. By using shortcuts within programs like Microsoft Word, you can quickly adjust key elements such as margins, fonts, line spacing, and indentation. This guide outlines the essential steps, including setting up the title page, organizing headings, and formatting the references page. By mastering these keyboard commands, you can streamline the process of formatting your APA paper and ensure it meets academic standards.

    To format an APA paper using keyboard commands, you can use several standard shortcuts within word processors like Microsoft Word. Follow these tips to make APA format paper writing easier:

    1. Setup the Document in APA format paper writing style

    • Margins: The default margins in Word are typically 1 inch, but you can check by pressing Alt + P, then M, and selecting “Normal”.
    • Font and Size: Use Ctrl + D to open the Font dialog box. Set the font to Times New Roman and the size to 12. Both settings are essential in APA format paper writing.
    • Line Spacing: To set double spacing, press Ctrl + 2.
    • Indentation: For the first line of each paragraph, press Ctrl + T to create a hanging indent. To undo this and create a regular first-line indent, press Ctrl + Shift + T and then Tab to indent the first line.
    APA format of paper
    APA format of paper

    2. Title Page

    • Running Head: Press Alt + N to go to the “Insert” tab, then H for “Header”, and Ctrl + R to right-align the text. Type “Running head: YOUR TITLE” (in caps) on the first page. On other pages, just type the title without “Running head”.
    • Title: Press Ctrl + E to center the title. Capitalize each major word in the title.
    • Author and Institution: Press Ctrl + E again to center your name and institution. Press Enter between lines. Proper formatting of this section is crucial for APA format paper writing.

    3. Main Body

    • Heading Levels:
      • Level 1: Centered, bold. Use Ctrl + E to center and Ctrl + B to bold.
      • Level 2: Left-aligned, bold. Use Ctrl + L to left-align and Ctrl + B to bold.
      • Level 3: Left-aligned, bold, and italicized. Use Ctrl + L, Ctrl + B, and Ctrl + I.
      • Level 4: Indented, bold, ending with a period. Use Ctrl + T for hanging indent, Ctrl + B, and type your text.
      • Level 5: Indented, italicized, ending with a period. Use Ctrl + T, Ctrl + I, and type your text.

    4. References Page

    • Hanging Indent: Select the references text and press Ctrl + T to apply a hanging indent, following APA format paper conventions.
    • Title: Center the title “References” using Ctrl + E.

    5. Page Numbers

    • Insert page numbers by pressing Alt + N, then N, and selecting “Page Number”. Place the number in the top right by pressing Ctrl + R.

    This approach covers the essential formatting elements for an APA paper using keyboard shortcuts. Let me know if you need specific details on any step for better APA format paper writing! Find MLA Word Format here.

    Other Tech Tip Lessons

    How to Properly Format a Paper

    Teach how to set up computer

    Google dictation

    Apply latest update

    APA-MLA tech tip

    Select Noncontiguous folders

    Braille Display to do work in WORD

    Math for all ages

    Let us know how we can help you: Contact US: TechVisionTraining@yourtechvision.com

  • Google Dictation Using Speech — Tech Tip for the Day

    Google Dictation, also known as “Voice Typing,” enables users to write and edit text using their voice instead of a keyboard. By using simple voice commands, you can dictate text, add punctuation, and format documents hands-free, making the process faster and more accessible. Additionally, with a few keyboard shortcuts, you can easily start or stop dictation and manage the flow of your work. For a more comprehensive experience, mastering Google Dictation using Speech can be a game changer. This guide outlines essential keyboard shortcuts and voice commands to help you navigate and edit documents more efficiently using Google Dictate.

    Google Docs Dictation, also known as “Voice Typing,” allows users to dictate text using voice commands instead of typing. Here are the keyboard commands for using Google Dictate:

    Google doc Dictation mode
    Google Dictation using Speech in Docs

    1. Start Voice Typing

    • Windows & Chromebook: Press Ctrl + Shift + S. Also, under Tools Menu
    • Mac: Press Cmd + Shift + S. This command opens the Voice Typing tool in Google Docs.

    2. Pause/Resume Dictation

    • Once Voice Typing is active, click the microphone icon to pause or resume dictation. There is no direct keyboard shortcut for pausing or resuming dictation, but you can toggle it by pressing Ctrl + Shift + S (or Cmd + Shift + S on Mac) again.
    Google Slide dictation mode
    Google Slide Dictation mode

    3. Voice Commands for Editing (While Dictating):

    • New line: Say “New line” to move to the next line.
    • New paragraph: Say “New paragraph” to start a new paragraph.
    • Select text: Say “Select [word/phrase]” to highlight specific text.
    • Delete text: Say “Delete” or “Backspace” to remove the selected text or go back one character.
    • Bold text: Say “Bold” to bold the selected text.
    • Italicize text: Say “Italicize” to italicize the selected text.
    • Underline text: Say “Underline” to underline the selected text.
    • Go to the end of the document: Say “Go to end of document” to move the cursor to the end.
    • Go to the beginning of the document: Say “Go to beginning of document” to move the cursor to the start.

    4. Punctuation Commands

    • Period: Say “Period” to insert a period.
    • Comma: Say “Comma” to insert a comma.
    • Question mark: Say “Question mark” to add a question mark.
    • Exclamation mark: Say “Exclamation point” to add an exclamation mark.
    • Colon: Say “Colon” to add a colon.
    • Semicolon: Say “Semicolon” to insert a semicolon.

    5. Editing Commands (While Typing or Dictating)

    • Undo: Say “Undo” to undo your last action.
    • Redo: Say “Redo” to redo the last undone action.
    • Copy: Say “Copy” to copy selected text.
    • Paste: Say “Paste” to paste the copied text.

    These commands allow you to efficiently dictate and edit documents using Google Voice Typing, streamlining the process for those who prefer hands-free typing.

    More on YouTube

    Let us know how we can help you: Contact US: TechVisionTraining@yourtechvision.com

  • Apply Latest Computer Update-Tech Tip for the Day

    Regularly updating your computer is crucial for keeping it secure, efficient, and running smoothly. It’s important to apply the latest computer update to take advantage of these benefits. Software updates provide important improvements, such as enhanced security, better performance, and bug fixes. These updates also ensure that your computer stays compatible with the latest software and hardware, while offering new features to improve your user experience. Keeping your system up to date is a simple yet effective way to protect your device and ensure it operates at its best.

    Regularly updating your computer as new updates are released is essential for several reasons:

    Reasons to Apply Latest Computer Update

    Regularly updating your computer is crucial for several reasons, starting with security. Updates often fix vulnerabilities that hackers could exploit. By keeping your system updated, you protect it from viruses, malware, and cyberattacks.

    Computer updates in Settings
    Computer updates in Settings

    Secondly, updates improve performance by making your computer faster and more efficient. They address bugs and glitches that can slow down your system.

    Next, applying the latest updates introduce new features or improve existing tools, enhancing both your user experience and productivity.

    As software evolves, updates also ensure compatibility with the latest programs, hardware, and devices.

    Finally, many updates focus on fixing bugs and stability issues, helping your computer run smoothly and preventing crashes.

    By consistently updating, you keep your computer secure, fast, and fully functional, avoiding many common problems.

    Other Tech Tips

    Schoology with Jaws

    Schoology navigation

    Teach how to set up computer

    Google dictation

    Apply latest update

    APA-MLA tech tip

    Here is how you fix WORD also

  • Connect Focus 40 braille display to Jaws

    Connecting a Focus Braille Display to a computer using JAWS screen reader enhances accessibility for blind and visually impaired users. The process of connecting a Connect Focus 40 Braille display allows users to interact with digital content through tactile feedback, improving independence and productivity. By following a few simple steps, you can seamlessly connect the Braille display via USB or Bluetooth and configure it in JAWS for optimal use. This guide provides an easy-to-follow approach for setting up your Focus Braille Display and ensuring smooth integration with JAWS.

    Here are the steps to connect a Focus Braille Display to your computer using JAWS screen reader:

    Connect Focus 40 Braille Display or other displays

    1. Power on the Focus Braille Display

    Ensure the Focus Braille Display is fully charged and powered on before connecting.

    1. Connect the Display to the Computer

    Use either USB or Bluetooth to connect the Focus Braille Display to your computer.

    For USB: Plug the USB cable into both the Braille display and the computer.

    For Bluetooth: Enable your computer’s Bluetooth and pair the Focus display in the Bluetooth settings.

    1. Enable Braille in JAWS

    Open JAWS by pressing Insert + J. Then, press Alt + O to open the Options menu.

    Press B to select Braille or use the arrow keys to navigate, then press Enter.

    1. Select the Braille Display

    In the Braille settings window, ensure the “Focus” display is selected under the Default Braille Display dropdown.

    If it’s not selected, use the arrow keys to choose “Focus” or manually type the model of the Braille display.

    1. Check Braille Display Connection

    After selecting the correct display, click OK or press Enter to confirm the connection.

    JAWS should now detect the Focus Braille Display. Braille output should appear, and the display keys will control JAWS.

    1. Configure Settings (Optional)

    To further customize settings like verbosity and Braille output, go to Braille options via Insert + J, Alt + O, and B.

    1. Test the Connection

    Use JAWS commands on your keyboard or the Focus Braille Display keys to navigate.

    If the connection works, the Braille display will respond to the text output from the computer.

    By following these steps, you should successfully connect your Focus Braille Display to a computer using JAWS.

    Braille Display and Other Lessons

    Quadratic Formulas with UEB Math or Nemeth and/or display with JAWS audio & MathCat

    Complete Advanced Math with LaTex to finish math fast using Mathkicker.AI, JAWS, NVDA and/or display

    Transcribe Math into Word documents for blind students using Math editor, Jaws and a Braille Display

    Track Changes with Commands-inserting comments and editing work

    Essential WORD keyboard commands for setting defaults

    Excel line plot graph-copy to Word for Math

    Complete an excel graph and copy into Word document with screen reader

    Basic WORD JAWS commands with Typing Trick

    Rebuild Microsoft Word Template when it is not working well

    Other Focus Display lessons

  • Excel for Geometry: Create Shapes and Label Graphs with JAWS

    Using Excel for geometry tasks, such as inserting shapes and labeling graphs, can be highly effective, especially for visually impaired students. By leveraging keyboard commands, students can efficiently navigate through Excel’s features. For instance, pressing Alt + N opens the Insert tab, and SH brings up the Shapes menu, allowing users to select and draw shapes. To label a graph, students can use Alt + JC to access the Chart Tools Design tab, followed by A to add chart elements like data labels and titles. These steps not only enhance the learning experience but also demonstrate the power of assistive technology in making complex tasks accessible and manageable

    Start at the top of A1 and start adding data in both A and B. Make sure you add a space between you 2 Geometric shapes so they can mirror each other or whatever the assignment requires.

    Here are other options for Geometry shapes

    Here’s how you can insert shapes and label a graph in Excel using keyboard commands:

    Geometry: create Shapes and label graphs
    Geometry: create Shapes and label graphs

    Excel for Geometry: Create Shapes and Label Graph

    Inserting Shapes

    1. Open Excel and navigate to the worksheet where you want to insert shapes.
    2. Press Alt to activate the ribbon shortcuts.
    3. Press N to go to the Insert tab.
    4. Press SH to open the Shapes menu.
    5. Use the arrow keys to select the shape you want, then press Enter.
    6. Click and drag (or use arrow keys) to draw the shape on your worksheet.

    Labeling a Graph

    1. Select your chart by pressing Ctrl + Arrow keys to navigate to it.
    2. Press Alt to activate the ribbon shortcuts.
    3. Press JC to go to the Chart Tools Design tab.
    4. Press A to open the Add Chart Element menu.
    5. Press D to select Data Labels, then choose the desired position using the arrow keys and press Enter.

    Adding a Chart Title to Excel for Geometry

    1. Select your chart.
    2. Press Alt to activate the ribbon shortcuts.
    3. Press JC to go to the Chart Tools Design tab.
    4. Press A to open the Add Chart Element menu.
    5. Press T to add a chart title, then type your title and press Enter.

    These steps should help you efficiently create Shapes and label graphs in Excel using keyboard commands. If you need more detailed instructions or have any specific questions, feel free to ask!

    Other Excel Lessons

    Another Student Mastering Excel with PPT integration

    Create a Histogram

    Scatter plot with trendline

    Excel line plot graph-copy to Word for Math

    Complete an excel graph and copy into Word document with screen reader

    If your fingers need to see multiple lines on your display, then this lesson will help

  • Desmos Graphing Calculator Solution for Blind and Low Vision

    In this Video lesson, Dr. Denise Robinson demonstrates the Desmos calculator, an online tool used in schools for graphing solution for even Geometry. She highlights its fun and accessible nature, noting that while she can’t cover all its features in 1 video, she will guide through the basics of using the Desmos.

    First, she instructs users to press Control + O for 1 option for a new graph. Using JAWS screen reader. But any screen reader will work. After pressing Control + O, users hit Enter to create a new blank graph. They can navigate through options using the down arrow also for many other types of graphs. Dr. Robinson then guides users to type in formulas to create parabolas and lines, making use of various functionalities in the Desmos Graphing Calculator Solution.

    Visual Calculator and PC Calculator for Desmos Graphing Calculator Solution

    A keyboard appears at the bottom of the screen, which is manageable for low vision children. For low vision children, she recommends using Control + Plus to zoom in, allowing them to adjust the size as needed. Control + Zero returns the display to normal size. Blind students will use the PC built in calculator for full access, ensuring the best use of the Desmos Graphing Calculator Solution.

    Desmos graphing solutions- picture of parabola and formulas
    Desmos Calculator Graphing Solutions- picture of parabola and formulas

    Next, Dr. Robinson explains how to open the field dialogues or share or export to emboss a graph by pressing Insert + F5. She mentions Desmos works well in Chrome, Edge and sometimes in Firefox based on updates. She advises users to label their graph. Insert + F5 also assists in many other JAWS screen reader functionalities, enhancing the use of the Desmos Graphing Calculator Solution.

    Dr. Robinson then demonstrates typing formulas, such as X superscript 2 minus 1/2. She shows how the graph forms visually and explains using Shift + 6 for superscript. Users can listen to the graph’s details by using H and the arrow keys, with the right arrow moving right and the left arrow moving left, providing detailed information about the graph’s points. Desmos Keyboard Shortcuts and other Math Lessons further elaborate on how to effectively use the Desmos Graphing Calculator Solution.

    Find more with Desmos:

    Desmos 3D graphing

    for Geometry in Desmos

    for STEM and Embossing in Desmos

    Desmos and inserting graphs into Math Work in WORD

    Creating shaded Parabolas in Desmos

    Games with Desmos with Drag and Drop

  • Focus Display Navigation options

    Dr. Robinson demonstrates how to navigate with the Focus 40 Braille Display, highlighting various commands and features for efficient use. She introduces the Focus 40 Braille Display, explains the importance of navigation commands, and demonstrates various navigation techniques. Additionally, she covers Focus Display Navigation Options to help users maximize their efficiency.

    Focus Display Navigation Options Video Highlights

    • Introduction to navigation
      • Dr. Robinson introduces the Focus 40 Braille Display.
      • Explains the importance of navigation commands.
      • Prepares to demonstrate various navigation techniques.
    • Basic navigation commands
      • Shows how to move to the top and bottom of the display.
      • Uses specific key combinations for navigation:
        • Move to Bottom: Press dots 4-5-6 + Space.
        • Move to Top: Press dots 1-2-3 + Space.
      • Emphasizes the logic behind the commands.
    • Line and word navigation
      • Demonstrates moving one line at a time.
      • Uses key combinations for precise movement:
        • Move Down One Line: Press dot 4 + Space.
        • Move Up One Line: Press dot 1 + Space.
      • Explains how to navigate by words:
        • Move Forward One Word: Press dot 5 + Space.
        • Move Back One Word: Press dot 2 + Space.

    Other Display Navigation

    Focus braille display navigation options using router key
    Focus Braille Display navigation options using router keys
    • Router keys and mode buttons
      • Highlights the use of router keys for quick cursor movement.
      • Introduces mode buttons for different navigation options:
        • Router Keys: Press the router key above the desired character.
        • Mode Buttons: Located on the left and right sides.
      • Shows how to navigate by paragraphs and sentences:
        • Move Forward One Paragraph: Press the right rocker switch down.
        • Move Back One Paragraph: Press the right rocker switch up.
        • Move Forward One Sentence: Press the left rocker switch down.
        • Move Back One Sentence: Press the left rocker switch up.
    • Panning and rocker switches
      • Explains the function of panning buttons:
        • Move Forward One Display Width: Press the right panning button.
        • Move Back One Display Width: Press the left panning button.
      • Demonstrates the use of rocker switches for line navigation:
        • Move Up One Line: Press the right rocker switch up.
        • Move Down One Line: Press the right rocker switch down.
      • Highlights the benefits for sighted individuals working with Braille learners.

    Benefits of Focus Display

    The Focus 40 Braille Display offers numerous benefits. Firstly, it enhances Braille literacy through intuitive navigation commands. Additionally, its versatile features support efficient reading and writing. Moreover, students can easily move through text, improving their skills. The Focus Display can be used exclusively to control the computer–that means, you DO NOT need to use the keyboard if you cannot or do not want to. This makes for VERY efficient math calculations. The device’s compatibility with various screen readers ensures accessibility. Furthermore, its portability allows seamless use in different environments. Overall, the Focus 40 empowers users, boosting their independence and confidence in learning.

    Options for going between the display to take notes and the computer give many more options also